Making a Step Stool
P. Michael Henderson
I teach veneering and for years, I've had my students do a small class panel, about 10" by 13". Recently, my wife took my veneering class and she made a couple of suggestions regarding the class. One suggestion was to offer the students the opportunity to make a panel that could be used as the bottom of a serving tray. I like that idea, and did a tutorial on how to make a rectangular serving tray. That works for those who choose to make the tray bottom, but what about those who choose to make the traditional student panel? What could be made out of that?
That was my wife's second suggestion - she suggested that the traditional student panel be used as the top of a step stool, since she always needs a "step up" to reach things. Thus this tutorial. I begin by assuming you have the traditional student panel. If you don't, you can make up a panel any way you like, including just gluing some boards together to make the top.
This is not a "simple" project. There are a lot of angles in this project, which requires some calculation and special handling. You need to be careful in your work and make sure you know the cut you're going to make, and that you're making it in the right place. Before you cut the expensive wood, it's always a good idea to make a prototype out of cheap plywood or some other low cost wood.
If you find this tutorial helpful, please send me an e-mail at mike@mikes-woodwork.com with "Step Stool" in the subject line. I'd just like to know how many people use these tutorials.
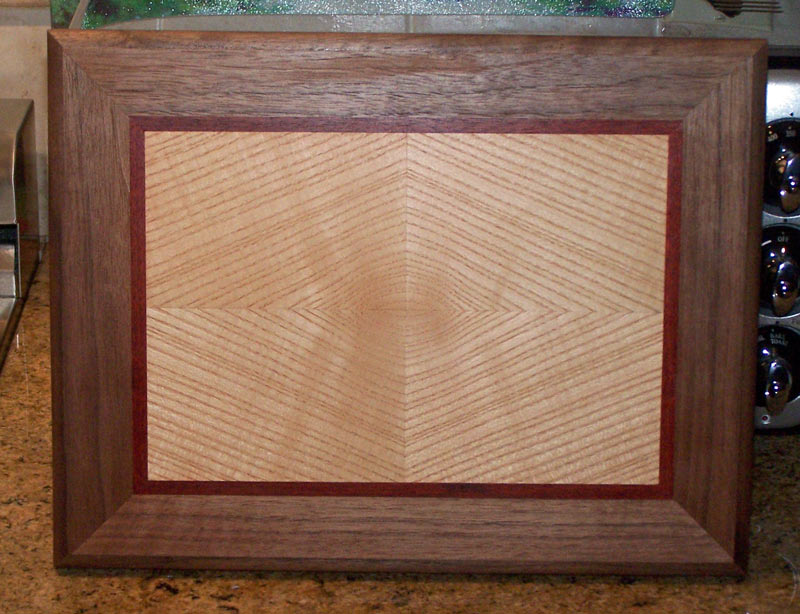
But let's get started. Here's a picture of the class panel. It's actually the panel my wife made in class.

And here's where we're going. This is a picture of the completed step stool. Now let's see how this is made.

Let me start with a few comments about the design of a step stool. First of all, the legs should splay out beyond the edges of the top of the stool. If the legs don't splay out, you have a chance of tipping the stool over if you step too far out on the edge, especially if the stool was not exactly level. Think of the step stool that the railroads used. The porter would alight first with the step stool and place it so that the passenger could step on the stool to board the car, or when leaving the car. That step stool had the legs splayed out quite a bit to make sure it was stable as people stepped on it.
Second, how tall should a step stool be? If it's too short, it won't be of much use. If it's too tall, the person will have a hard time stepping up to get on it. I decided to make this step stool about 10" high, which I thought was a good compromise.
For looks, I decided to have the top of the stool overlap the base by about one inch all around. Since the top (the student panel) is about 10" by 13", the top of the base will be 8" on the sides, and 11" on the front and back.
Next design question - how much should the legs be splayed out. The bottom of the legs needs to be more than 10" on the sides, and more than 13 inches on the front and back. I decided on about 12" at the bottom of the sides and about 15" on the bottom of the front and back. Those are just rough numbers. Doing a bit of arithmetic, those numbers give me an angle of about 78* for the splay.
Knowing that the pieces will splay out by 78*, I can calculate the angles required to cut the pieces to give a perfect miter on each corner. The angles come out to about 11.75* and about 43.75*. This is similar to cutting crown molding so if you have experience with crown molding you can probably calculate the angles needed. You can find calculators on the web which will do these calculations for you, or contact me and I'll send you a spreadsheet.
Here's a couple of pictures showing the size of the top of the stool.


The stool has to be safe so I decided to use 5/4 stock for the base, just for the extra strength. I went to my supplier and was able to find a decent 5/4 board of walnut. It was not cheap. I paid about $44 for the board and I used every bit of it for the base. So this isn't an inexpensive project.
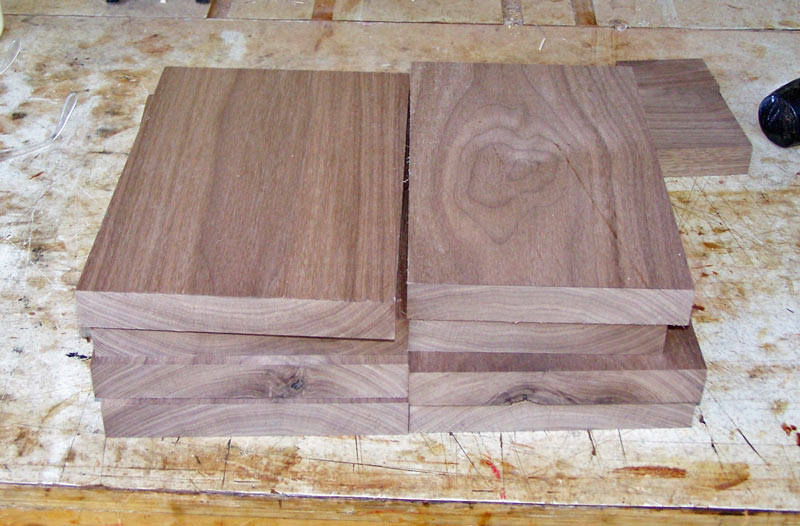
I cut the board into pieces about 10" long. See the picture below. Note the small offcut on the right side of the stack of eight pieces. It's 3" long and I'm going to use that piece.

I match the pieces up for the best grain match and for the width needed. I used that small offcut to get a bit more width in the front and back piece. Since I'm going to cut out that center section there's no need to have solid wood there.

After the four pieces are glued up, I mark each one to indicate the outside and the top.

Next, I used the protractor head on my combination squares and set one for 78* and the other for 43.75*. Since I wanted 8" at the top of the sides, I measured 8" and used the protractor head to draw where the cut will be made.

Then I used the 43.75* protractor head to mark the angle of the cut - the miter angle. I'll use the 78* lines to line up my cut on the table saw. Next, I set my table saw to a tilt of 43.75 degrees.

Then I cut a wedge of 11.75* on my miter saw.

I'll make the cut using my table saw sled - the one I use for tilt cuts. You can see the wedge behind the walnut side. Since this is a left tilting saw, and I'm cutting on the left side of the blade, the inside of the walnut side is up. I use the lines I drew earlier to align the cut.

Here's what it looks like after you make the cut. This view is from the other side of the sled.

Go ahead and cut the rest of the sides. One thing that's very important is that the opposite sides are EXACTLY the same size. You can test this by putting two opposite sides together face-to-face.

You can do a trial fit, if you want, but the base will look odd at this point.

You'll notice that the top of the base is not flat - so that's our next task. Since the angle of the sides is 78*, set the table saw to 12* (90* - 78* = 12*).

Cut the tops of all the sides, with the inside of the side up.

Then turn the side over and end-for-end and cut the bottom at 12*. If you need to shorten the sides, this is the time to do it. You have to cut the bottom because if you cut the top, the top will wind up too wide.

The tutorial continues here.