Teak and Olivewood Jewelry Box Tutorial
June 1, 2024
P. Michael Henderson
I did a tutorial for making a jewelry box earlier - basically, the one I used to use for my woodworking class on box making. That box had certain advantages but one difficulty - when you installed the hinges it was easy to have the top be just a bit out of place. It required great accuracy in the placement of the hinges to have the top fit the rest of the box "exactly".
I decided to design a jewelry box that would eliminate that issue and that's what this tutorial is all about. If the top is a small bit out of place, no one will notice.
Before we get into this build, let me make a few comments. First, this is not a "weekend build". There are a lot of steps required to produce this "simple" box and that takes time. And each of those steps requires thought, craftsmanship, and great accuracy. You're building a box that will last centuries and can be passed along in your family. If you do a good job, your descendants will be able to say, "This box was made by my grandfather/grandmother (or uncle/aunt, etc.) over a hundred years ago."
But to achieve that status requires two more things. The box must be attractive to the eye. People aren't going to keep and use something that's ugly. So choose your woods carefully. Zebrawood and purpleheart may look good to you, but most people find them garish. Choose woods that are subdued in color and which fit together colorwise. Finally, the box must be functional. If it doesn't do the job it was designed for, and do it well, it won't be kept.
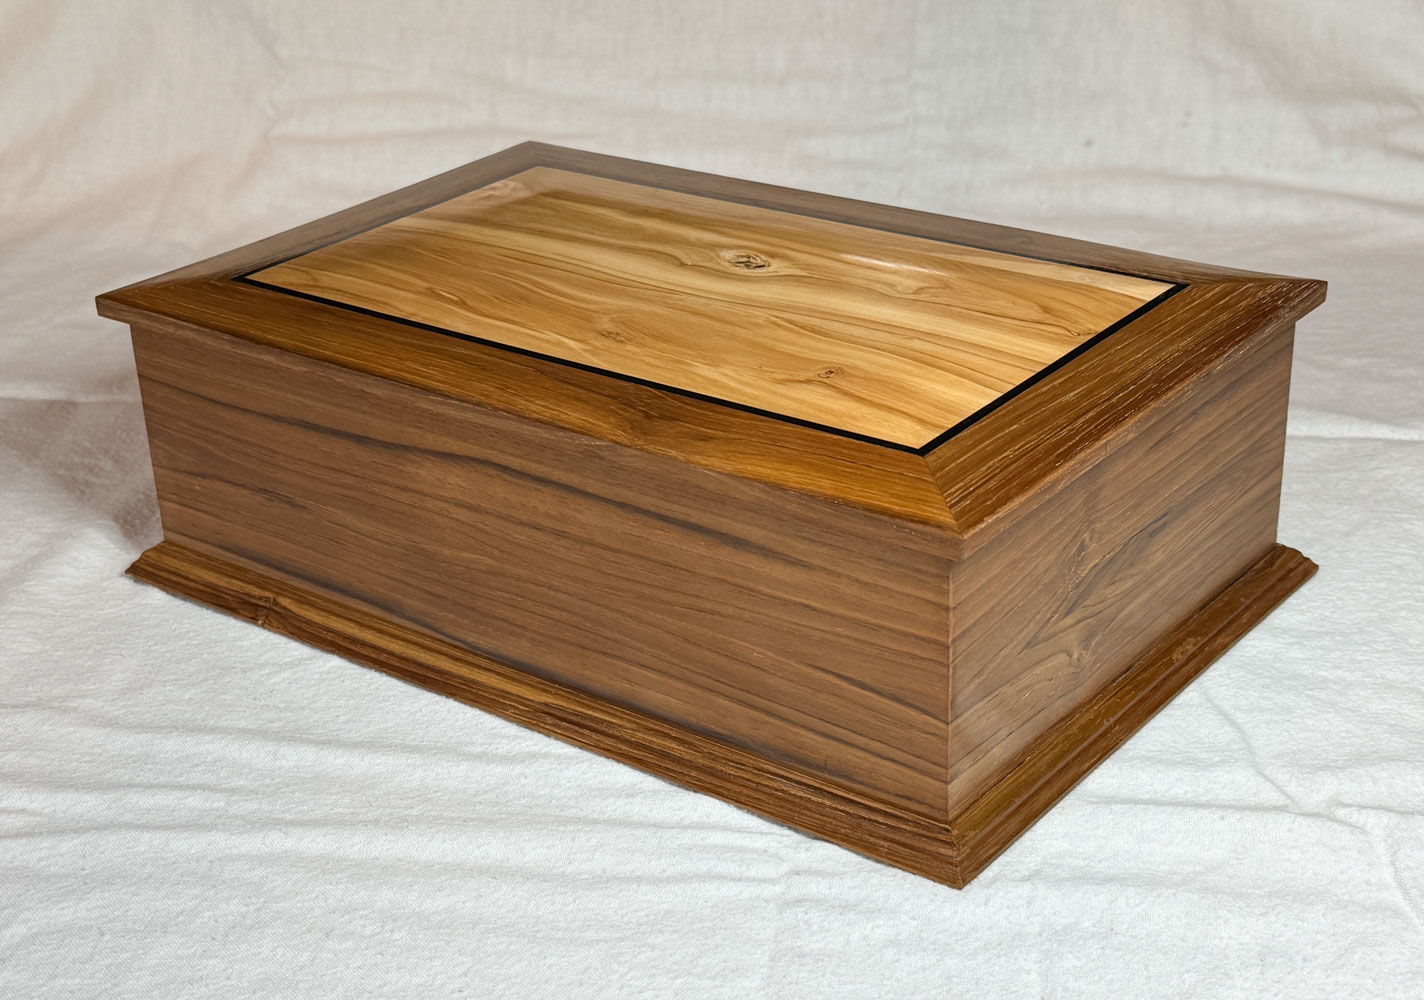
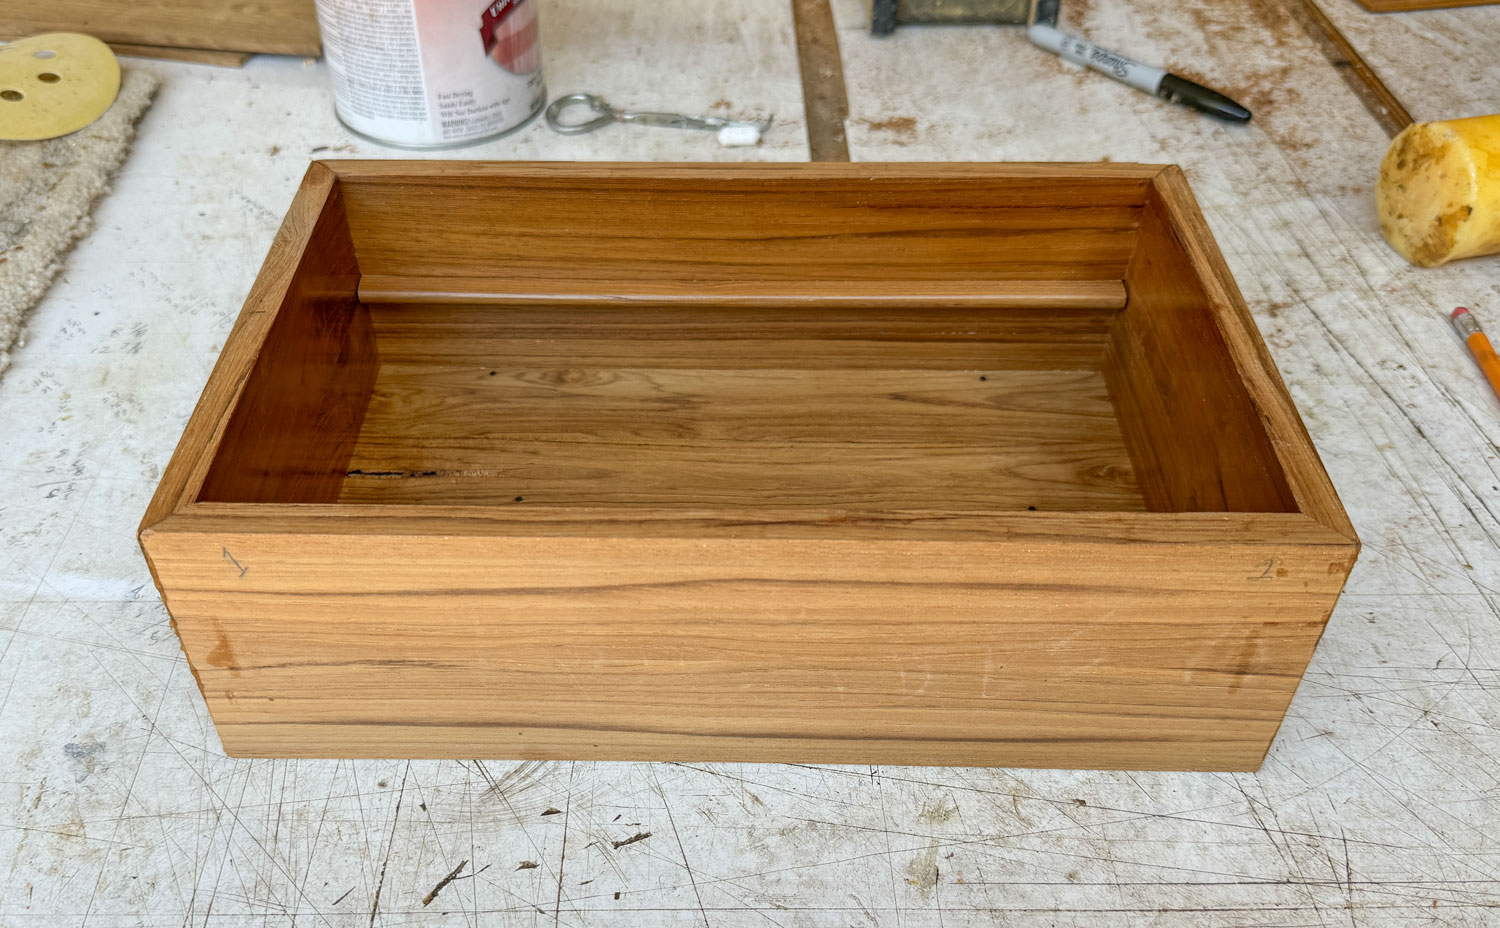
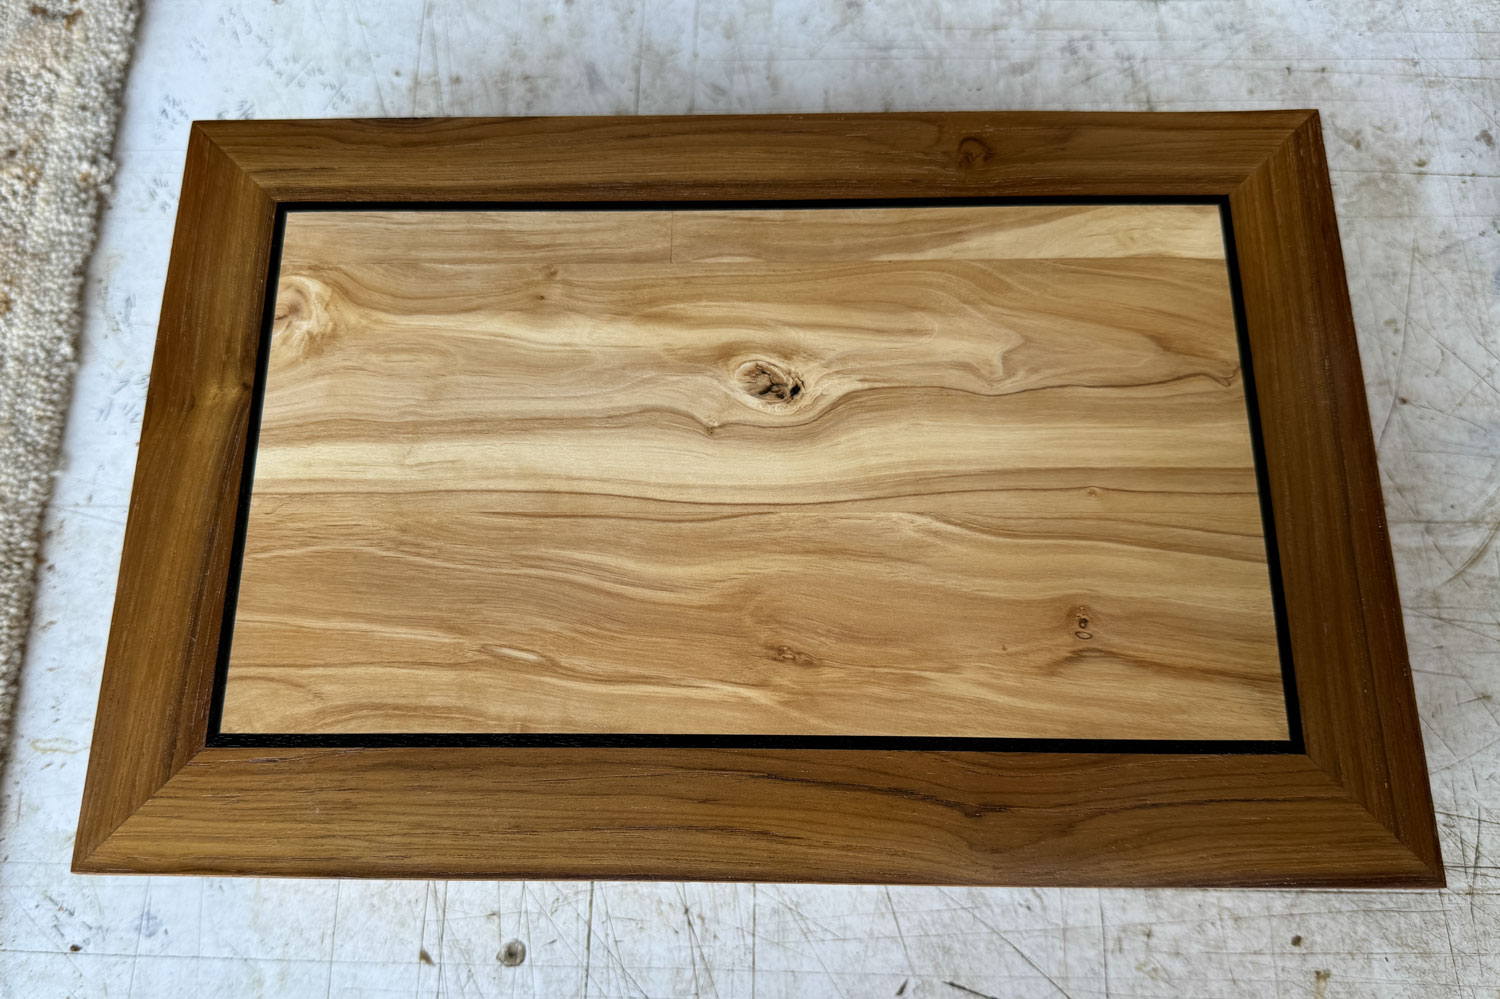
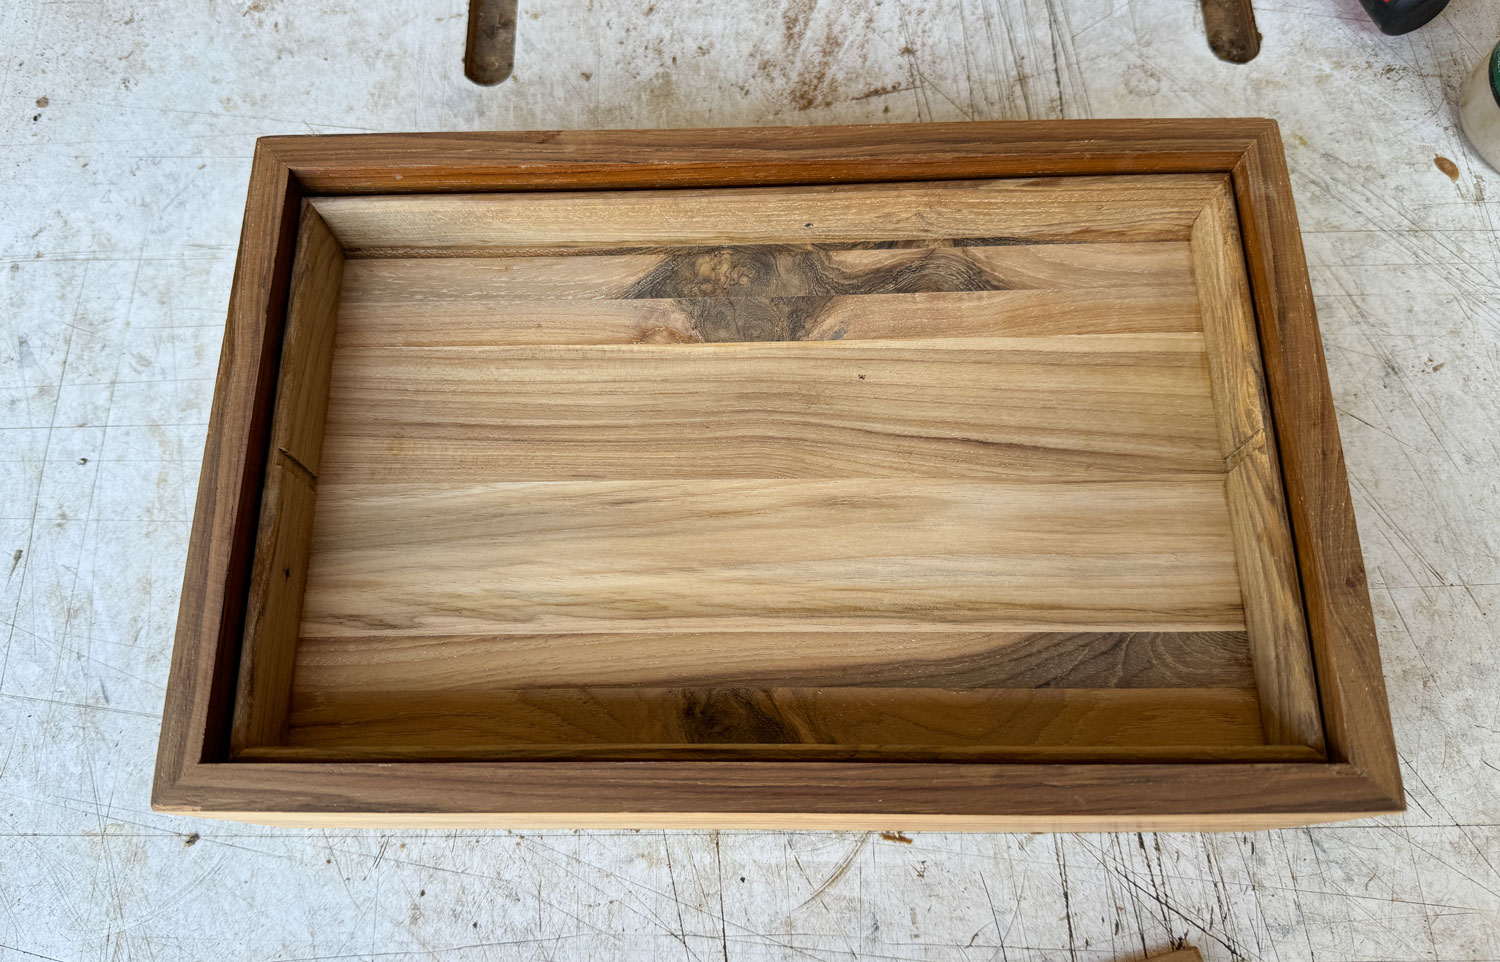
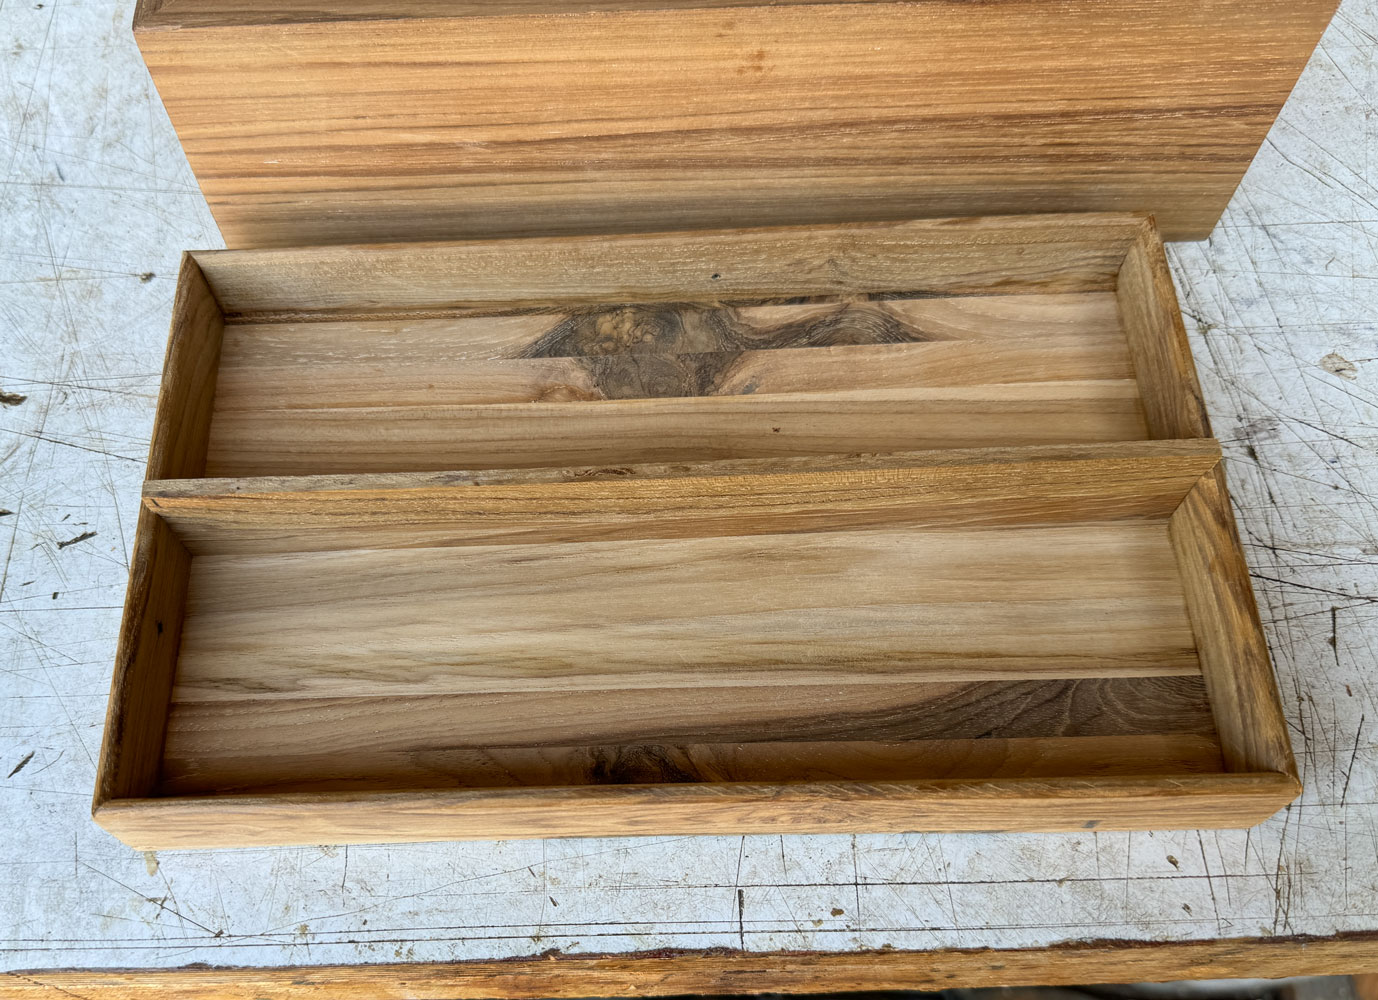
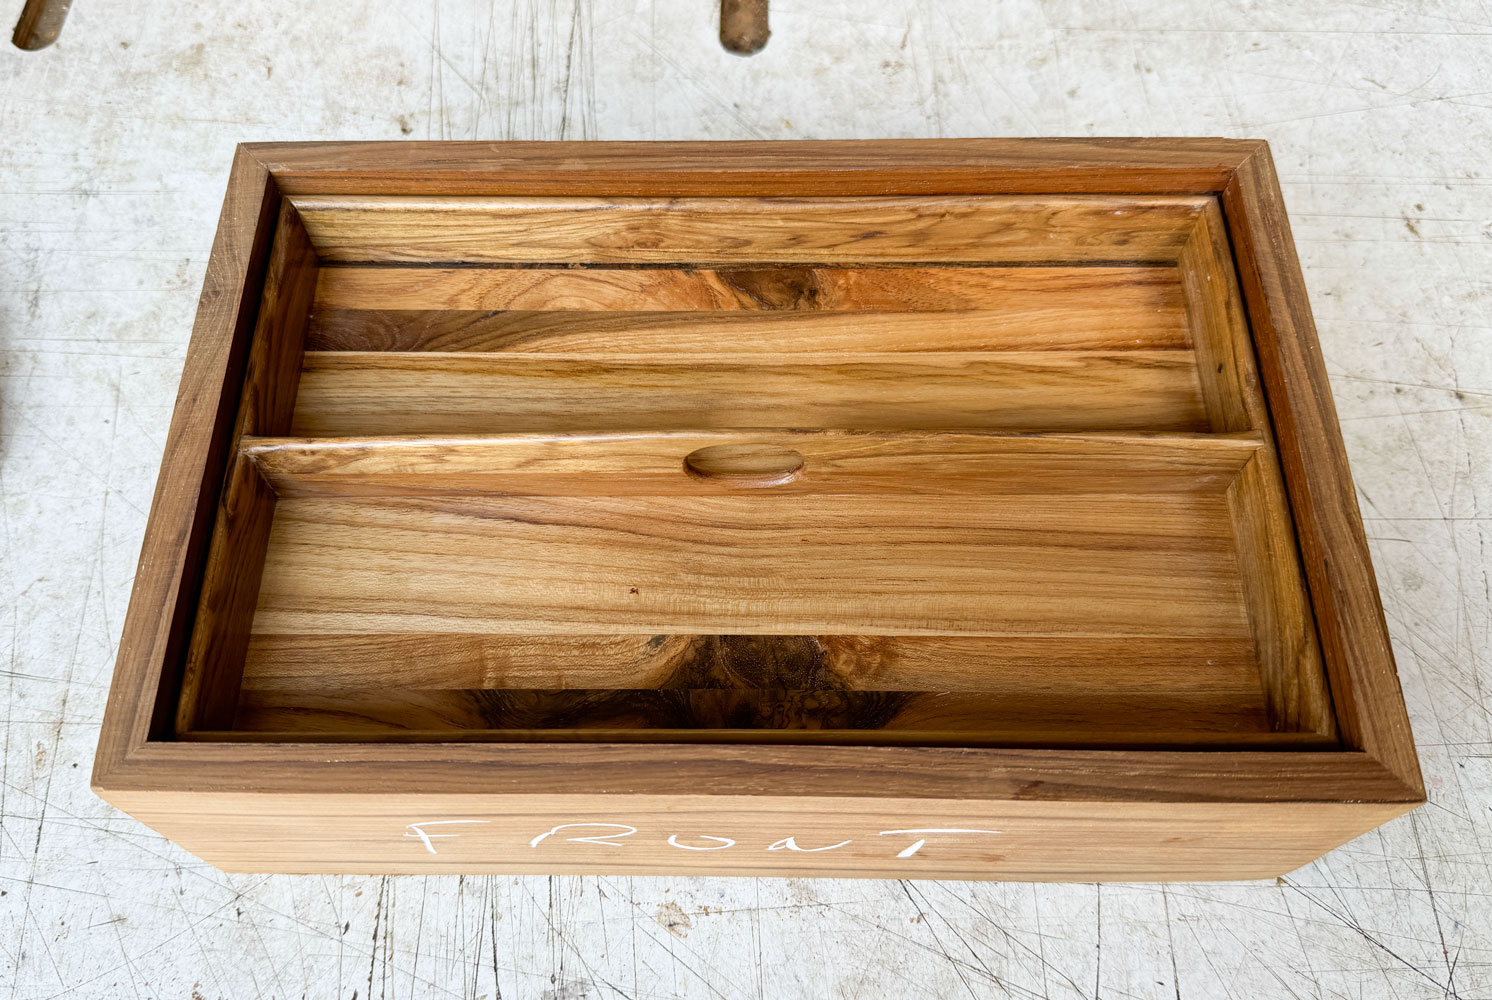
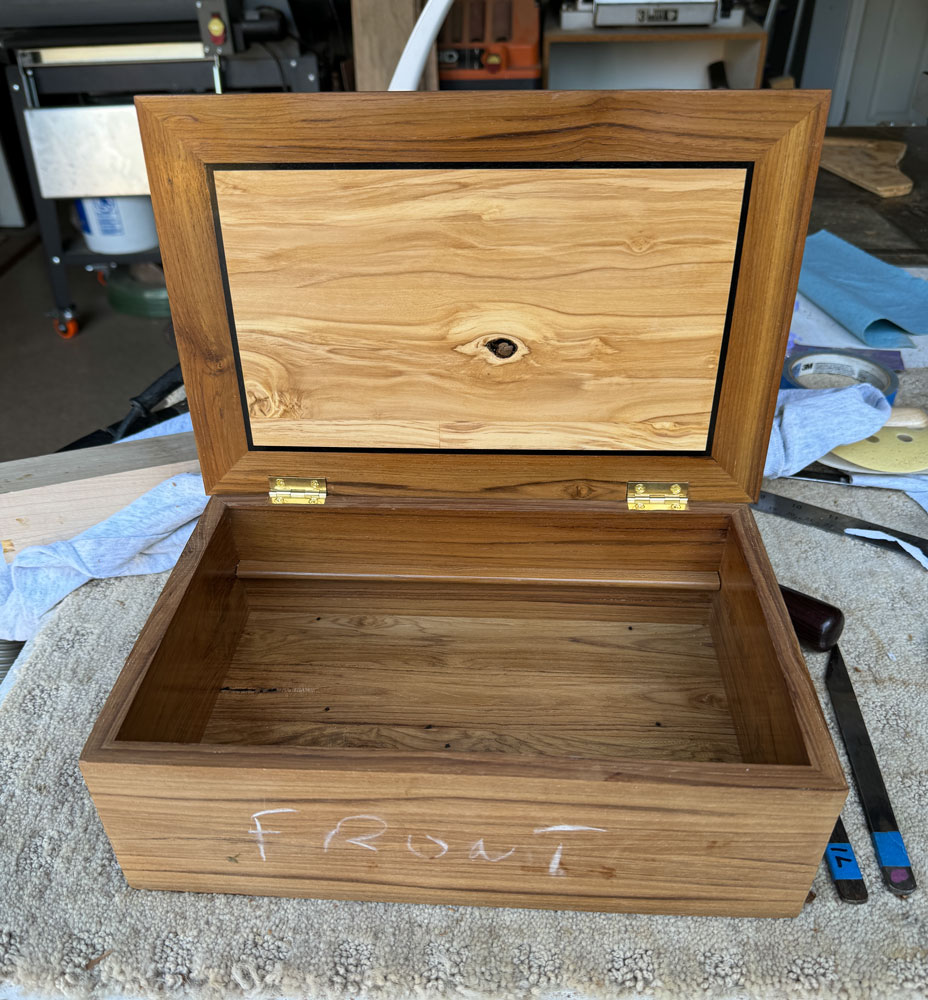
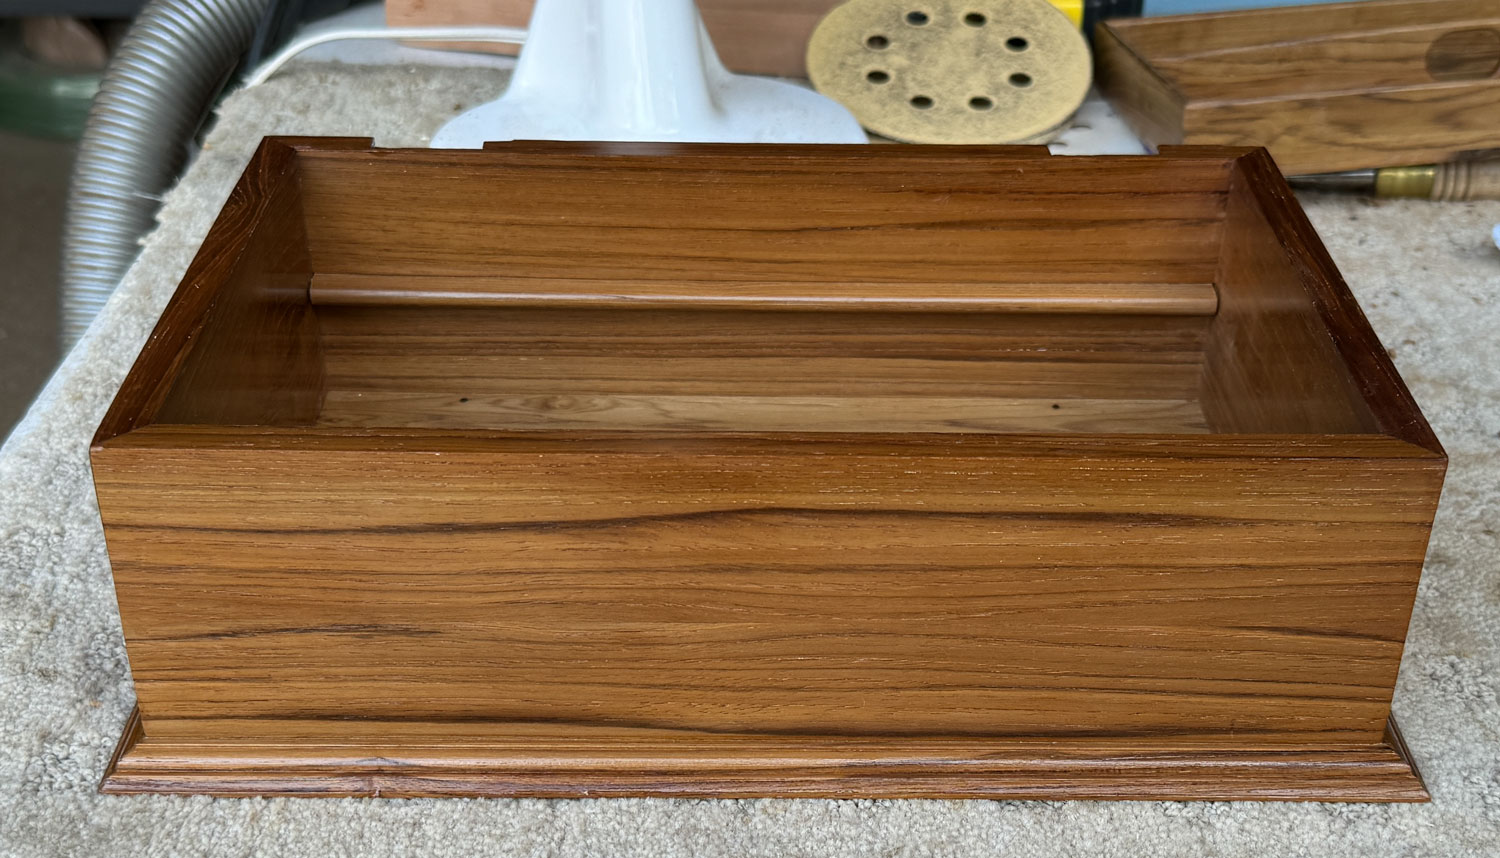
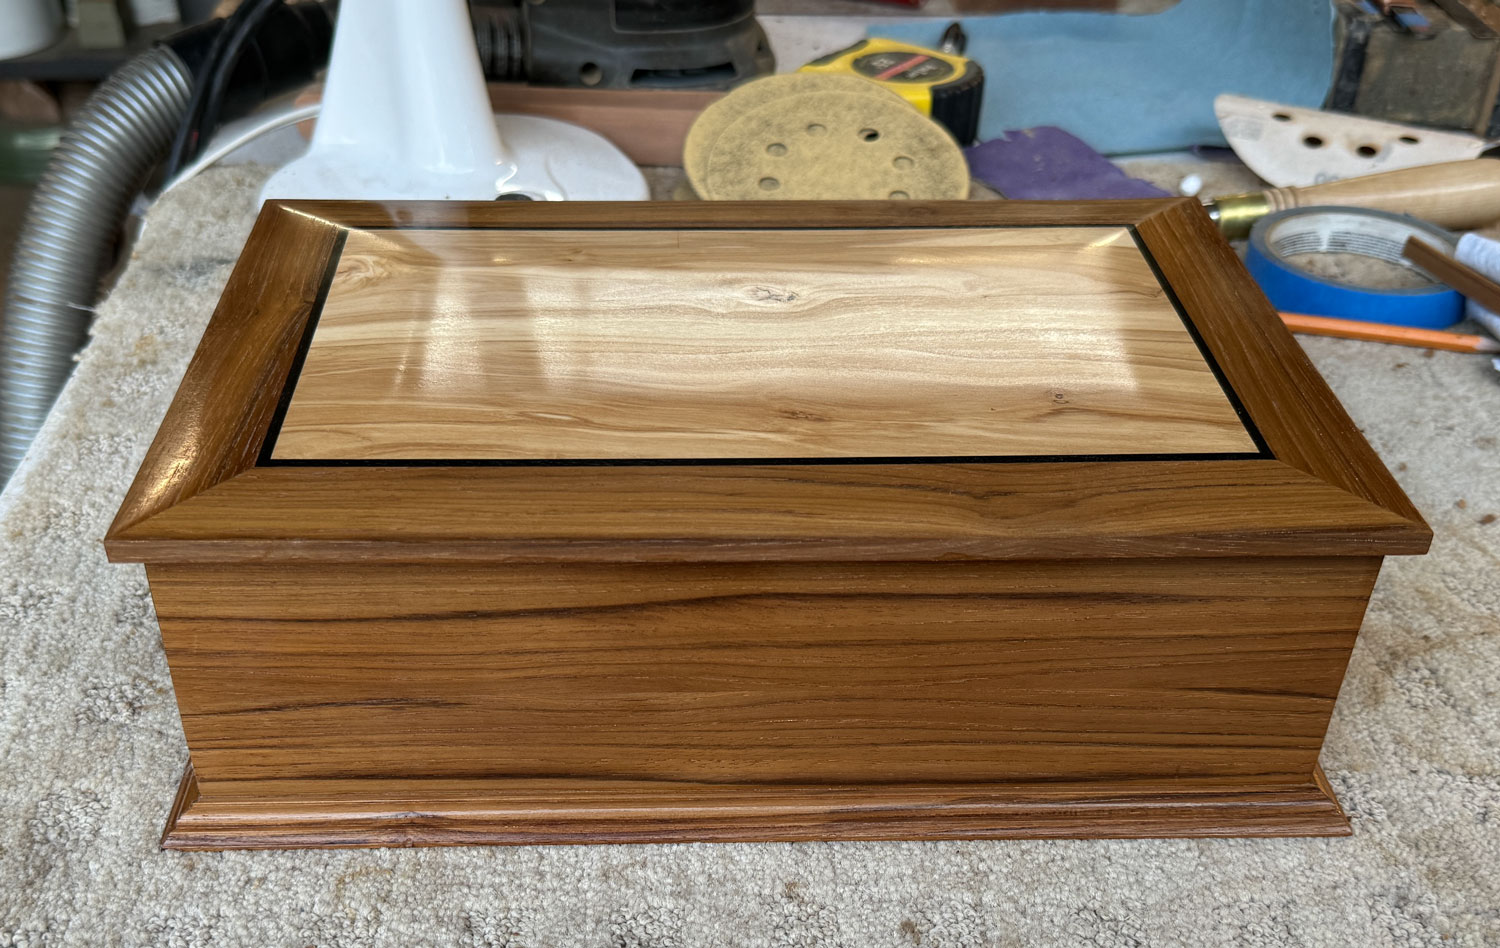
Here's where we're going with this tutorial. These pictures were taken after completion of the build.
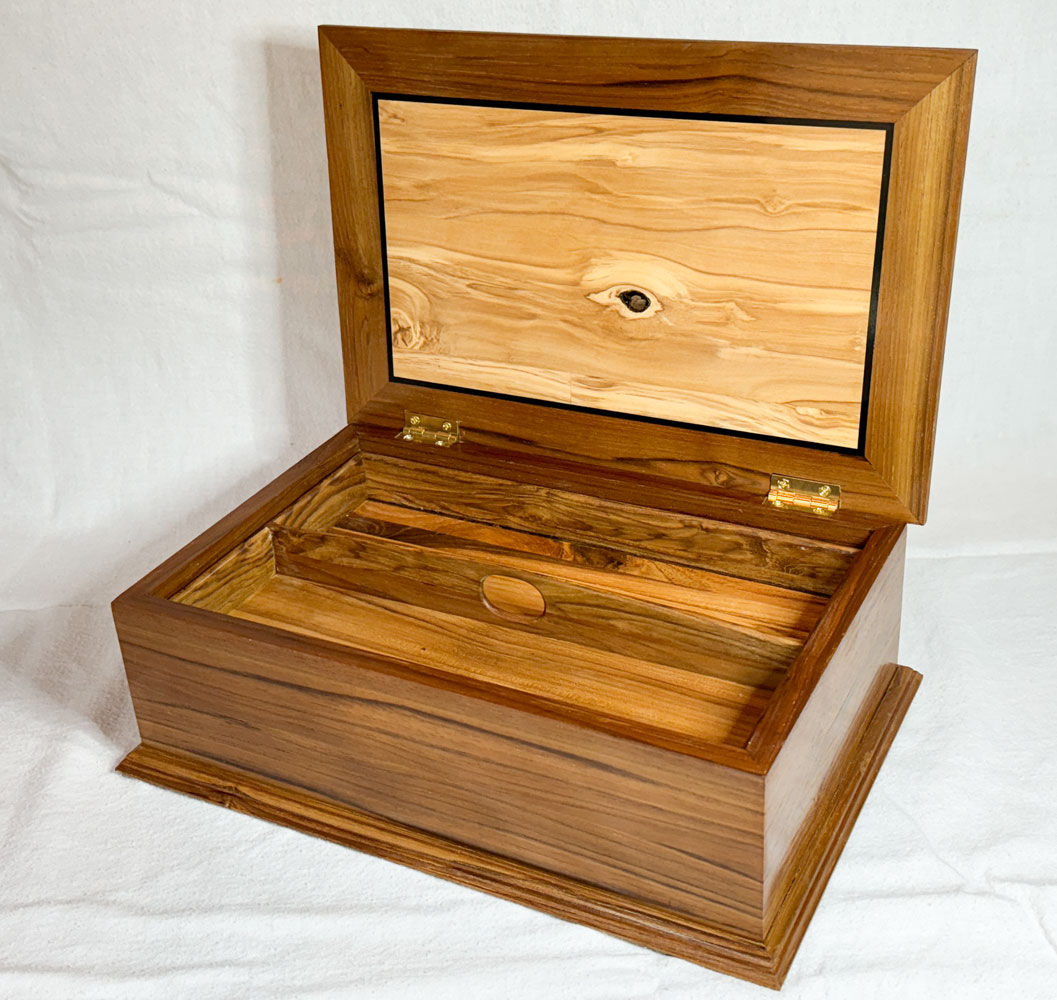
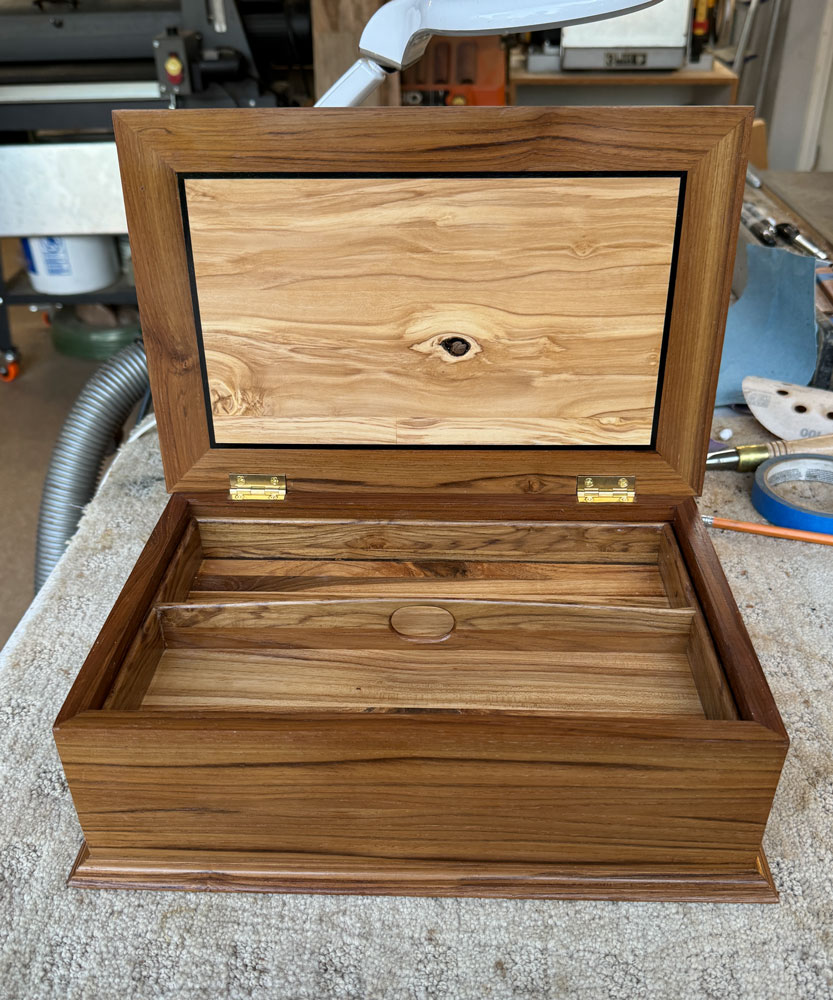
The interior has a tray.
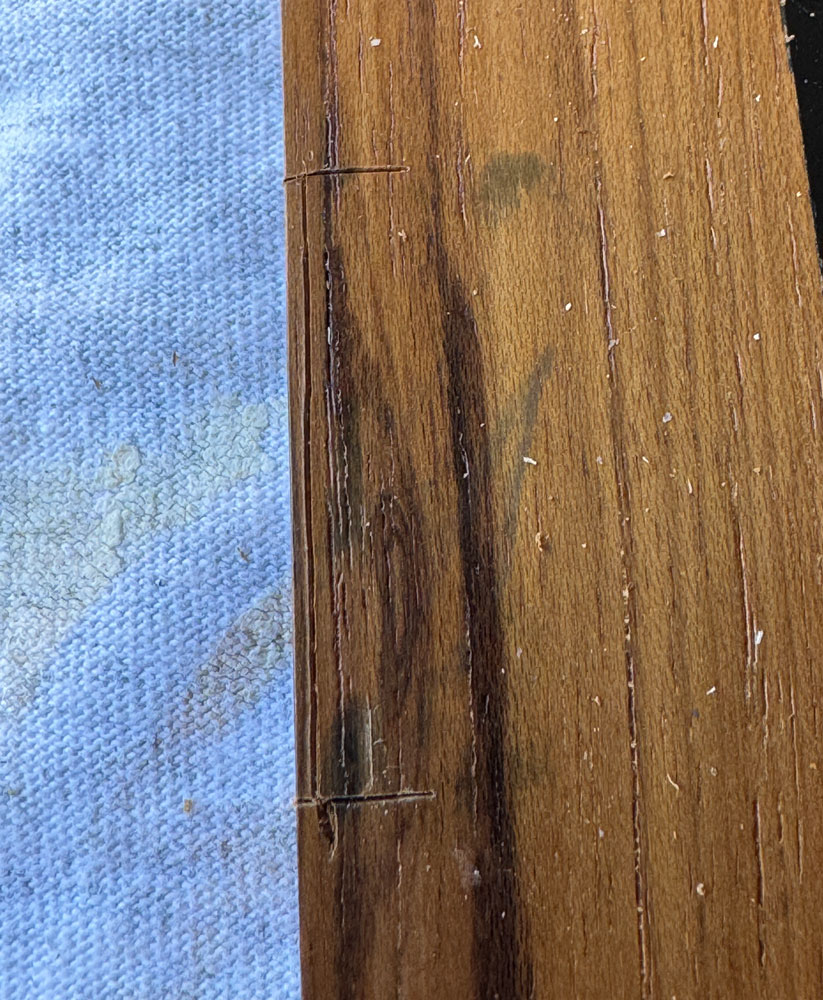
First, a little background. People in my neighborhood are aware that I do woodwork. And occasionally one of them will have some wood that they can't use and offer it to me. A neighbor had some furniture that he had purchased from Indonesia and the furniture contained some teak, along with some other secondary wood. He didn't want the furniture any more, and it was not the kind of furniture someone else would want, so he and I disassembled the furniture and I took the wood. The teak was not first class teak, and it had been screwed and nailed to make the furniture. But teak sells at my local wood supply place for almost $50/board foot. I repaired the worse places, some by putting in plugs, and others by filling the cracks and nail and screw holes with black epoxy.
I also have some olivewood from some olive trees that we had to remove because they were infected with a tree virus. I really liked the contrast between the olivewood and the teak and made a couple of jewelry boxes with it. I thought they came out very nice and decided to do this tutorial with the remaining teak and olivewood that I had. I didn't have much olivewood and had to glue pieces together to make the center of this top.
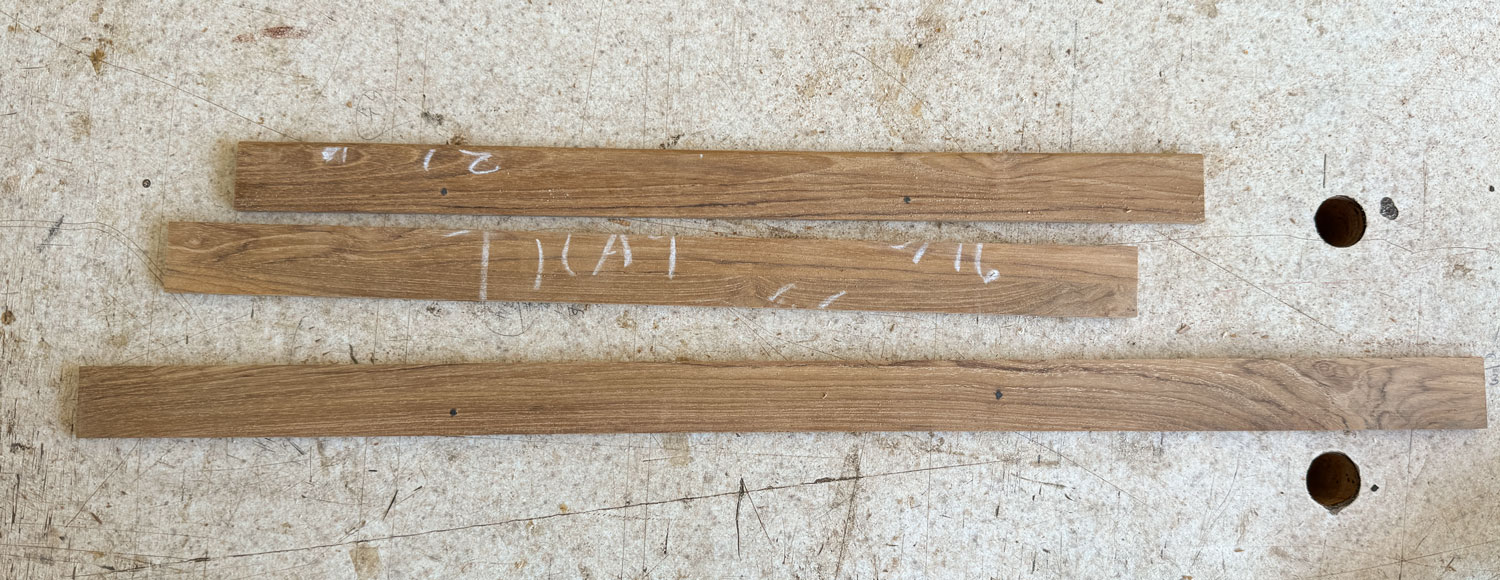
Since I mostly had teak scraps from the previous two boxes, I had to glue pieces of the teak together to get what I needed. I won't cover that except with this one example.
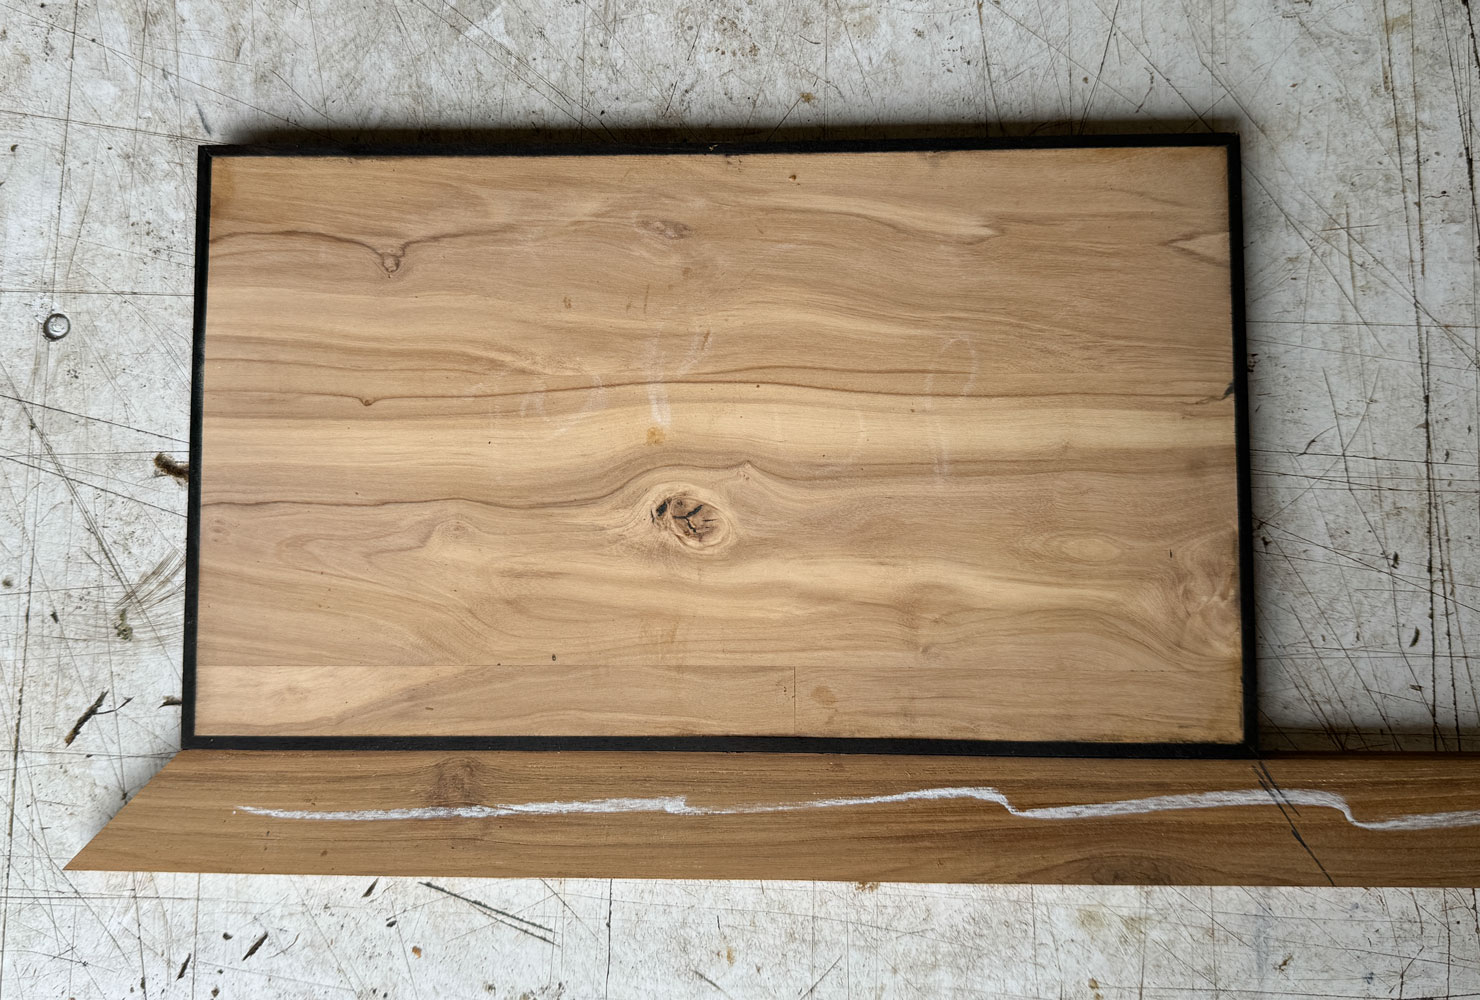
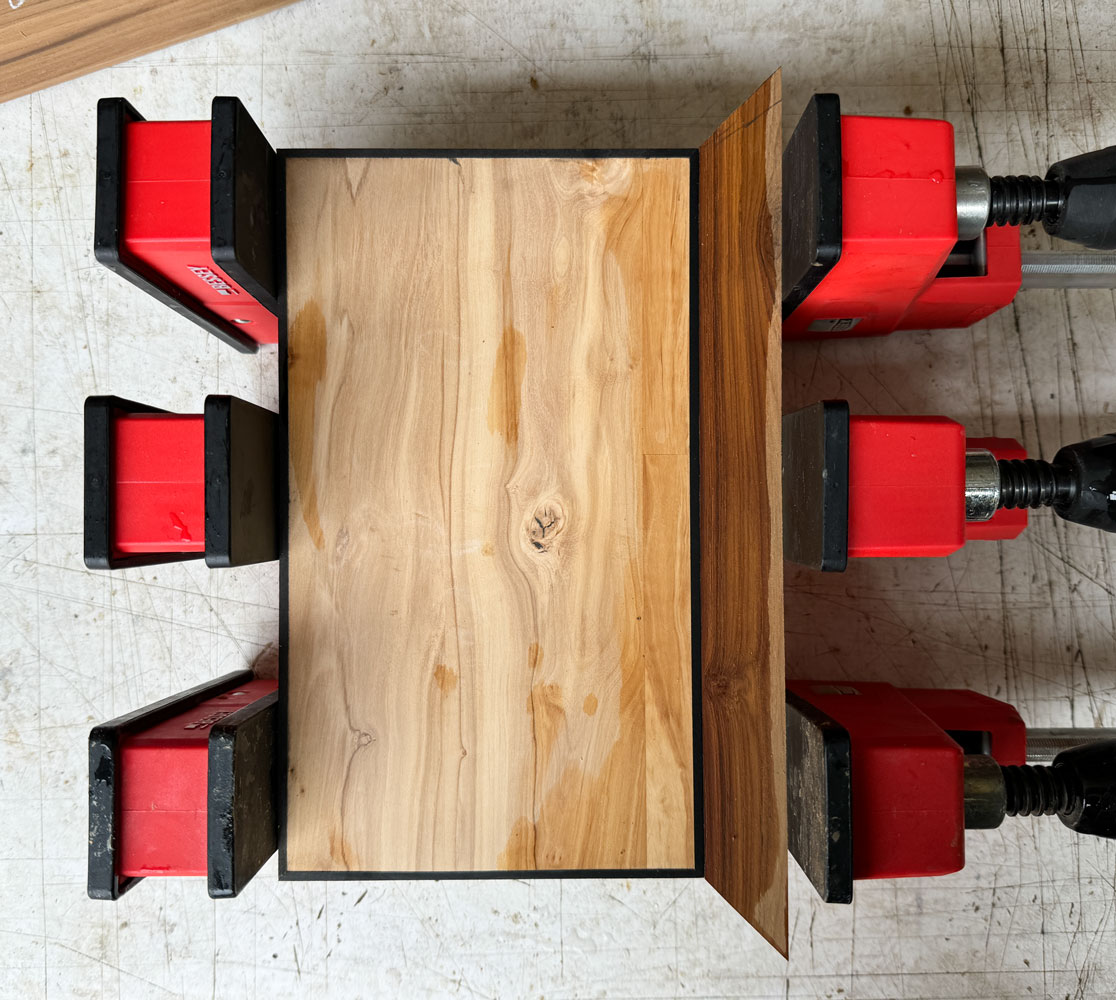
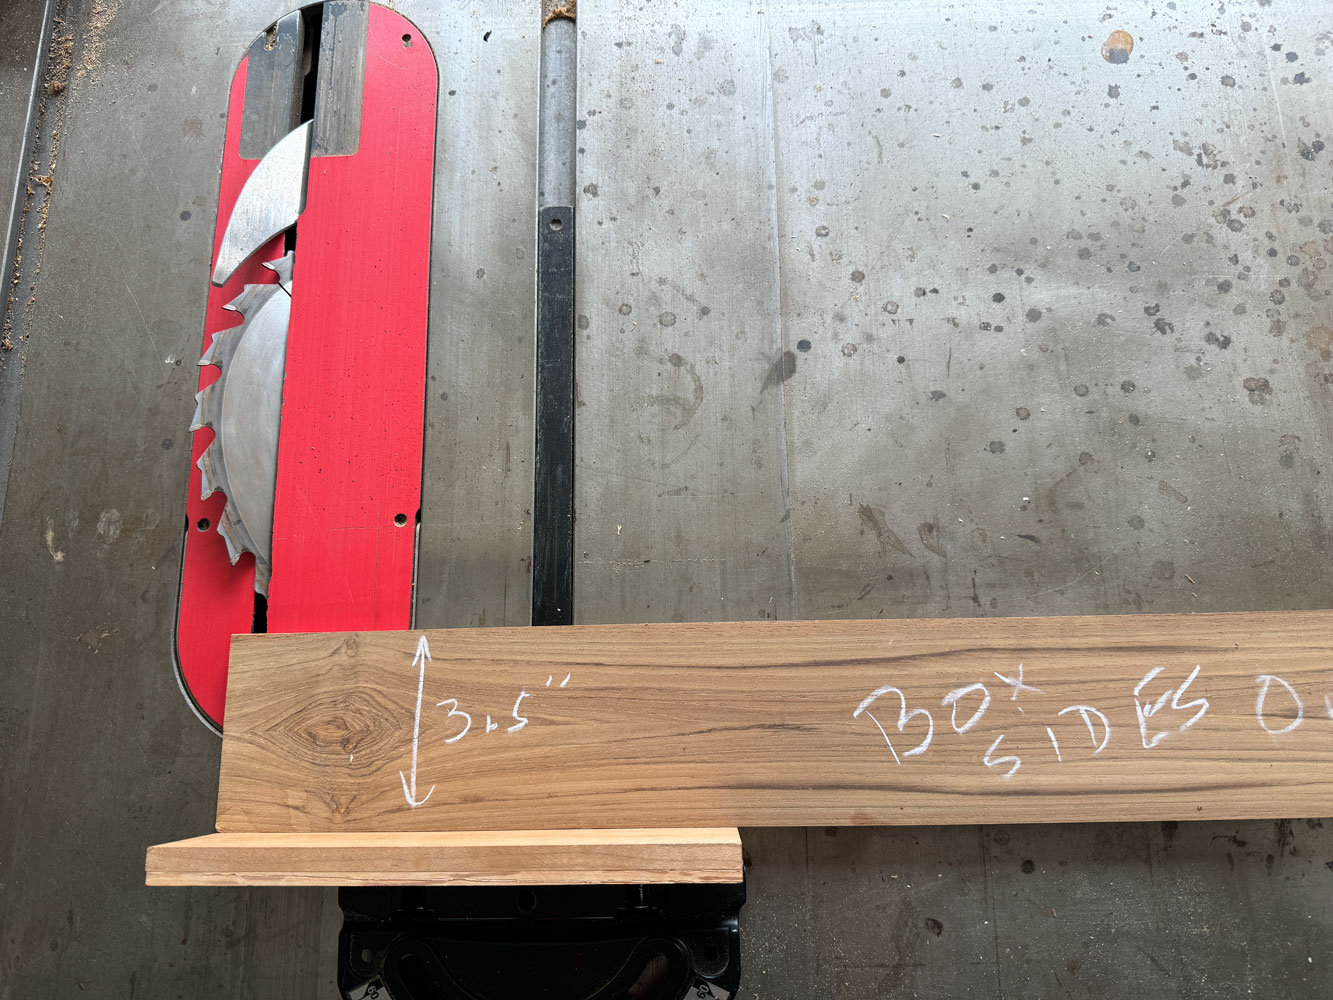
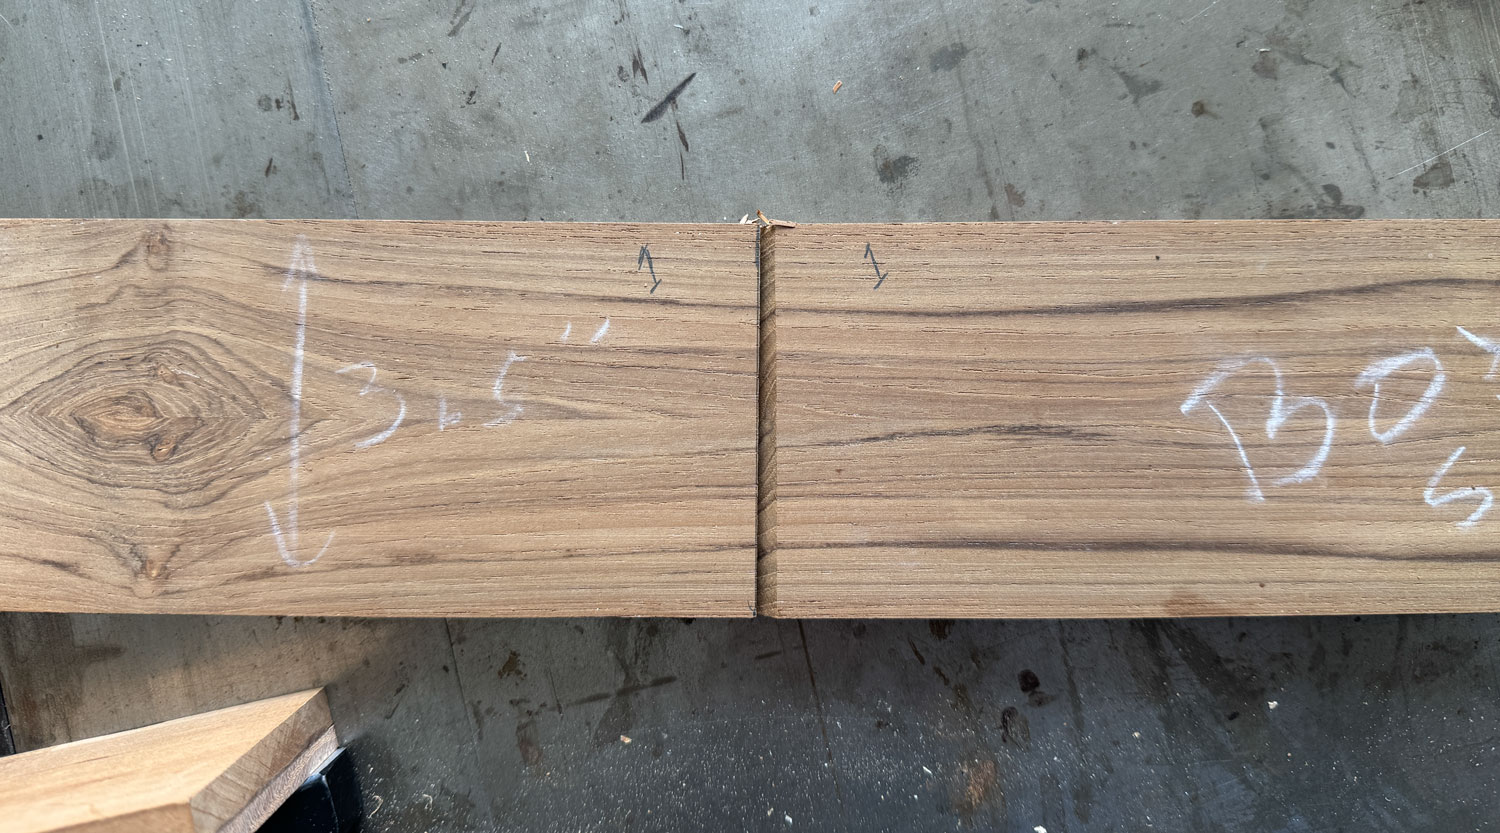
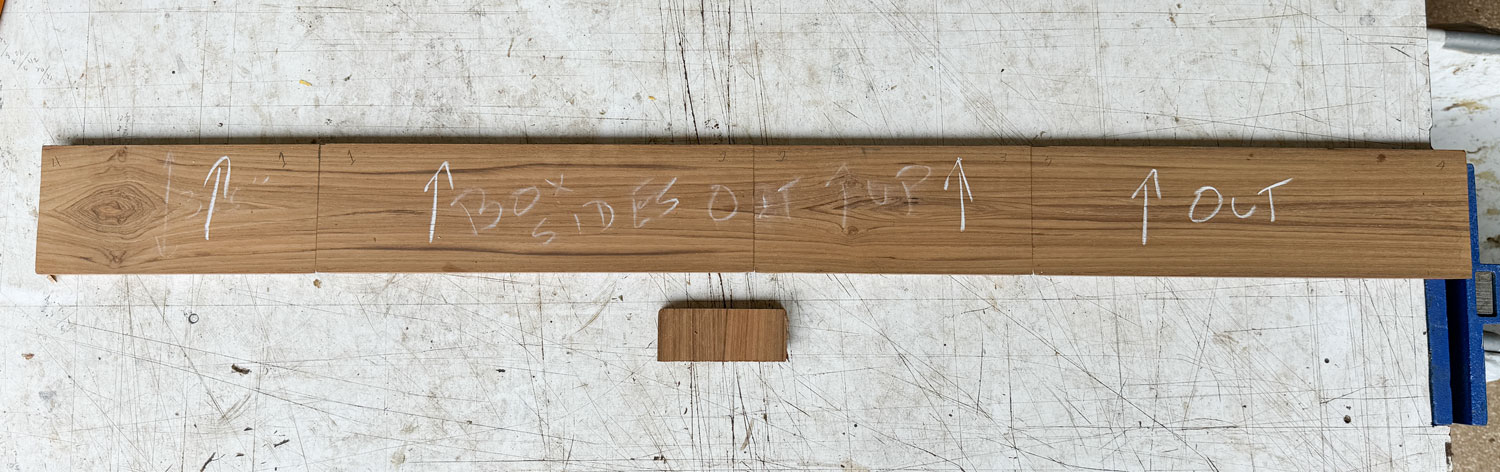
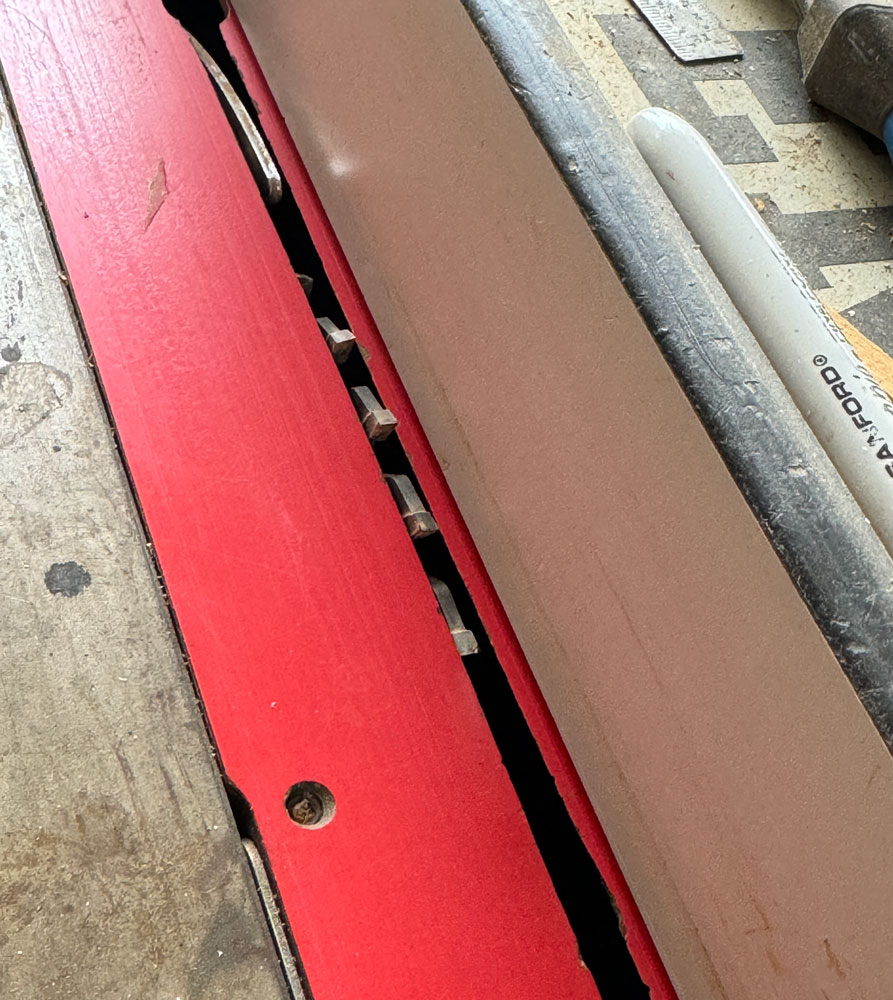
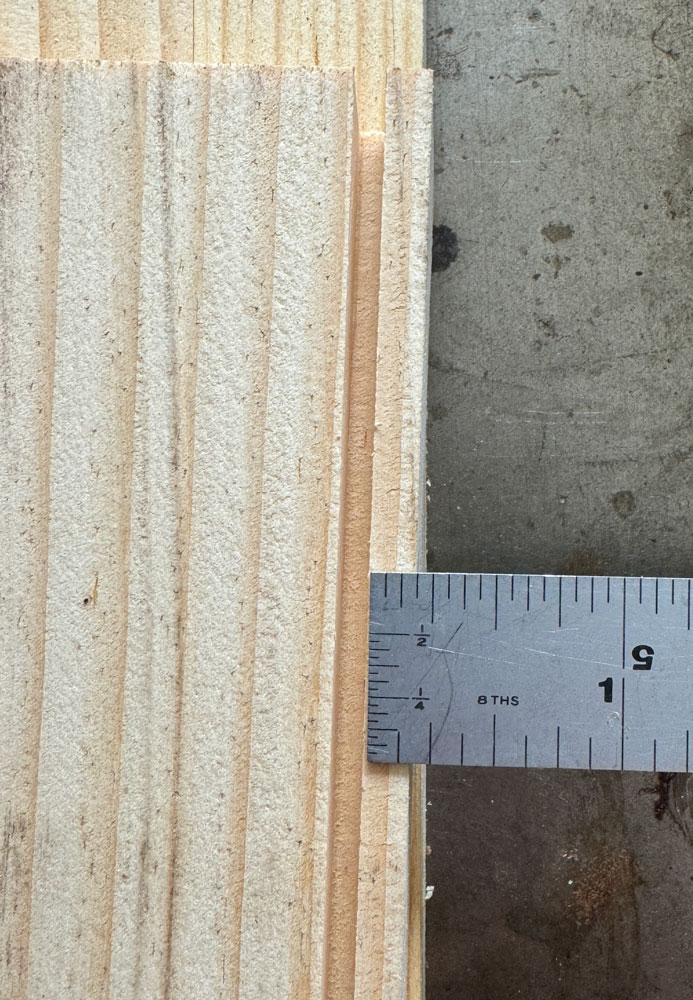
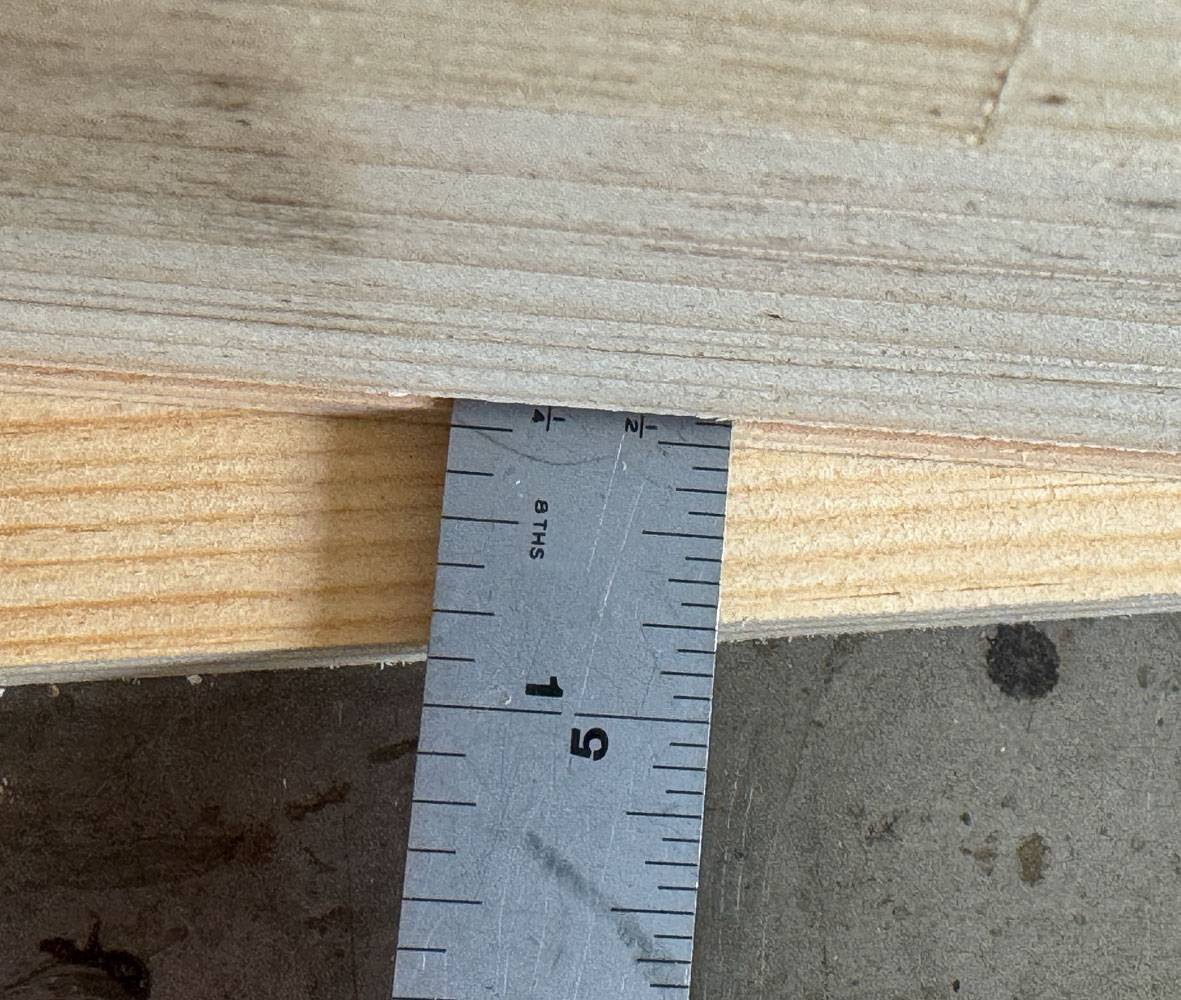
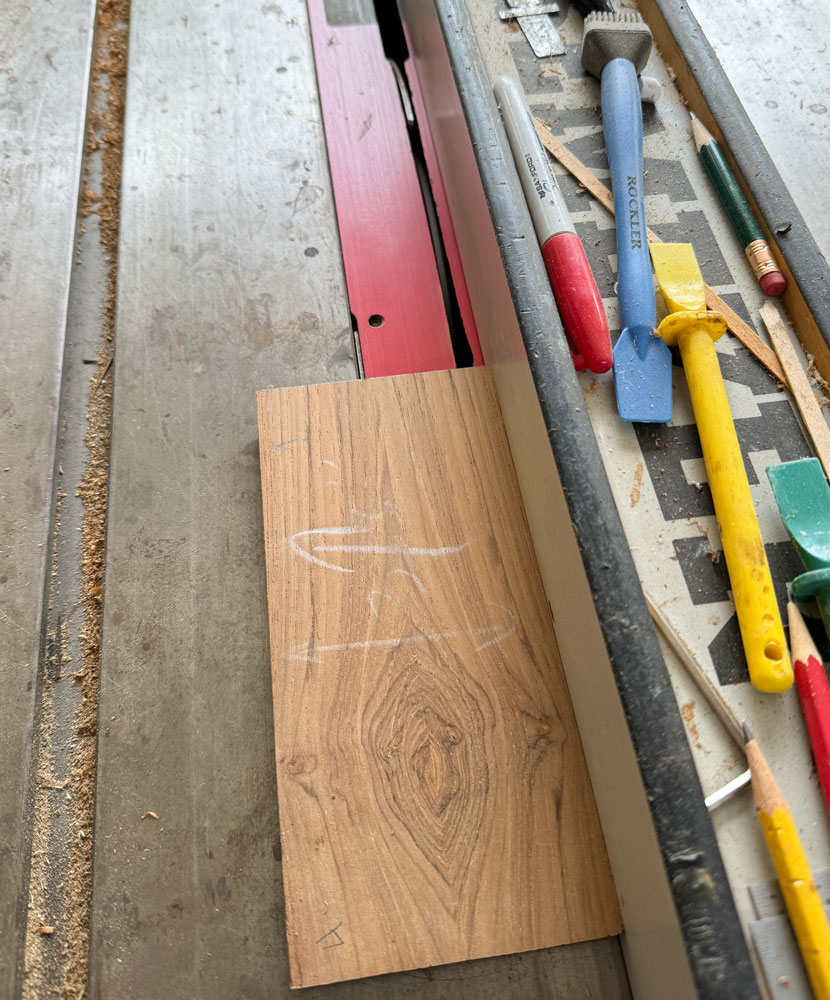
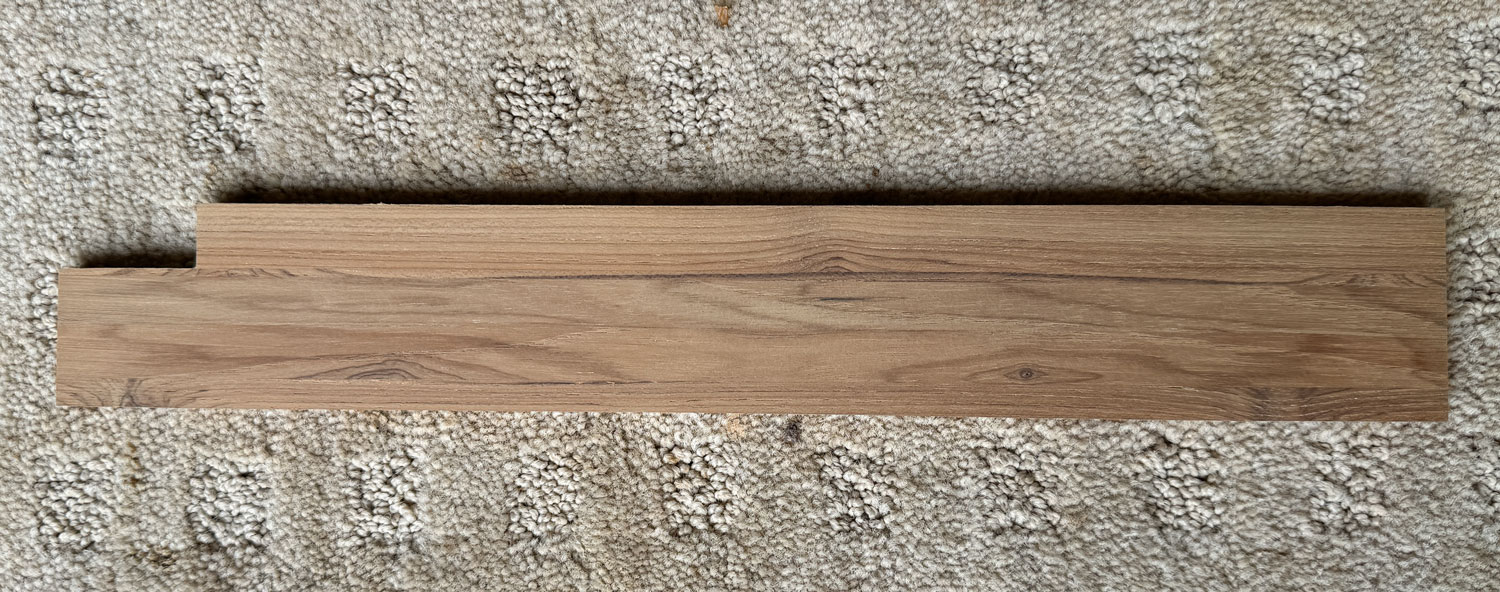
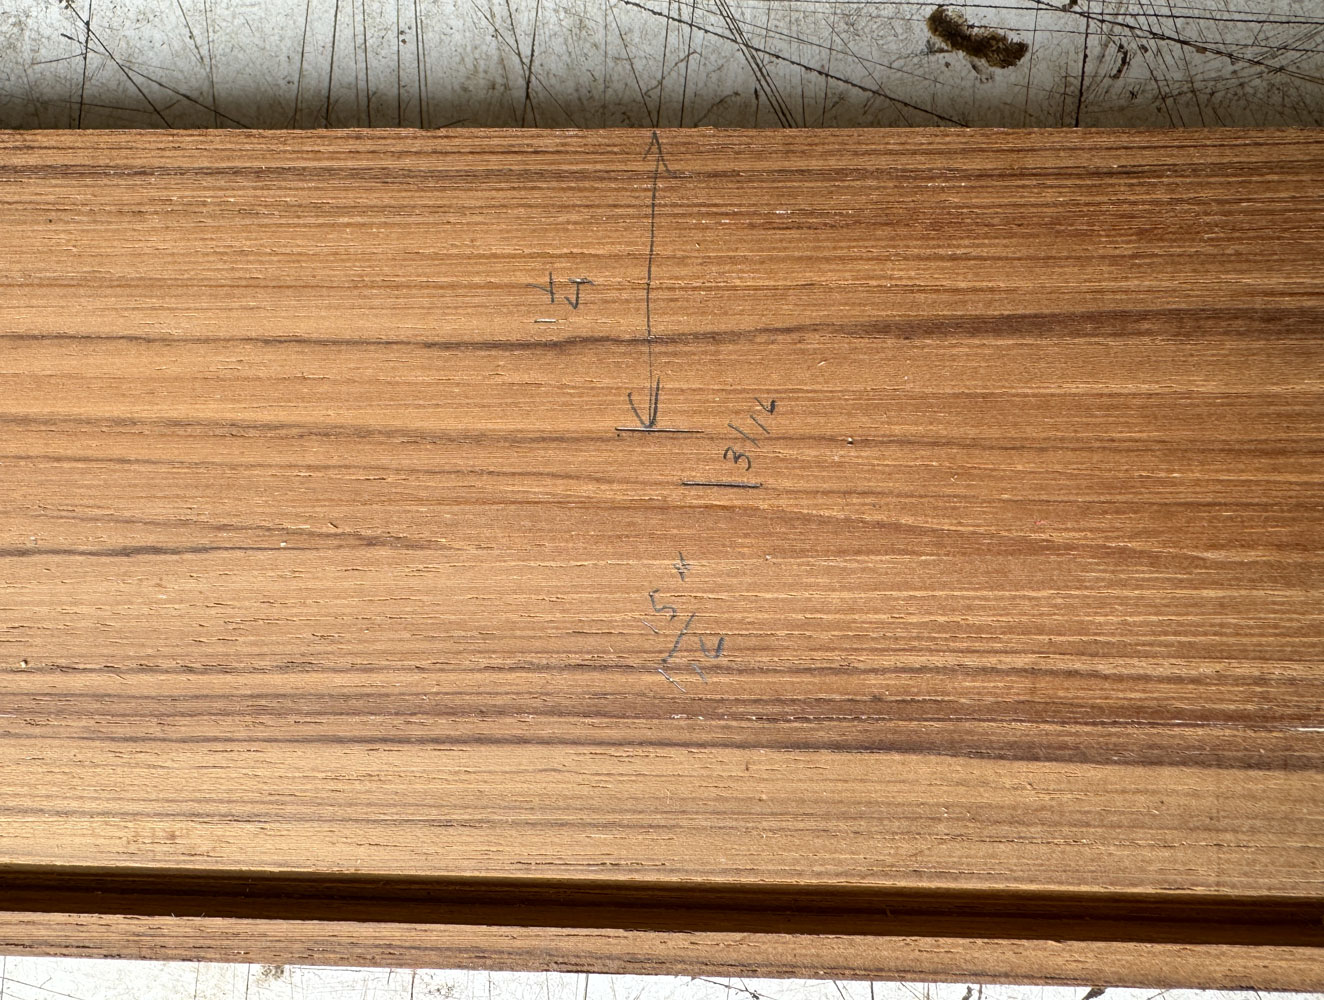
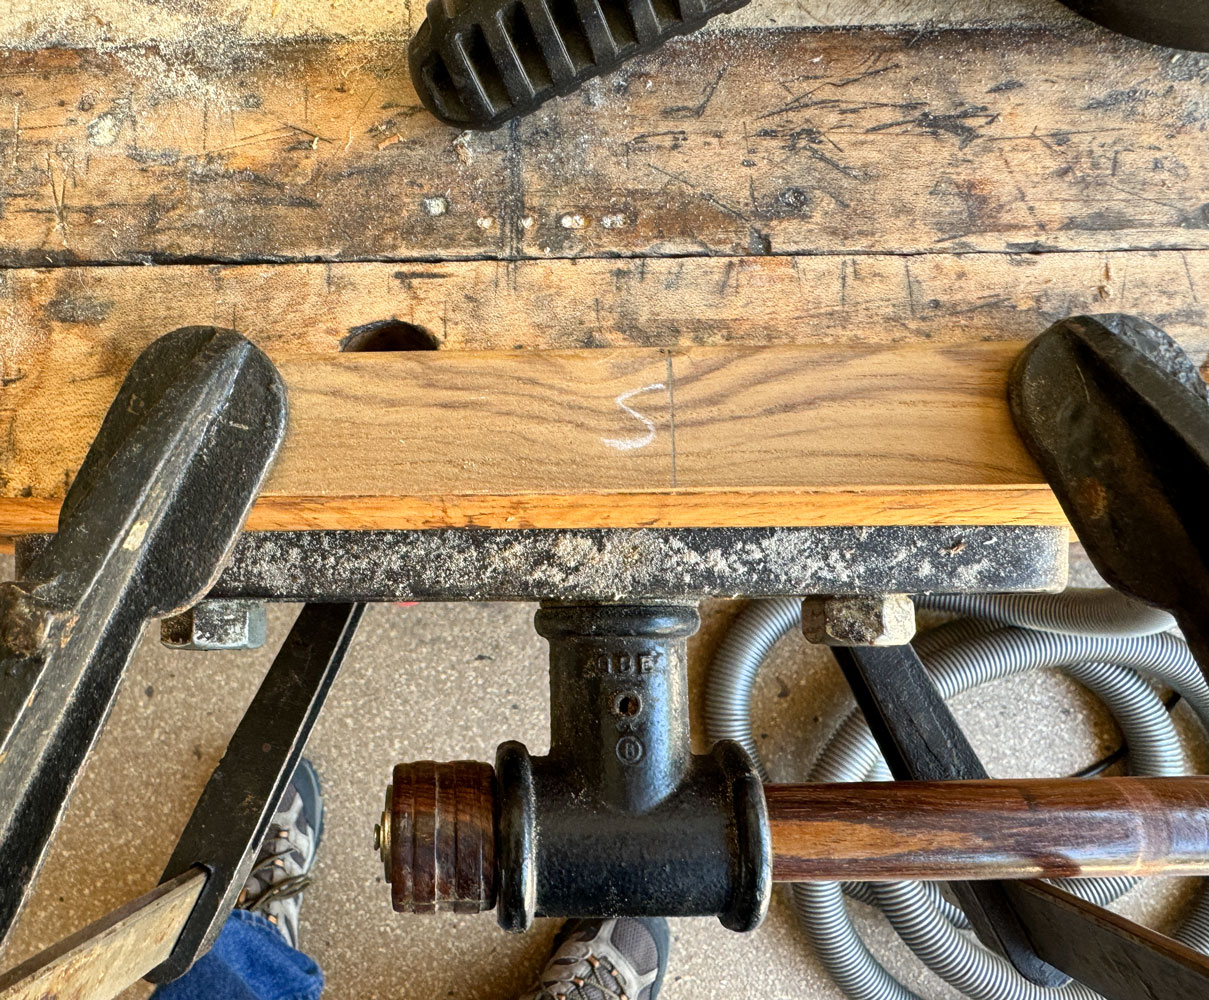
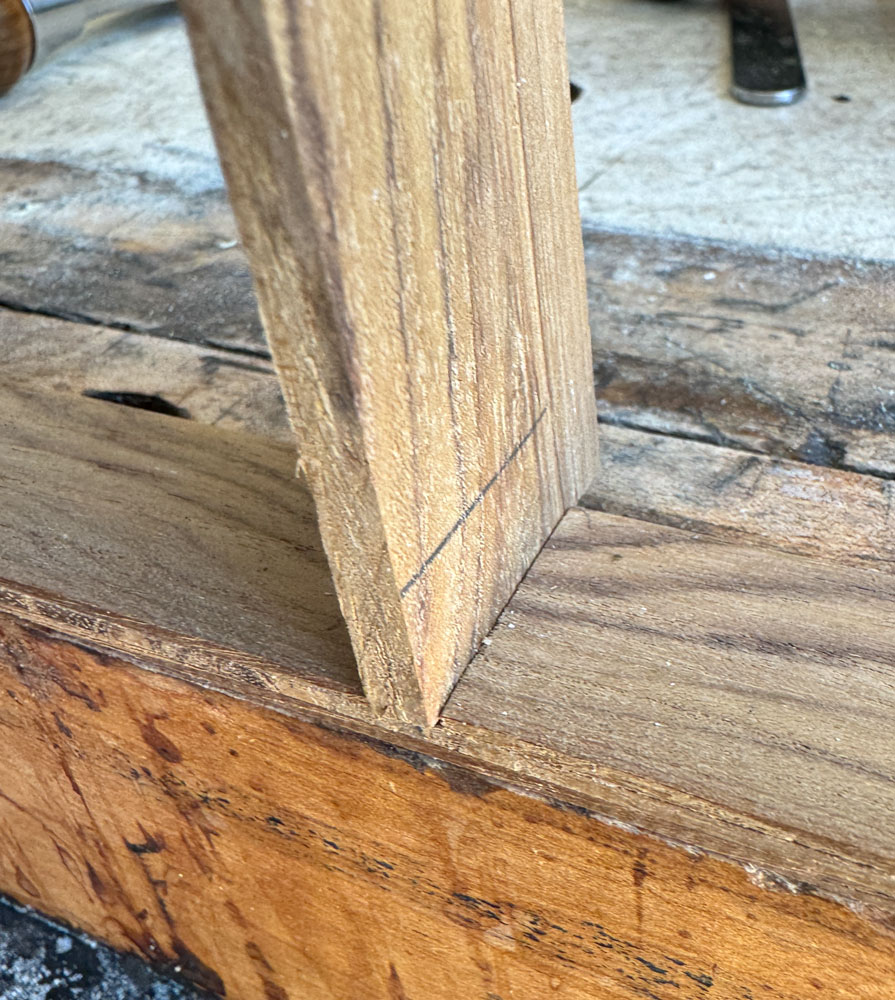
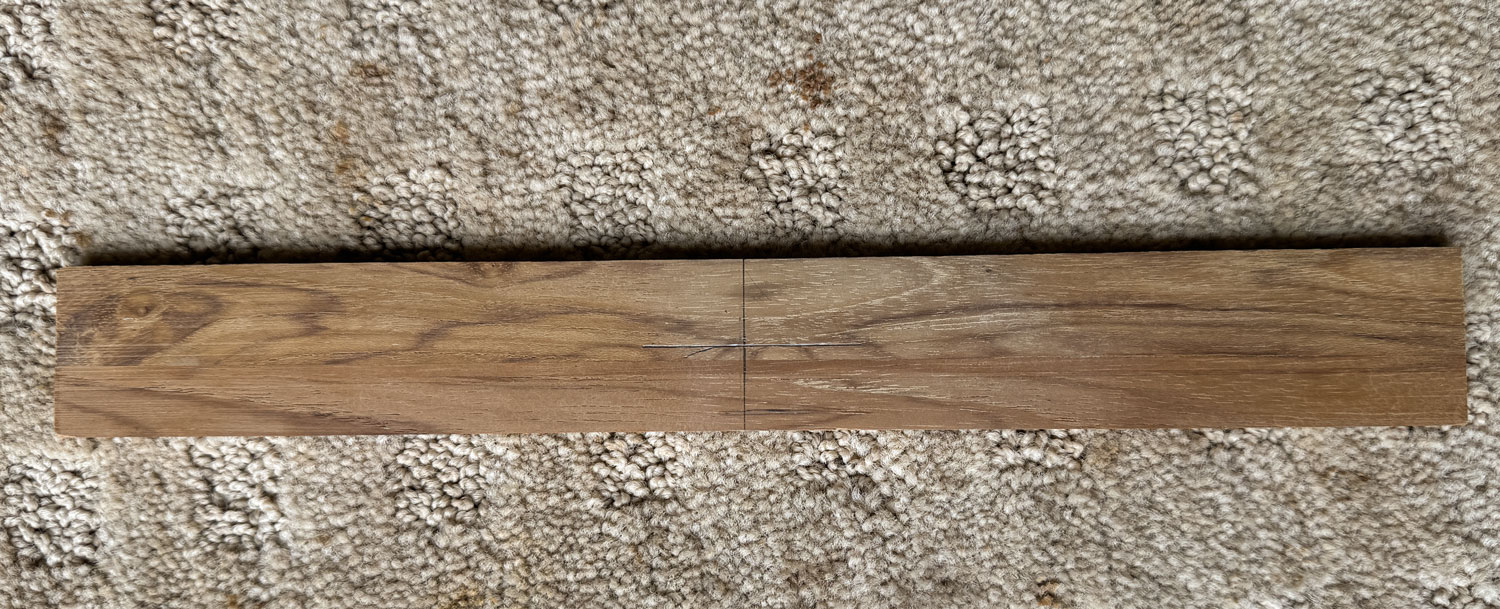
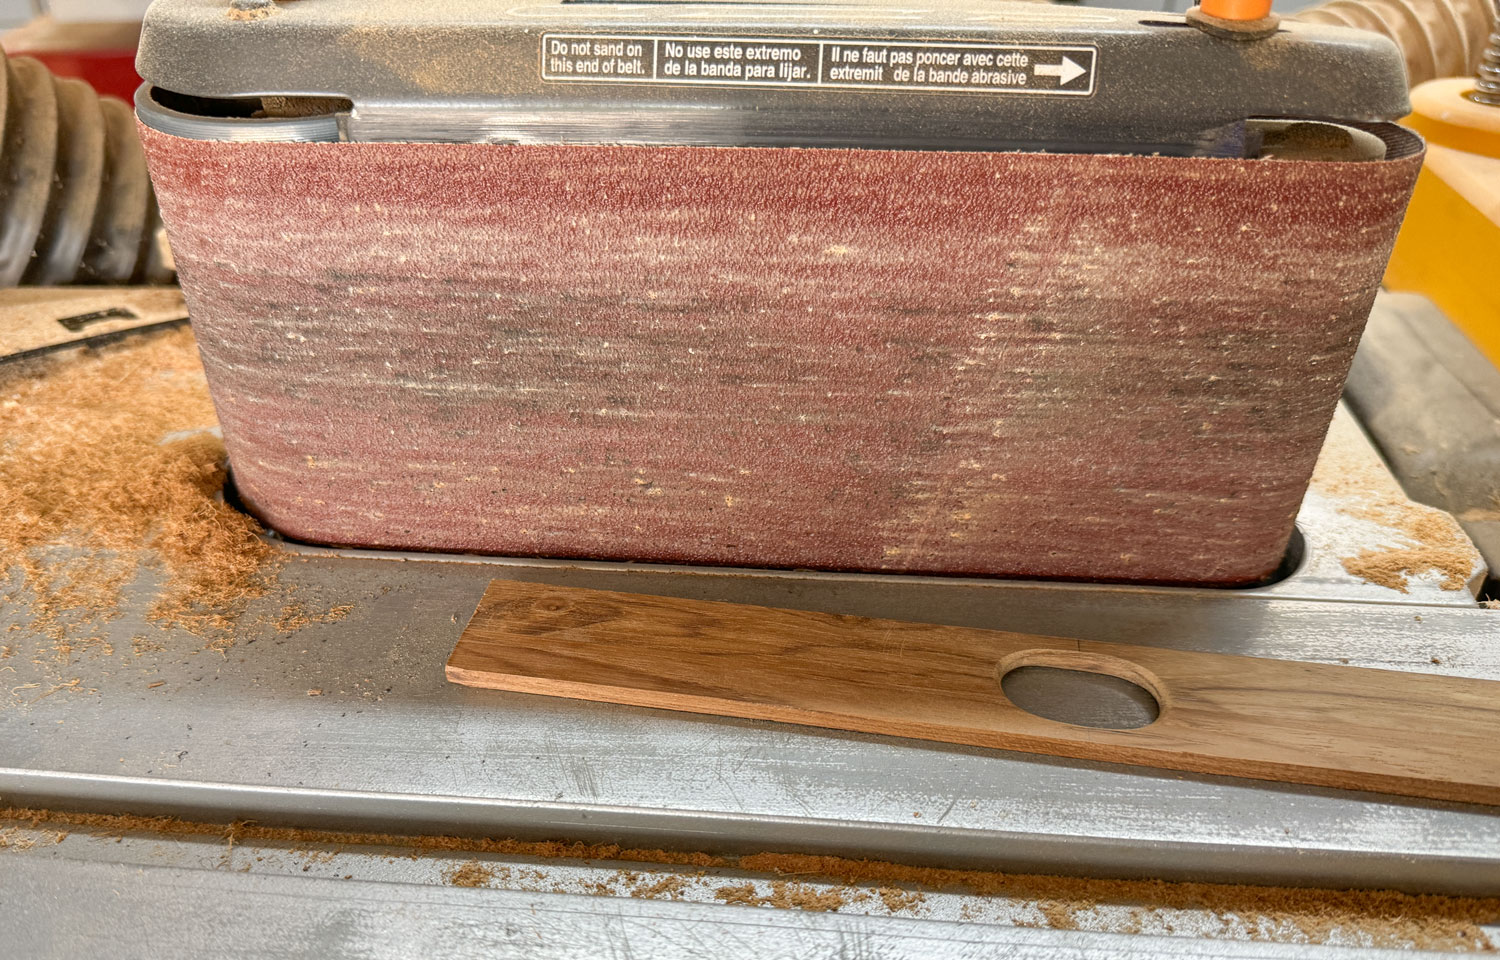
Here's a piece of teak that's about 39 inches long. It's about 1.75 inches high and a bit over 1 inch thick. I resawed it along the 1 inch dimension, and glued the two pieces together to give me a piece about 7/16 inch thick and 3.5 inches high. I used a Tenryu 5/64 (0.079) inch blade to save as much of the teak as I could.
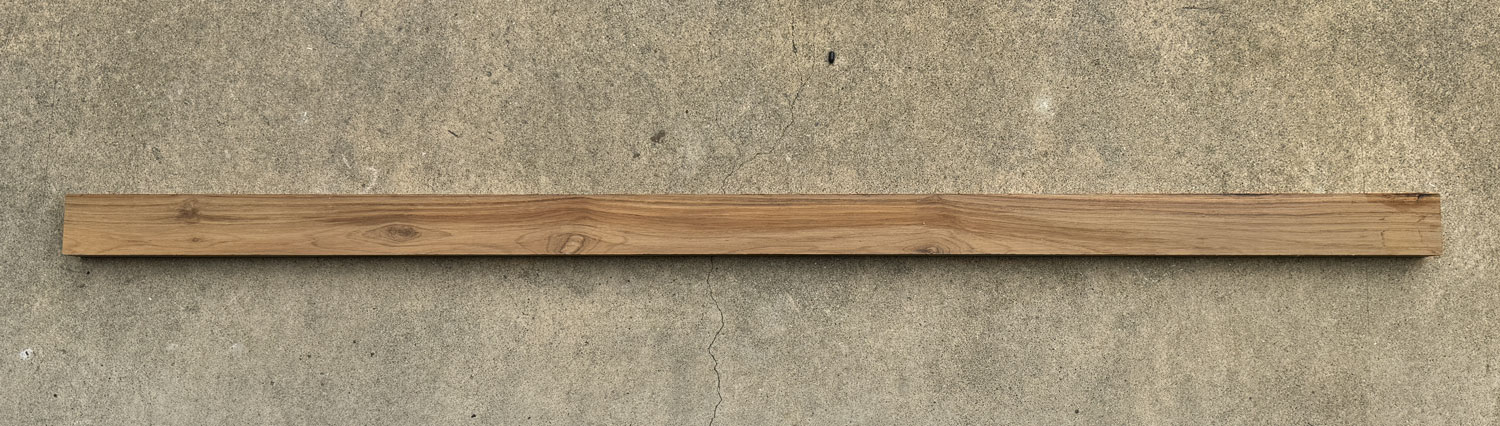
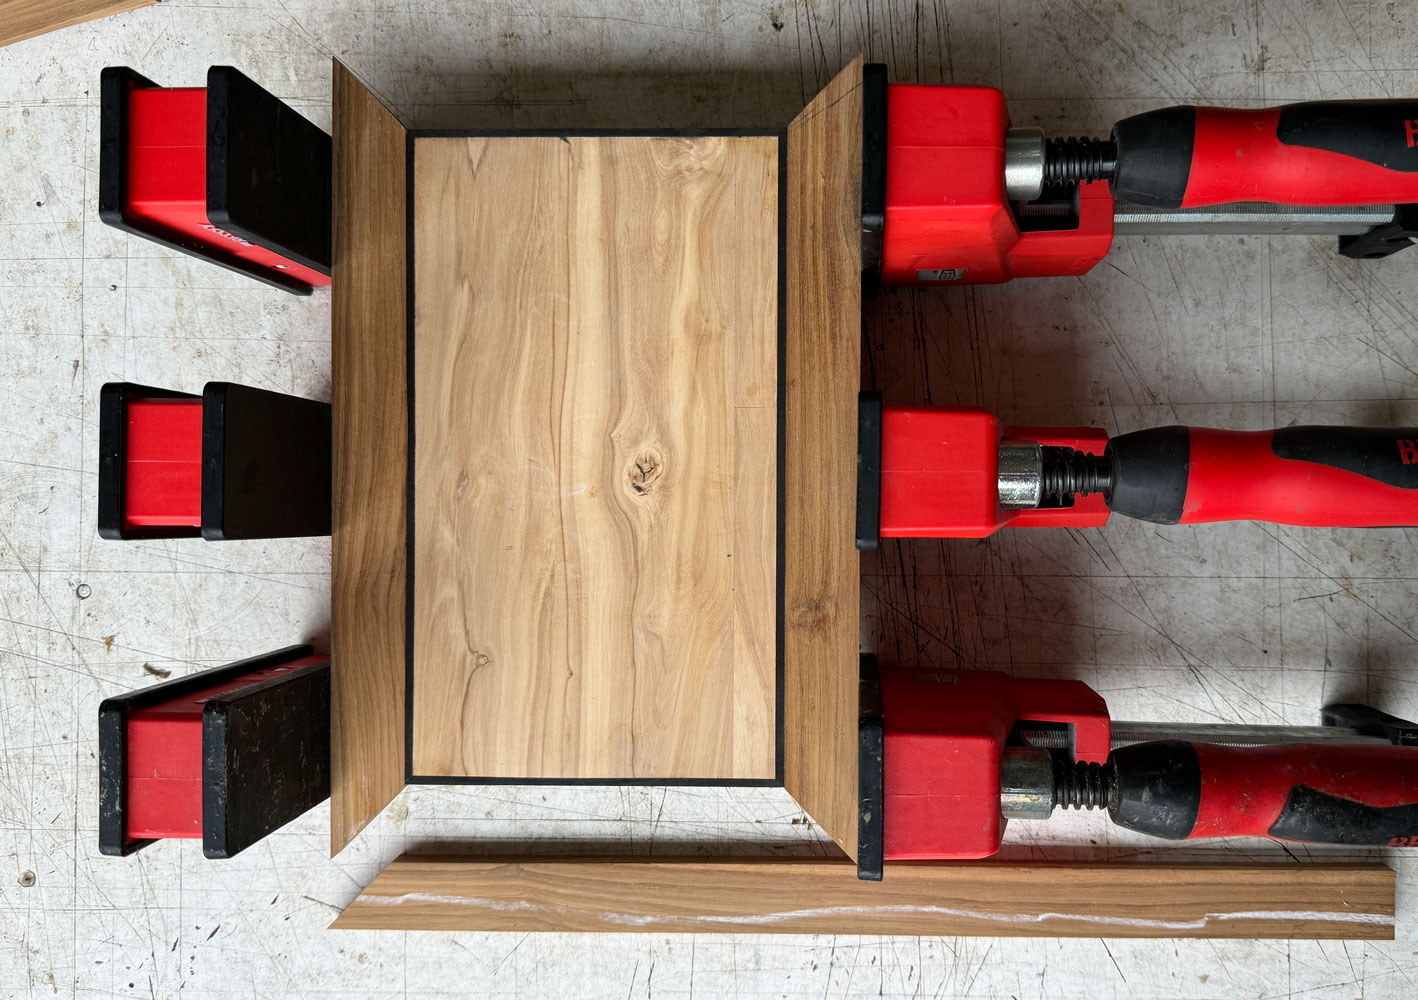
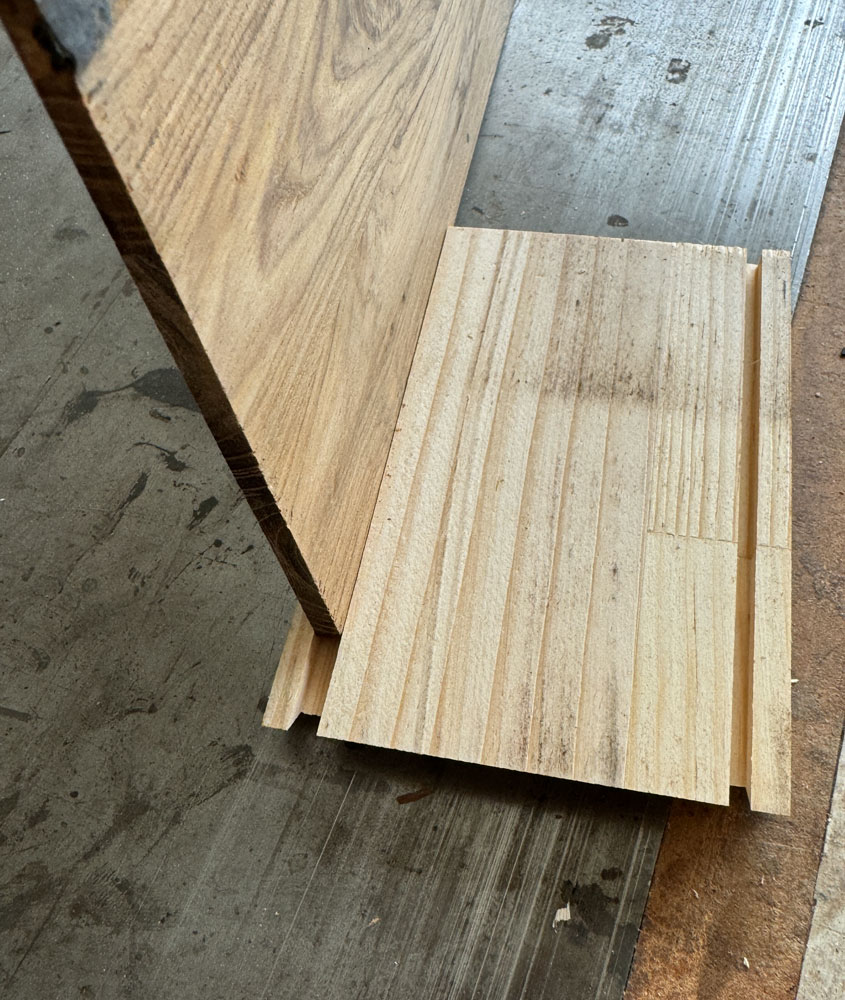
Here are those two pieces, in clamps, being glued together. This will become the sides of the box, itself.

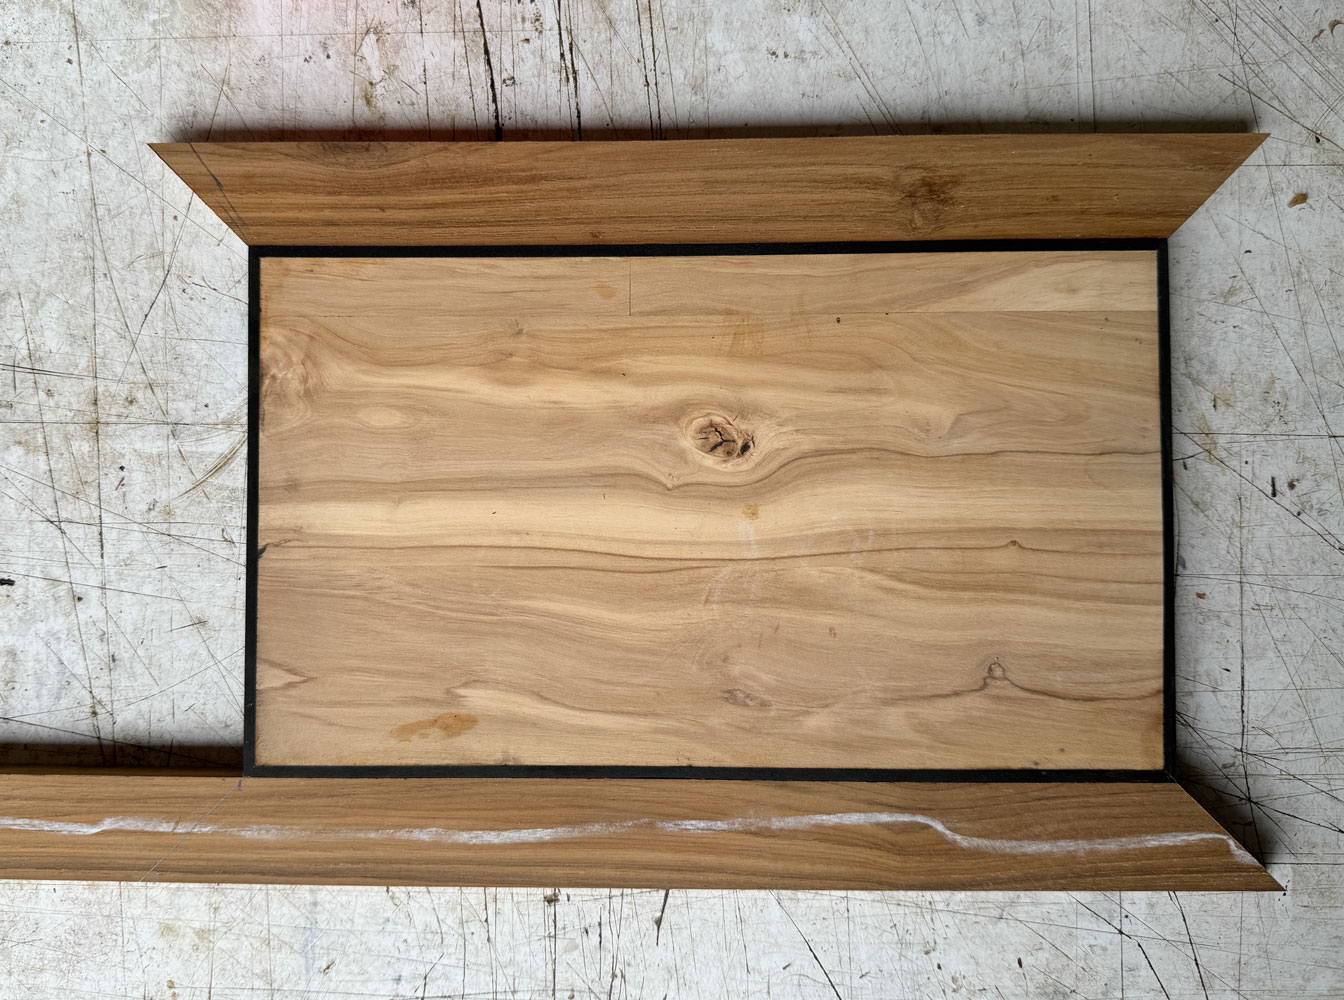
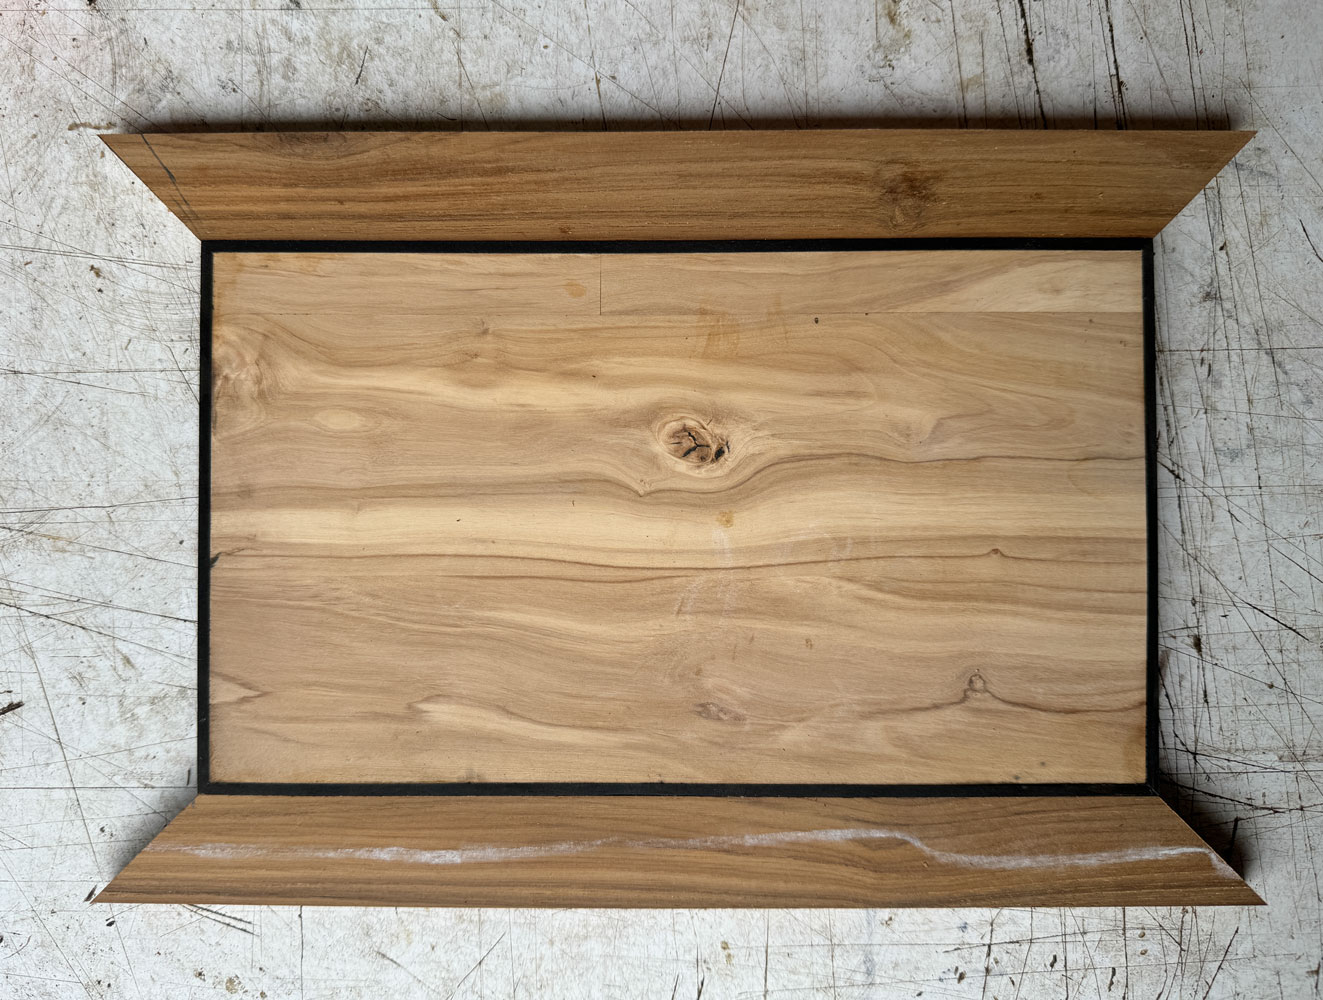
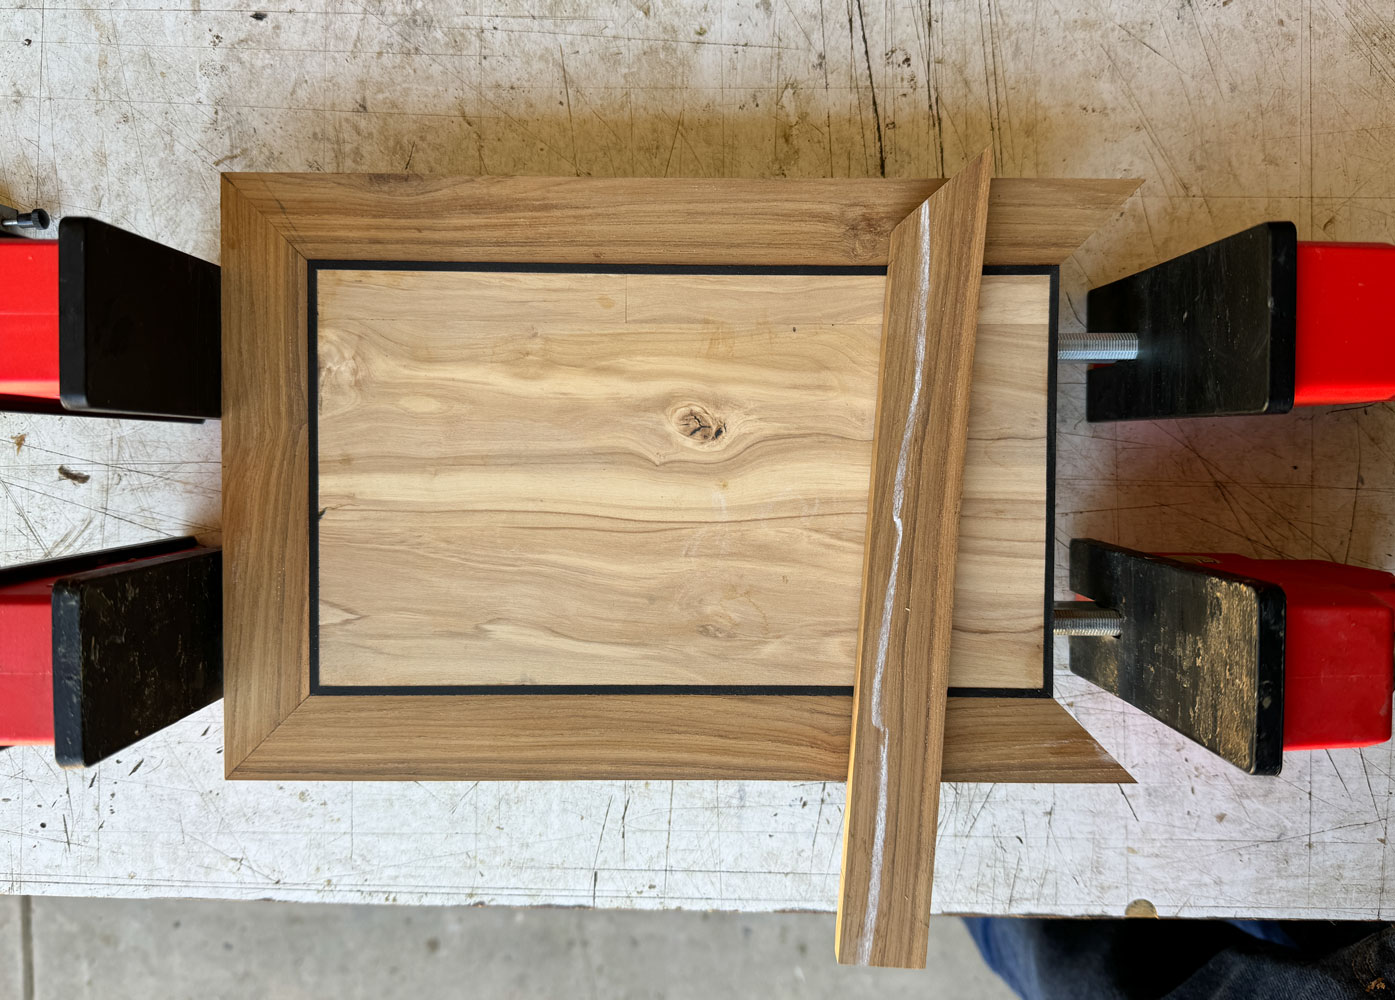
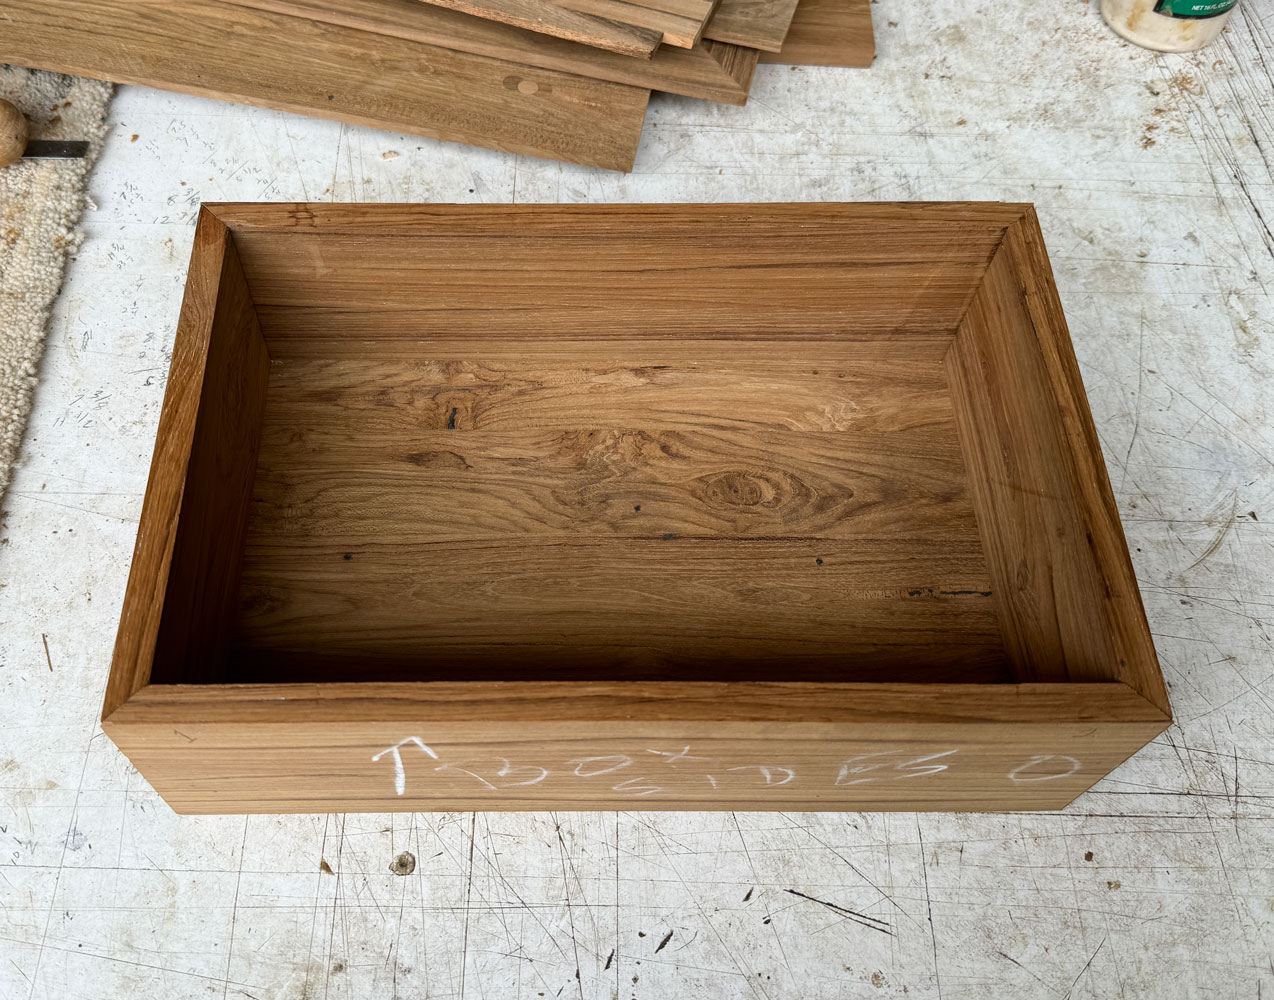
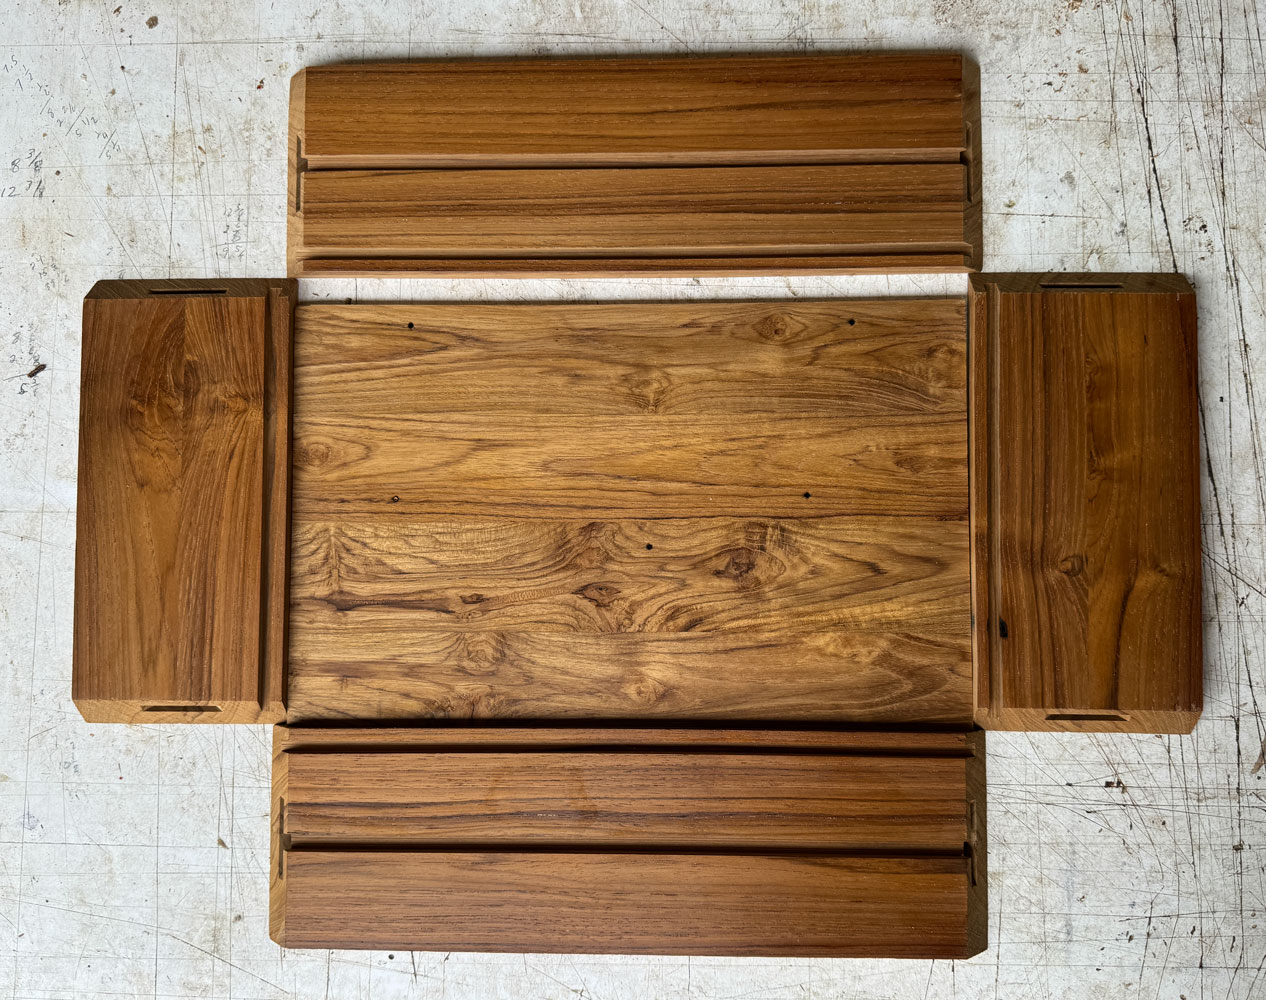
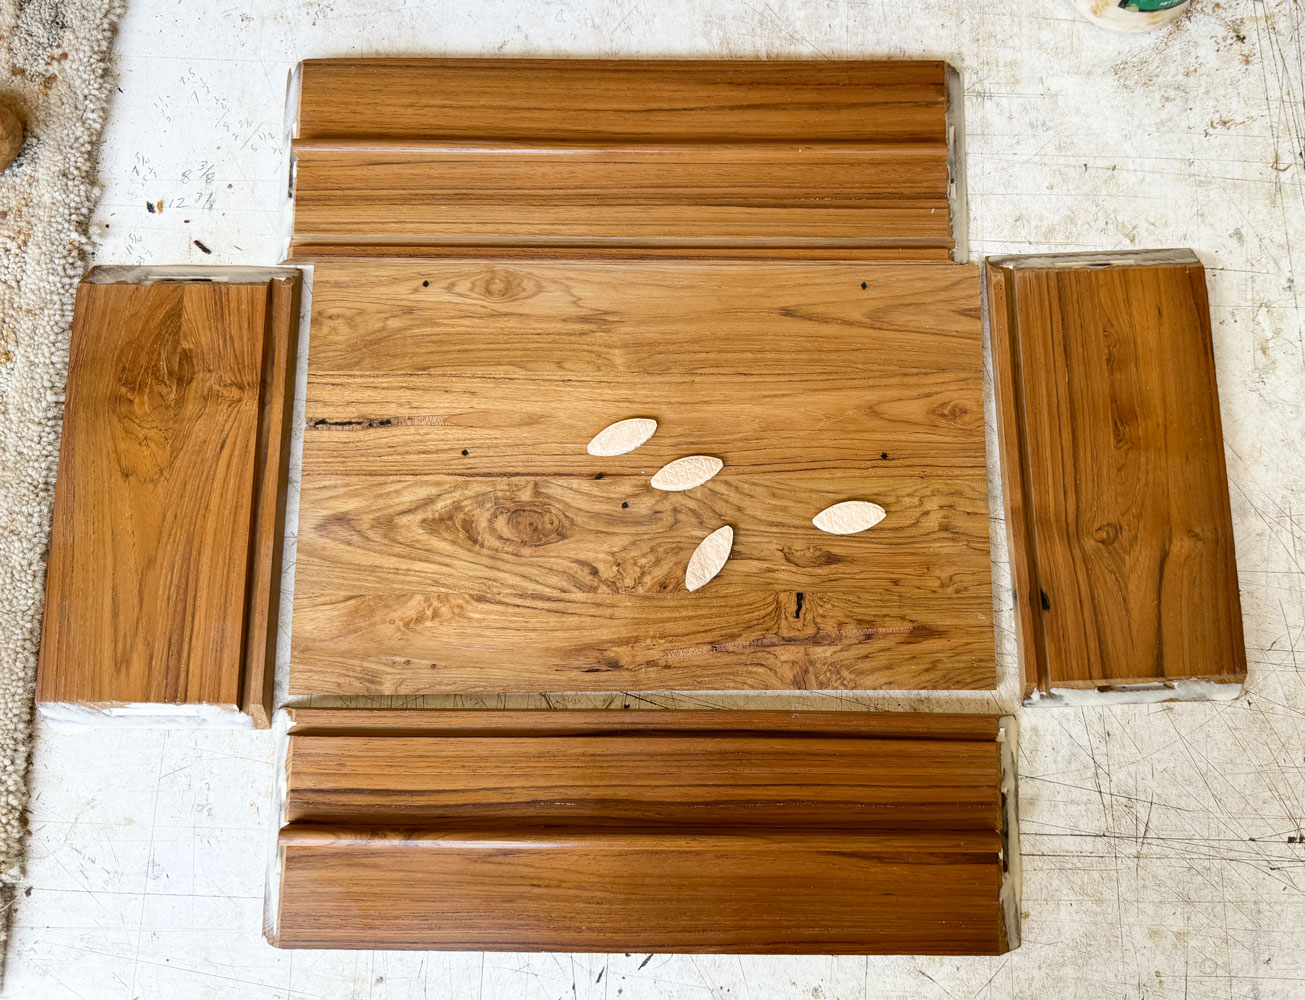
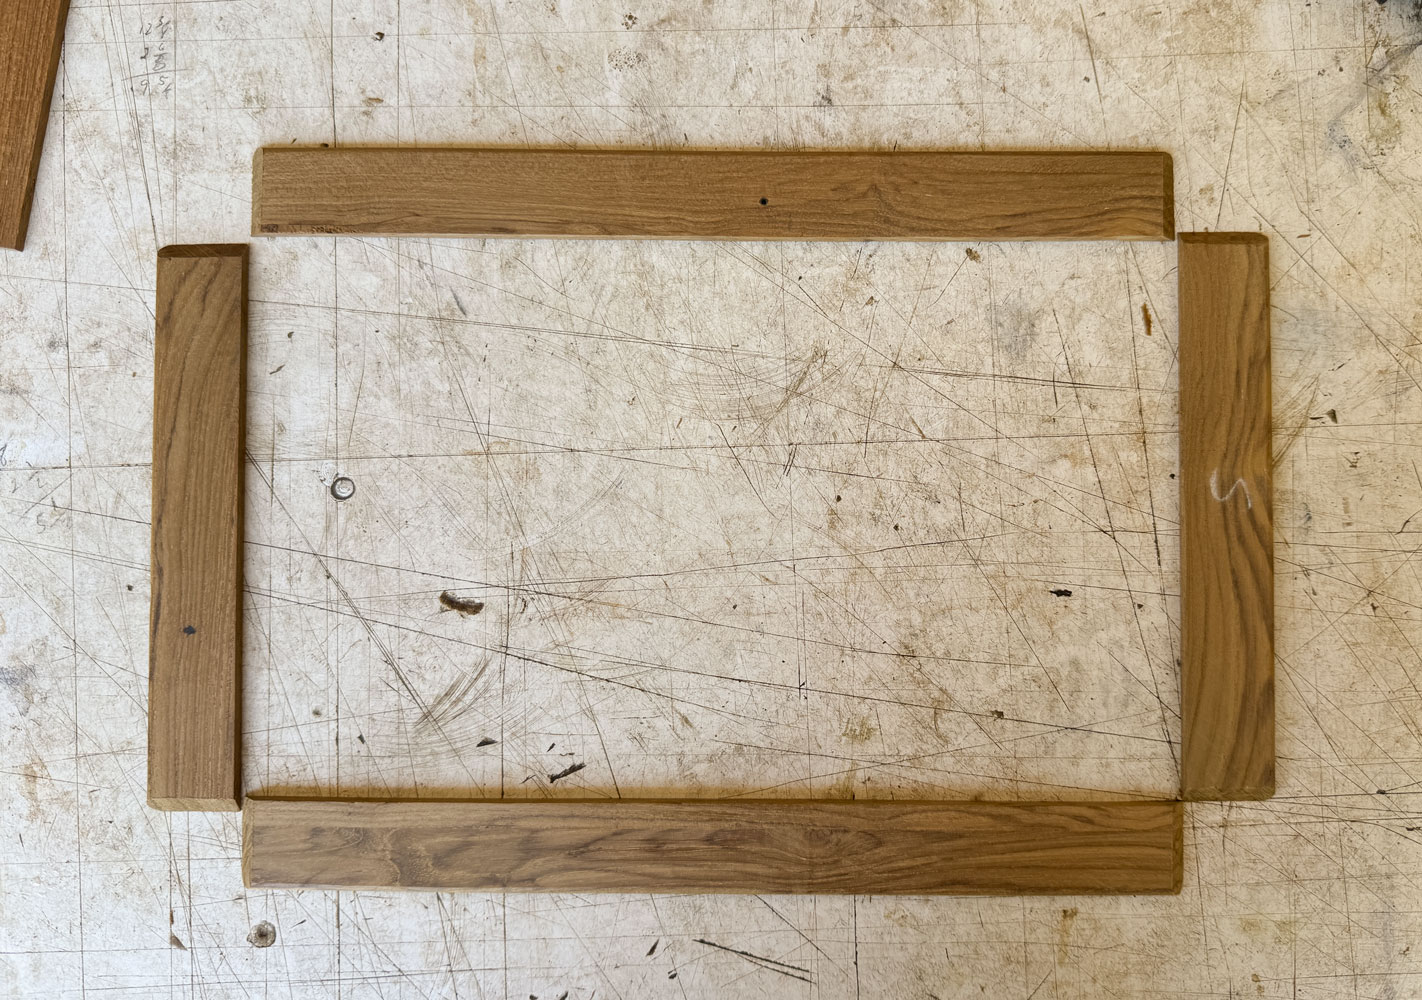
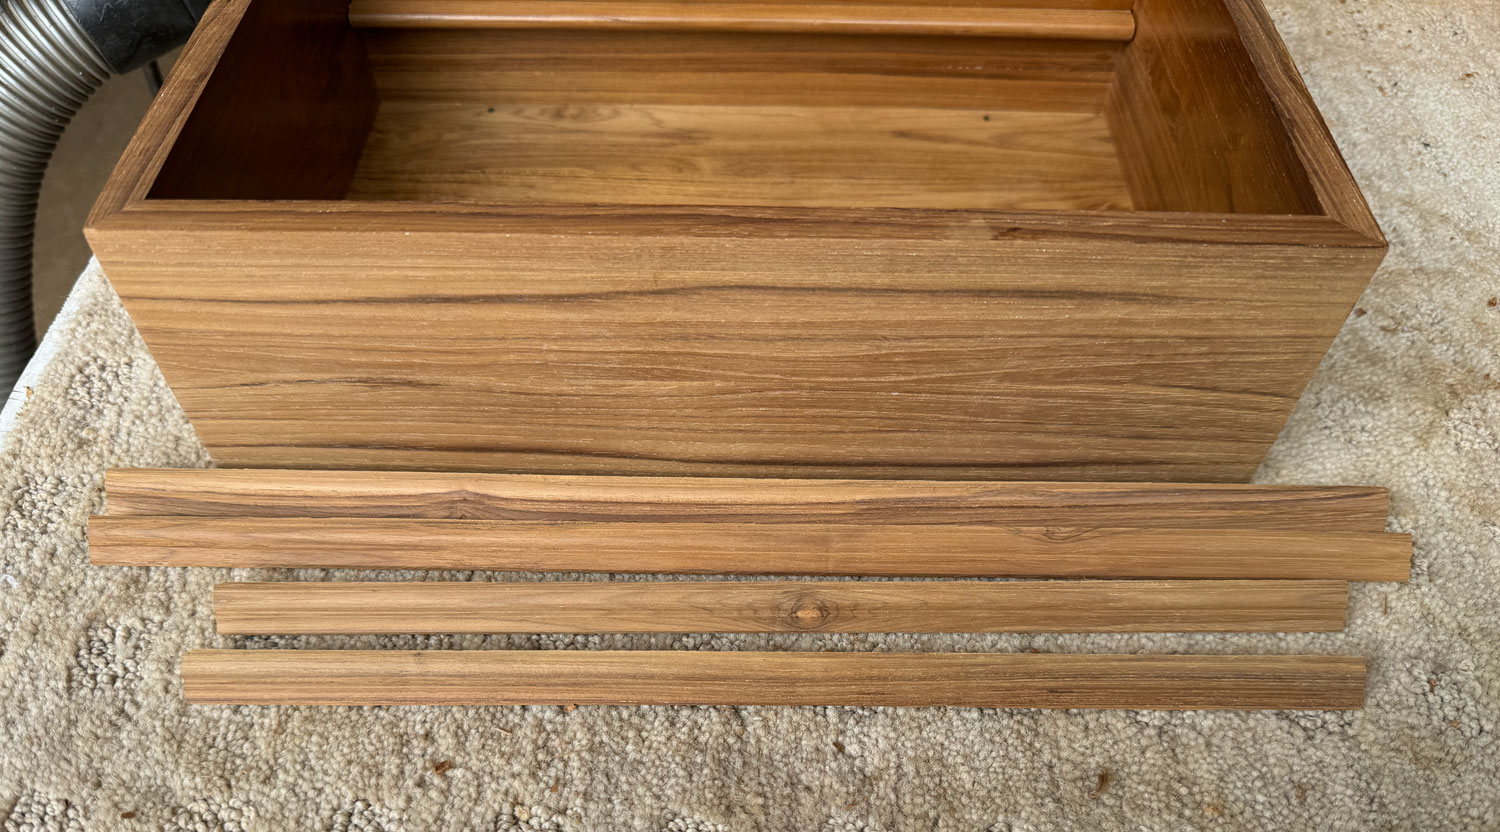
In following this tutorial, you can use any wood you want, and you probably won't have to work so hard to prepare the wood. Here are the parts of the box. The board in the bottom of this picture, labeled "Box Sides," is the glued board shown above. Those black strips in the middle of the picture are ebony.
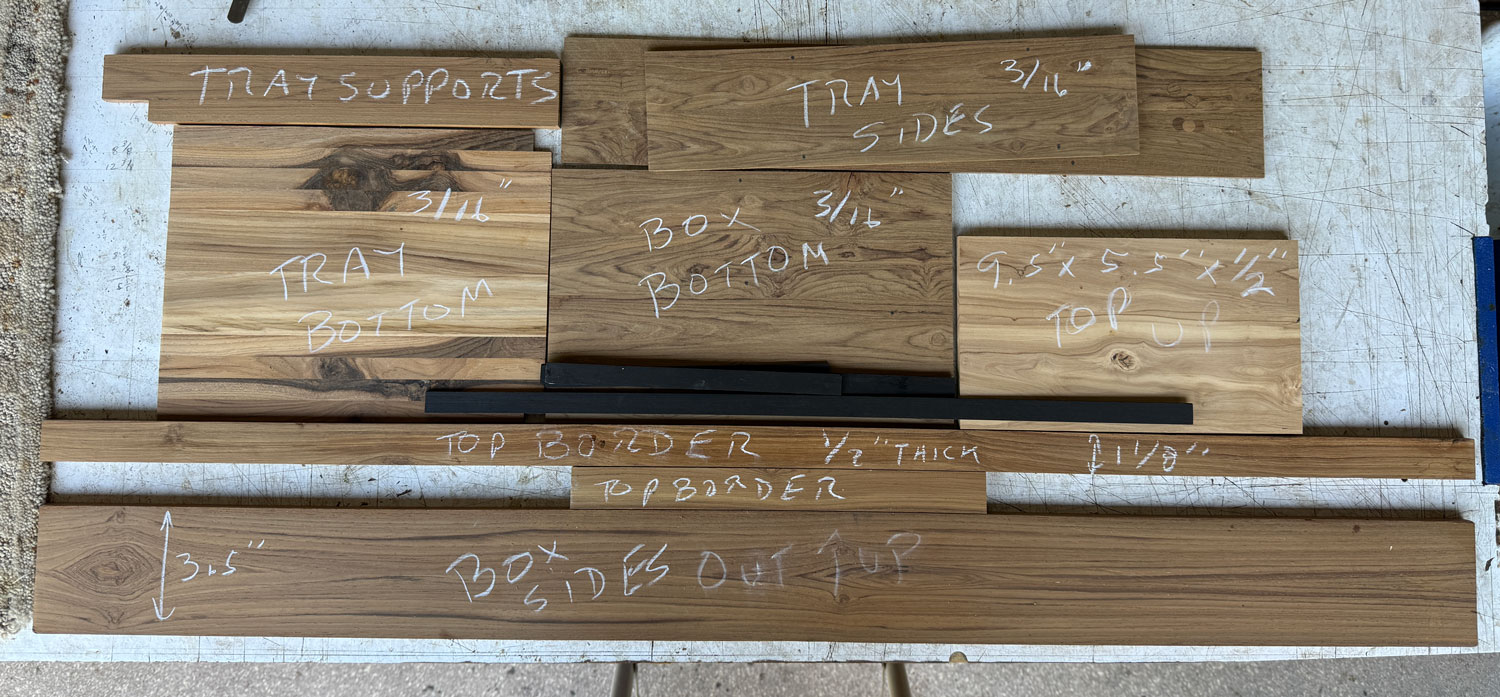
Also, I'm doing the top with a center of the olivewood, bordered by some 1/8 inch ebony, followed by a border of 1 1/8 inch teak. You could do a simpler box with a solid wood top in your choice of species.
I usually make a jewelry box about 12 inches wide and 8 inches on the side. The height has changed over the years - I used to make them 4 inches high but now think that 3.5 inches in height looks better. I'm very limited with the wood I have, so I'm going to have to make this box just a bit smaller. This one will be 11.5 inches across the front and 7.5 inches on the side.
The top will overlap the box by 1/4 inch all around, so the top will be 12 inches by 8 inches, and will rough out at 1/2 inch thick. The first thing I'll make is the top. Since I want the top to wind up as 12 x 8, and I'll put a border of 1 1/8 inch teak and 1/8 inch ebony (1.25 inches all around), the olivewood has to be 9.5 x 5.5 inches. However, in order to remove a defect from the olivewood, I had to cut it to 5 3/8 inches, so the top wound up as 12 x 7 7/8 inches. This will make the box 11 1/2 inches by 7 3/8 inches.
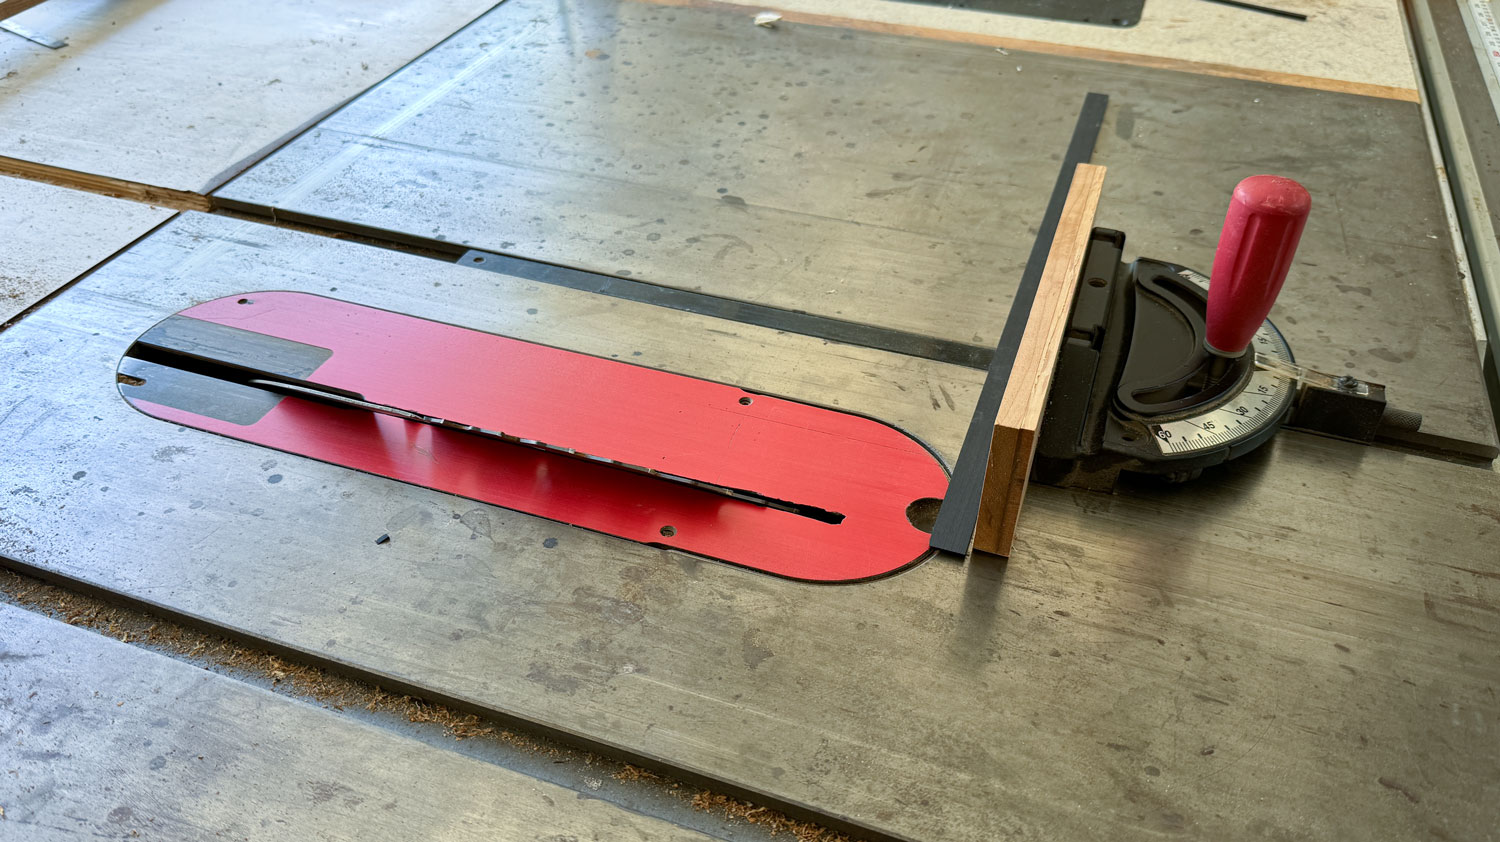
I'll start by applying the ebony (a friend gave me a bunch of ebony strips 20 years ago). Ebony is a hard, brittle wood and difficult to work with. My main challenge is to cut two miters on the ends of each piece. I'm going to use my table saw to make those miter cuts. I have the blade tilted over at 45 degrees and the miter gauge has been carefully adjusted to 90 degrees so I get a square cut across the wood. The pieces of ebony are a bit more than 1/2 inch wide. When I apply them, I'll have them proud on both sides. I don't want them below the surface of the olivewood.
I cut the first piece to go along the length of one side of the olivewood. The inside length of the ebony is *exactly* the length of the olivewood. Here's what the two sides look like when the ebony is placed against the olivewood. It will help if you have a backer piece against the ebony when you cut it - to prevent tear out at the end of the cut - and cut slowly.

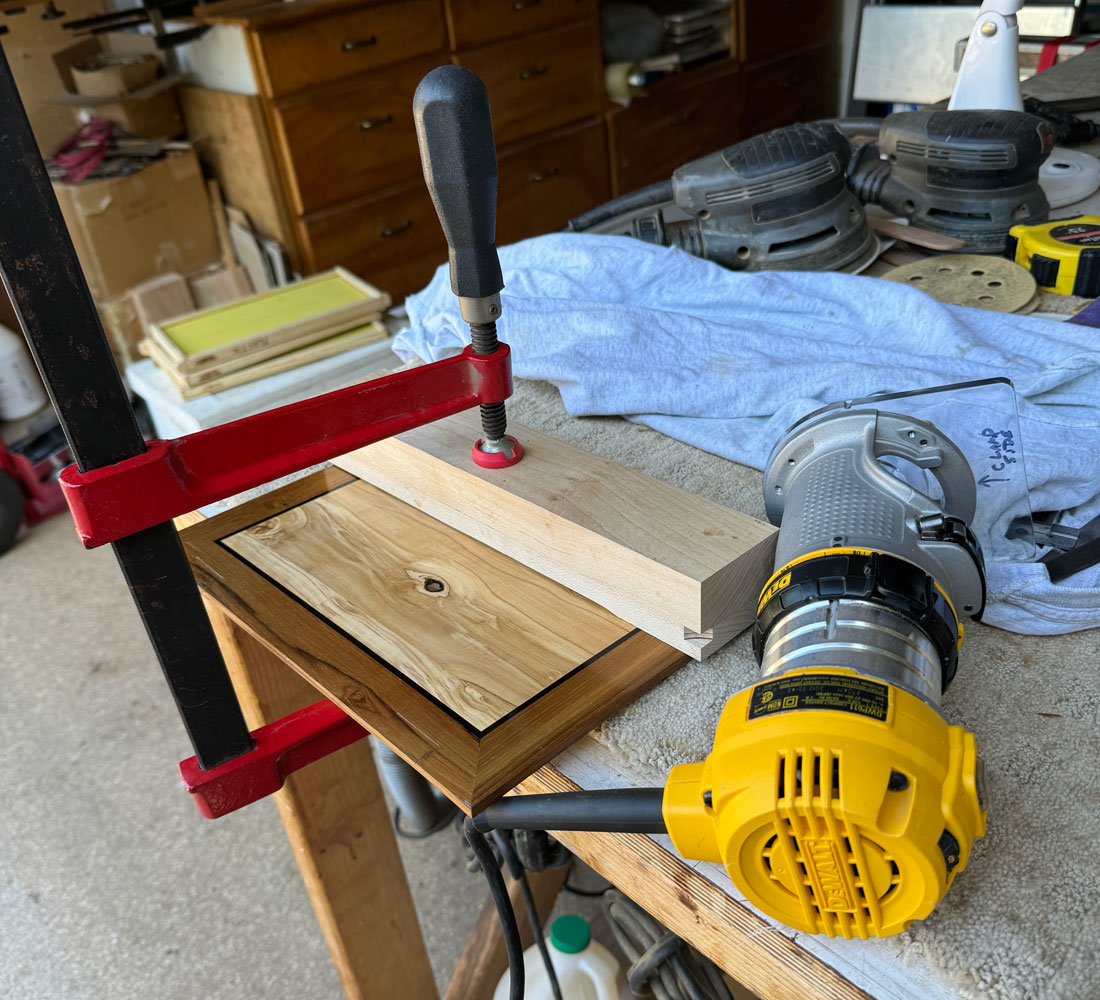
I glue the ebony to the olivewood, one piece at a time. Here's the first piece in clamps, with a caul against the ebony. Doing it one piece at a time is slow, but it allows me to get good, tight miters at the corners.

Here's a close-up of one side of the ebony while it's in clamps.
Once you have one side done, do the other side and clamp as before. Here's a picture of the second side being clamped. The ebony for the other two (short) sides is on the olivewood and will be fitted to the sides.
The first end piece is cut to fit tightly between the two long pieces of ebony. This is a precise cut. The piece needs to be tight against the other pieces of ebony so that the miter is tight, but not so long that it pushes the existing ebony pieces apart as you clamp the side piece.

Then do the other end piece of ebony, and you have the ebony border done. If you have any gaps in the ebony, you can always fill the gaps with black tinted epoxy. If you follow what I did carefully, it's unlikely you'll need any epoxy filler.
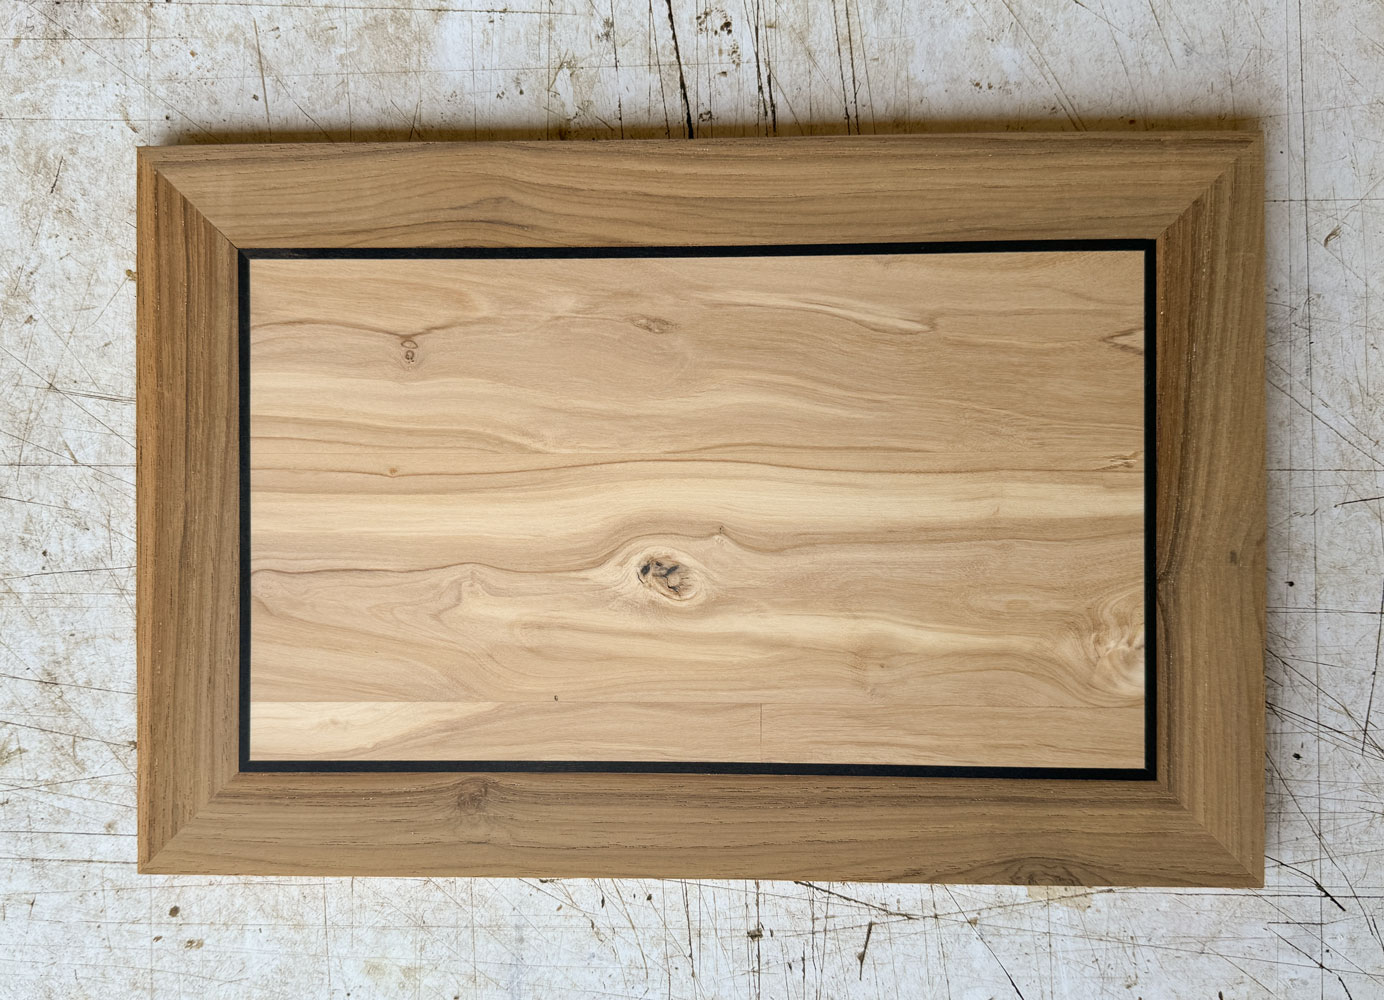
Here's what it looks like with all four sides done. The miters are tight with no gaps. I sanded the ebony down a bit to bring it closer to flat with the olivewood. When I glue the teak border, I'll feel with my fingers to align the teak with the olivewood and ebony. If the ebony is flat to the olivewood, it's easier to get the teak piece properly aligned.

I used a sanding block and dressed the corners. Don't try to use your power sander - there's too much chance of rounding things over.
Now I'm going to put the teak border on the top. I do this exactly the same way as I did the ebony. It would have been nice to do "chasing grain" around the center olivewood, but 39 inches is not quite enough to do a 12x8 border. I can save wood by using the miter cut from the previous piece. That would normally require flipping each alternate piece, but by putting the pieces on the alternate side I can maintain the same face up. I prefer doing that to maintain the color and the approximate grain structure. Even if I did chasing grain, I'd have one corner where the grain didn't match.
Here's the first piece to be cut. I've marked this side with chalk so I keep the same side up. I cut these miters on my miter saw.
After cutting, I glue it one piece at a time. When I wiped the excess glue off, I wiped the chalk mark off, also, but you can still see the pencil mark.
Now, I'm ready to do the second piece. You can see in this picture that the same side is up, but the opposite edge is facing the olivewood center.
After cutting to length.
And gluing up. I've put the piece of teak along side the glue up to show that I can keep the same face up.
Here's the first end being glued up. I put the remaining part of the wood to show that I have more than enough to do the final end.
When you're fitting the end piece you may find that the miters are not perfect and you have to adjust the angle of the cut slightly. The adjustment should be *very* small - usually much less than half a degree. If you go too much, you'll get a gap on the other end of the miter.
Another hint: If you cut that piece too short you can "lengthen" it slightly by taking a small cut off the short side length. This will allow the piece to fit further in, tightening up the miters. This will make that piece narrower and you may have to take an equal amount off the outside of the other three pieces to compensate. Or glue a very thin piece (veneer thickness) to the outside.
If you sneak up on the fit - taking very small cuts as you fit the piece - you shouldn't have that happen.
Here's the final, with all four border pieces attached. I'm satisfied with the miters. Although I did not do the chasing grain, I think the border looks good and even colored.
I put the top through my drum sander to make it flat. It came out about 7/16 inch thick.
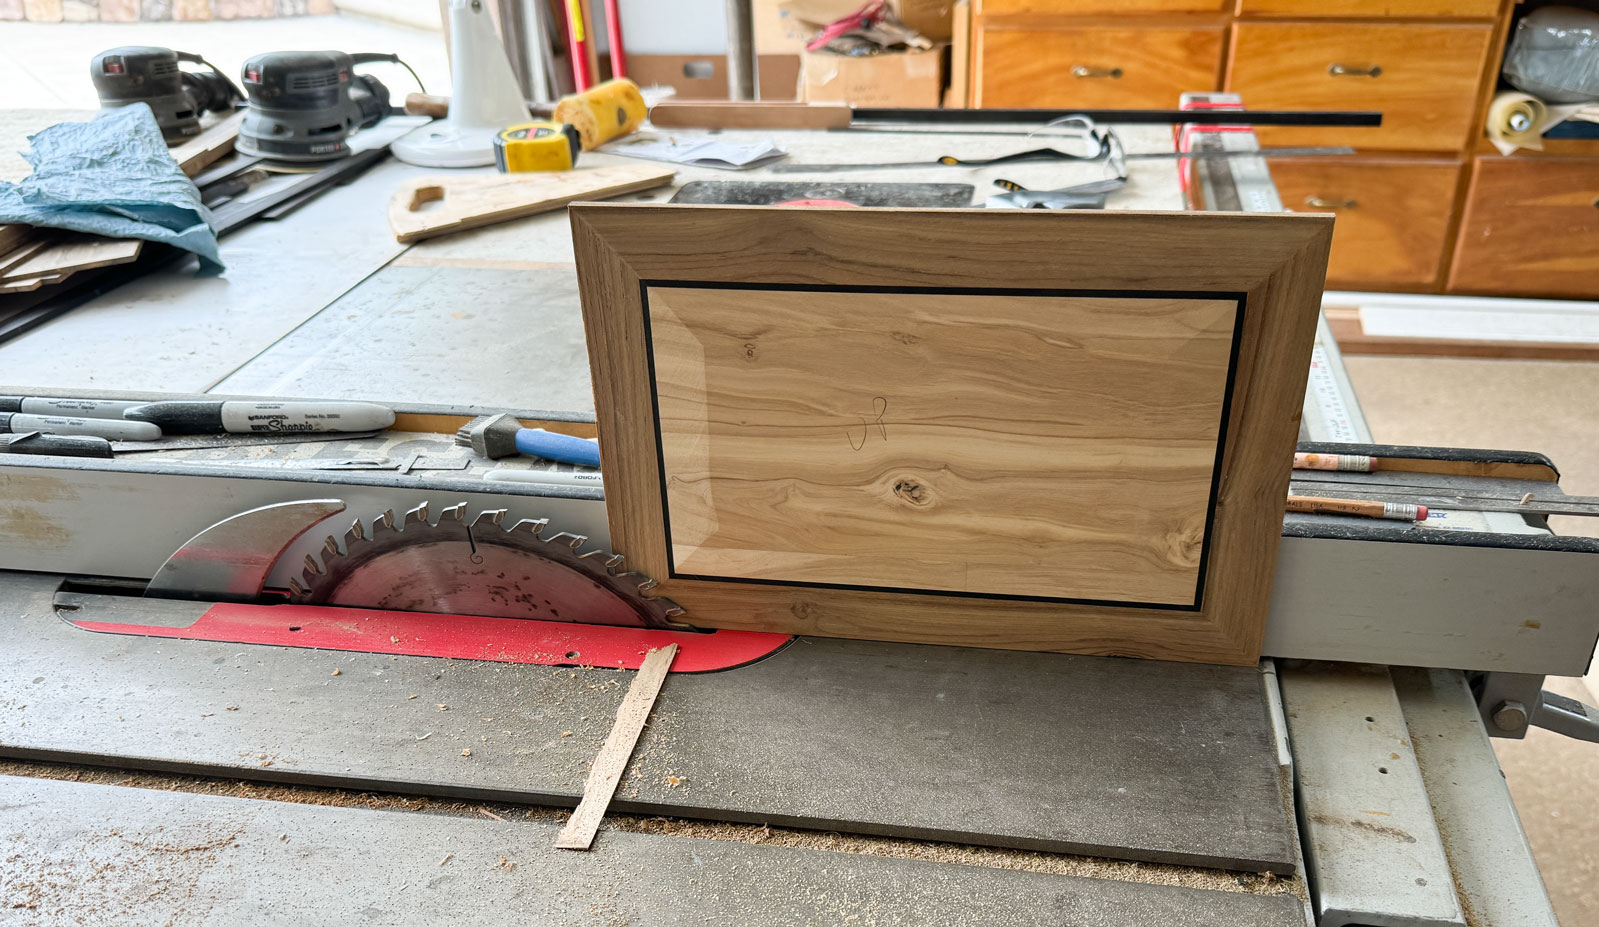
I don't want a flat top - that's too boring. What I want to do is "dome" the top a bit, which means I need to taper all four edges. You can do this by hand with a hand plane, but I'm going to use my table saw.
This is one of those "use at your own risk" things. It would be much better to make a jig that held the top and slid along the table saw fence. But I don't plan to make any more of these boxes so I don't want to go through the effort of making a jig and then either storing it or throwing it away. Here's what I did.
I set up my table saw with the blade fairly high and at an angle of about 5 degrees. I want the edge of the top to be about 1/4 inch thick so I'll wind up with the fence 1/4 inch from the bottom of the blade. Here's a picture of the starting situation. I have the blade set at 5 degrees and the fence is a bit more than 1/4 inch from the blade. I used that to make my first cut.
[Side note: When you make a cut with a very small deviation from the normal setting of the table saw or miter saw, don't forget to reset the blade when you finish. If you don't you may use the saw next time and think it is set up normally but you get a screwed up board. I haven't had that happen on the table saw but did encounter it on my miter saw when I had the saw about a half degree off 90 degrees.]
I couldn't take pictures while I was doing the cuts but here's an "after the fact" picture showing how I did it.
I made the first cut at 5 degrees and with the fence a bit more than 1/4 inch from the blade. I decide that I wanted the cut to extend further up the top, so I reduced the angle to 4.5 degrees and moved the fence to 1/4 inch from the blade. I was satisfied with that.
The problem with making this cut is that there's not much surface on the fence to register the top against. If you bobble the top as you're pushing it through you'll get a mess. So proceed at your own risk. Better yet, make a jig to hold the top in place as you push it through the cut.
[Update: Shortly after I did this tutorial, I found a video by Mike Pekovich that included a jig to do these kind of bevel cuts. It's a Fine Woodworking video and is not behind a pay wall. The part about making the bevel cut starts at 17:28. I would recommend you check it out. It's much safer and more accurate than what I did. Here's a picture from the video.
The only problem with the video is that the jig suddenly changes at 19:36. He has one jig at 19:35 and then a different one appears at 19:36.

This jig, where you put the top face of the box towards the jig, may not work well for what we're doing. The top is fairly small and the bevel is long. That means when you turn the top over to cut the other side, there's not much "flat" against the jig, so the top may bobble as you make the cut on the other side. It might be better to put the jig on the other side of the blade and make the cuts with the back of the box top against the jig.
End update.]
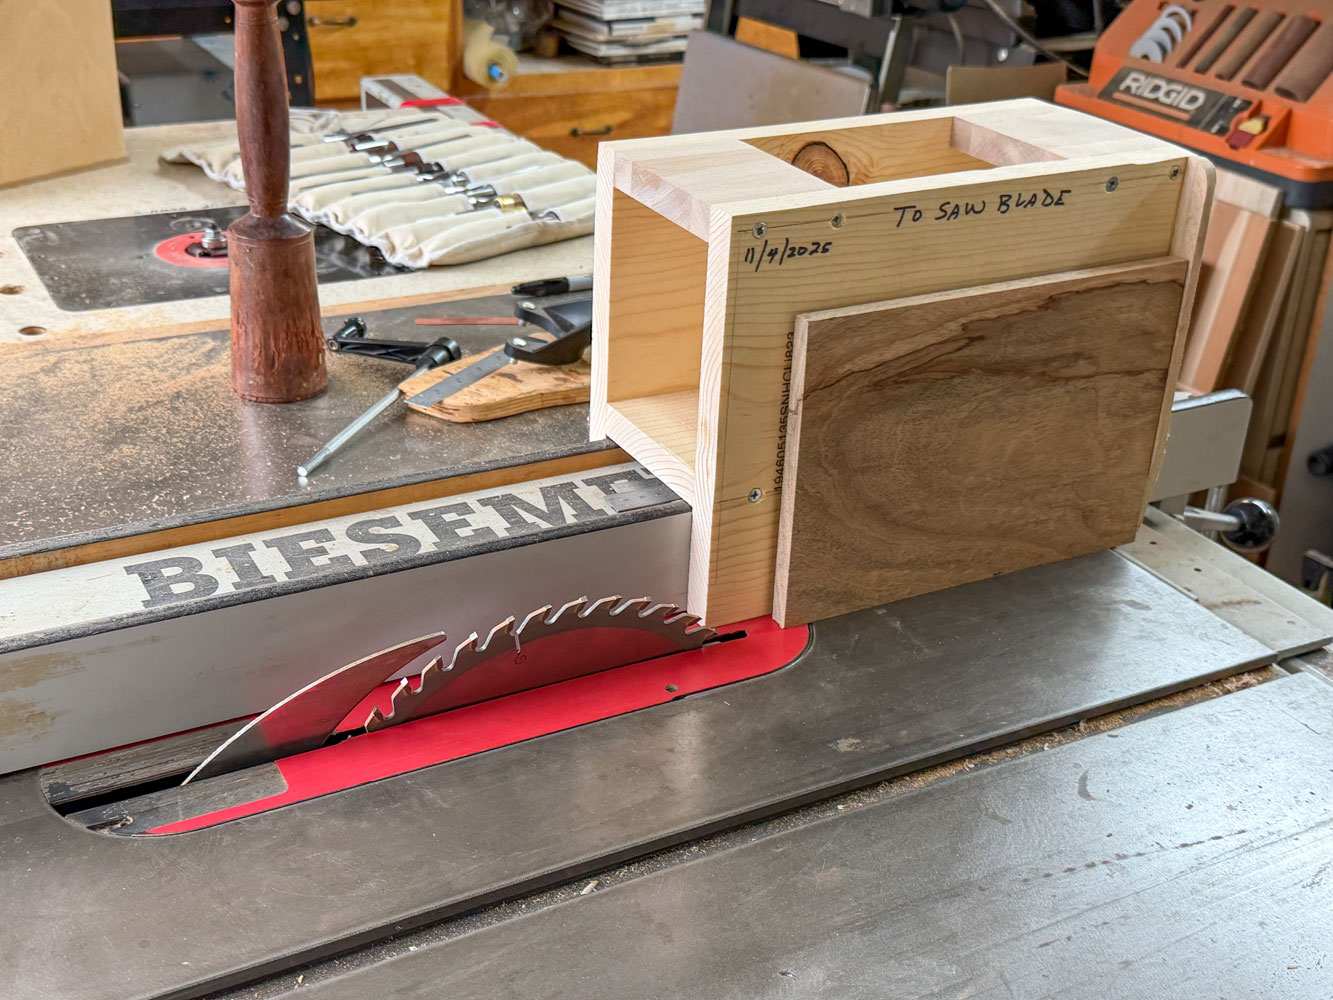
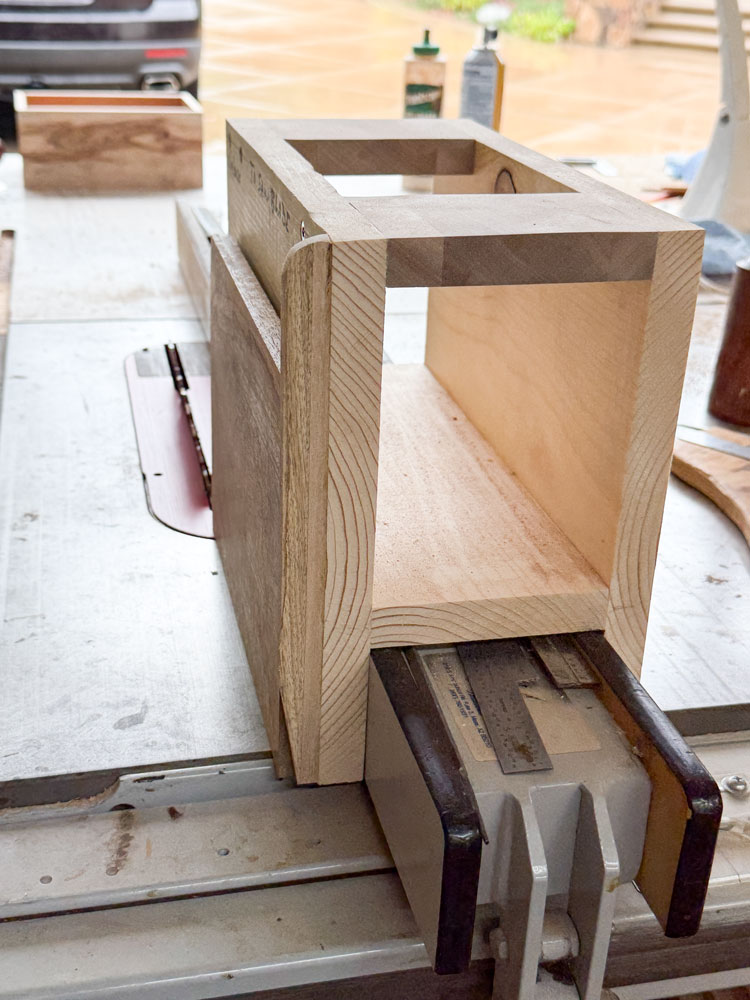
[Update: I built a jig to use when cutting the bevel for the top. I didn't like Mike Pekovich's design because the waste is trappd between the blade and the jig. I built a similar jig, but I use it with the fence in the normal position, and the waste is free to fall off. Here are a couple of pictures.
A view from the rear.
The jig should fit tightly to the fence. Mine was so tight it was hard to push so I used some was to make it slide easily. It works well and is a lot safer than trying to hold the top against the fence because the fence doesn't extend up enough to give you good support.
End Update]
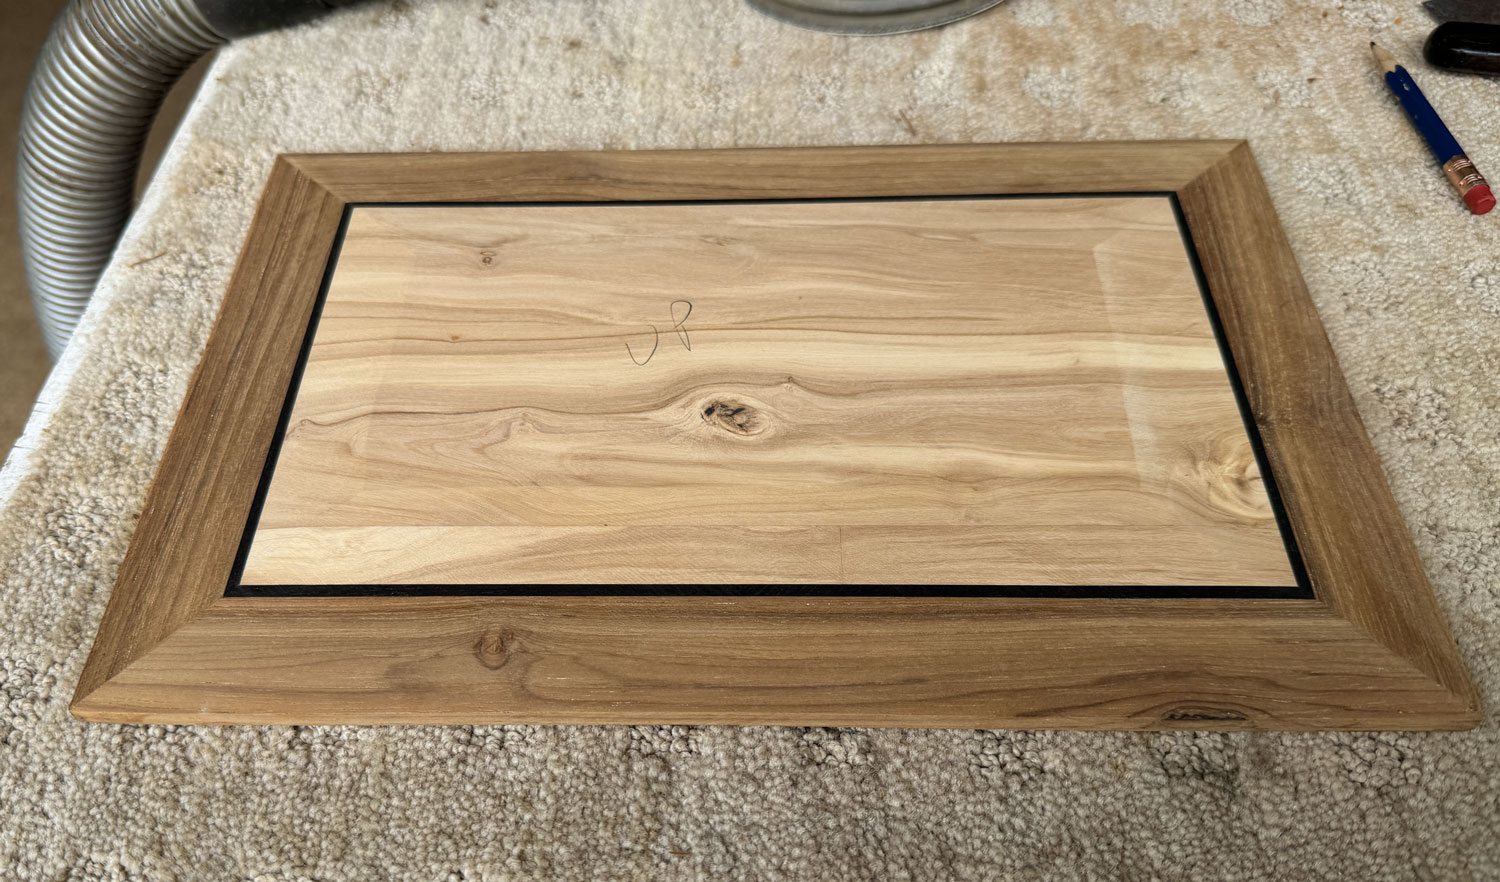
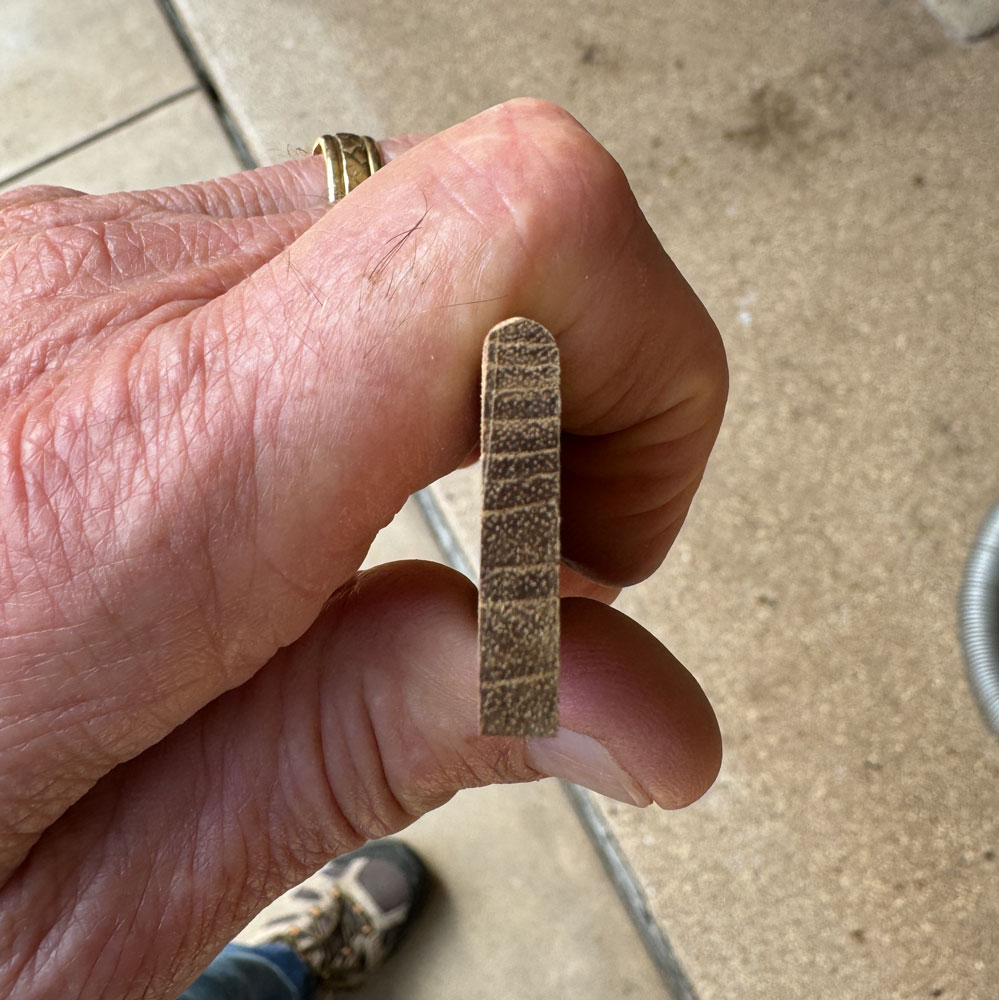
Here's the top after the four cuts. I'll sand it and try to round the top a bit. I tried to take an edge-on picture to show the bevel but could not get one that worked. The center of the top is 7/16 inch, the edges are 1/4 inch and the bevel is 2 1/8 inch long.
I'm going to put the top aside for a while and work on the main part of the box. I'll cut the miters on my table saw as I did for the ebony.
The box will be 11.5 inches across the front and 7 3/8 inches on the side. The first piece I'll cut will be for the left side. That will put the mismatched corner at the left rear of the box.
I cut the first piece 7 3/8 inches long and mark it, and the place where I cut it from, with a number so that I can put them back together later.
The end of the long piece marked "1" is cut to the proper bevel direction and then a piece 11.5 inches long is cut from it. I mark this cut as "2". This 11.5 inch piece will be the front of the box.

The next piece cut will be for the right side. I use the piece I cut for the left side to mark the length of this cut and cut it as I did before. It's important that the two sides are exactly equal in length. I check by holding them together.
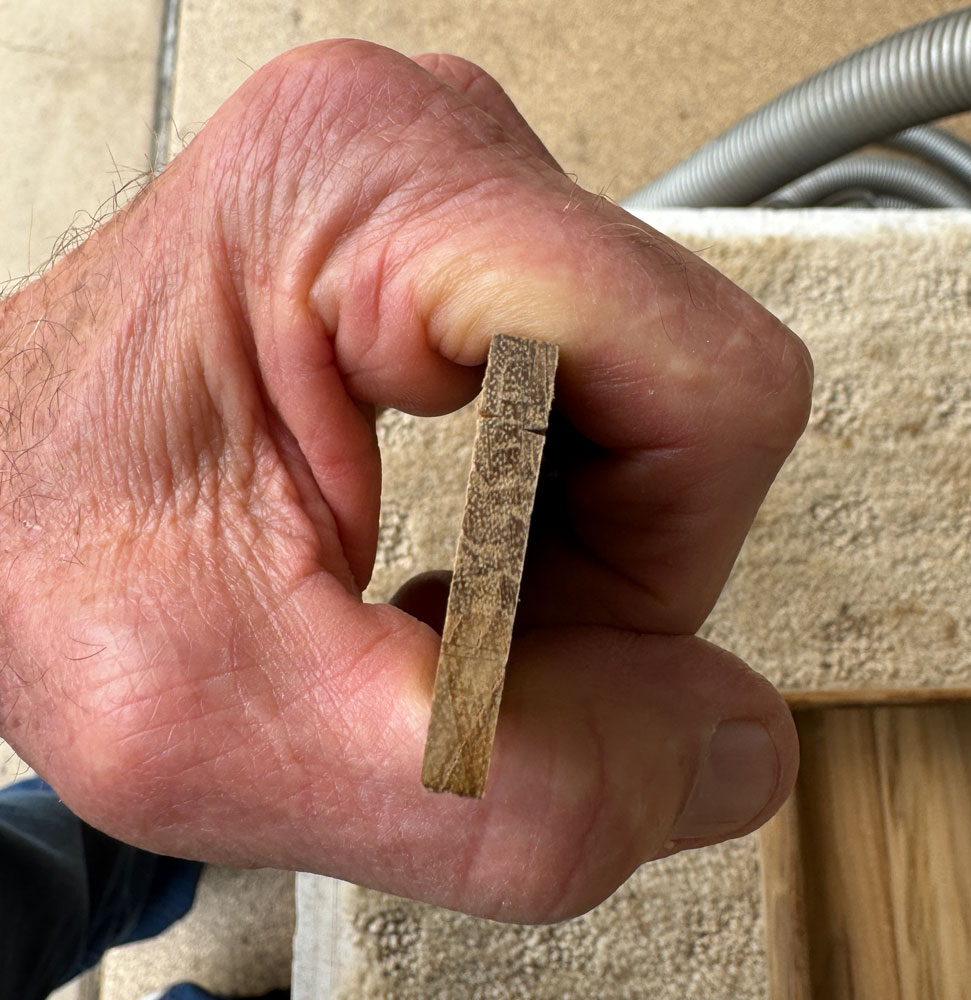
I mark the final piece from the 11.5 inch front piece. Here's what I had left. It was pretty close. Couldn't have made the box any larger.
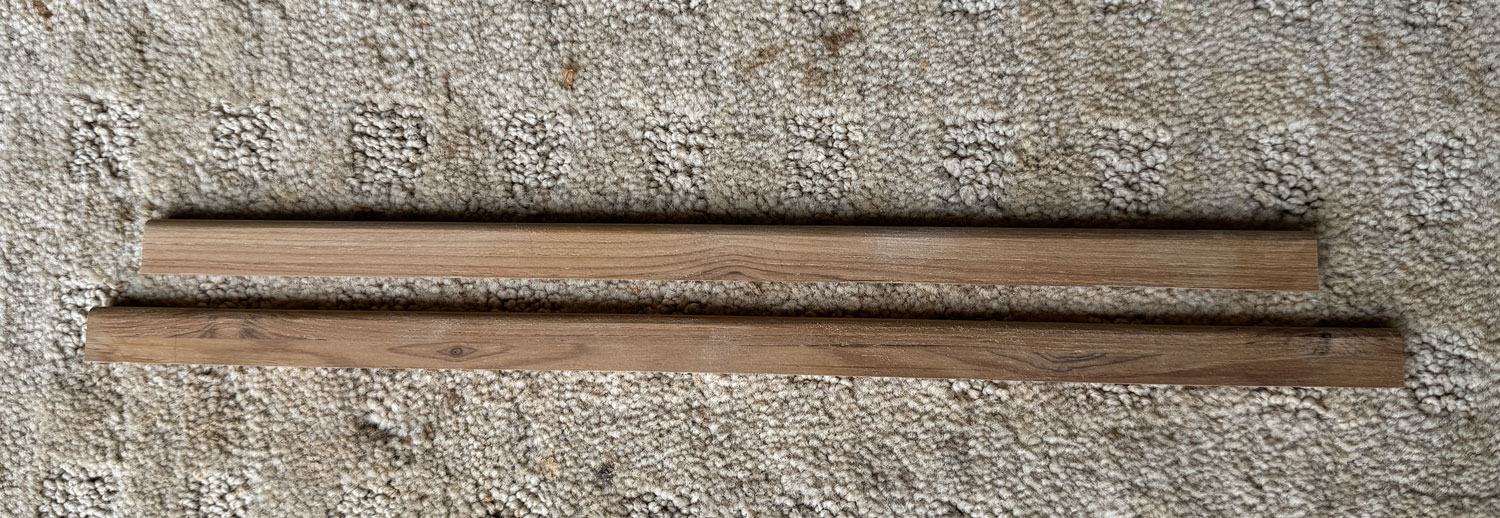
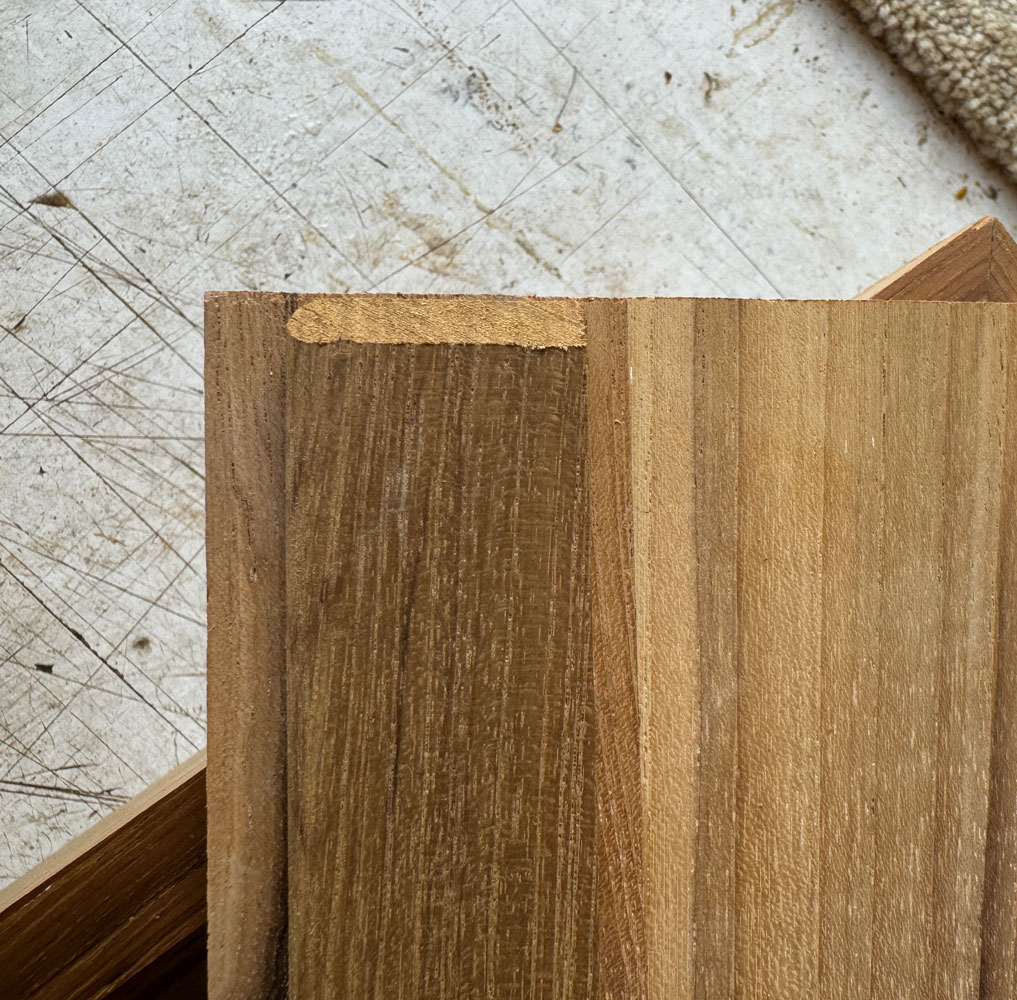
Here are the four sides of the box, laid along a line. You can see that the grain will flow around the corners, except for the last corner. I've included the final offcut just to show how small it is. I cut it close.
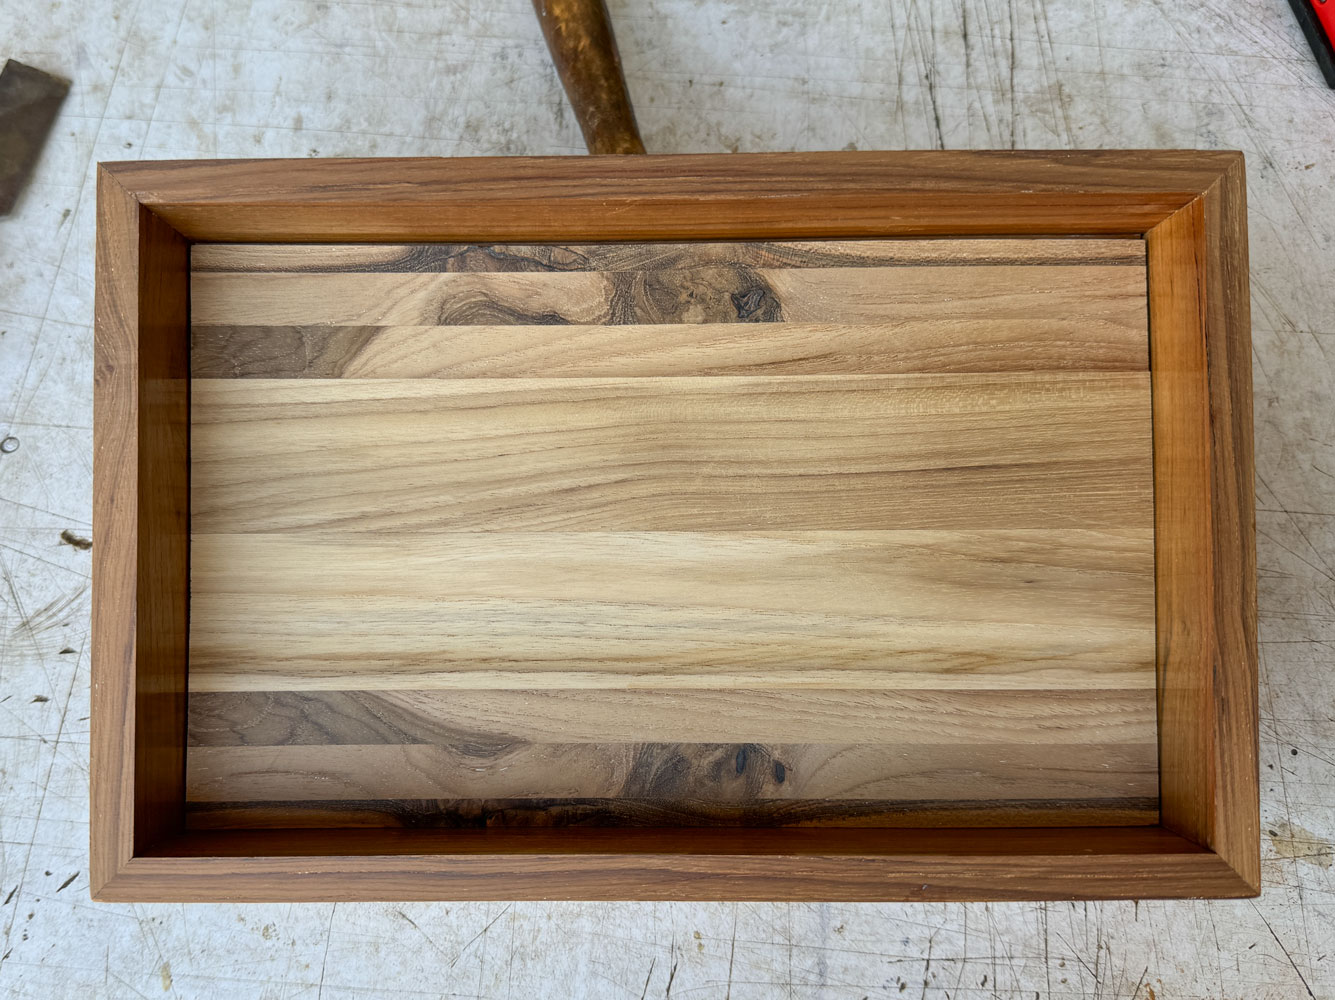
Here are the four sides put together, in sequence.
And with the top on.
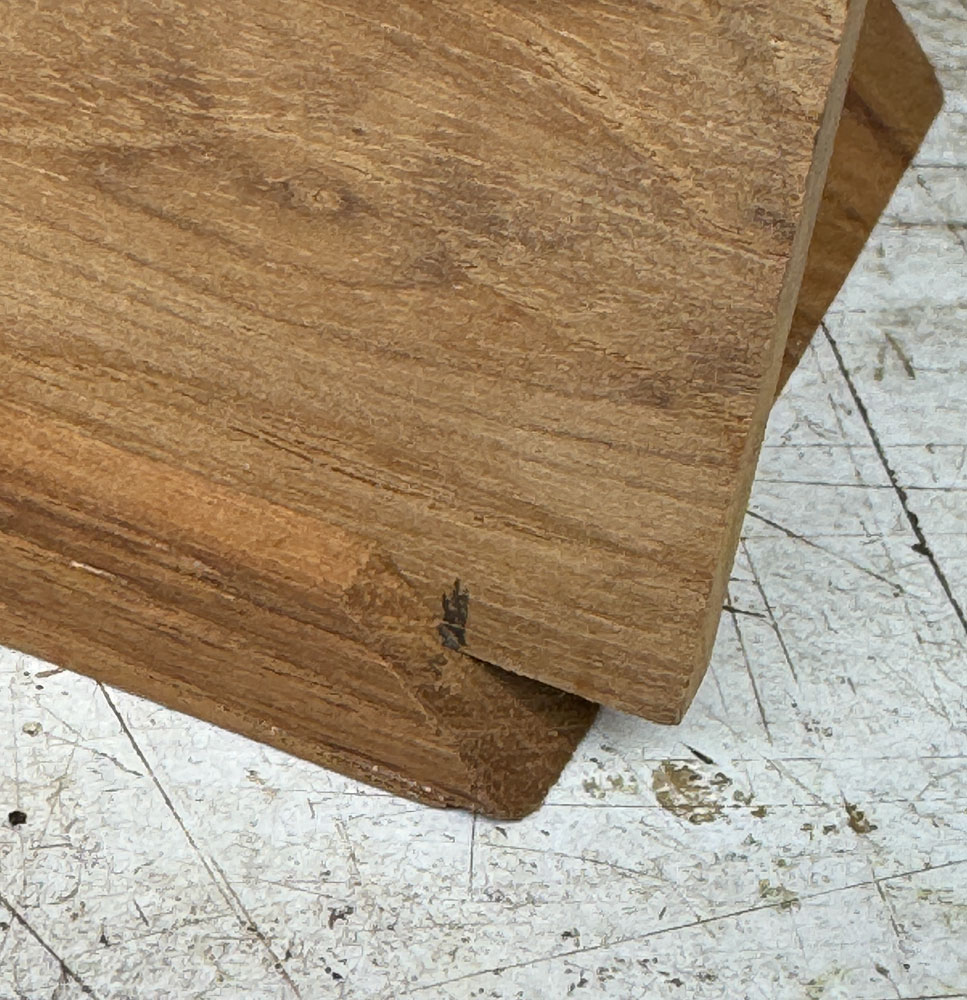
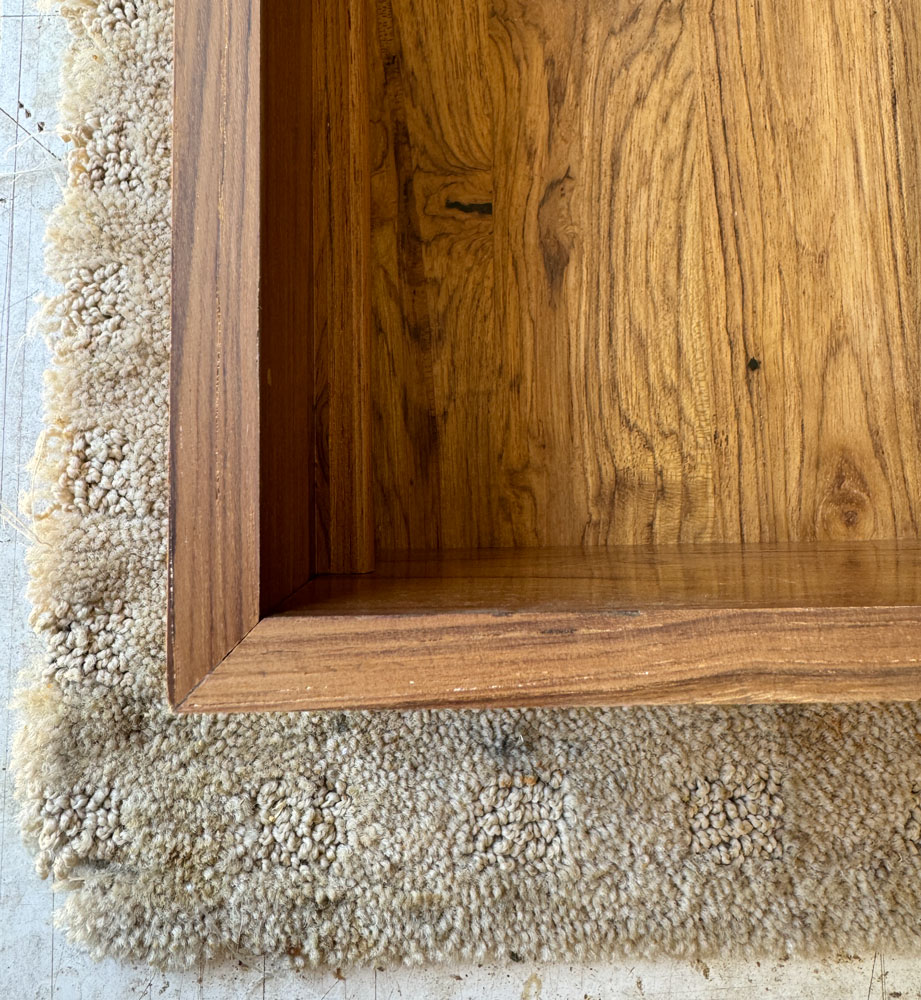
A corner view to show how the grain flows around the corner.
When putting a box together with miter joints, it's good to put a spline in the joint for strength and for help in aligning the sides when you do the glue-up.
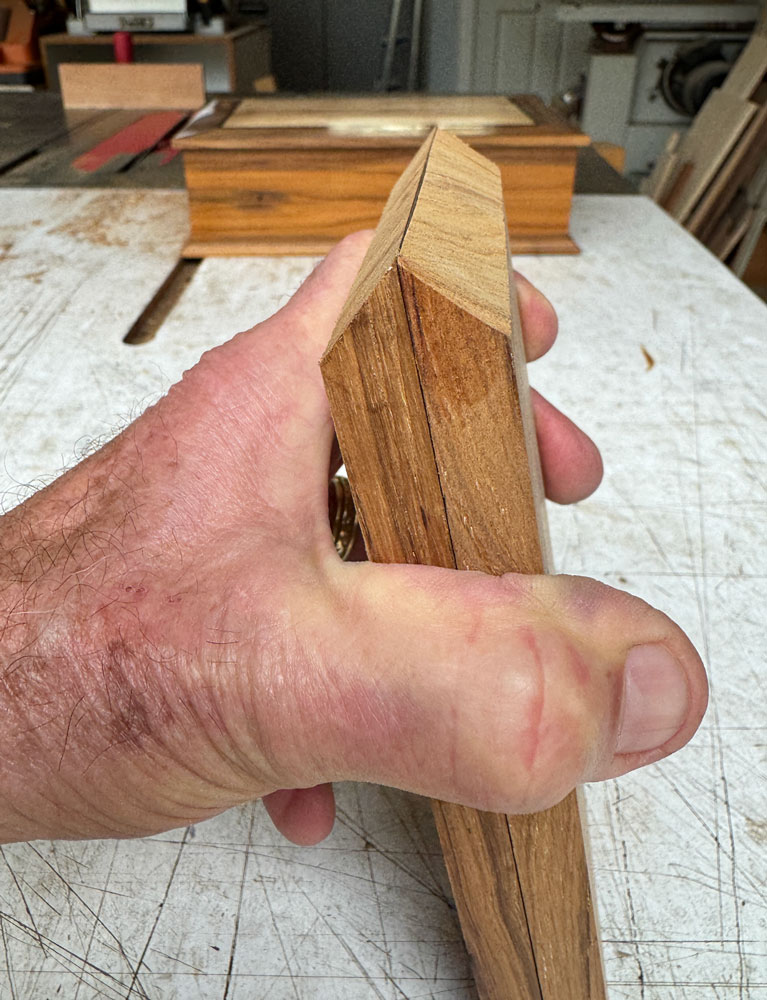
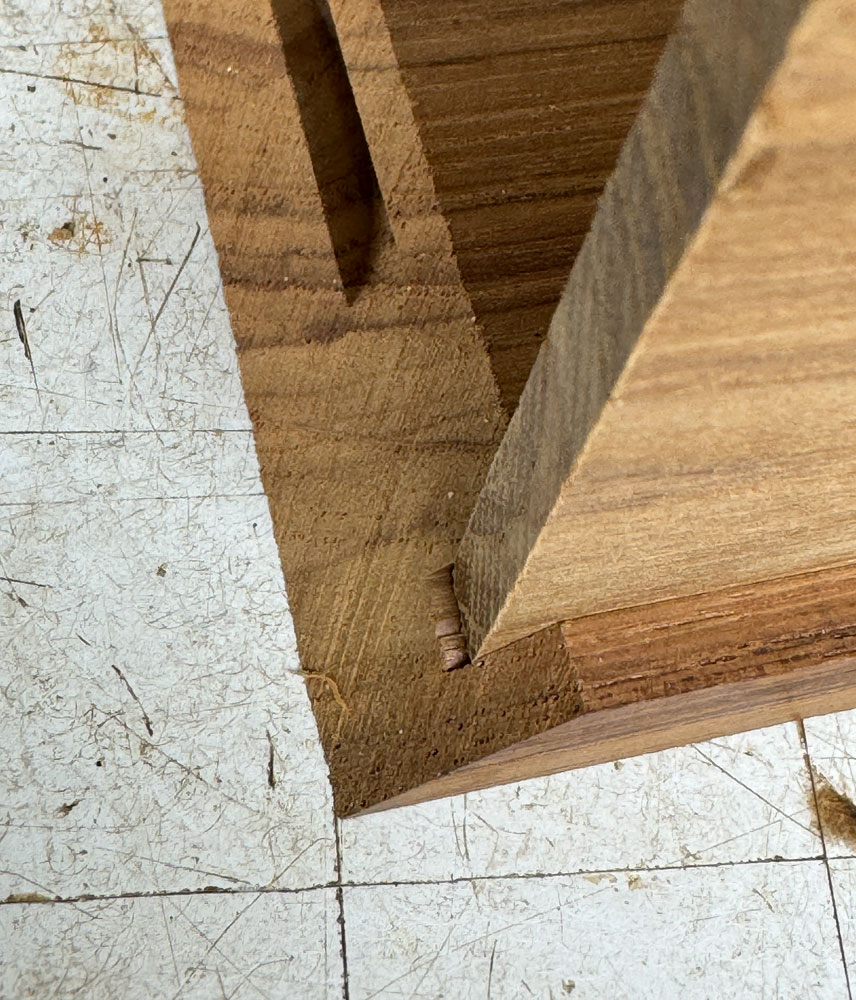
[A side discussion: You can do any of a number of joinery options. Dovetails, especially half blind dovetails, could work, look decent, and show off your dovetail skills. I'm going to use miter joints to show off the chasing grain, and because I want a box without the distraction of visible joinery. Miters are fairly easy, also. So make your own choices here.
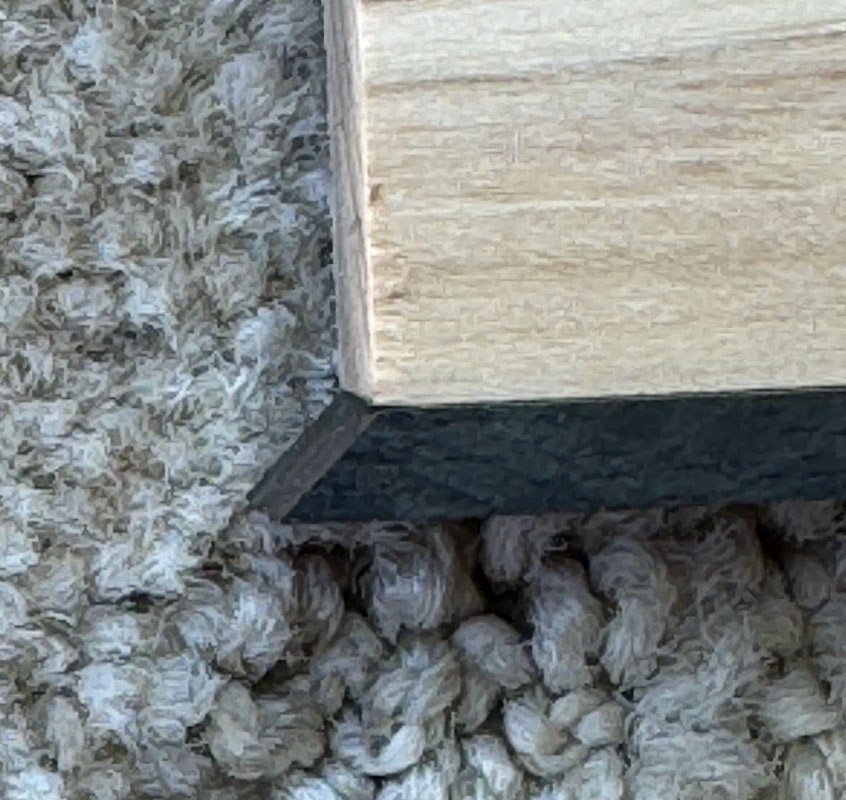
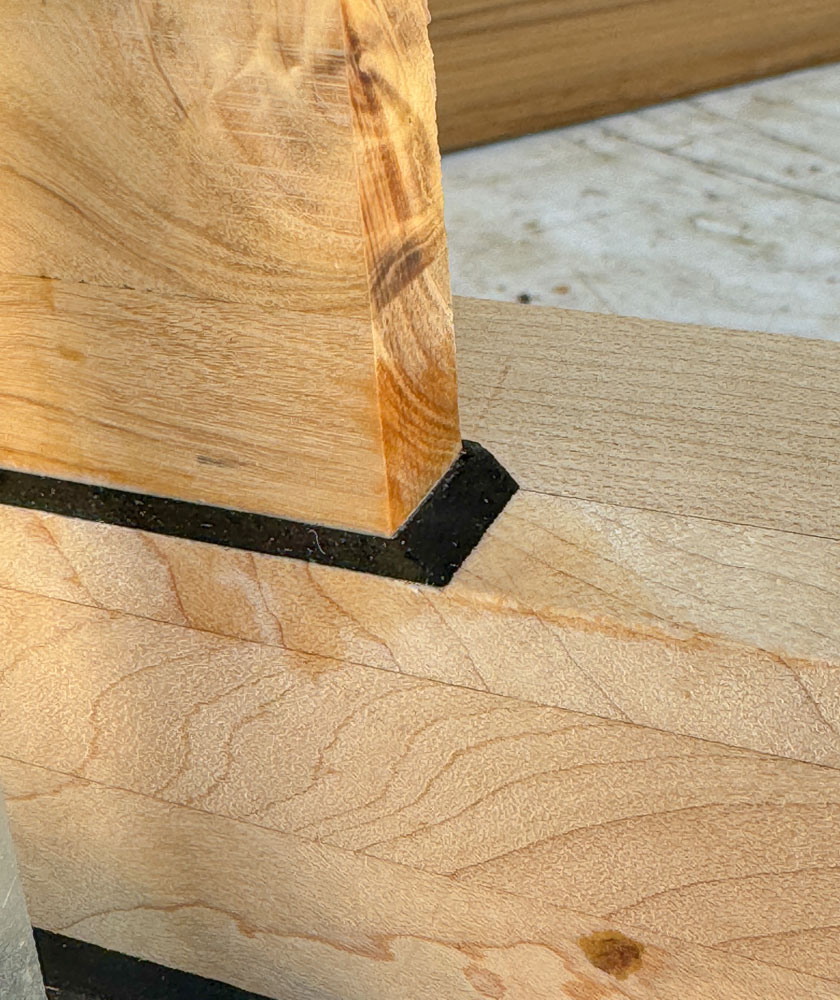
One thing I don't like is those visible splines where you saw across the corner and put in a contrasting wood. I've done that when I want the strongest miter possible, but I'm just not crazy about the look - I prefer a clean corner. This is what I mean:
 ]
]
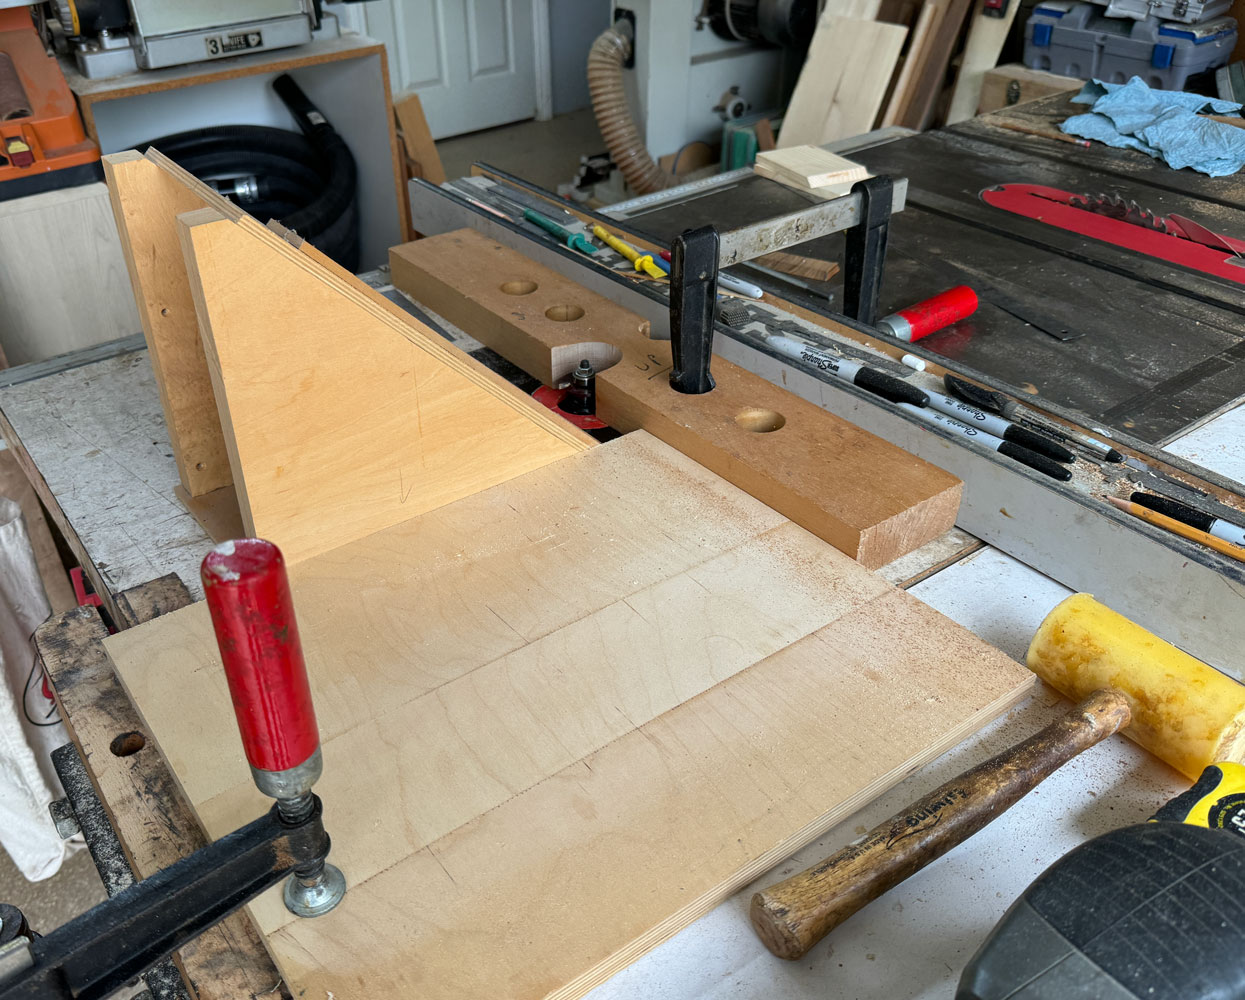
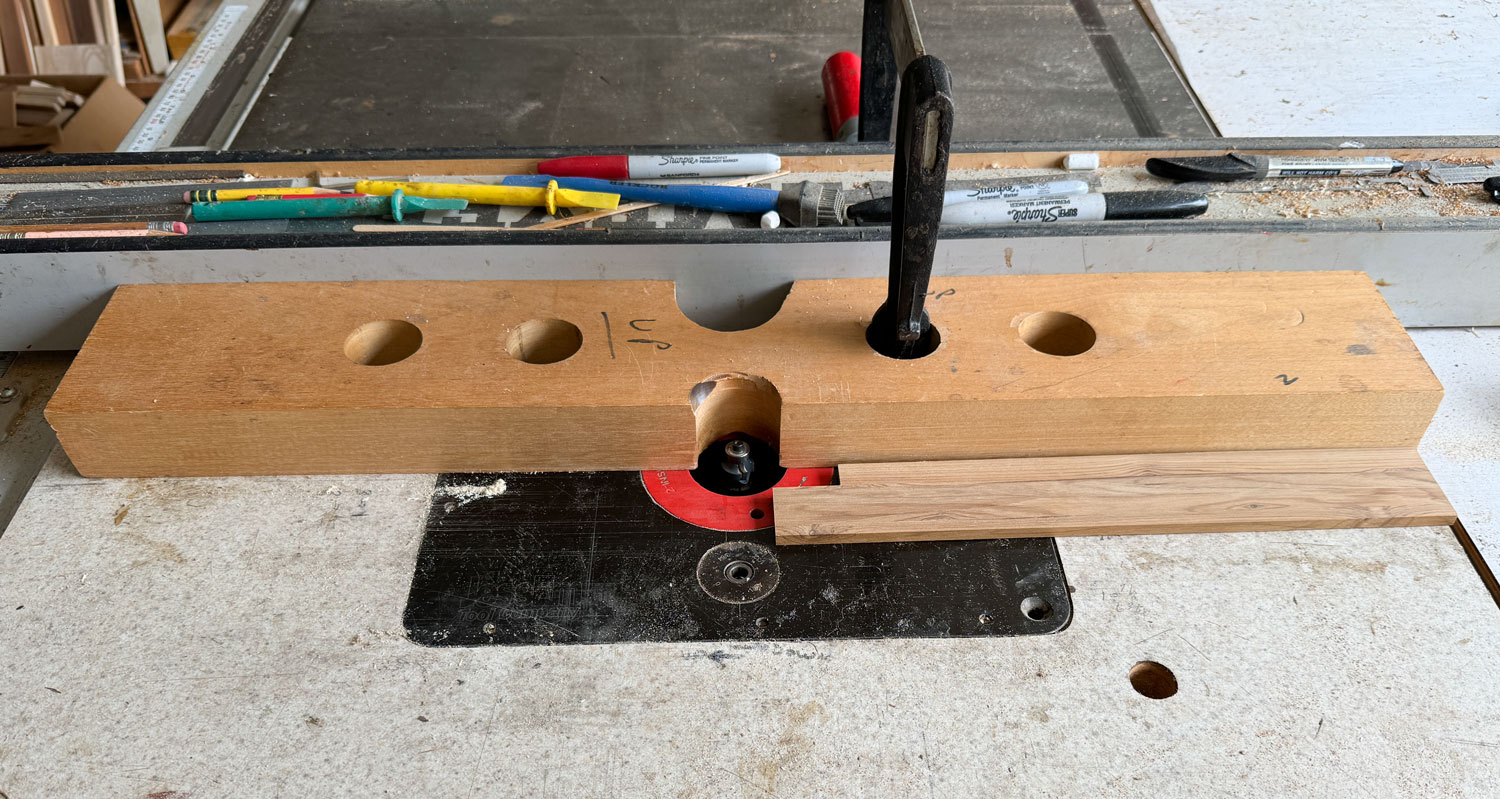
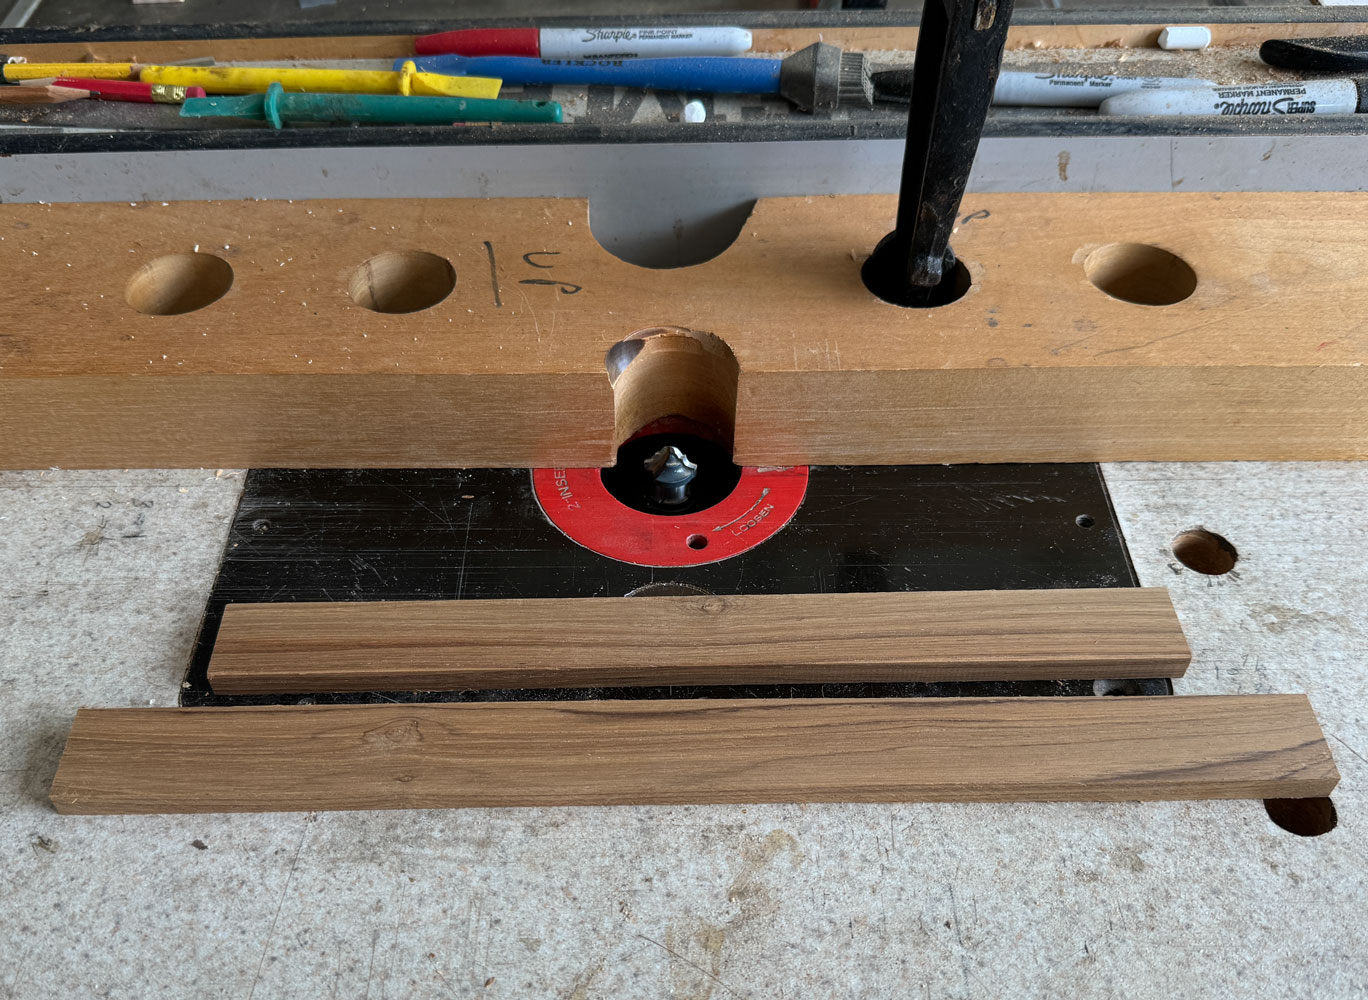
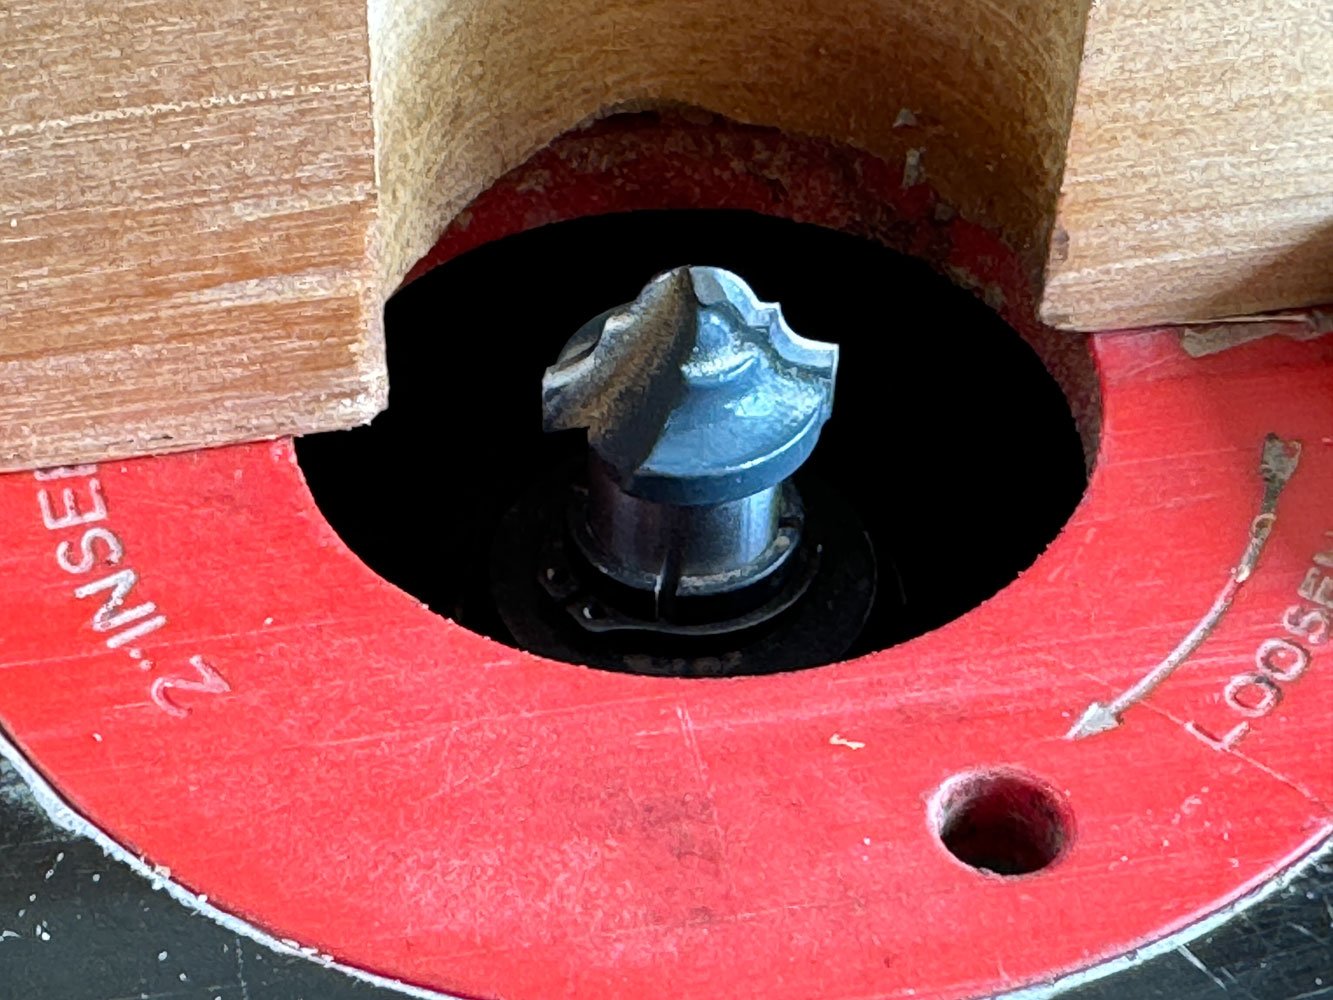
I use ff (face frame) biscuits for the splines. I cut the slot for the biscuits with a 5/32 inch slot cutter on my router table. I use a 45 degree jig to hold the pieces so that the miter is presented at 90 degrees to the slot cutter. Here are two pictures of my set-up.
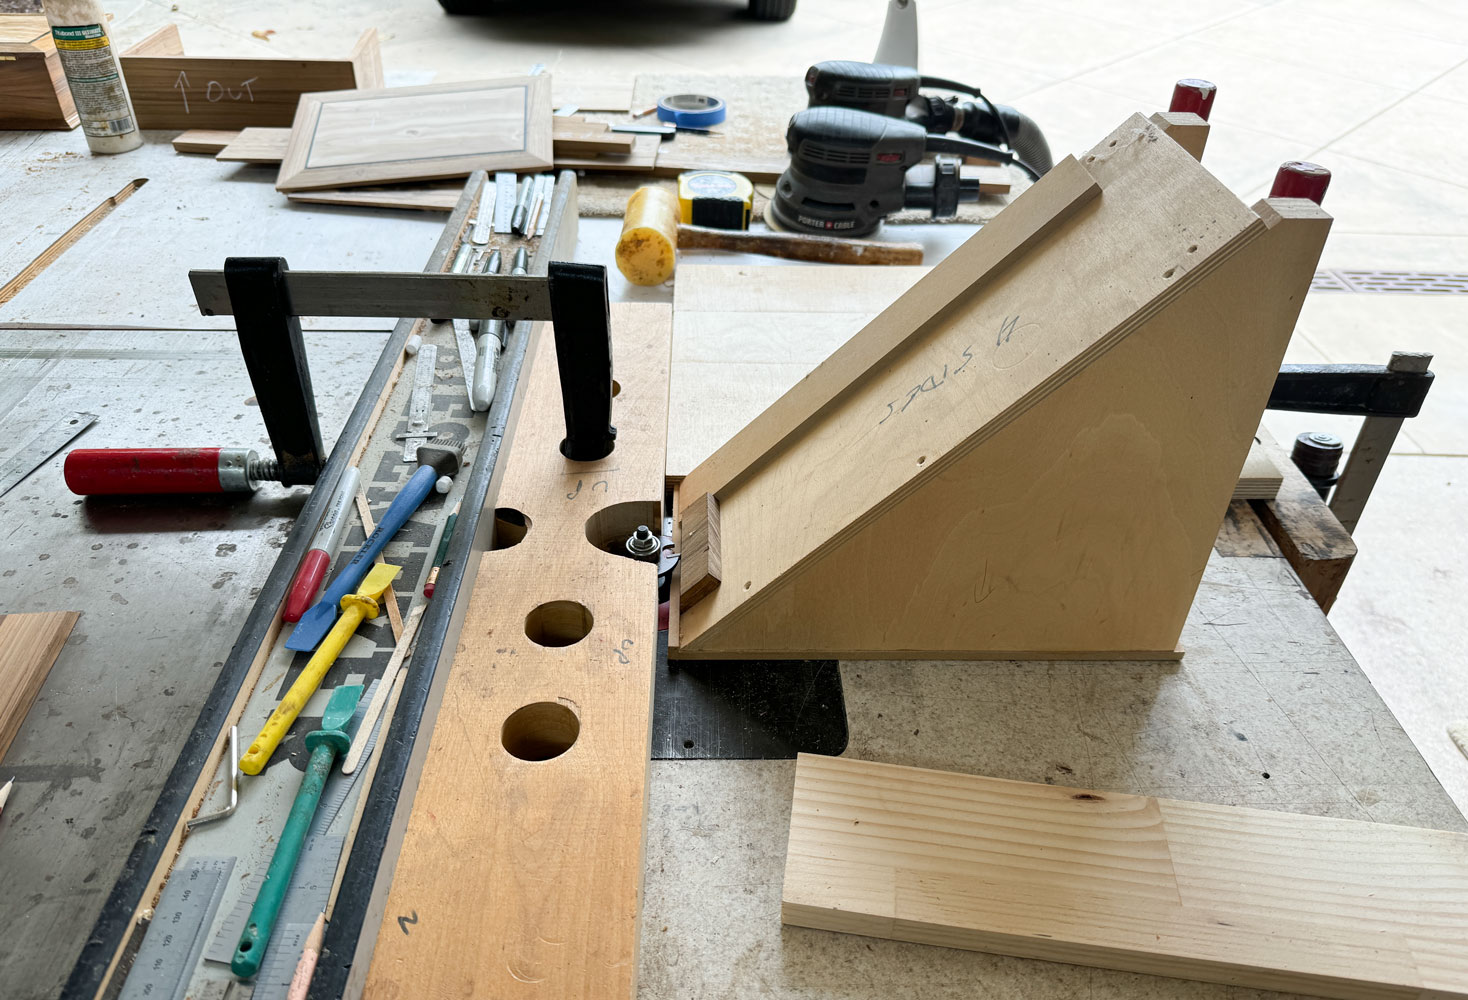
And a view from the other side. The way the slot cutter turns will push the jig towards the piece of plywood that I have clamped there. The plywood keeps the jig pointed in the right direction, while allowing it to move into and back from the cutter.
When doing this cut, DO NOT pull the wood side upward until you've pulled the jig back from the cutter. It will make a real mess if you make that mistake.
Most of the time I have a decent sized offcut from making the sides of the box, but this time the piece I had left is too small to use as a set up piece, so I made a piece the same size as the sides out of pine.

You'll have to make several test cuts to get the slot in the right place. Just take your test piece back to your miter saw and cut off about an inch and you'll be ready for another test cut.
You want it in the "Goldilocks" position, centered across the piece (so that when you put two pieces together the slots match), not too low on the miter, and not too high. If you cut too low on the miter, the slot will go through the piece and you'll have a hole on the outside of your piece. The depth of the slot should be half the width of an ff biscuit. The biscuit is about 1/2 inch so the slot should be 1/4 inch deep. Here's where I put the slot.
For a final test, cut a miter on the other side of your test piece and cut a slot on that miter. Then cut your test piece in half and put the two miters together with an ff biscuit in the slots. You want to make sure the miters close (that the slots are deep enough). But don't go too deep with the slots. You'll lose contact with the ff biscuit on one side and risk cutting through the piece.
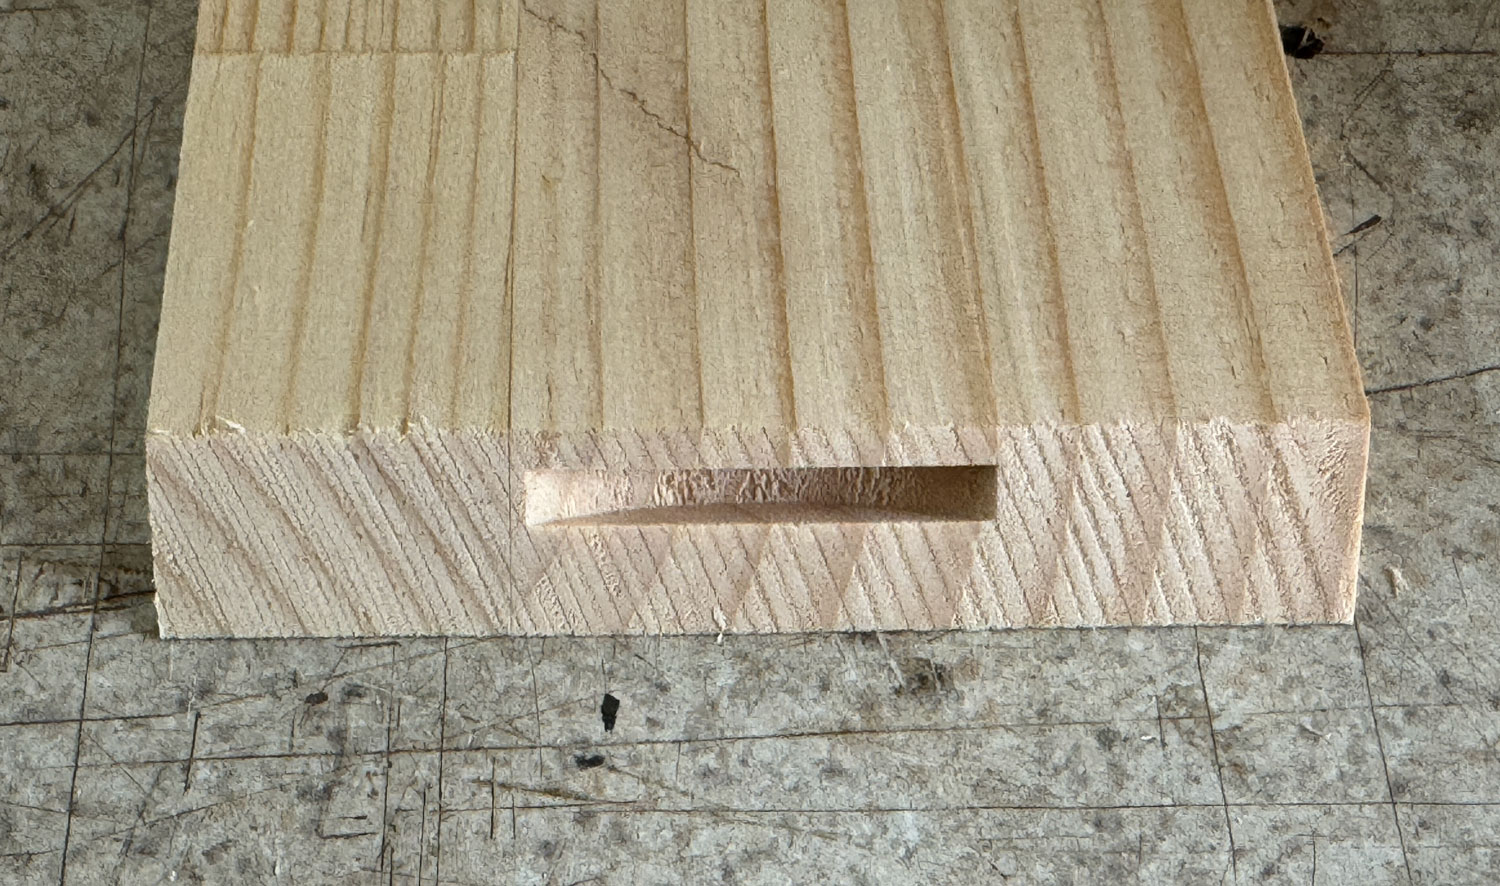
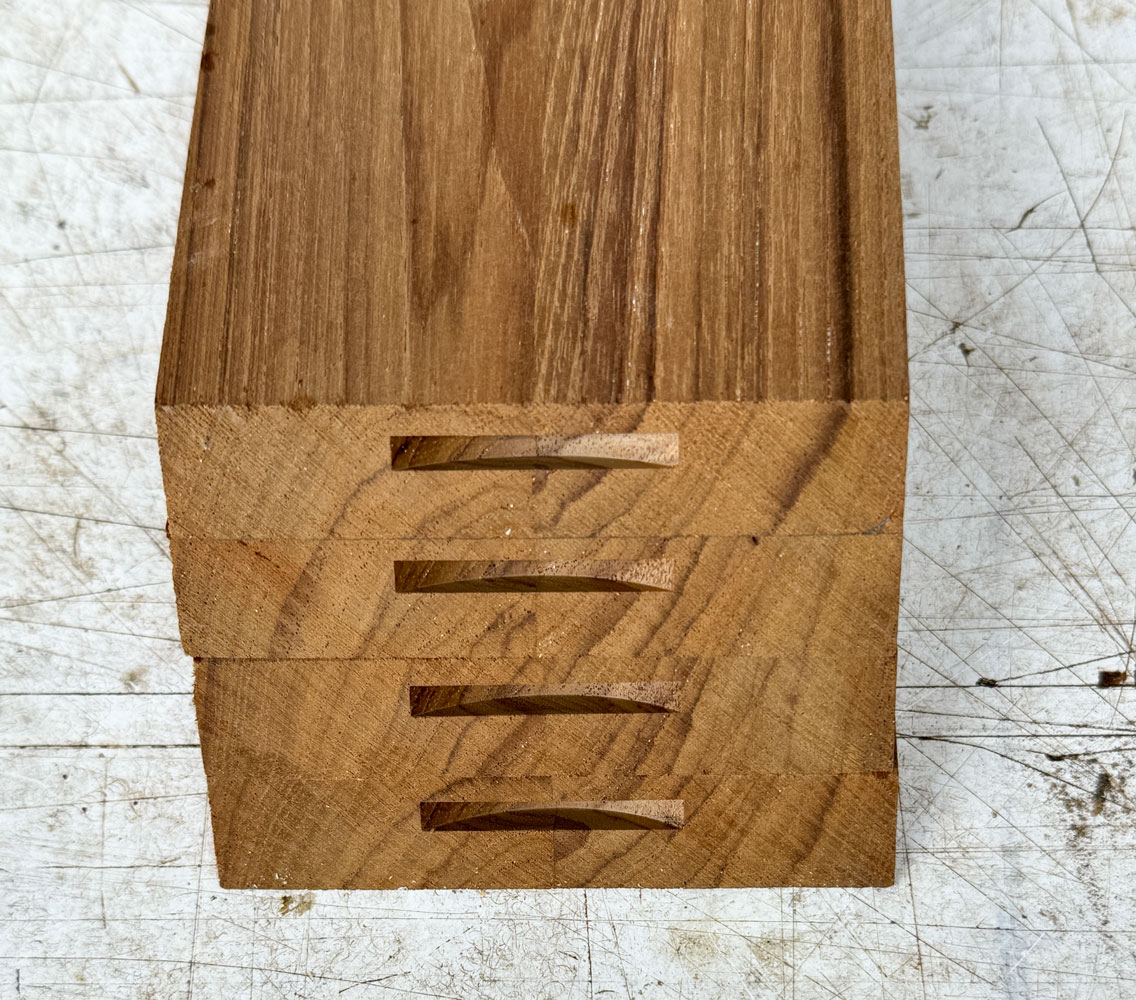
Then run your four sides, cutting a slot on the miter on each end. Here is one end of the four box sides showing the slots.
[Note: I have a Domino and the Domino has 4mm tenons, but I think it would be hard to get everything aligned properly and the mortise might cut all the way through the side. The ff biscuit is adequate for strength and only goes into the wood about 1/4 inch.]
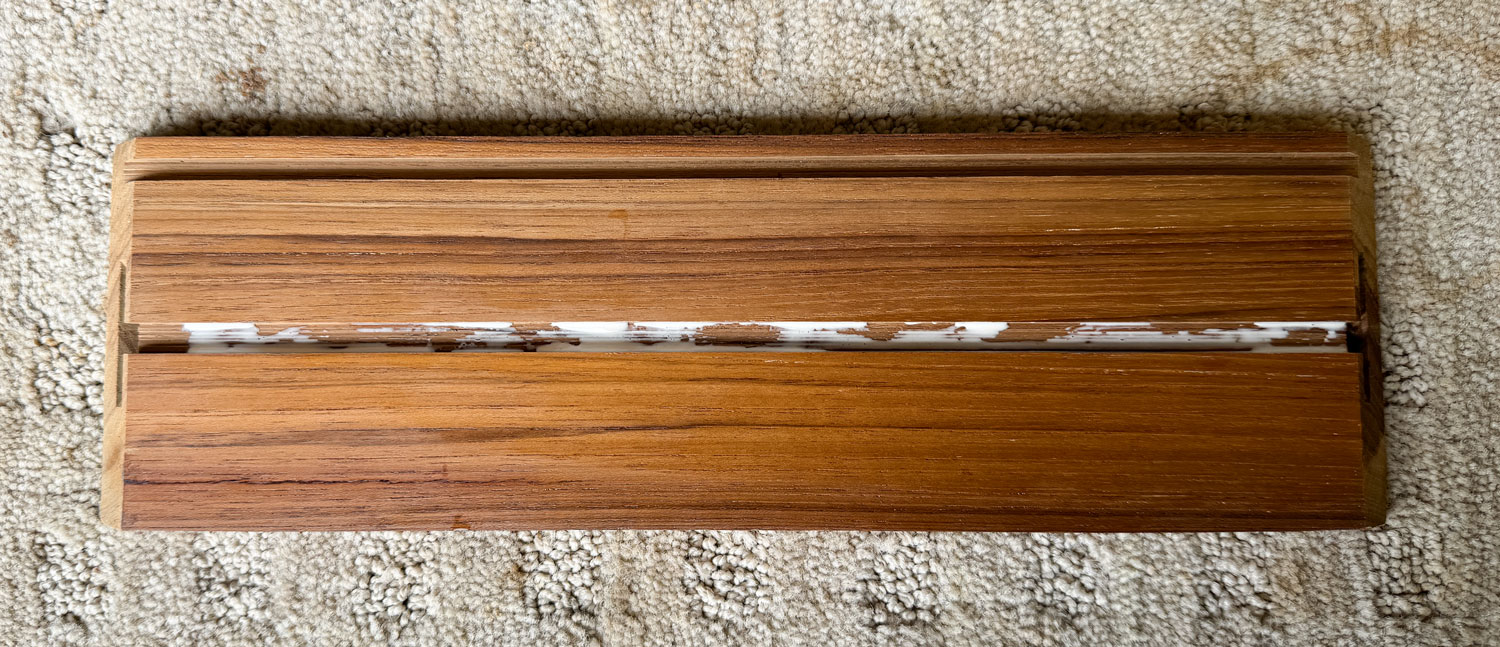
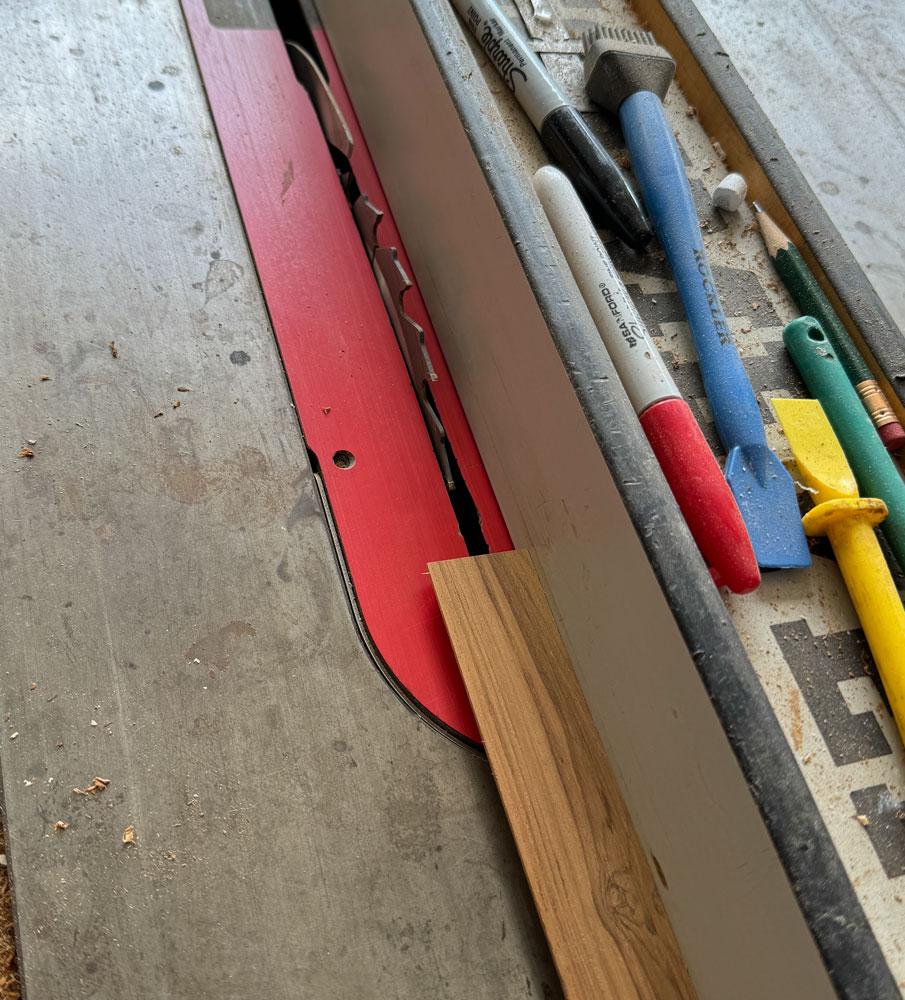
Next, we'll fit the bottom to the box. Since we're going to put molding at the bottom of the box, an easy way to attach the bottom is to glue it on after the box is glued together. Unfortunately, the piece I have for the bottom is not quite long enough to do that so I'm going to cut grooves in the sides of the box to capture the bottom.
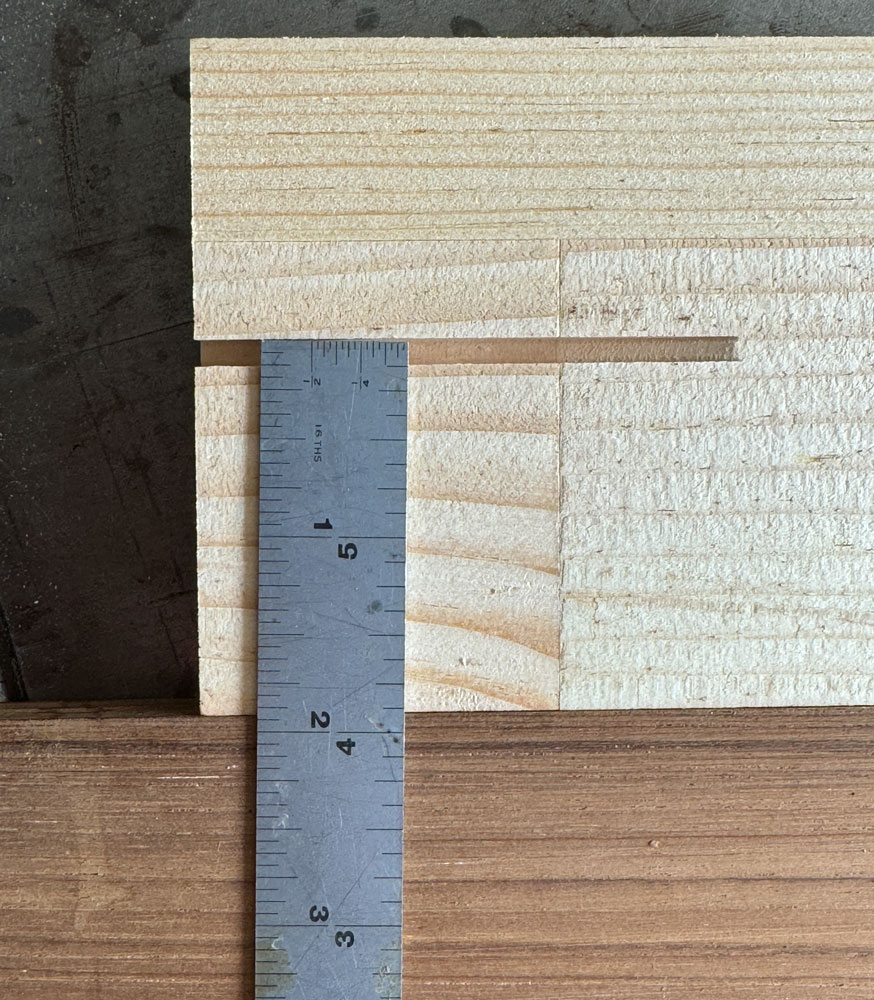
I set up my saw with the blade 3/16 inch from the fence, and 3/16 deep.
Those pieces I used to set up the biscuit slot can be used to check the cut. Run the test piece through the cut and check it. Here you can see the cut is 3/16 inch from the edge.
And 3/16 inch deep. I had to sneak up on this depth.
Now, run the four sides through the saw, being very careful to make sure you're cutting at the bottom of the box. That's one reason I put a big arrow pointing up on all the sides.
The bottom is 3/16 inch so I have to make one more cut to widen the cut to fit the bottom. I use the test piece and gradually move the fence away from the blade. I cut and then check the fit, then adjust and do it again until I have a good tight fit to the bottom.
If you find that the bottom has a high point, just sand that lower. You want a nice tight fit so the bottom doesn't rattle.
[Note: Sand the bottom before you fit it to the grooves. If you sand after fitting, the bottom will be loose in the grooves.]
In this picture, I have the groove just wide enough to fit the bottom. The groove you see on the other side of the test piece is from a test cut where I thought I'd use 1/4 inch offset. I decided that was too much and 3/16 was better.
Run all four sides through the saw, being careful to keep the bottom against the fence.
Now, I need to fit the bottom panel to the sides. I take the bottom panel and put it into the slot on one of the long side pieces. I make it just short of the end of the groove. This is just safety because if I were to cut it too long, the box would not go together.
However, when I cut the bottom to fit the shorter, side pieces, I leave it a bit short to allow for the bottom panel expanding and contracting with moisture.
Then I go to the other end and mark the end of the groove. I cut the bottom panel to fit - just short of the end of the groove. When deciding which side of the bottom panel to cut, look at the wood and cut the part with any defects.
Then cut the width of the bottom panel in the same manner, remembering to leave the panel a bit short to allow for expansion of the panel.
Here are the four sides with the bottom in the grooves.
One thing to consider about the bottom panel is which side to put "up". Should the better side go up or down. I suppose the user will put some kind of felt in the bottom of the box, which leads me to put the better side down. But until that is done, the inside will be what people will see when they examine the box - few people turn it over. So, I'll put the better side up.
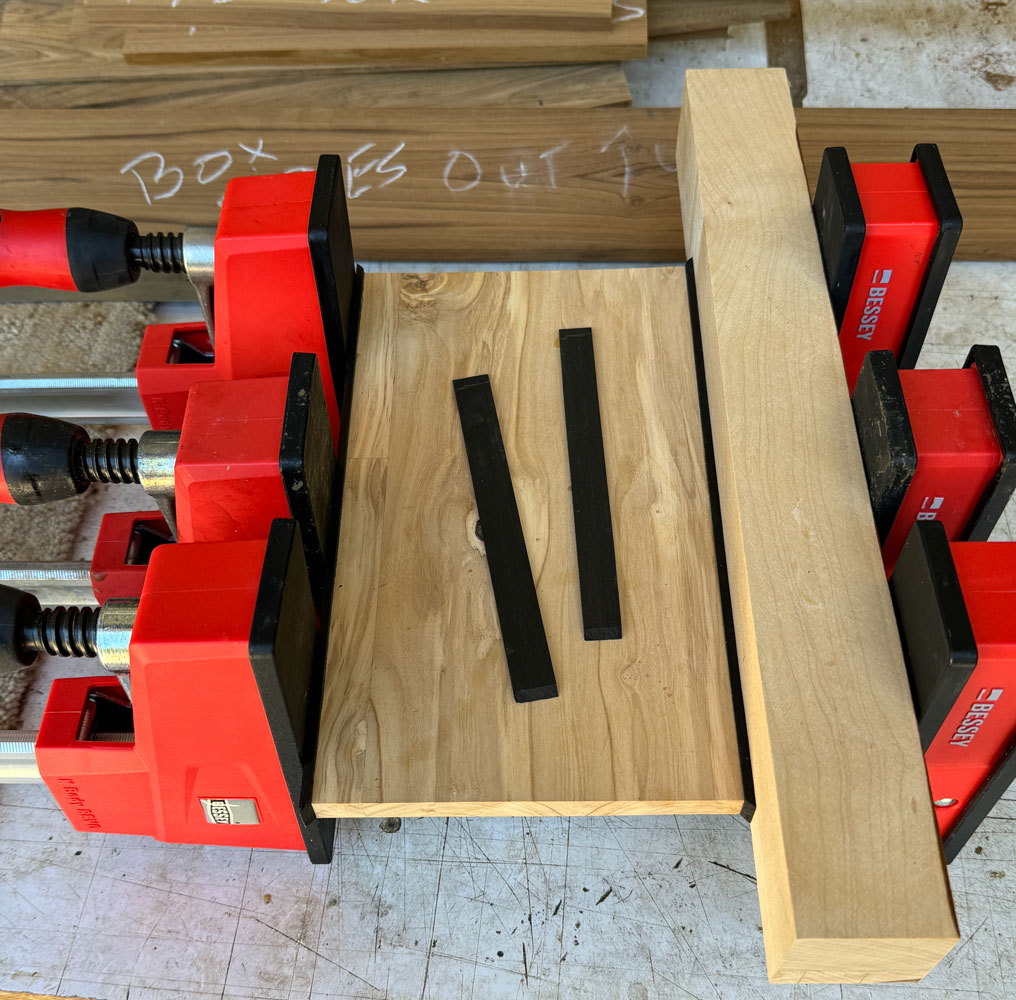
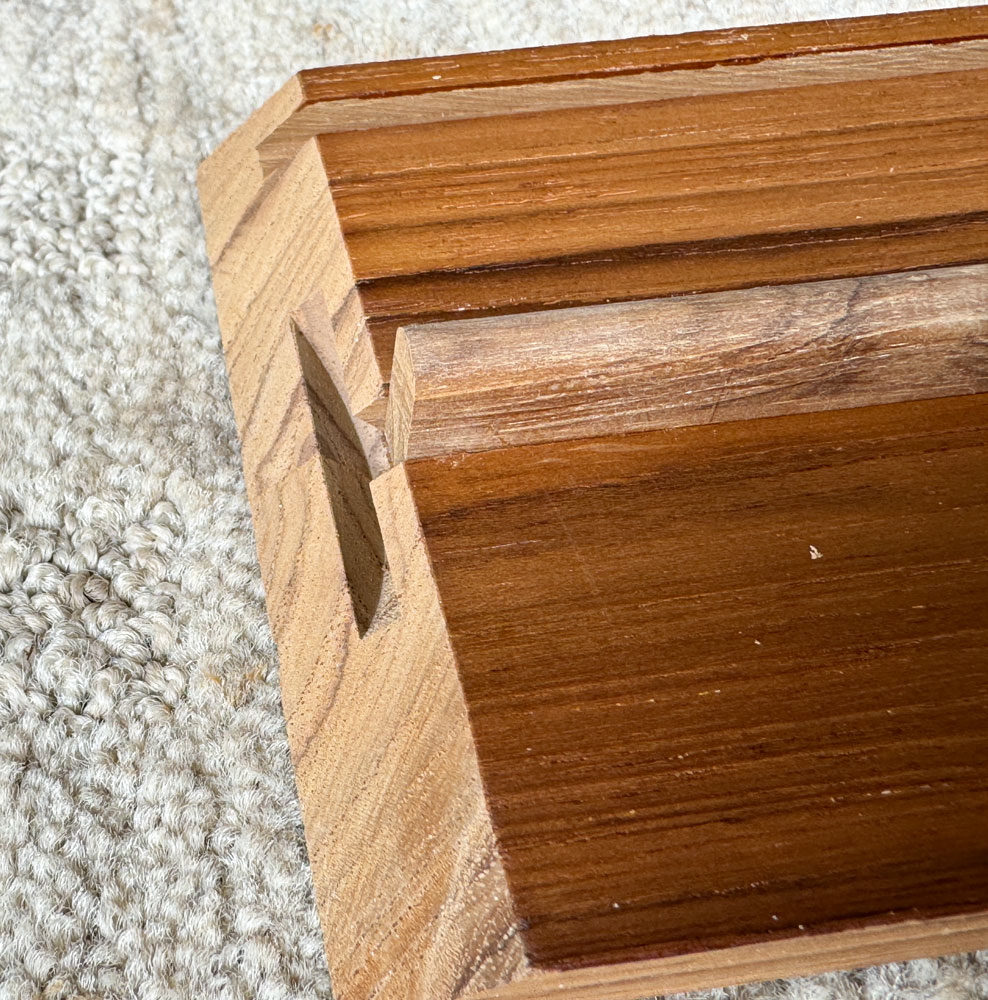
The next step is to put in the supports for the tray. These are two supports that are let into the long sides. They will be 1/4 inch thick, and will be let in 3/16 inch, and protrude 3/8 inch. Here's a piece of teak that I made by gluing some scrap together. I planed it down to 1/4 inch.
I set up my router table with a 1/16 inch roundover bit and I round over both sides.
Here's the piece with both sides rounded over.
The support is let into the side 3/16 and protrudes 3/8 so the width needs to be 9/16 inch. I cut one support from each side.
Now I need to let these into the sides, but where? The tray will have a handle that comes up from the interior of the tray 1 1/4 inch. Then the bottom will be 3/16 inch. Laying that out on the side of one piece gives me 1 15/16 inch from the bottom side of the long side. I'm referencing everything from the bottom.
That means I set up my table saw with the OUTSIDE of the blade 1 15/16 inches from the fence. I used those same test blocks that I used earlier to check my setup.
After the first cut, I move the fence TOWARDS the blade and make additional cuts until I can just fit the tray supports into the grooves. Incidentally, sand the tray supports before you do this fitting. If you fit before sanding, the supports will be loose in the grooves after sanding.

I'm not going to glue the tray supports in yet. I'm going to sand and finish all of the interior parts before that. It'll be essentially impossible to sand the interior surfaces once the box is put together.
I sanded the pieces to 220 grit and then applied a coat of shellac. When applying the shellac, make sure you do not get any shellac on surfaces that will be glued - that's the miters and the groove for the tray support.
We are starting to see what the color of the project will be.
Next I'm going to install the tray supports.
The tray support needs to be just inside the edge of the miter. If it extends past that point, you won't be able to get the miter together.
Mark the other side and cut to length. Then put a small amount of glue in the groove. You don't need much because there's very little force on the tray support. I have a bit too much in the next picture.
Install the tray support and use a couple of clamps to hold it in position. Wipe off any glue that creeps up along the tray support.

Apply shellac to the tray supports. Then I used a buffing wheel and carnauba wax and buffed all of the pieces.

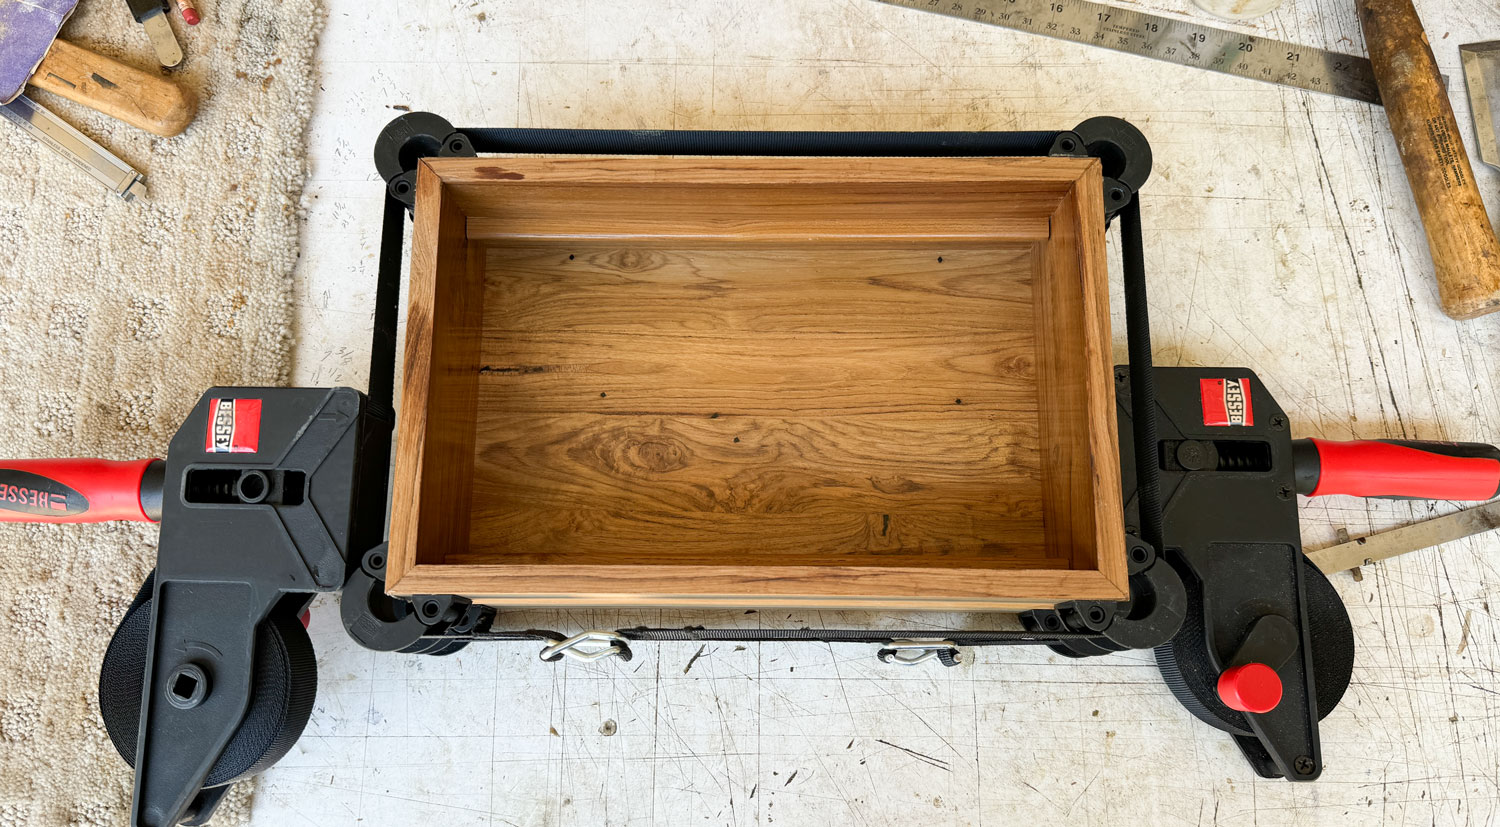
Next I applied glue to the miters, being especially careful to get glue into the slots in the miters - and put glue on the biscuits, also. The biscuits will provide a lot of strength, as long as they're well glued into the slots. This picture just shows the glue on all the joint surfaces.
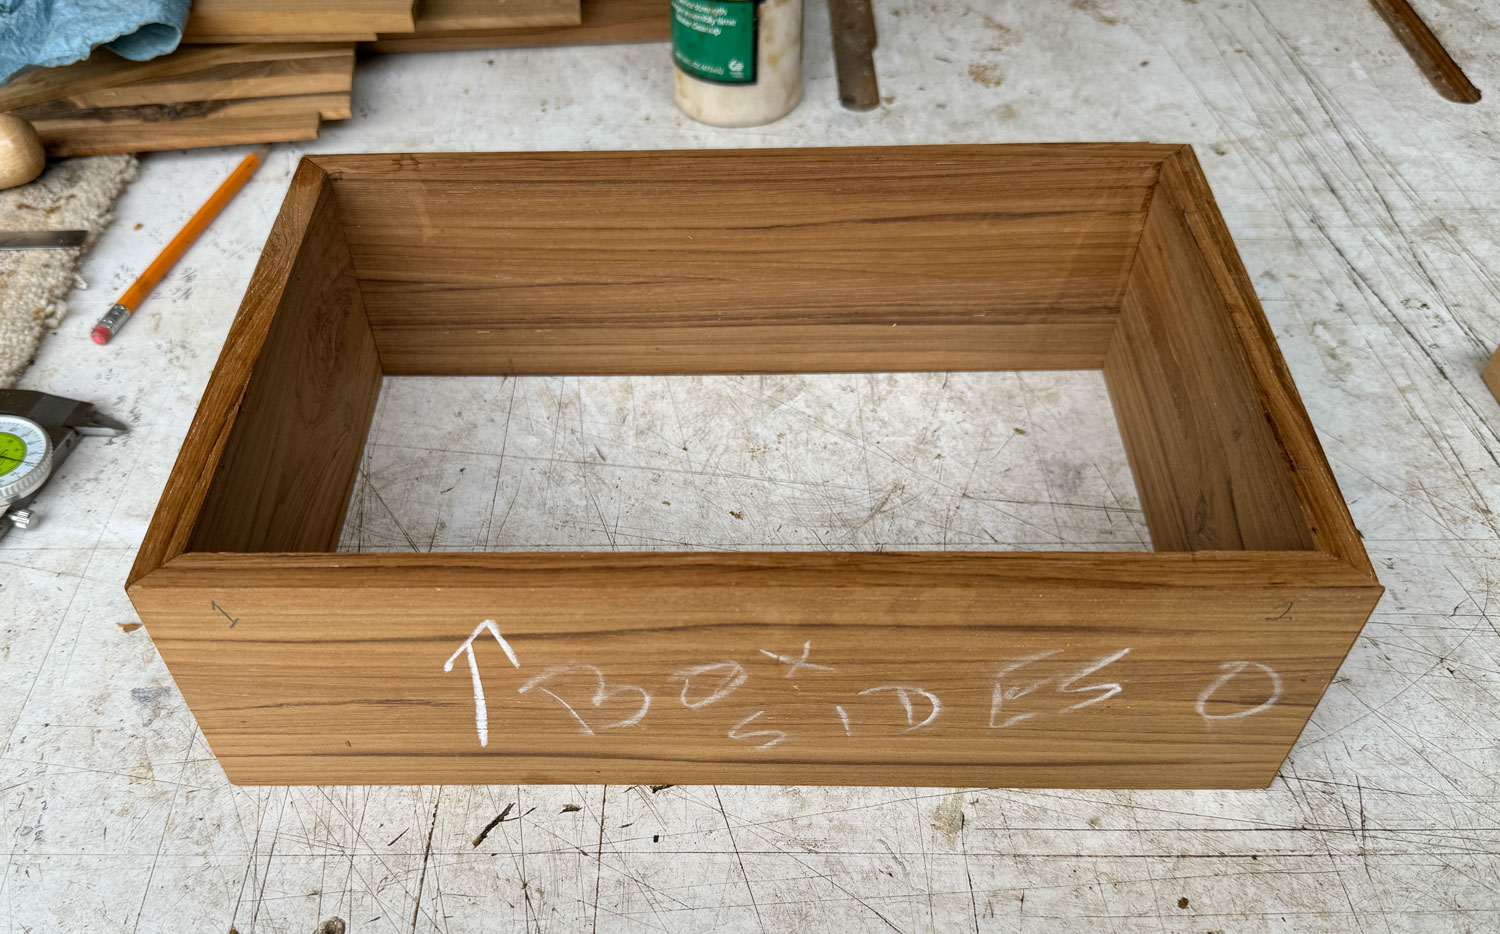
Then I used two Bessey strap clamps to clamp it, one strap at the top of the box and one at the bottom. I think the miters closed up well.
And here's the box, out of clamps. I'll sand the outside of the box next and then work on the tray. I ordered a set of Brusso JB-102 hinges but they won't come in for a few days. I also need to make the molding for the bottom of the box so I have things to do before tackling the hinges.
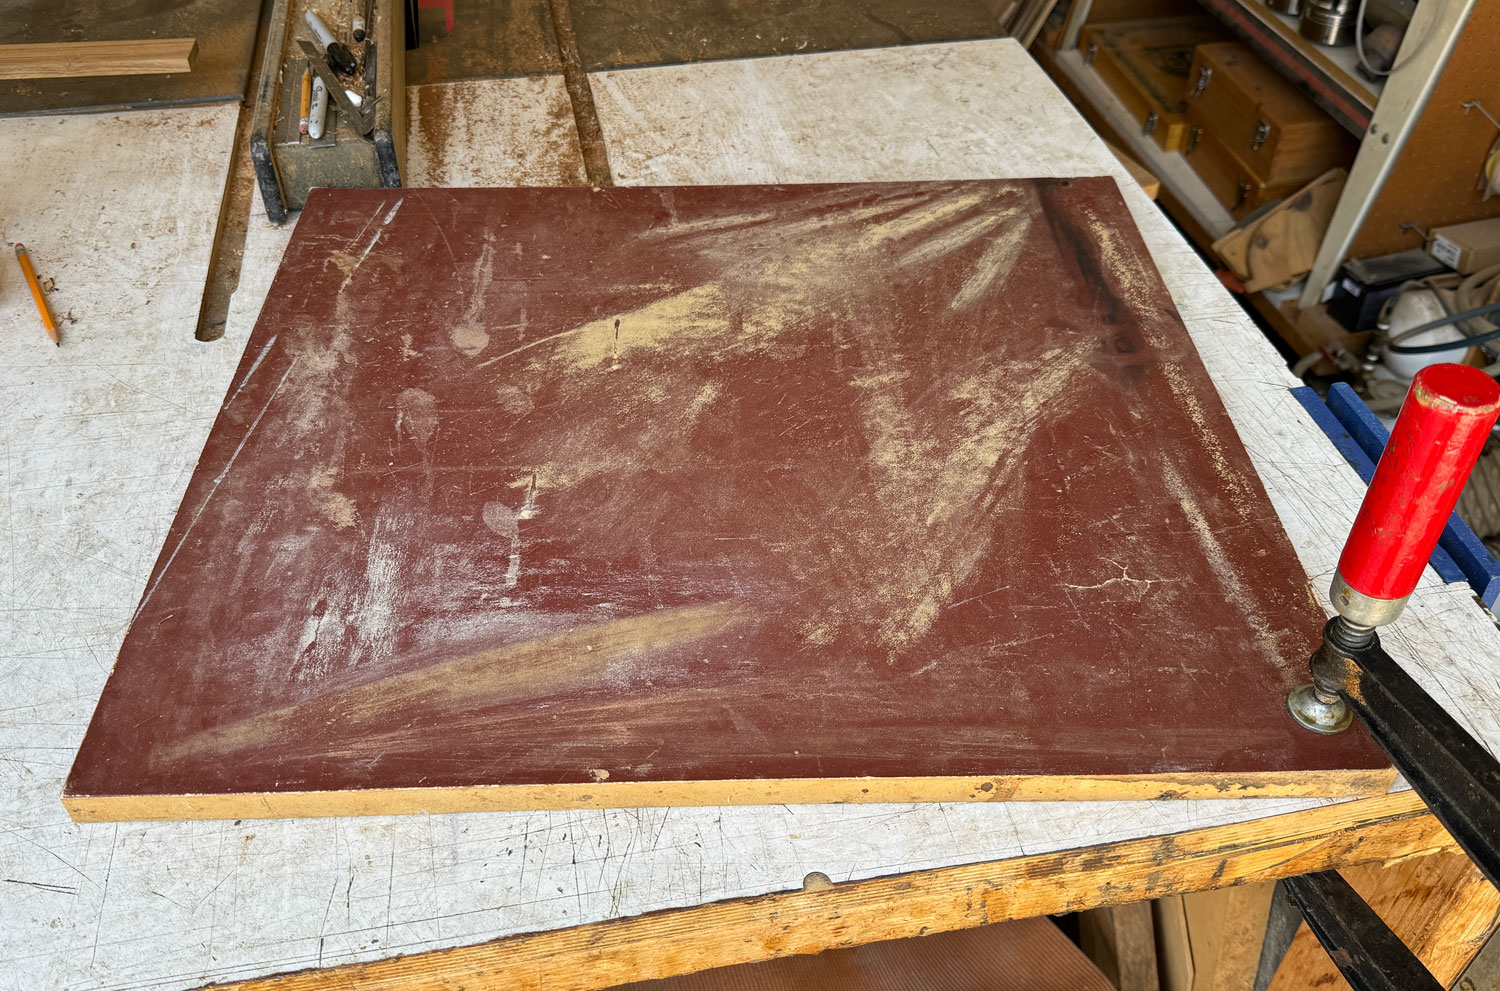
I sanded the outside of the box, and then flattened the top and bottom. I use a sandpaper panel. This is a large sheet of sandpaper - I bought a couple of those belts that are used on those really big belt sanders, such as a TimeSaver. I glued a piece to a piece of 3/4 inch MDF. MDF is very flat and works well for this, But when you glue it down, don't use a water based glue or the MDF will warp. I use 3M type 70 or type 90 spray glue.
Take a pencil and scribble all along the top edges of the box.

Then put the box on the sandpaper panel with those scribbled edges down and move the box back and forth on the sandpaper panel. When the pencil marks are all gone, the top will be flat. I usually have one miter where one side is a bit higher than the other and it takes a lot of back and forth to get the top flat.
While you're at it, do the bottom, also. You'll probably find that the bottom is flatter than the top because when you cut the grooves for the box bottom you referenced off the bottom edge of each side.
I also trimmed the panel for the bottom of the tray to fit inside the box.
Then I went back to the top and sanded it to 220 grit, and applied shellac. I followed that with sanding with 800 grit, and then waxed the top on a buffer with carnauba wax. I thought it came out looking good.
Next I'll build the tray.
The sides of the tray are one inch high. Here are the pieces I'll use.
I use my router table and round over one side.
Cut the miter on one piece and then place it on the tray bottom. I've already fitted the tray bottom, so I can use that to get the length of the sides. Align the end of the miter on one side of the bottom and then mark the other side for the length.
Do all four pieces.
You can trial fit the pieces by placing them into the box.

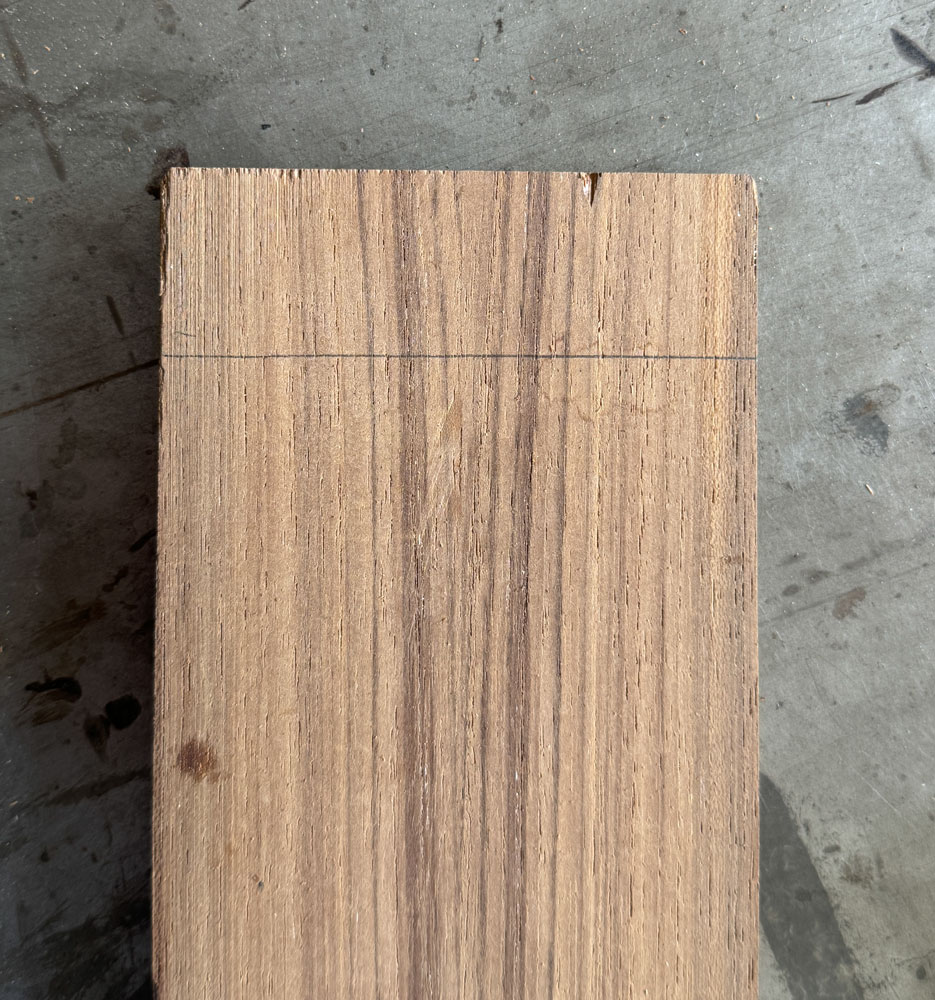
The handle for the tray will be a piece that runs across the center of the long dimension. To properly fit that piece, I need to cut a dado in the two side pieces. Here's one of the side pieces - I've marked the center of the piece. You're looking down on the piece clamped to my bench.
I place the handle piece against the side, centering it on the line
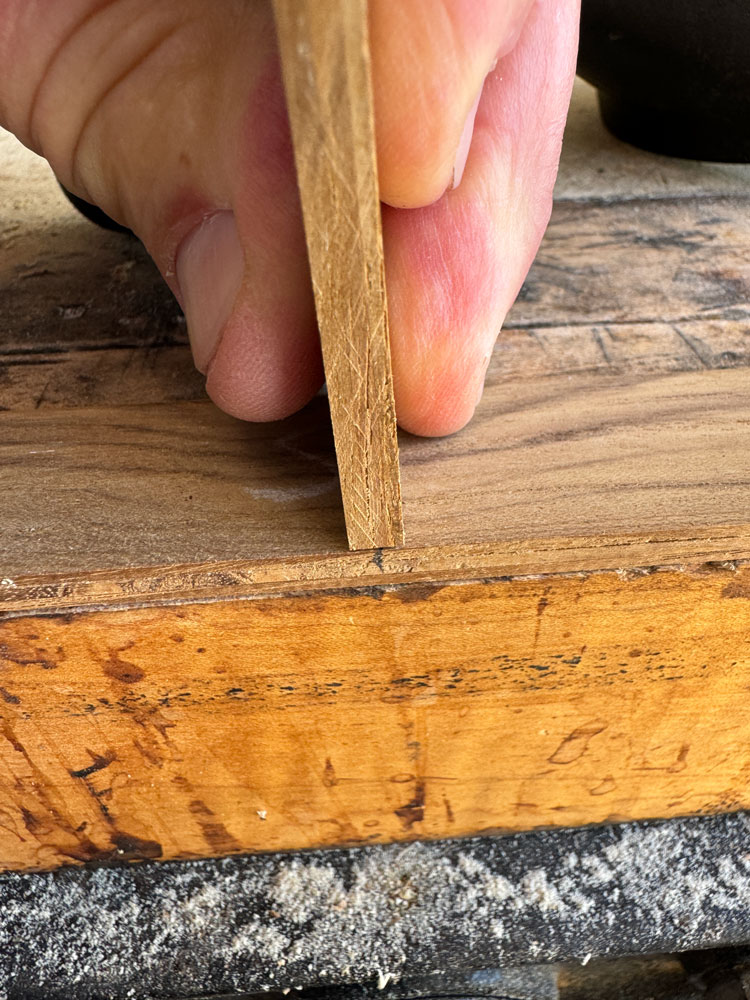
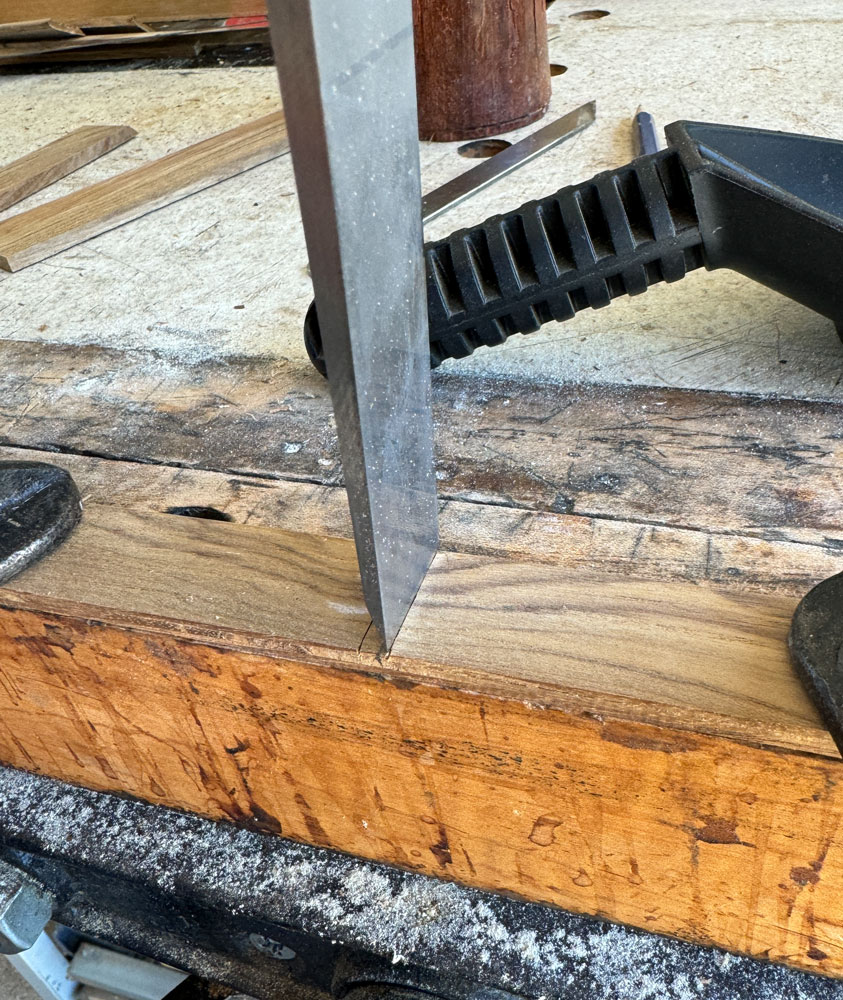
Using a knife, I mark each side. I mark into the center because when I use my chisel, it will open the dado slightly.

Using a 4 inch double square, I align the double square on each cut and scribe a line.
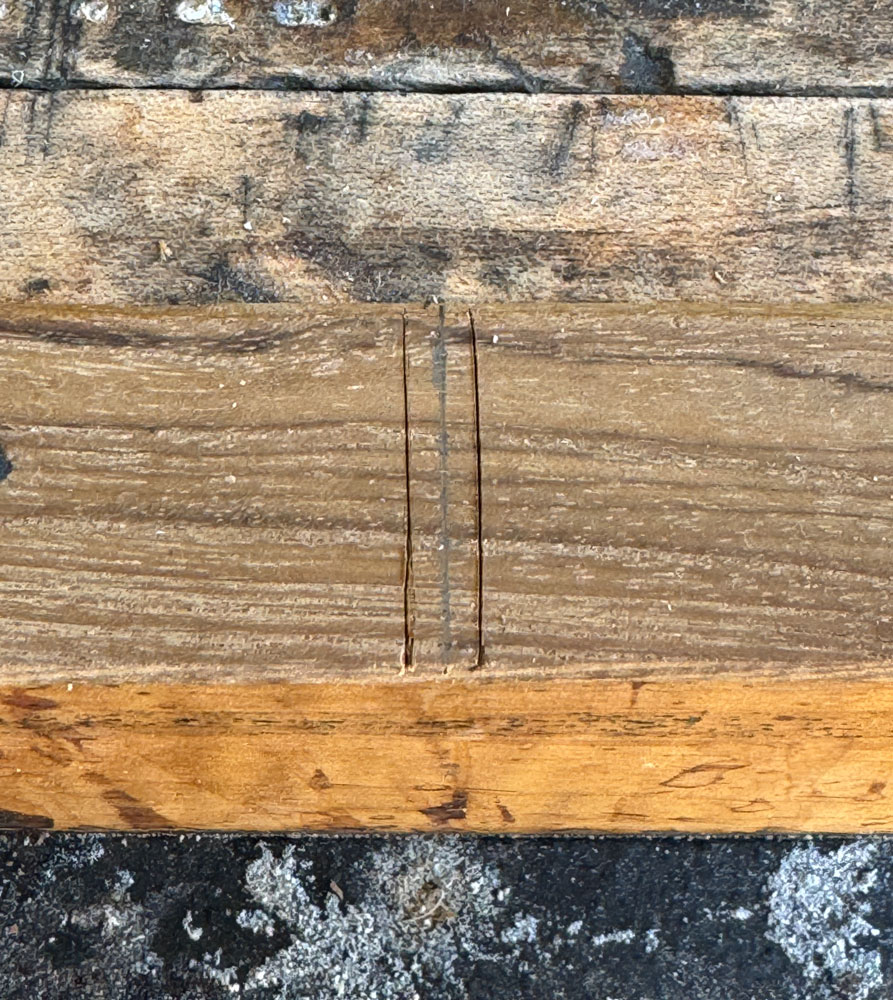
I use those scribe lines to register a 1" chisel and chop downward, usually only one hit.
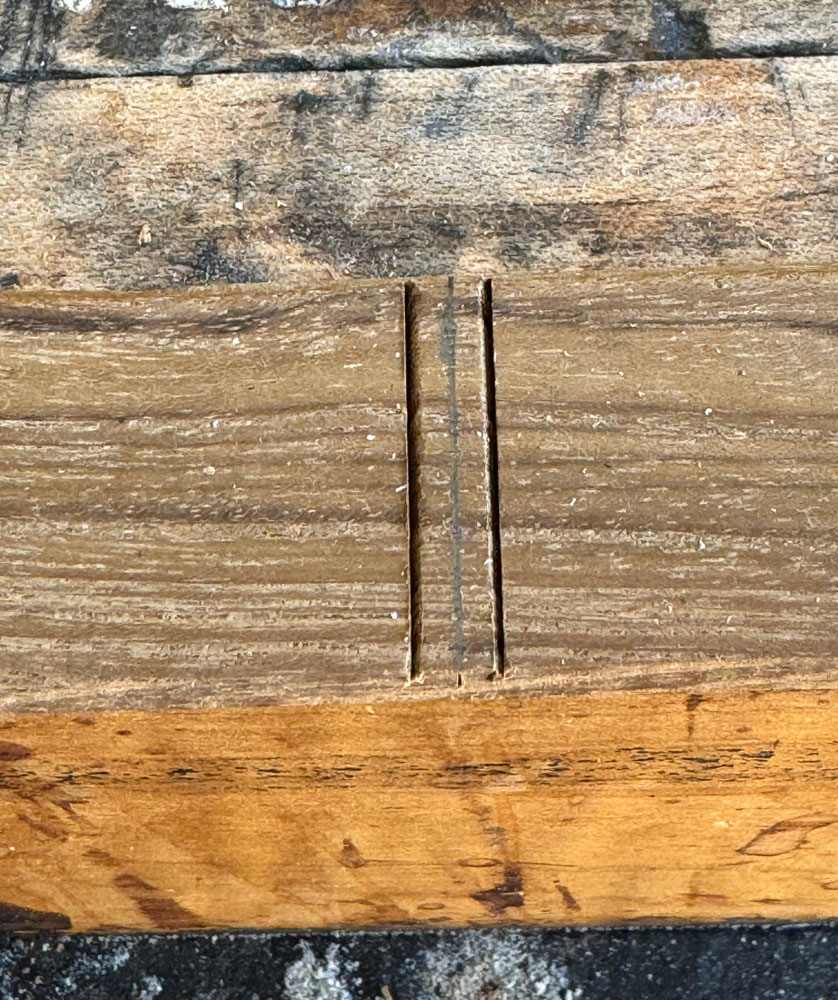
Here's what it looks like after chopping on each line.
I use a 1/8 inch chisel to begin remove some of the waste.
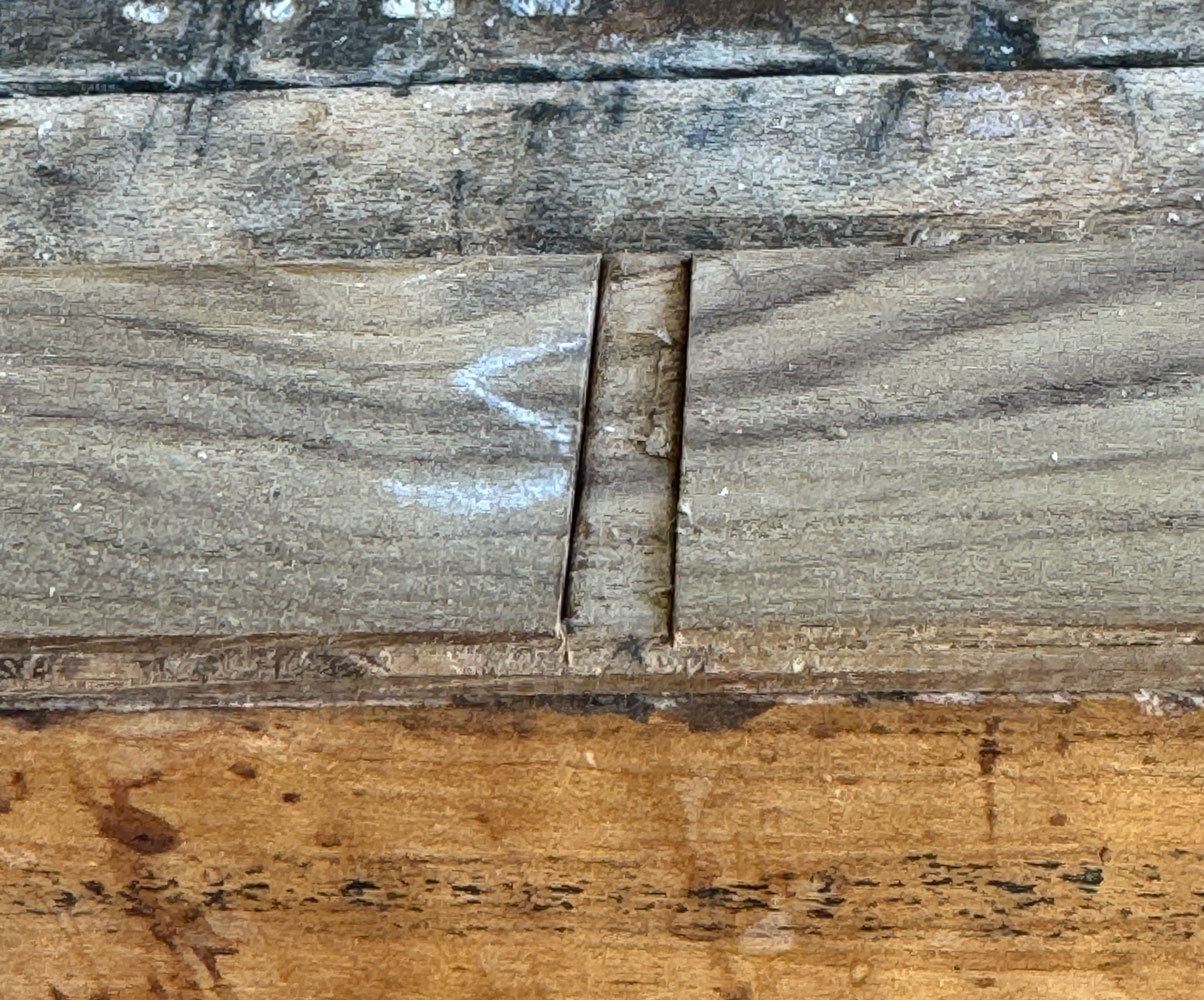
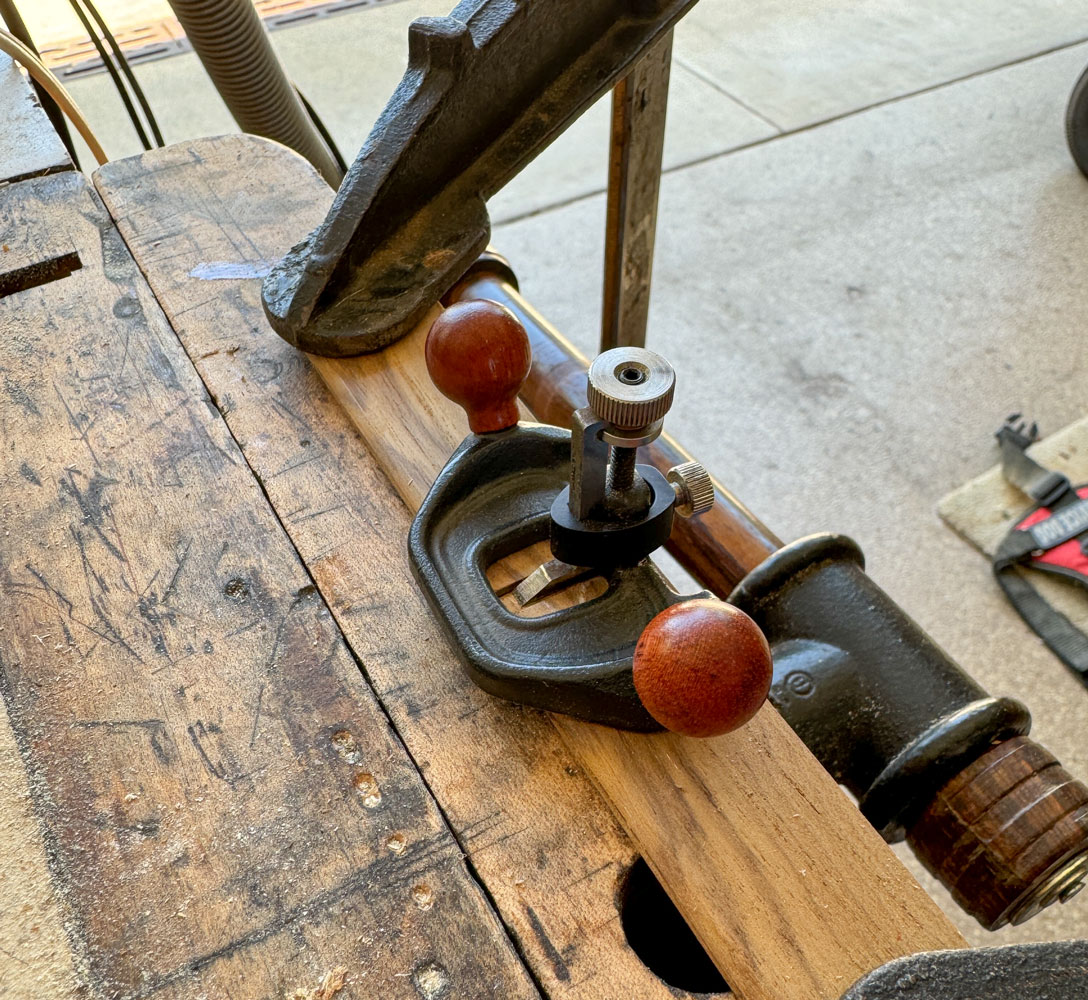
To finish it, I use this small router plane made by Lee Valley. The reason for using the router plane is to make the dado bottom flat.
Your center piece should be a snug fit. You're better off making the dado too narrow than too wide. If too narrow, you can sand the end of the center piece to narrow it to fit. But if the dado is too wide, there's not much you can do to recover.
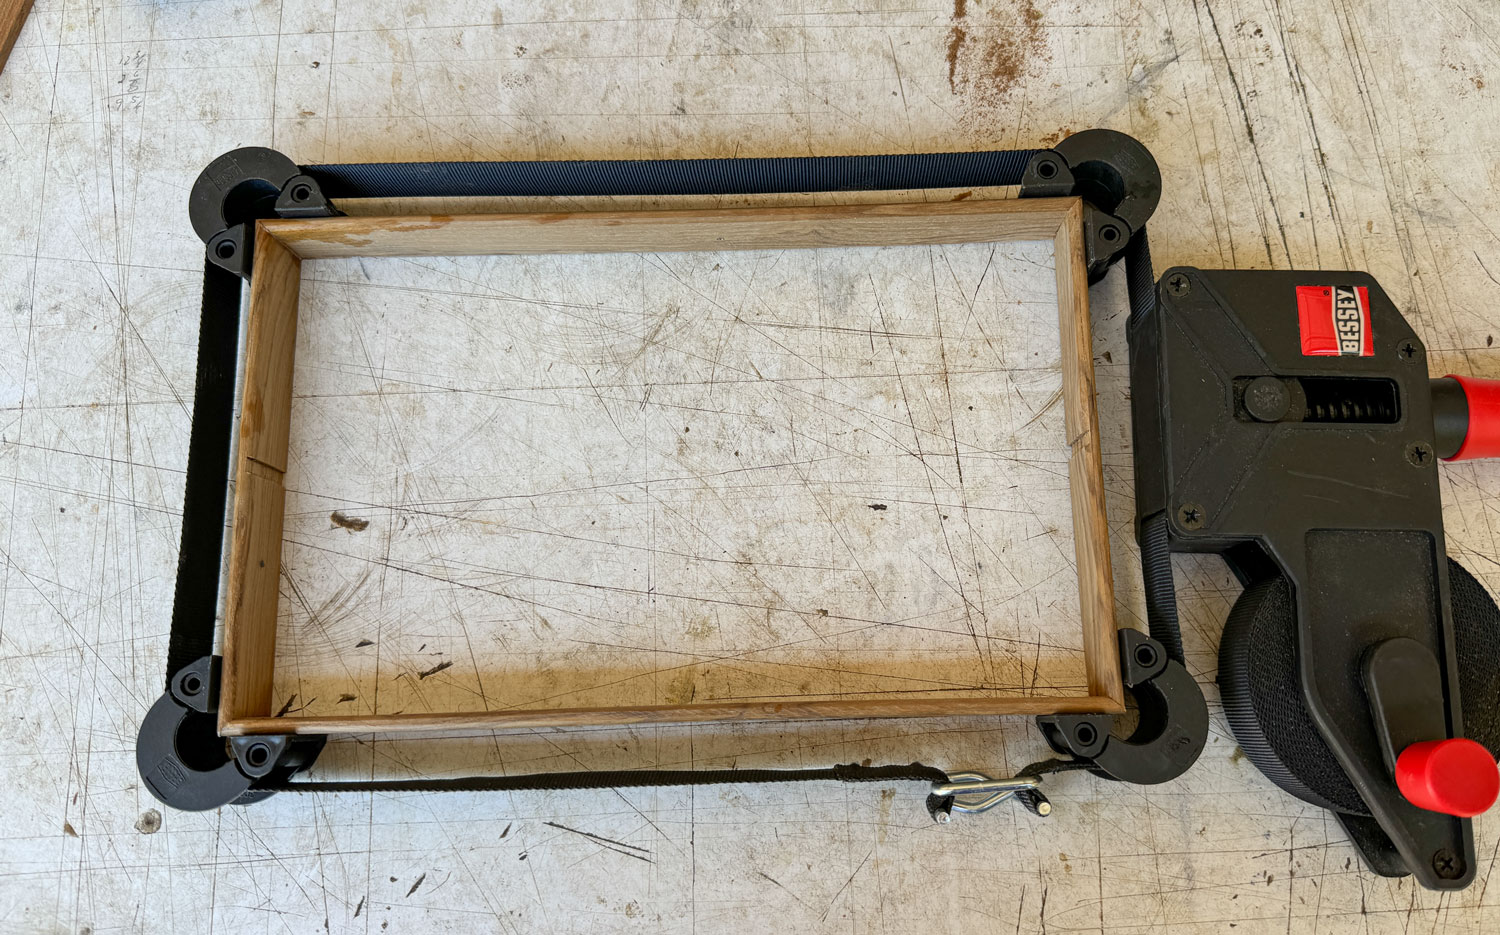
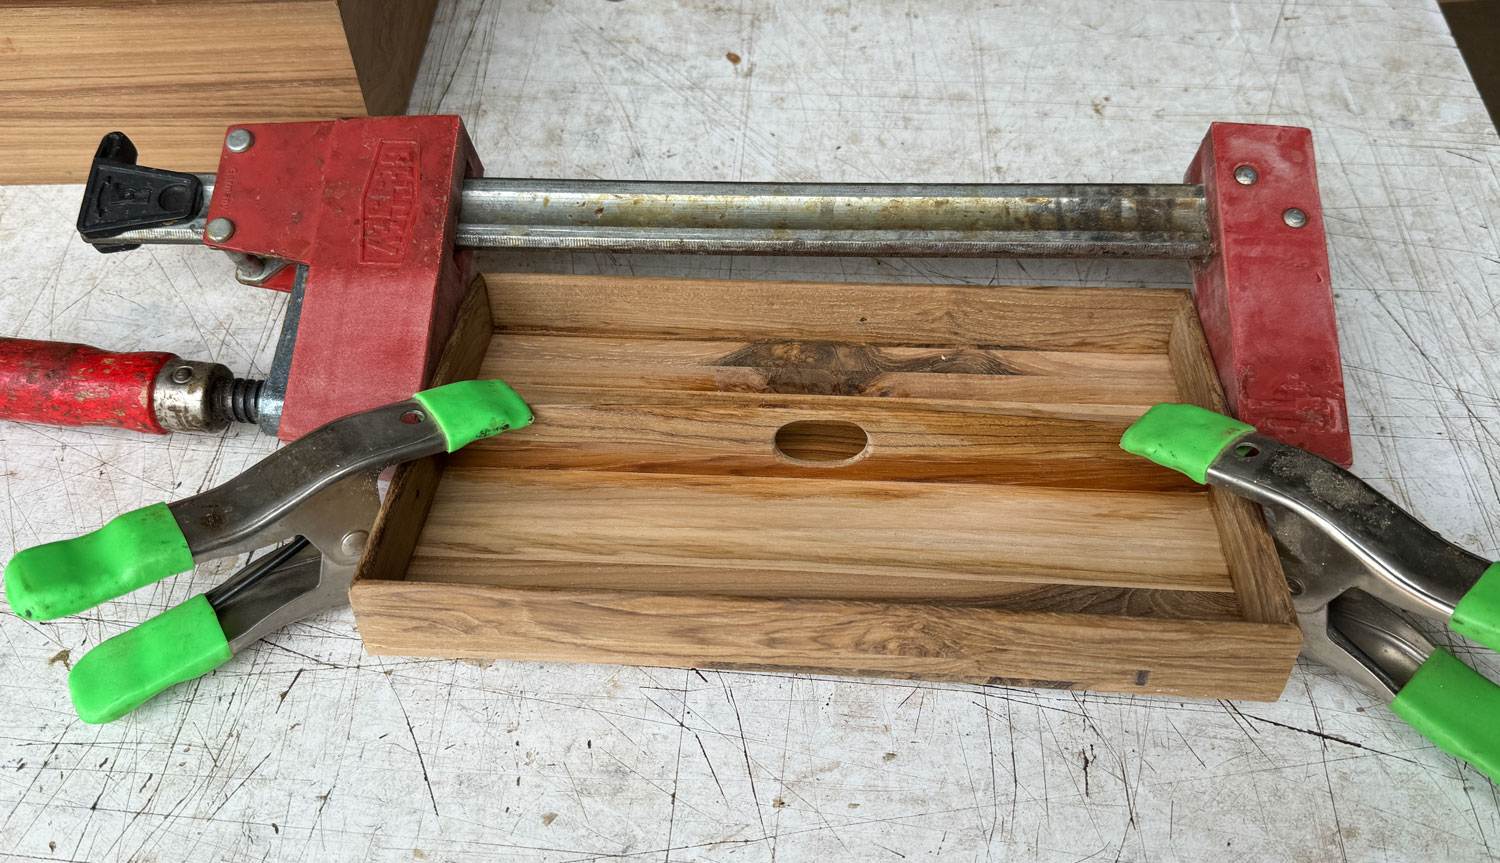
Then, using the Bessey strap clamp, I glued the four pieces together. Push each corner down to make sure the two sides align on the bottom. Don't clamp too tight - it will bend the sides. I'm a little too tight in this picture.
Once the glue sets, glue the sides to the tray bottom. Wipe up any squeeze out on the inside of the tray.
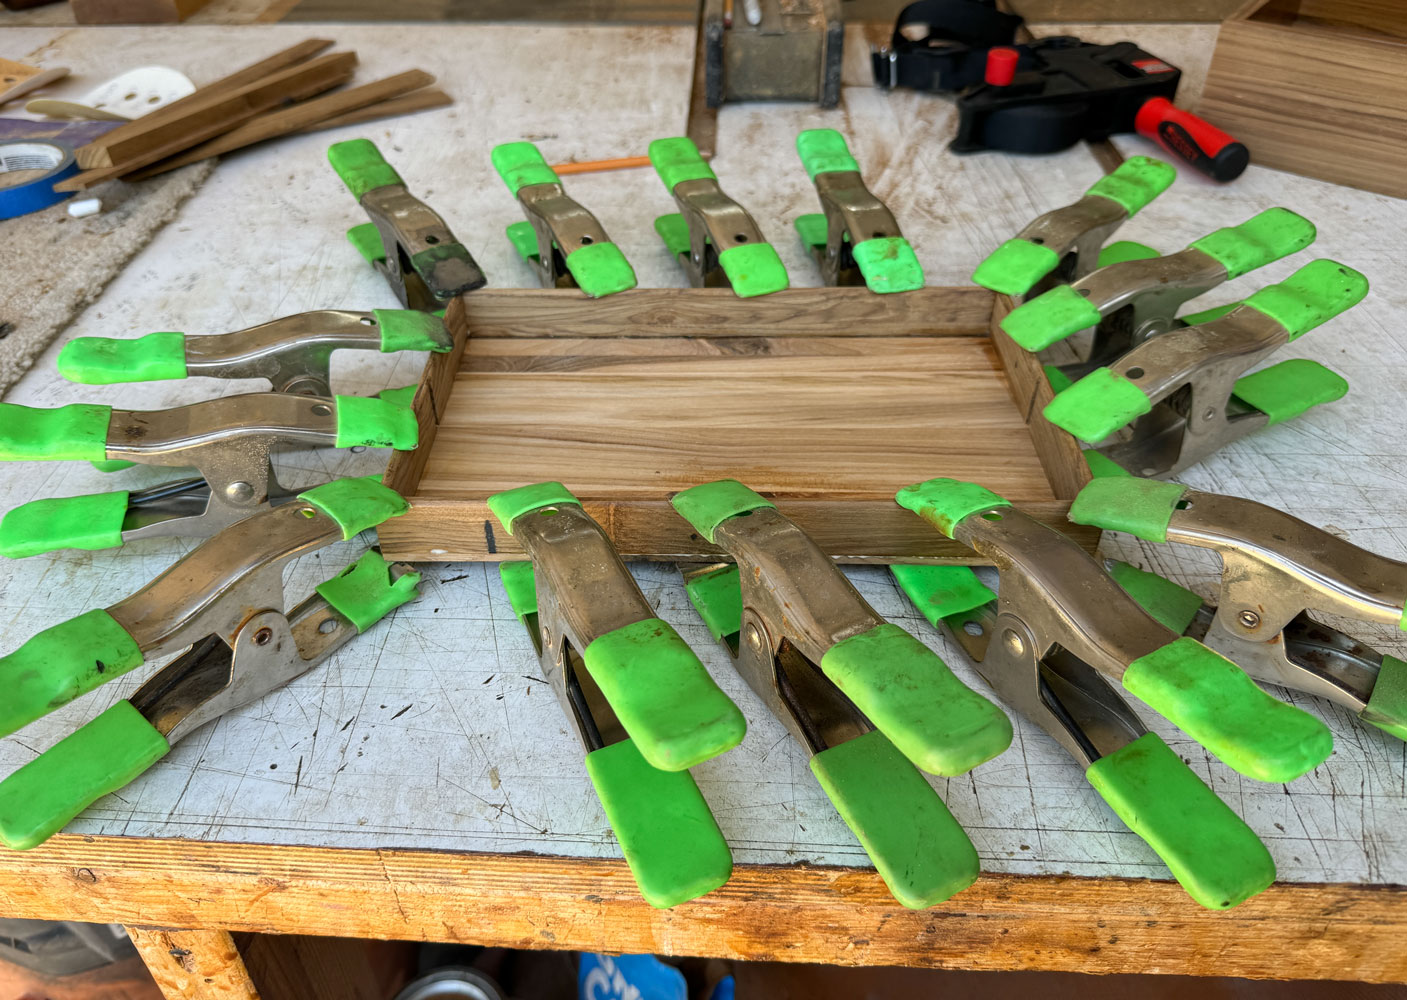
Once the glue sets well, remove the clamps and sand the outside of the tray. Then put it into the box and see how it fits. I think the fit is excellent. If you make the fit too tight, the tray will act like a piston and it will be difficult to put in or take out. There needs to be some space between the tray and the box to allow air to move in or out. But not too much space or it looks like a sloppy fit.
Then trim the center handle piece and slide it into the dados. This is a precision cut - just sneak up on it and get a tight fit.
Next, I'll drill a finger hole in the center piece and trim it to shape.
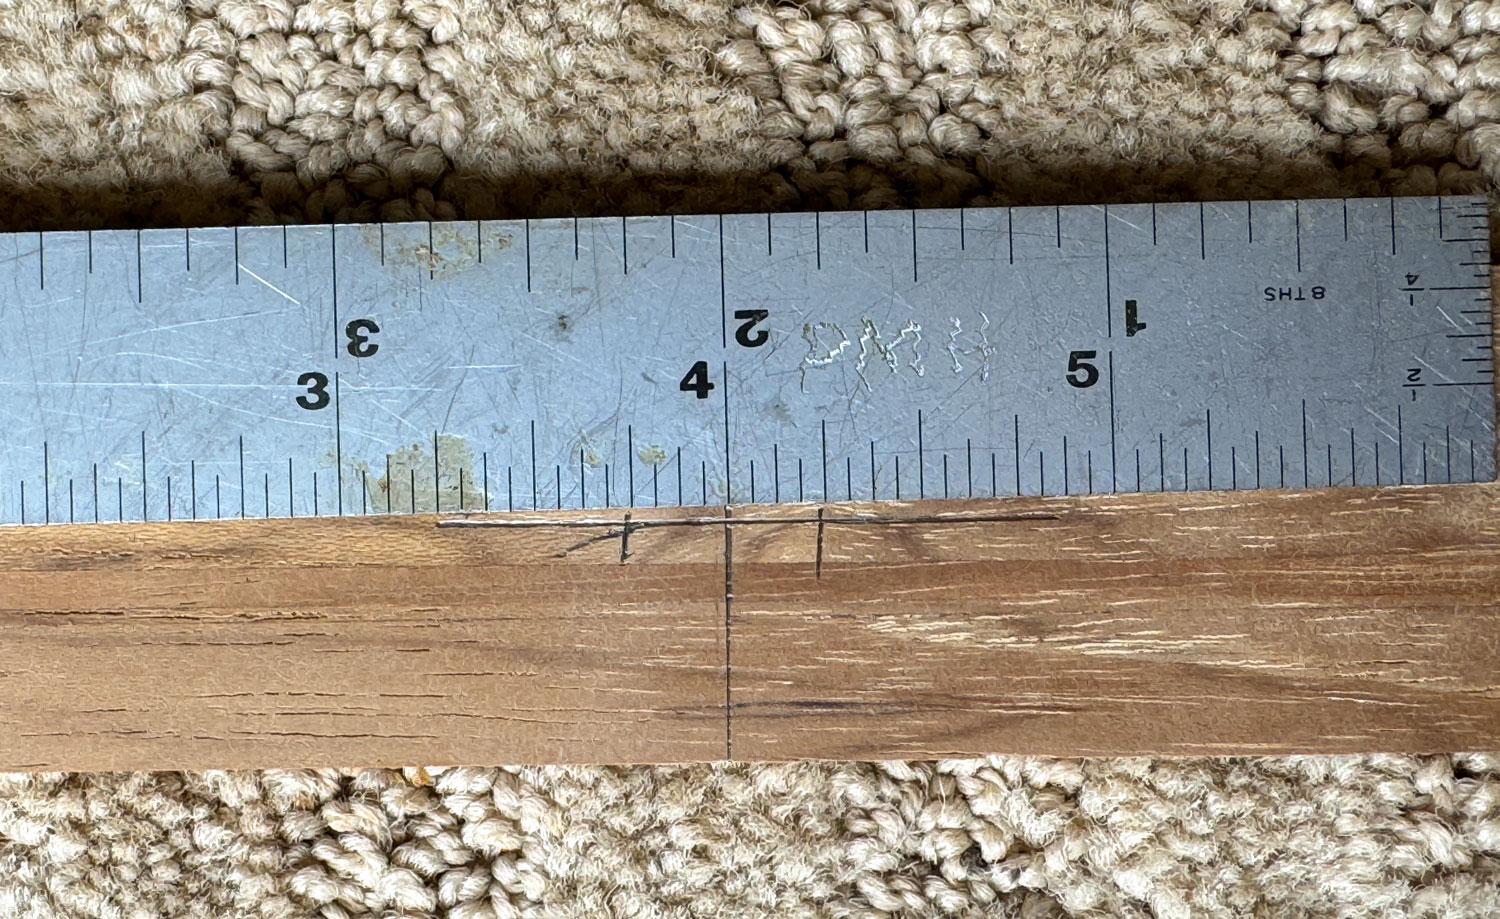
Take the center piece and mark the center from side-to-side and top-to-bottom.
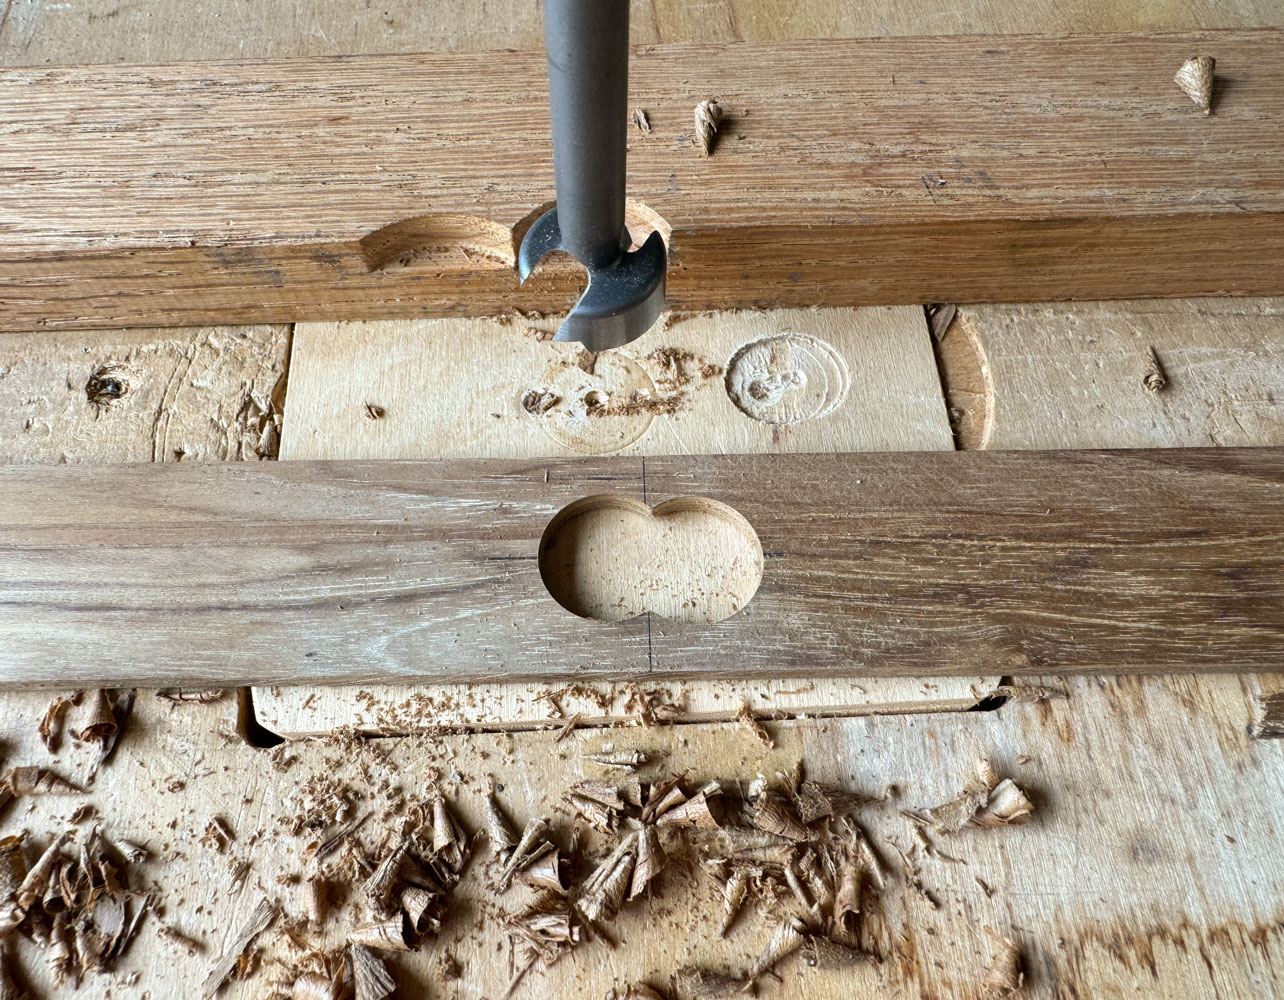
I'm going to drill two overlapping 3/4 inch holes so I mark 1/4 inch from the center.
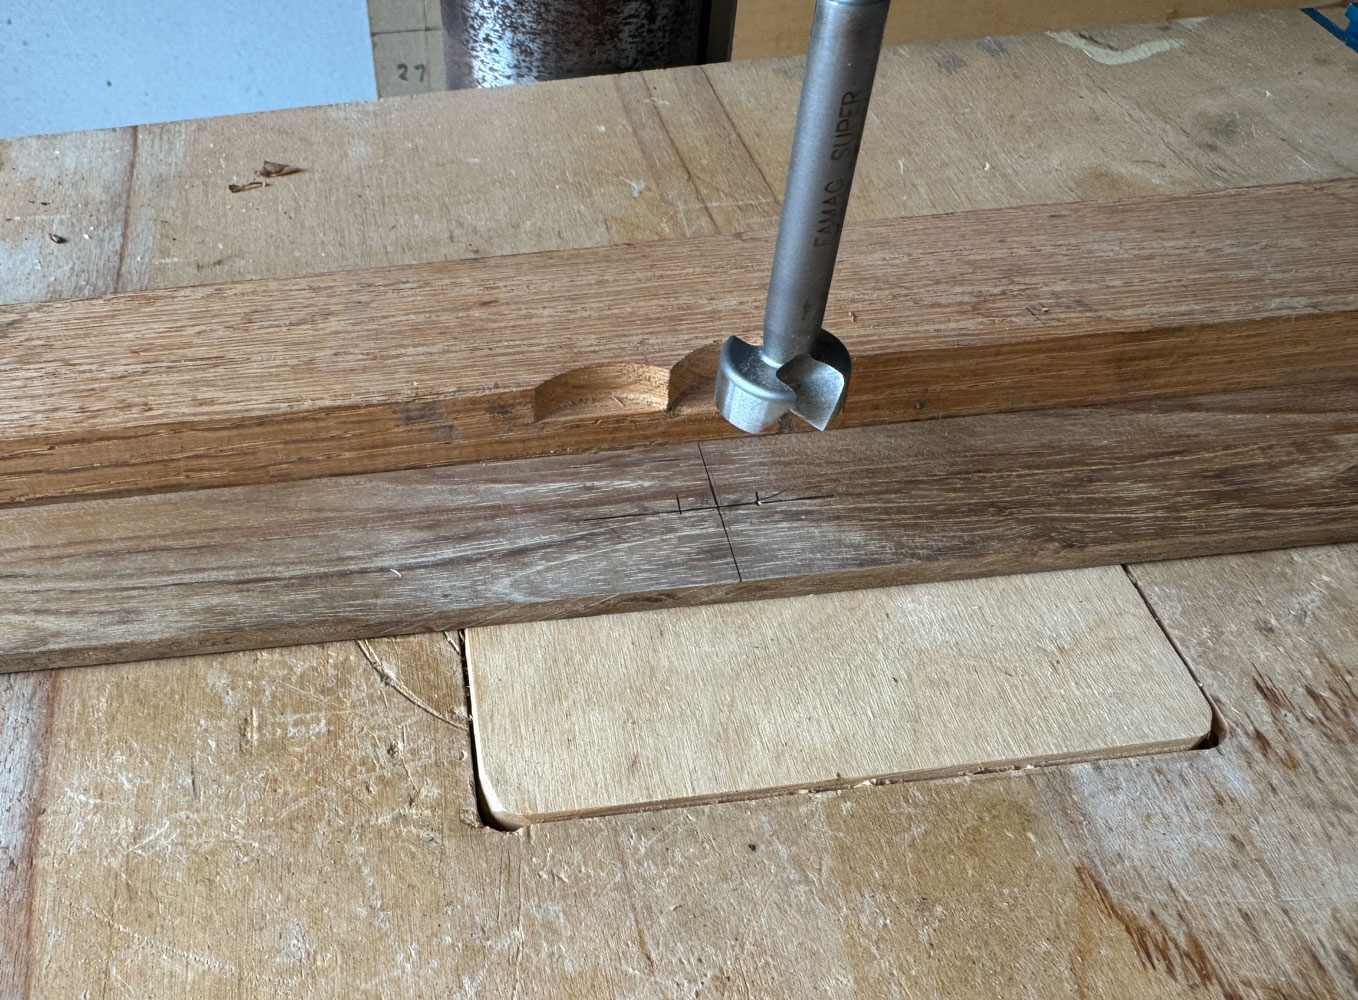
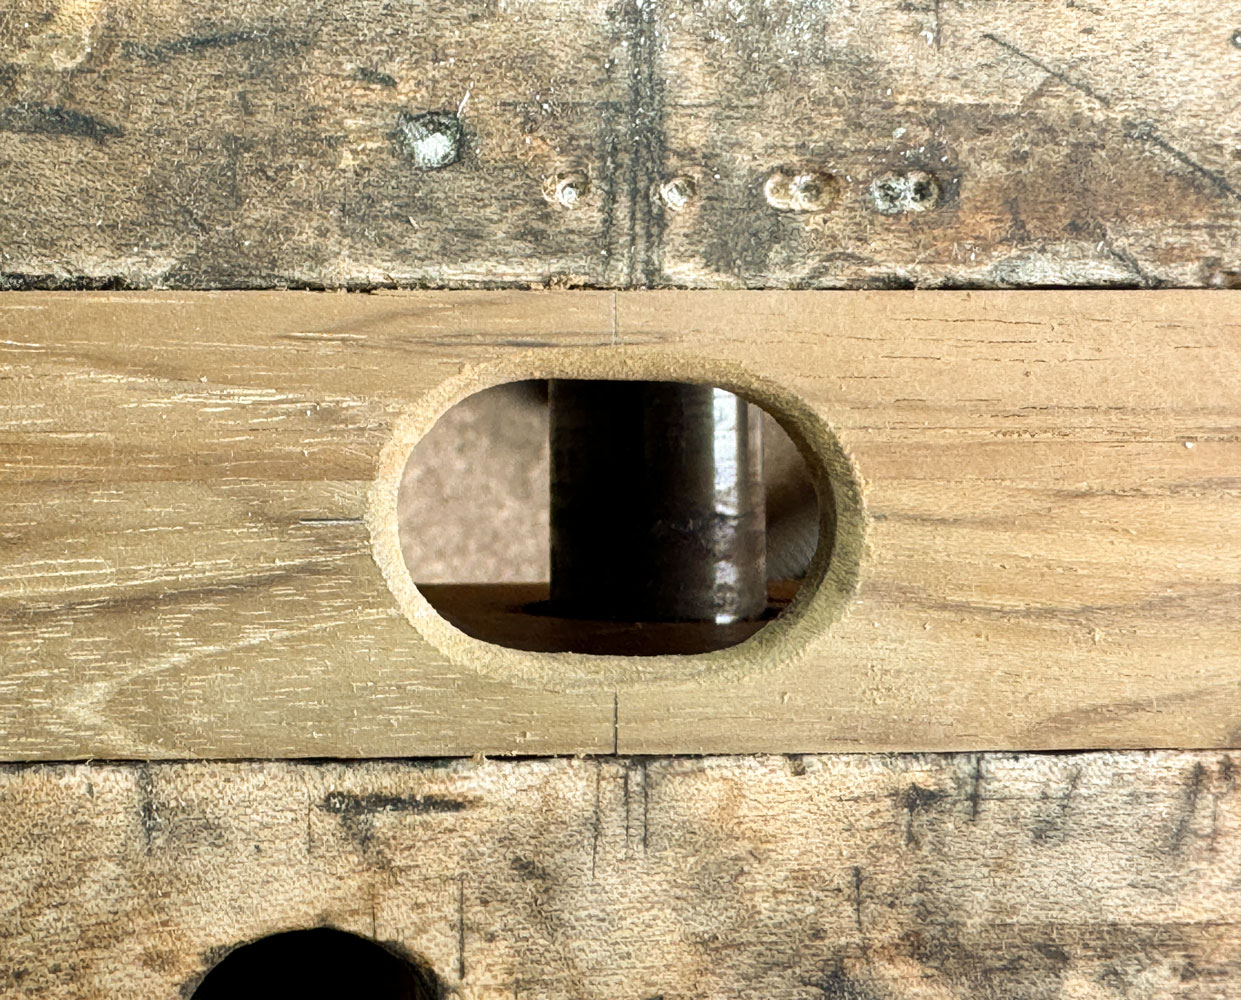
I'll use my drill press with a 3/4 inch Forstner bit. When you drill these holes, use the fence, as you see in the picture. Without that, there's a good chance that one hole will come out higher or lower than the other, and that's very noticeable. Also, clean the swarf from the fence before you drill the second hole. The swarf can displace the work and cause your hole to be offset.
Here's what it looks like after drilling the two holes.
I'm going to smooth out the two points in the hole, but you could leave them, or shape the bottom into a heart. If you shape into a heart, be aware of the strength of the piece. If you narrow the bottom too much, the center piece could break in half as you handle it.
I'm going to use a Nicholson 50 rasp.
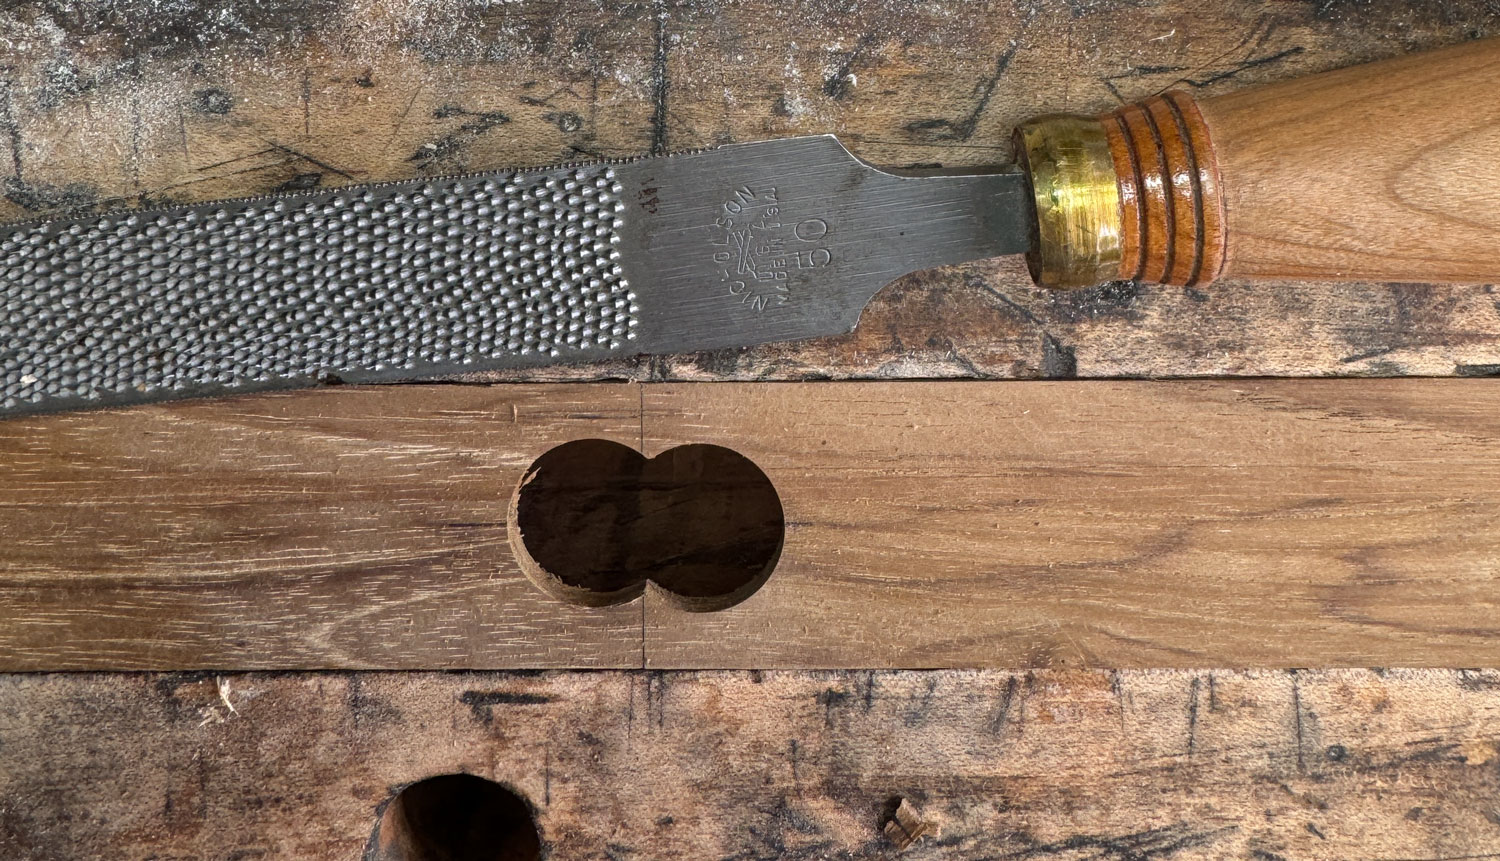
After the rasp, this is what it looks like.
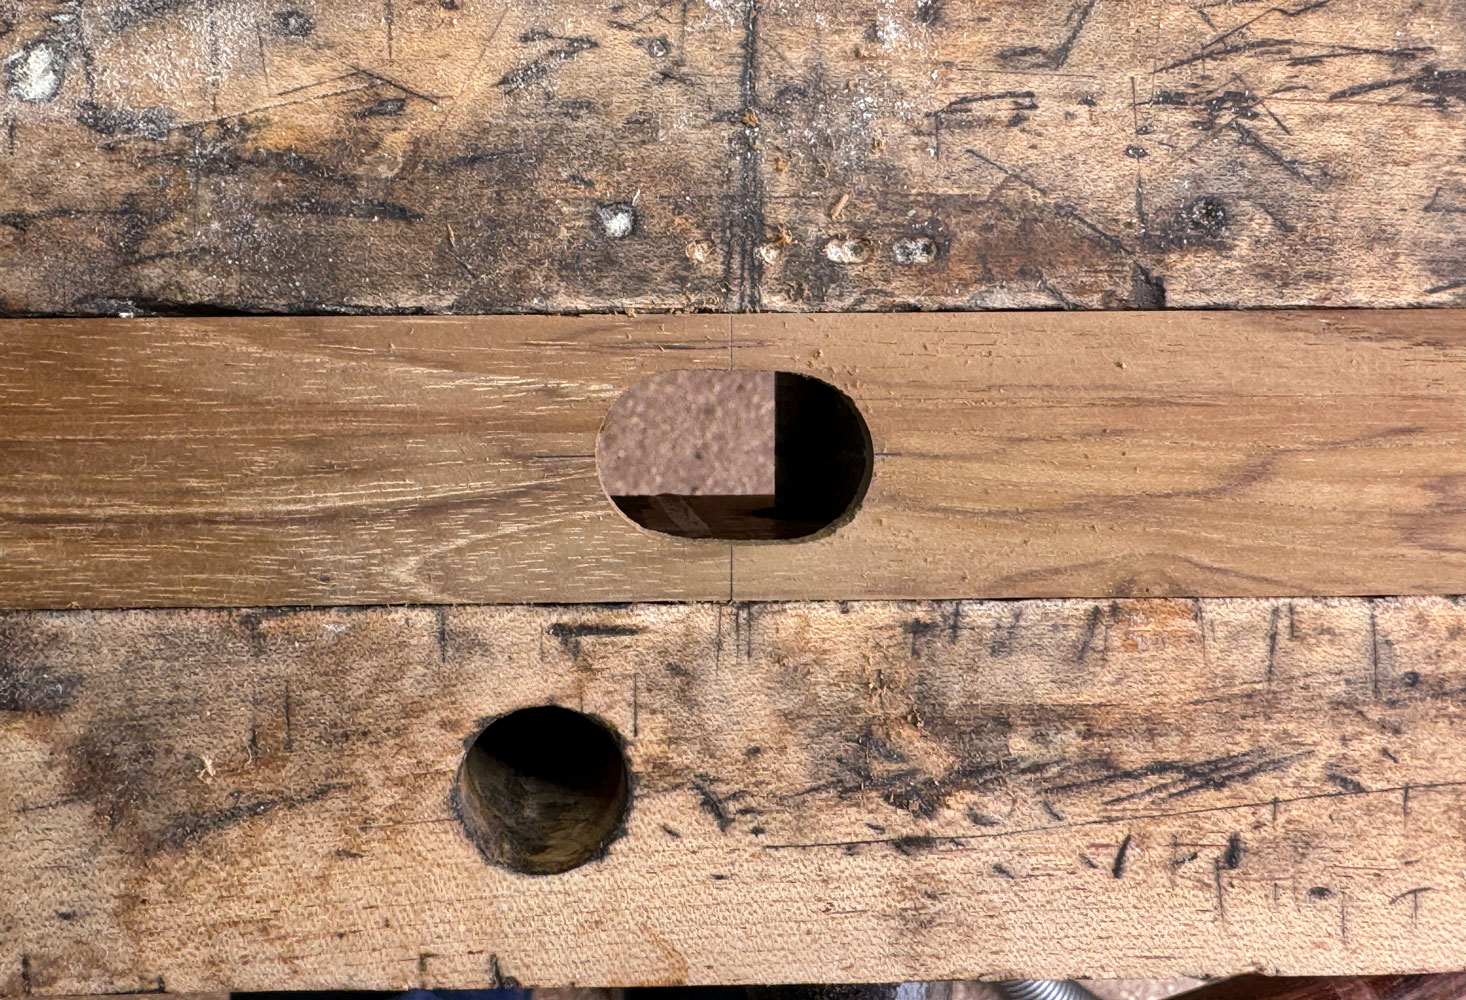
The edges of the hole are too "sharp" to be comfortable. I need to ease the edges. I take a piece of 100 grit sandpaper and roll it up. I use that to ease all the edges.
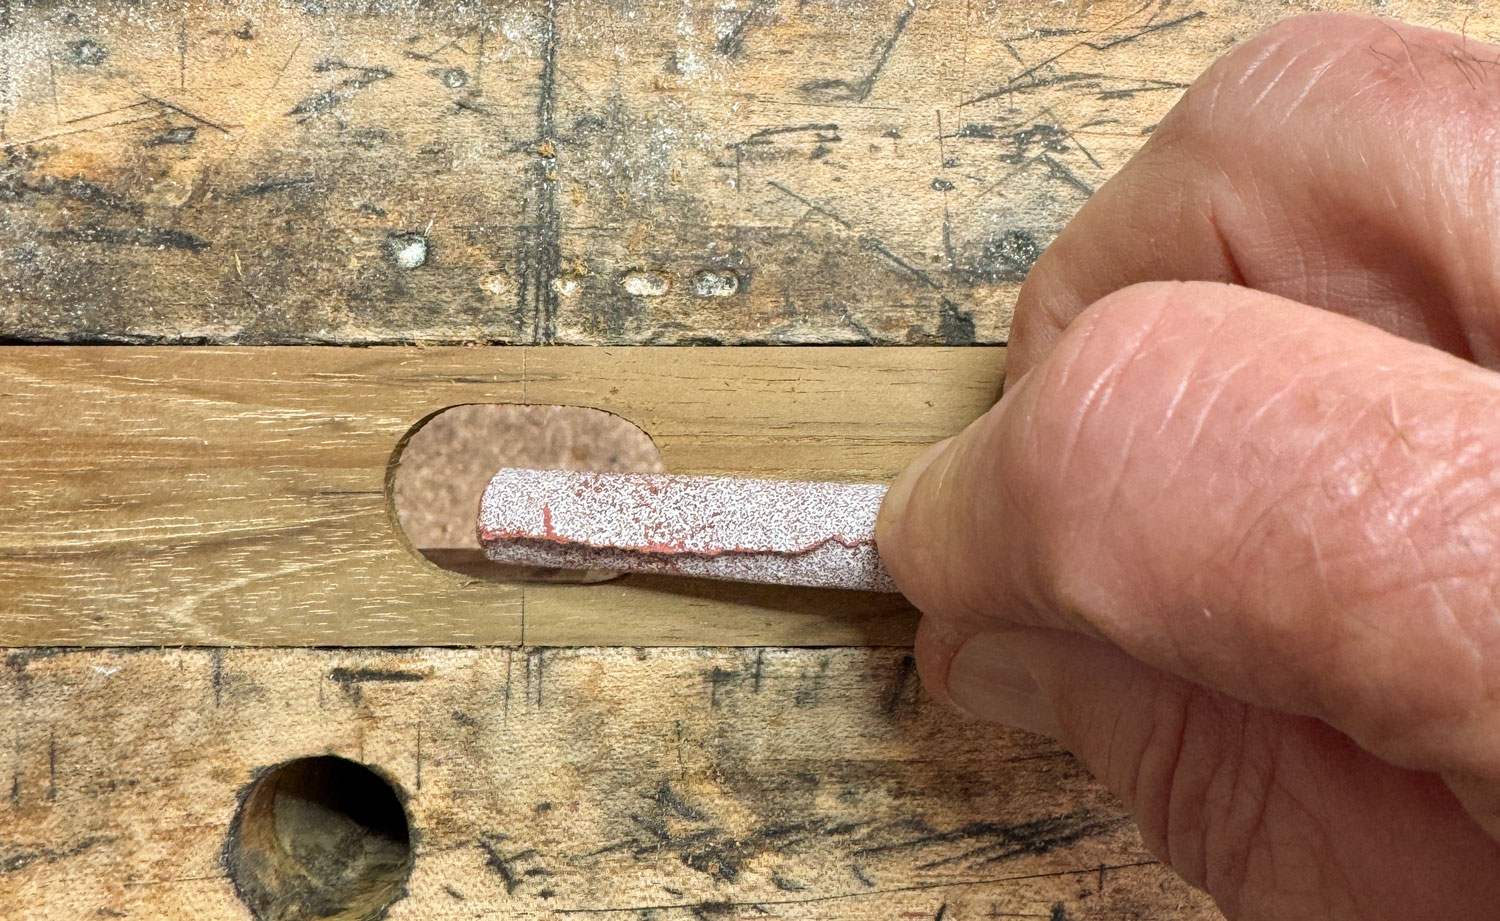
The 100 grit gives a fairly rough surface but is reasonably quick.
I follow this with some 150 grit to smooth out the eased surfaces. Sand this middle board, being careful to remove any remaining pencil marks.
Next, I put the center piece back into the tray.
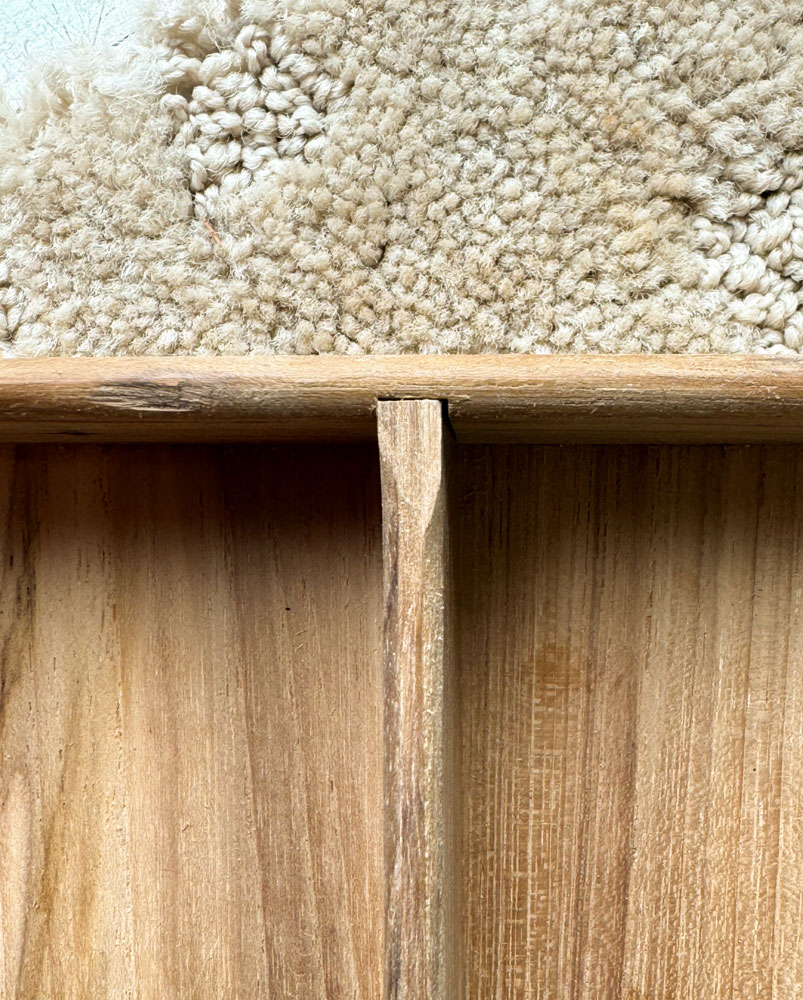
And mark where it meets the sides.
This is what it looks like after marking.
I go to my belt sander and sand the piece down to those marks, at an angle from the middle.
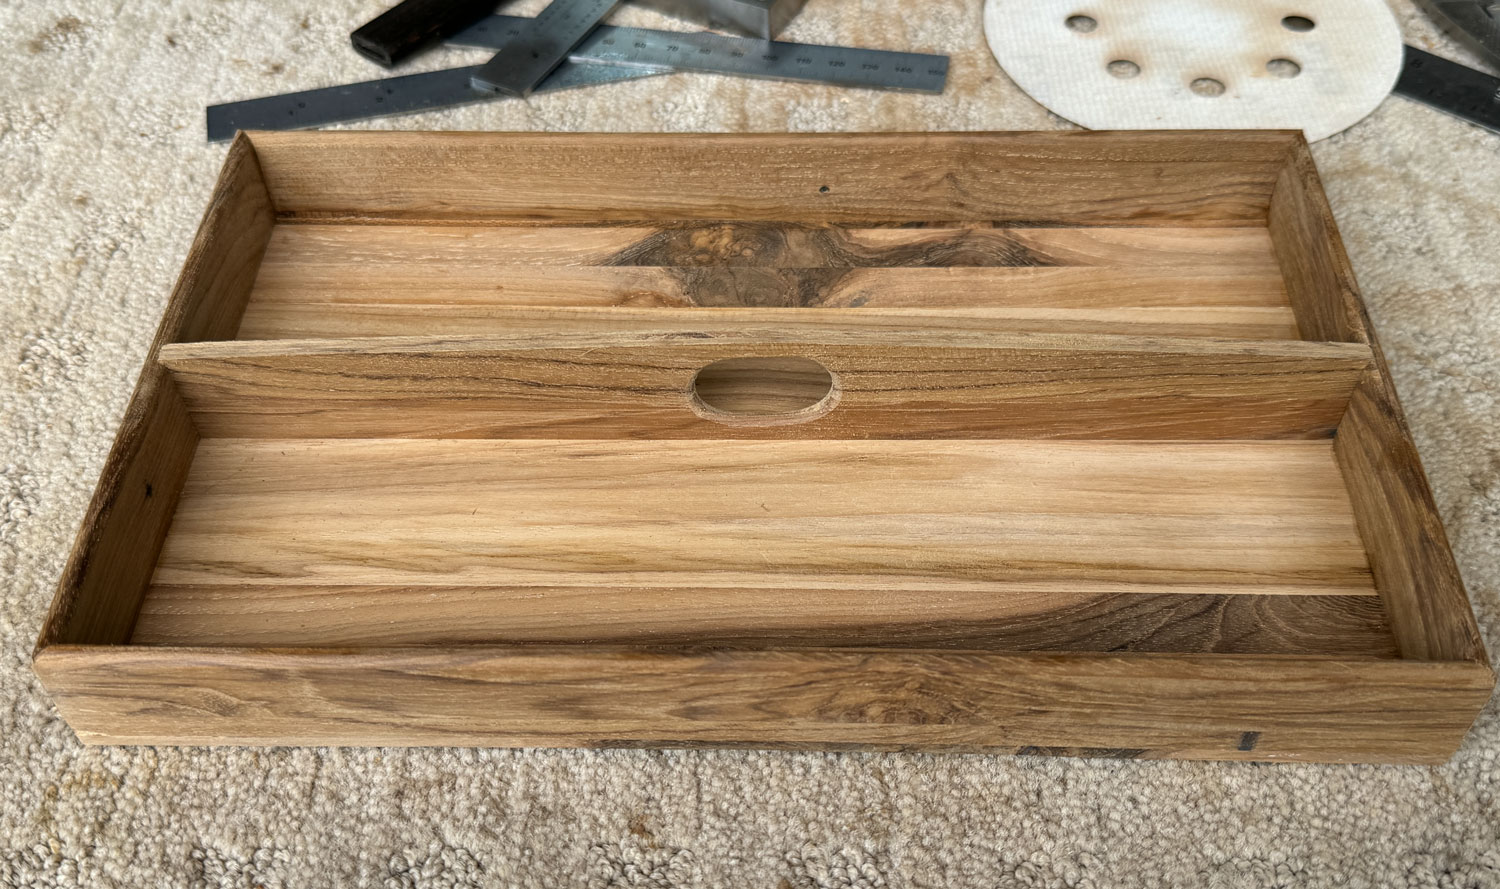
Here's what it looks like when put back into the tray.
Now I have to round over the top of this middle piece. I do this on the router table, the same way I did the other pieces of the tray.

But I don't want to round over all the way. I want to leave the ends square so that they fit neatly into the dados.
Run a bead of glue on the edges of the middle piece, put it into the tray, and clamp. Clean up any glue squeeze out.
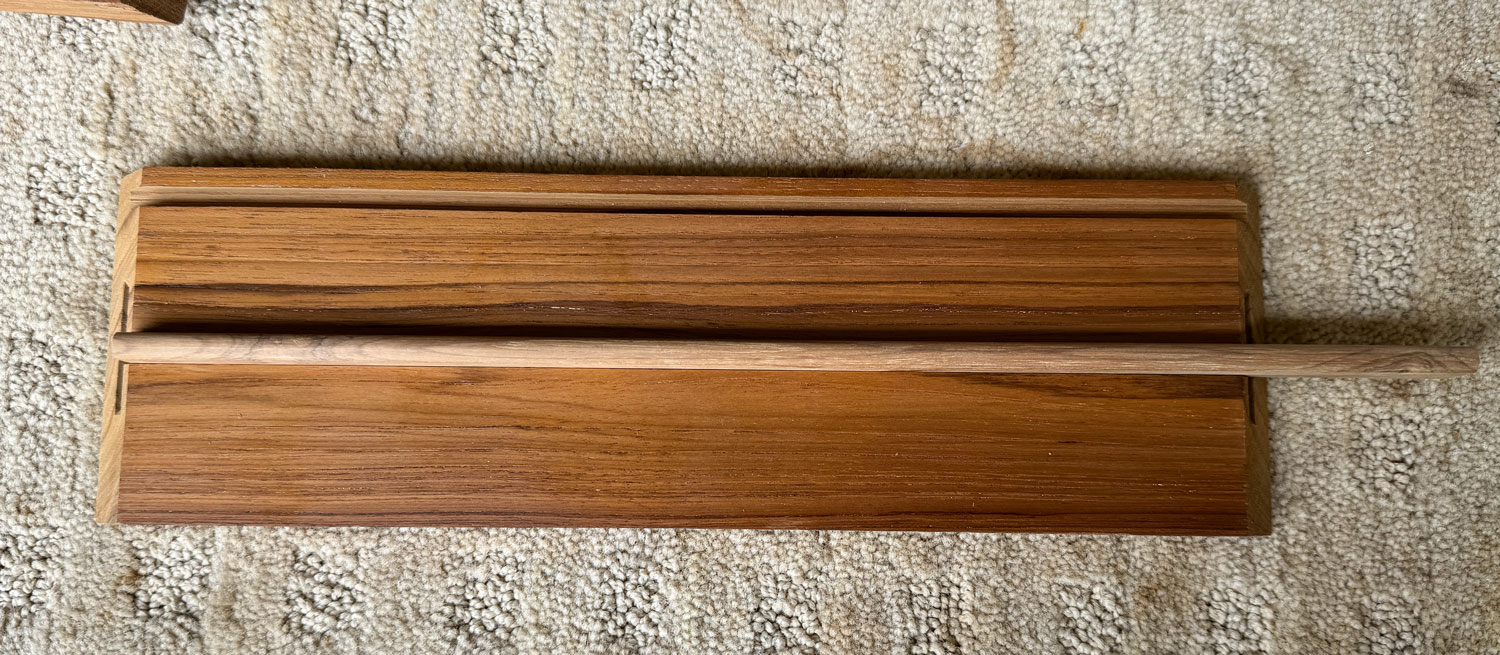
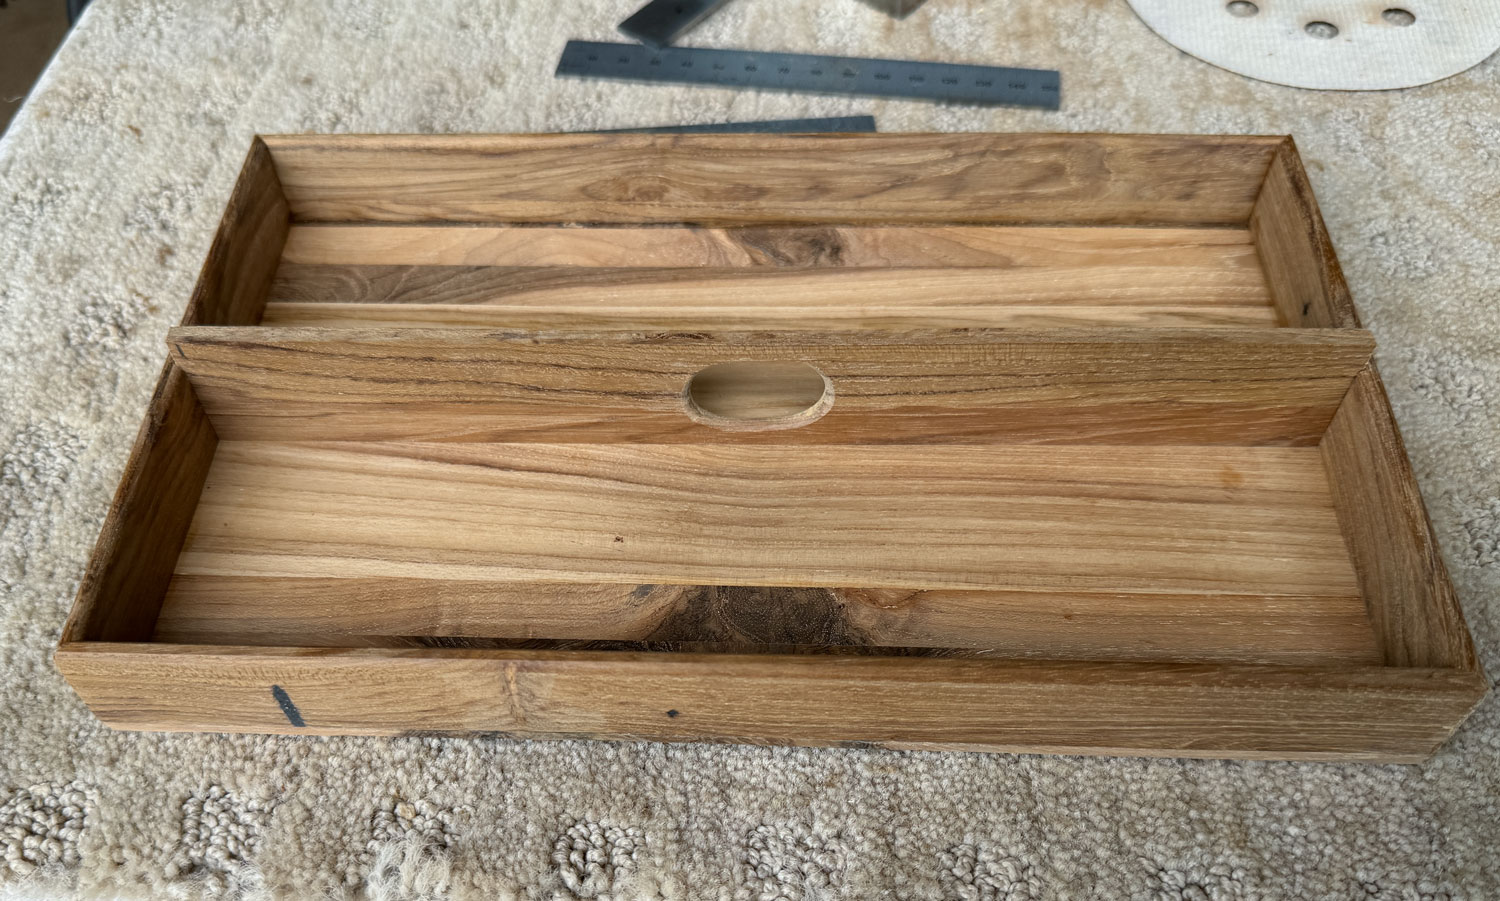
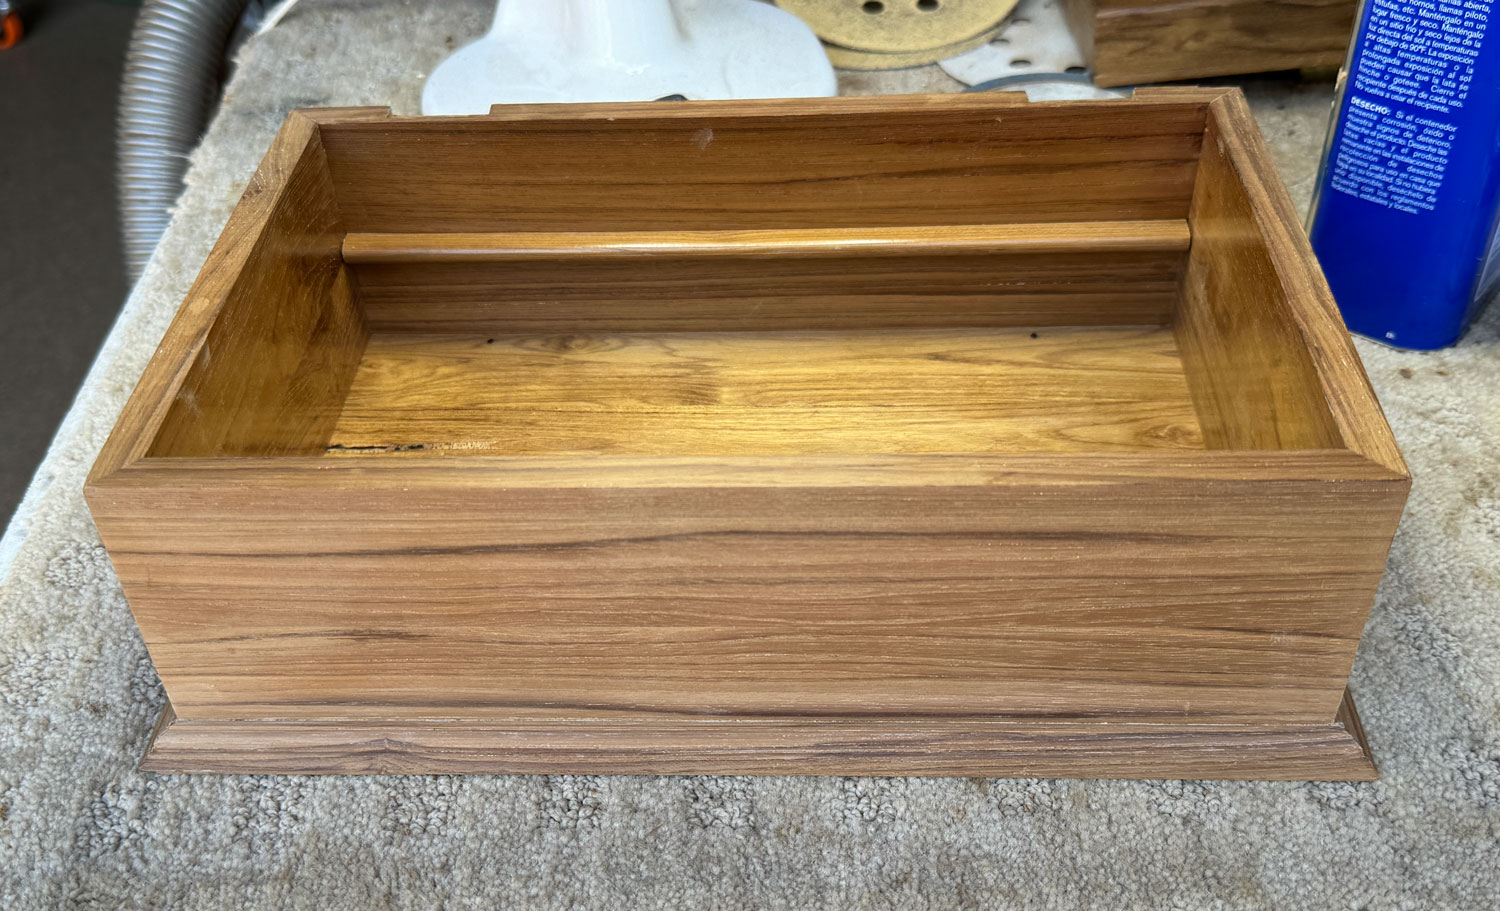
And there it is, sitting in the box. It needs some sanding to smooth things out, and some finish, but that's the majority of work on the tray.

I sanded the tray, applied a coat of shellac, and buffed it with wax. I think it came our fairly nice - nice color.
The next step will be to set the hinges which will attach the top. The last task will be to make and attach the base molding, and apply finish to the exterior.
Doing a good job of setting hinges require precision marking and cutting. Go slow and measure and mark as accurately as you can.
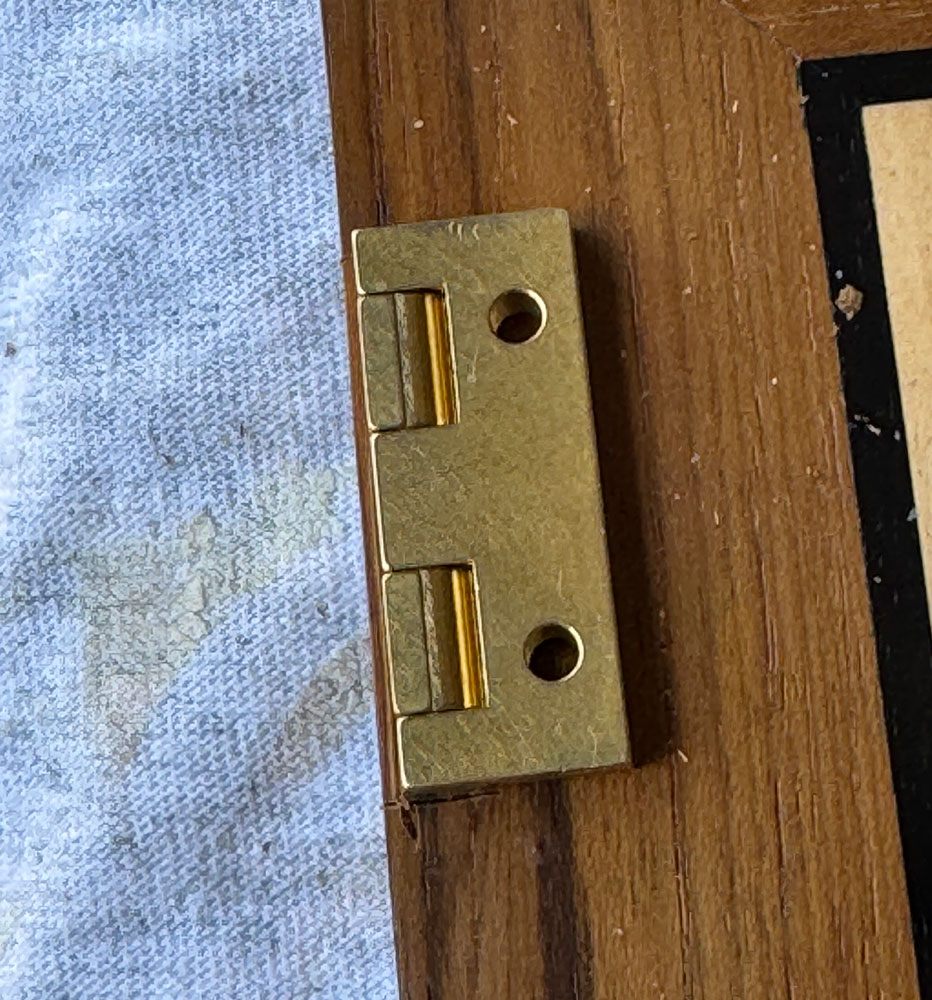
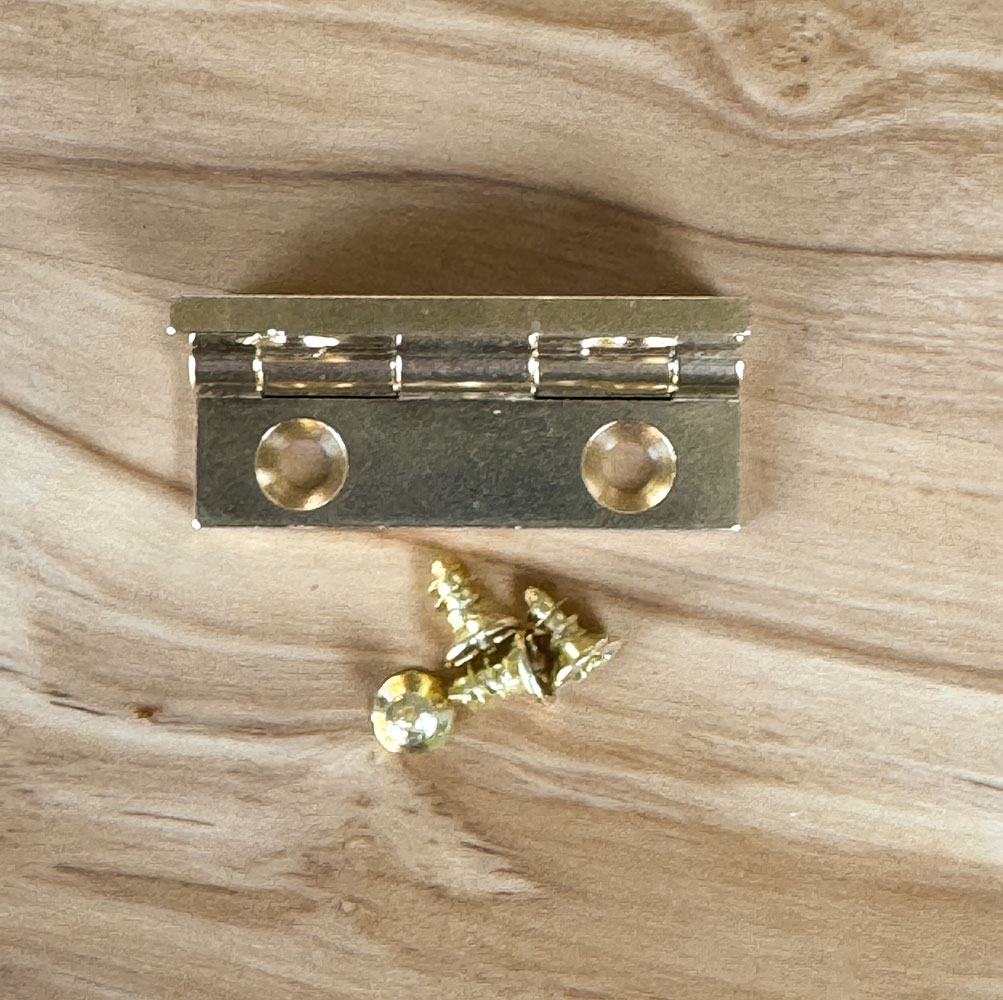
I'm using Brusso JB-102 stop hinges. Stop hinges will allow the top to open a bit more than 90 degrees and eliminate the need for a chain or rod stay to keep the top from falling over backwards. Note that Brusso gives you a steel screw as well as brass screws. I'll talk about how to use that later. They always provide an extra one or two brass screws, also, which is nice (looks like 10 brass screws in this package). If you mess up the Phillips head on a screw, you can discard it and you have another available. I save those extra screws and have a (small) bag full now.
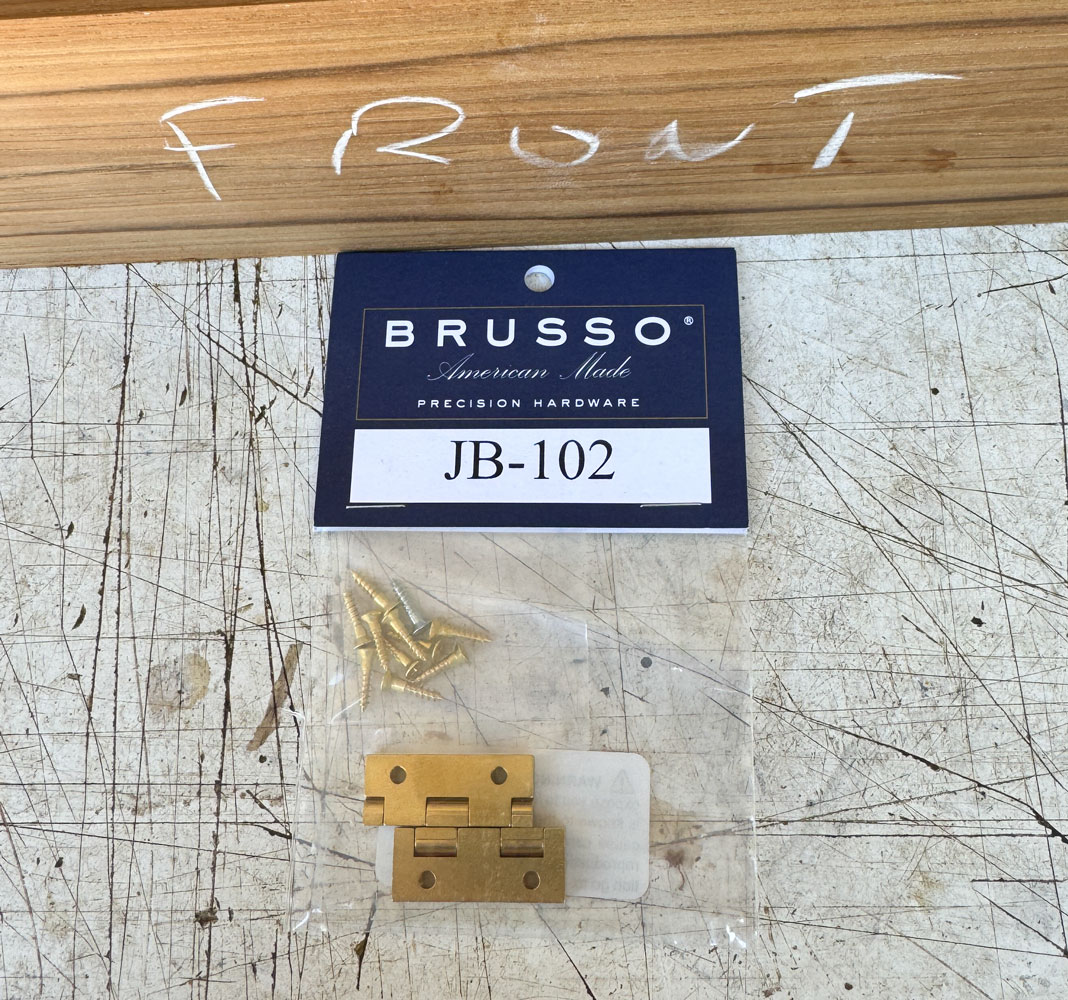
There aren't many stop hinges available. I've looked and the only one I've found that really works well and looks good is the Brusso. But it's expensive. Rockler lists them for $55 and Brusso has them for $45. The lowest price I've found (at this time, 6/12/24) is Lee Valley who has them listed for about $36. I expect Lee Valley will raise the price next time they get a shipment in.
The first question on hinges is "Where to put them?" Within limits, you can put them wherever you think they look good. You wouldn't put them both in the middle of the box, but beyond that, anywhere else will work.
To visualize, you can place the hinges on the box. Here, I've put the hinges 1 inch from the outside of the box.
To my eye, that looks too wide. Here, I've put the hinges 1 1/4 inch from the sides.
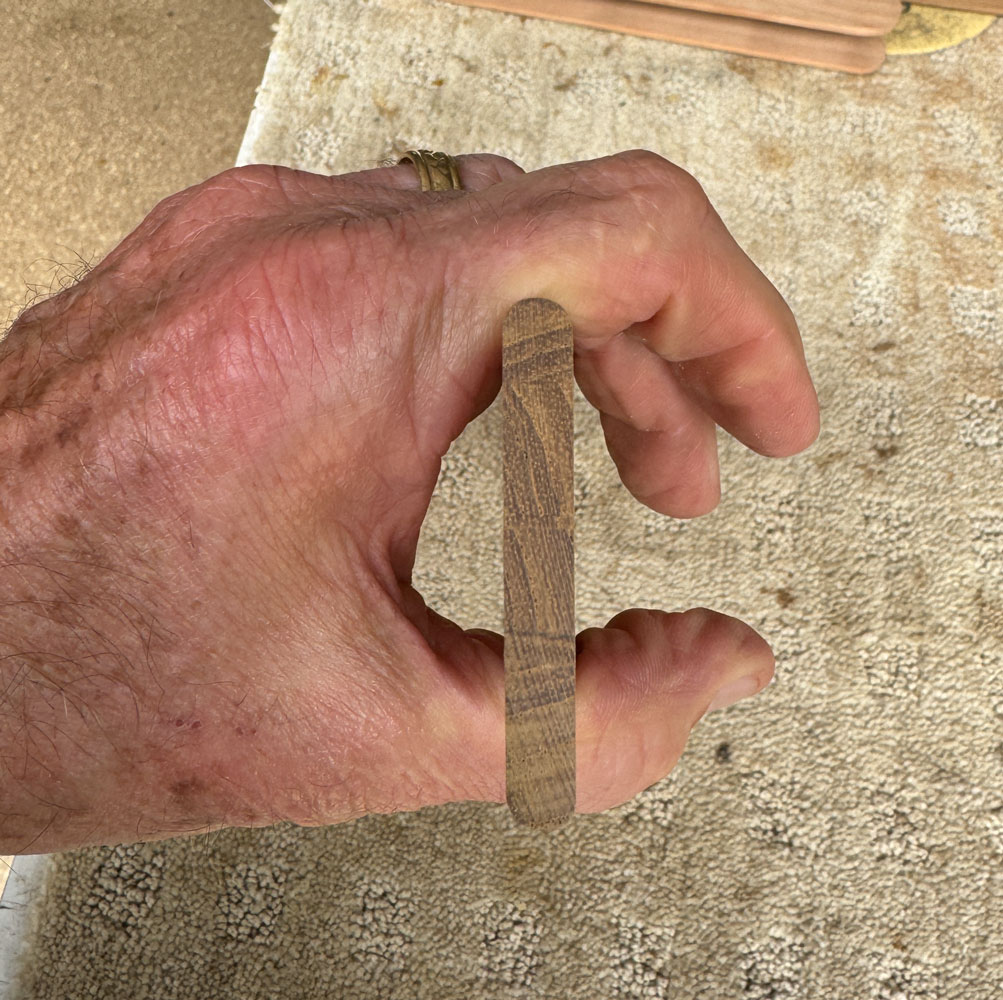
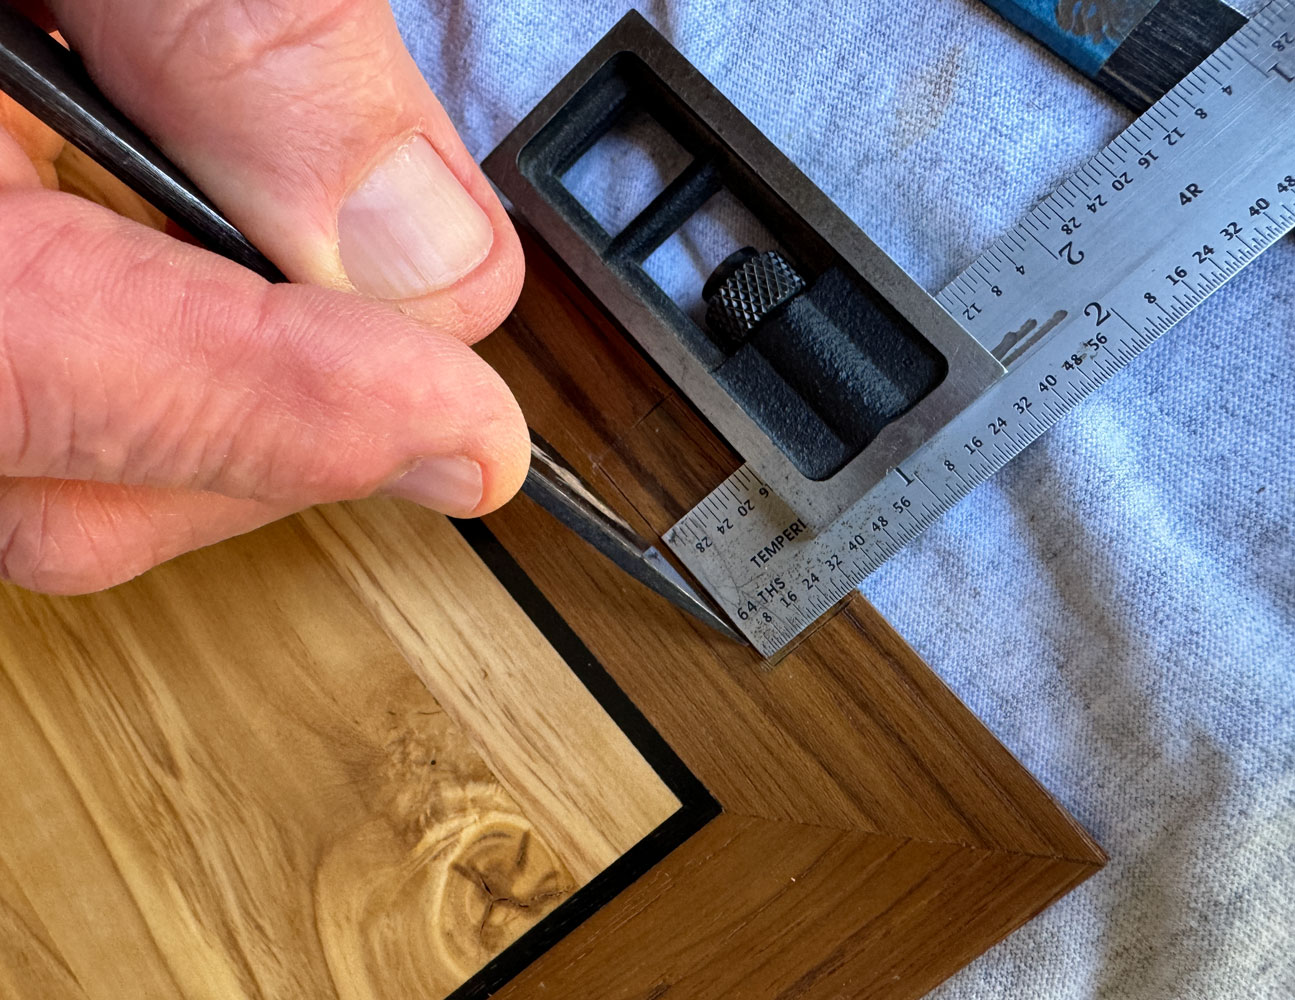
And just to make sure you understand what that distance is, here I am measuring it.
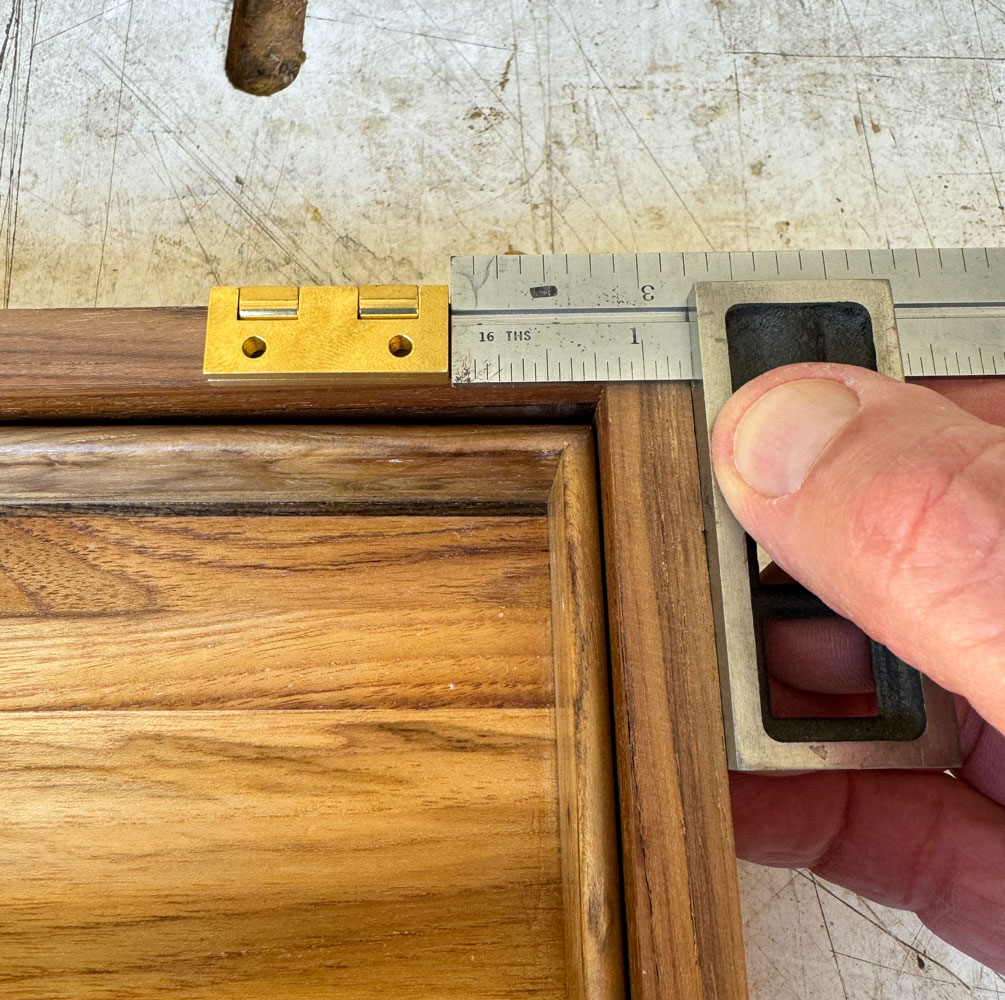
I'm going to set them about 1 1/4 inch from the outside of the box. I just think it looks better.
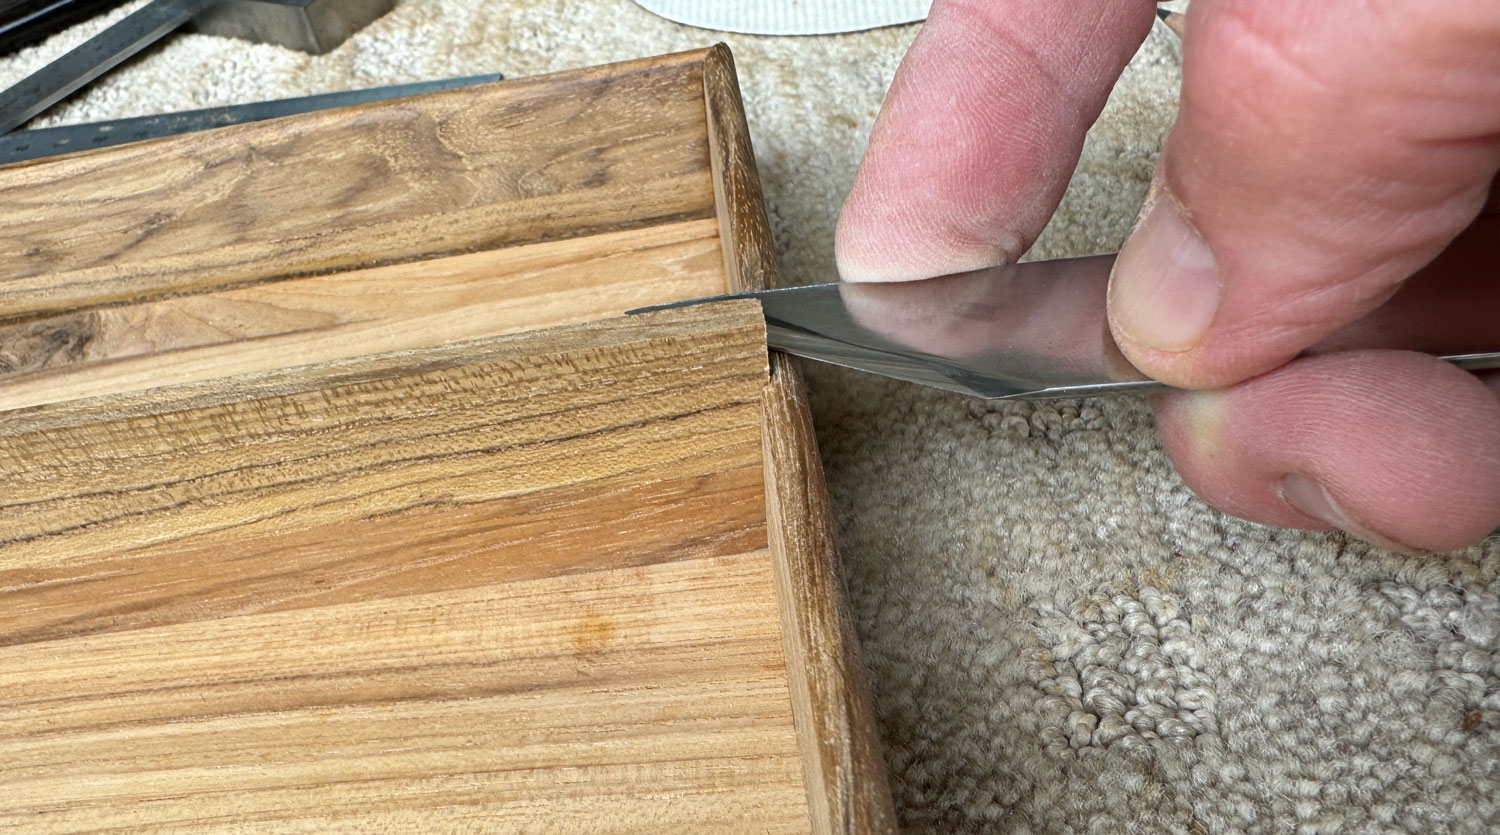
I've turned the box around and I'm going to make a knife mark 1 1/4 inch from each end.
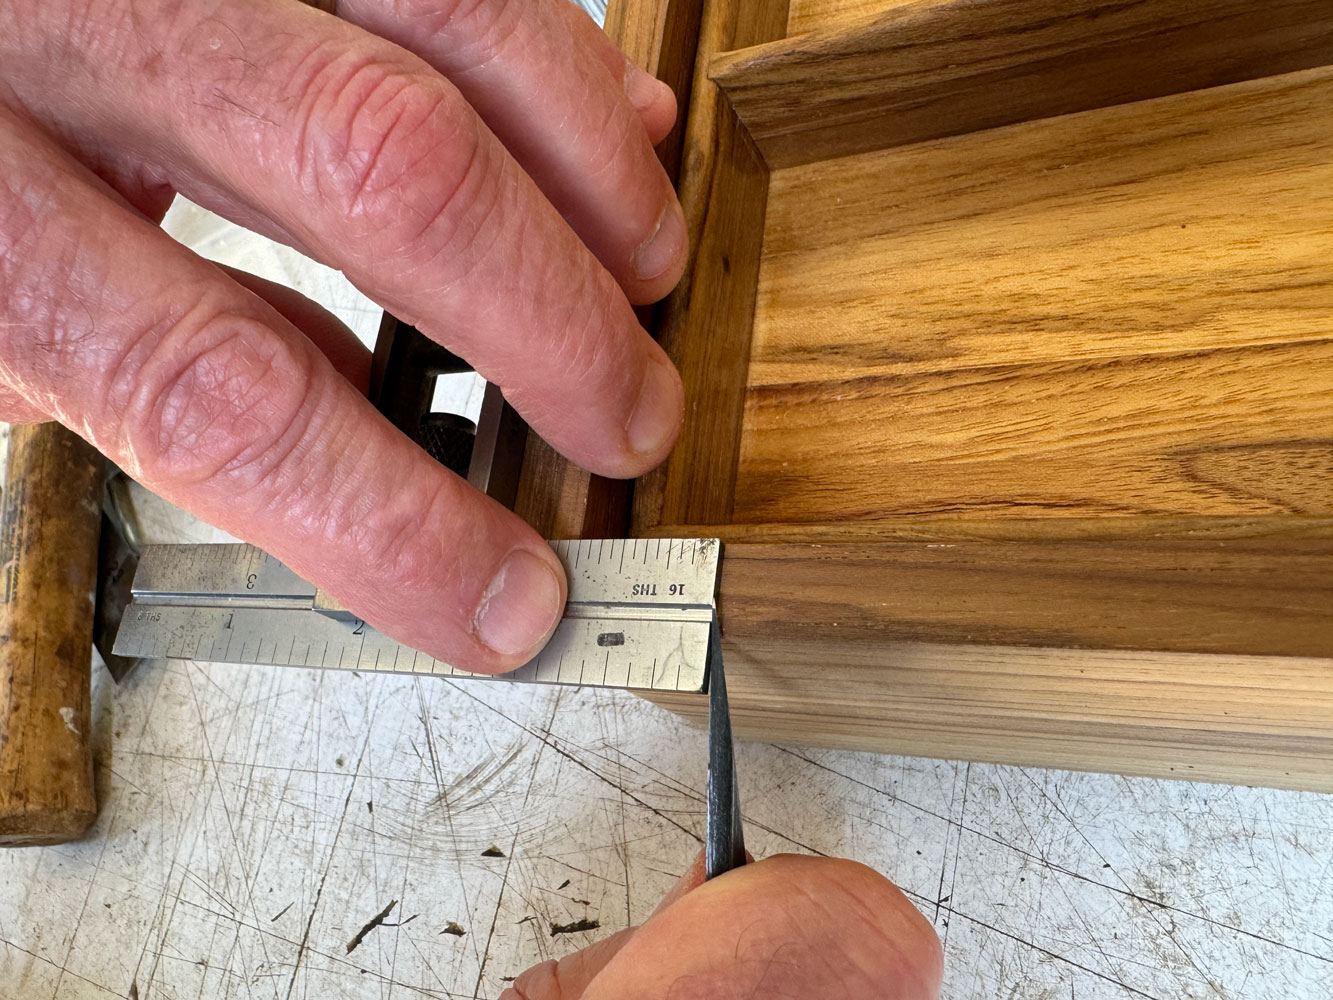
Here's what the mark looks like.
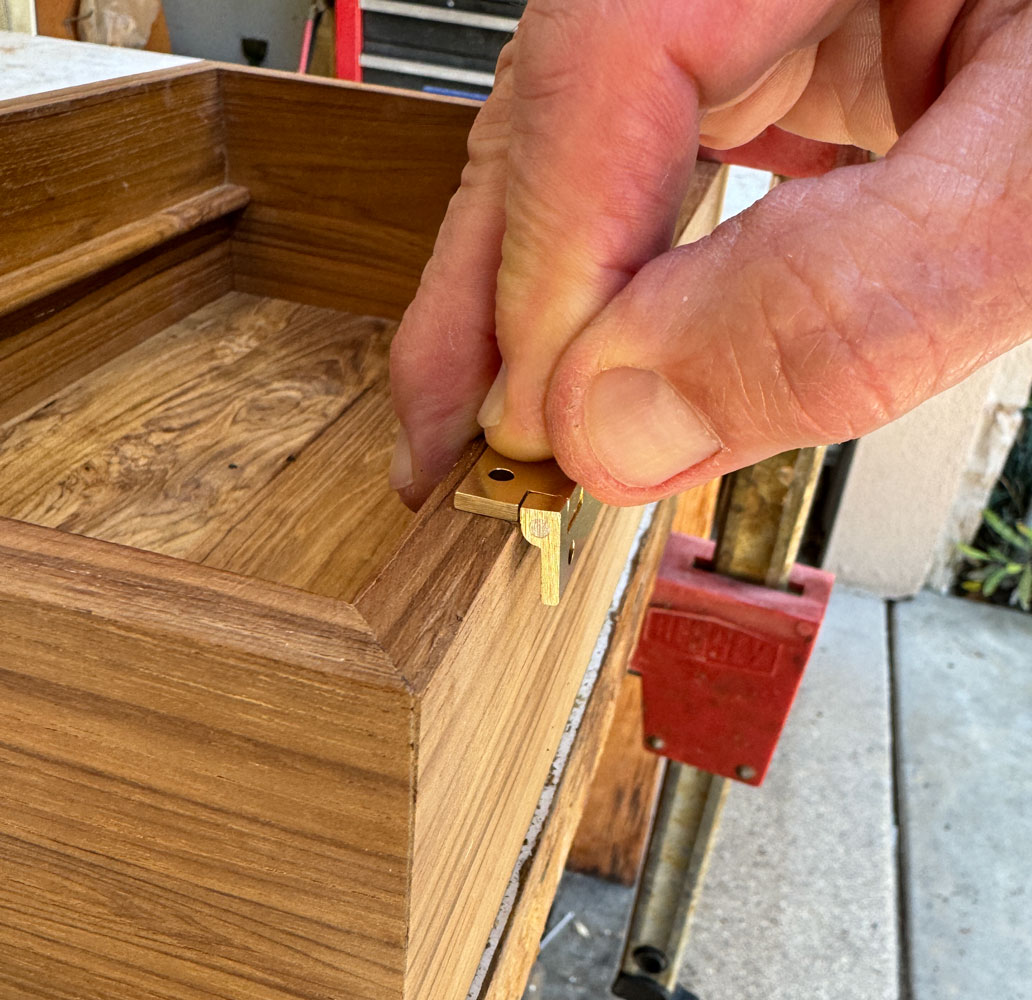
Now I want to mark for the hinge mortise. I open the hinge and place it upside down on the edge of the box. I align the edge of the hinge leaf with the knife mark, and push the hinge towards the box until the hinge knuckle is against the box.
Then I use a knife and mark around the hinge leaf. I'm using a single bevel knife here so I can get close to the edge of the hinge leaf.
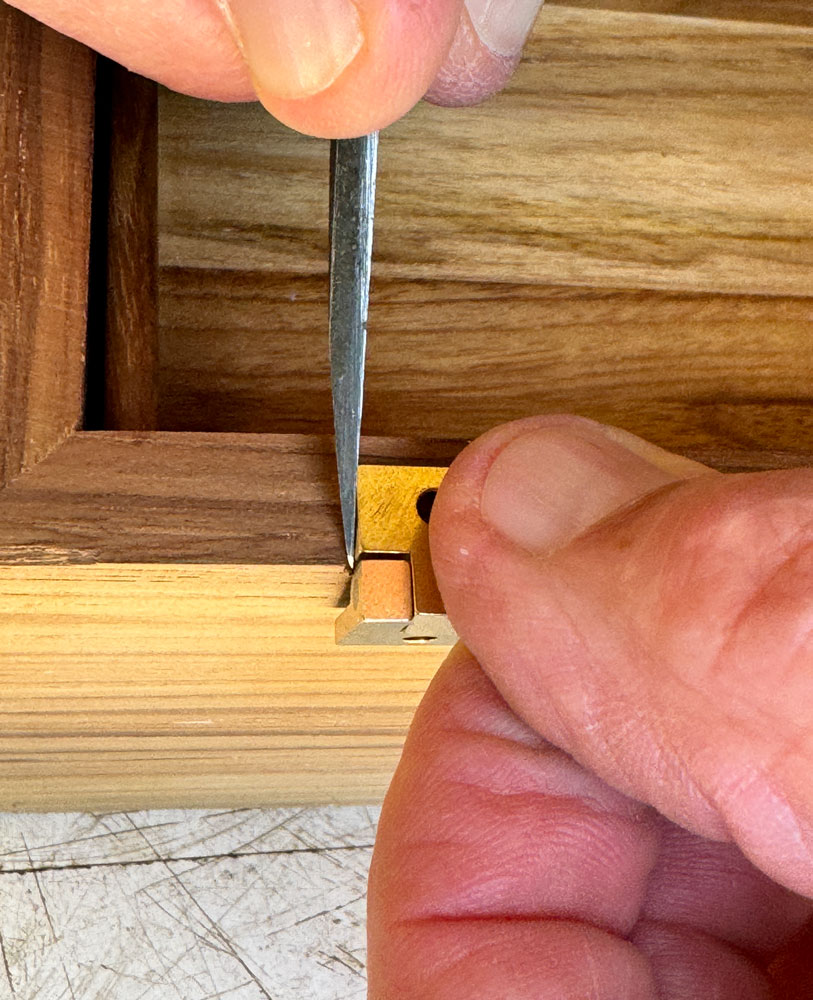
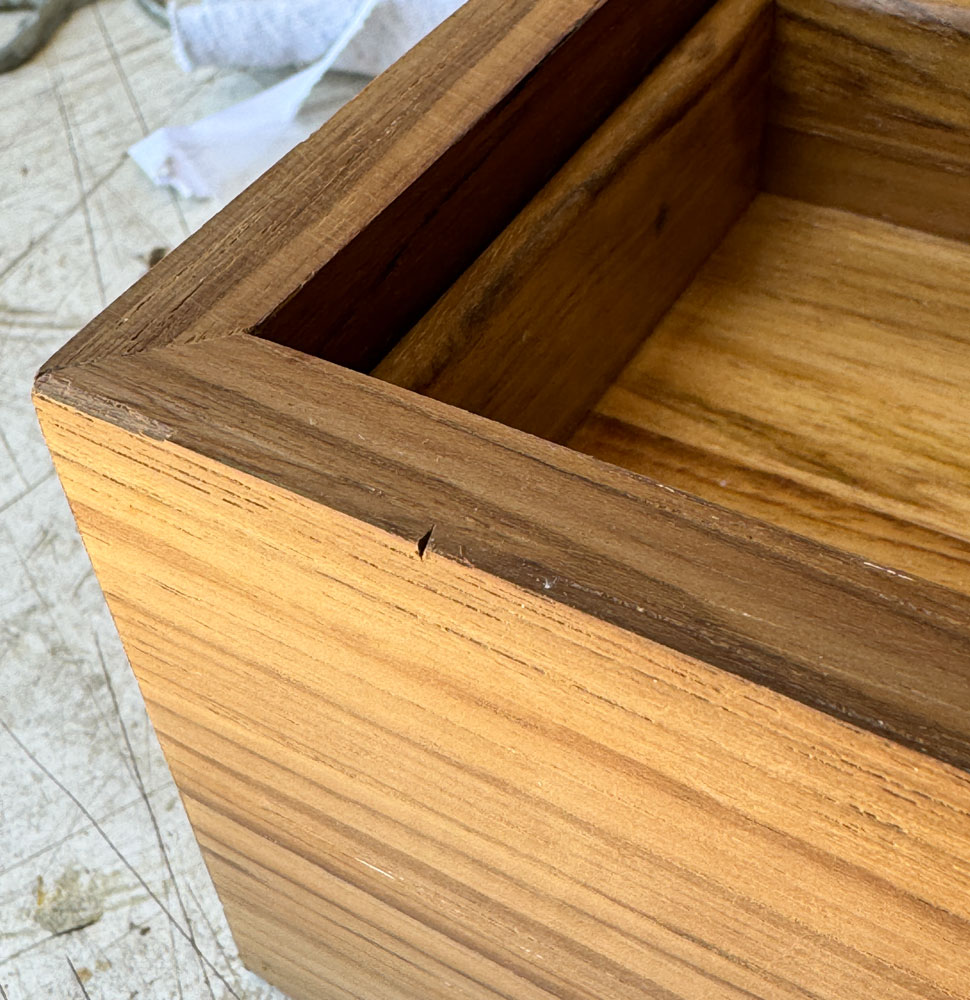
Here's what I wind up with. The lines are not that obvious so you may want to use the knife to mark them deeper, or trace the lines with a pencil.
I'm going to use a hand held router to route out most of the waste. But before I work on the box, I'm going to route the hinge mortise on some waste wood to make sure everything is set up properly. Here's my first attempt.
Not deep enough.
I won't bore you with pictures of gradually adjusting the router and making the mortise deeper. Here's where I wound up. You'll notice that the mortise is a bit deeper than the thickness of the hinge leaf. This is intentional. The top is thin so I'd rather set the mortise into the side a bit deep so that I can make the mortise in the top a bit less.
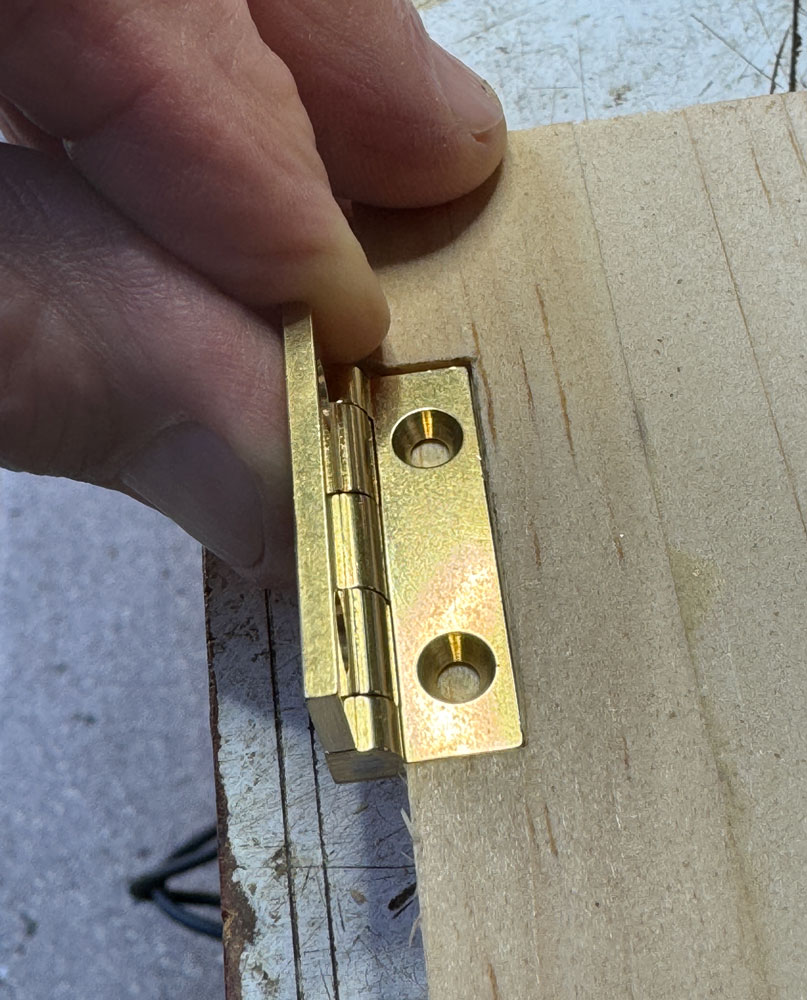
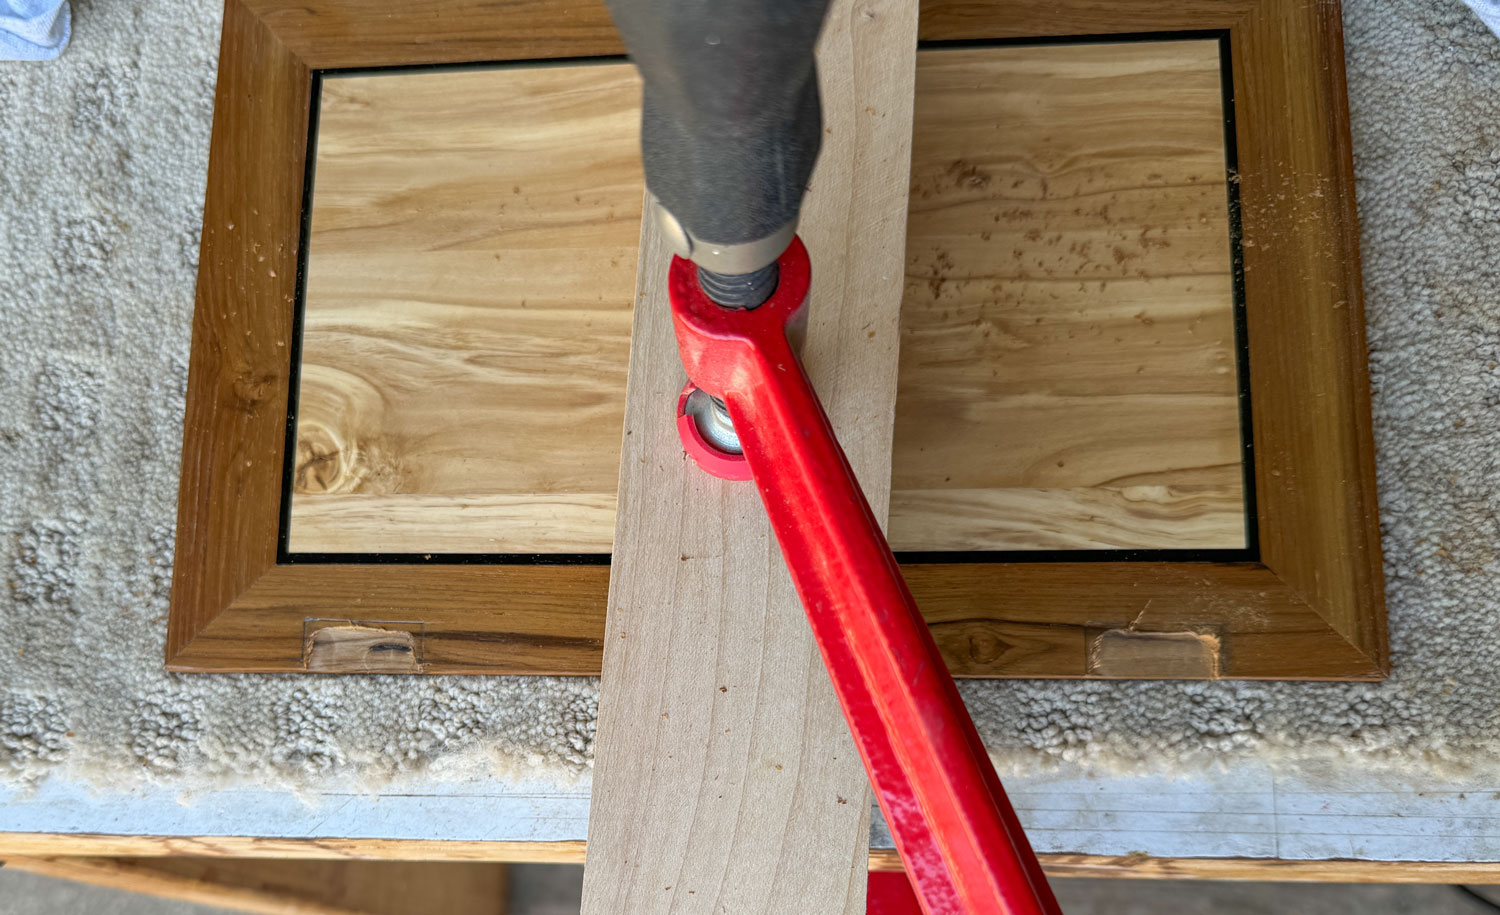
Now I'm ready to cut the mortises on the side of the box. I route as close to the lines as I dare. I'll finish with a chisel. Note the block of wood clamped where the mortise is. It wasn't there when I did the routing. The reason for doing this is to prevent the wood from breaking off when I chisel the waste out.
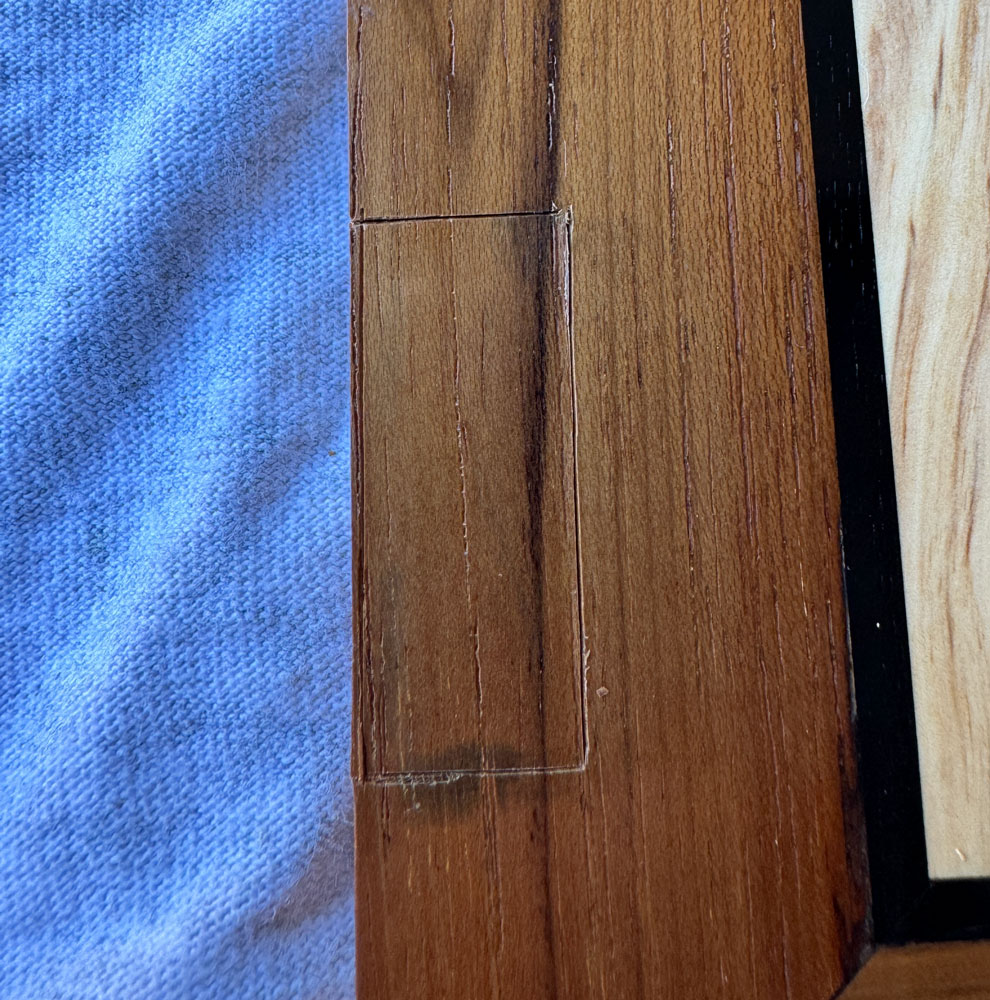
Here's the fit after I chisel out the waste. It just needs a small amount of touch-up from here.
To drill the holes for the screws I'll use a Vix bit.
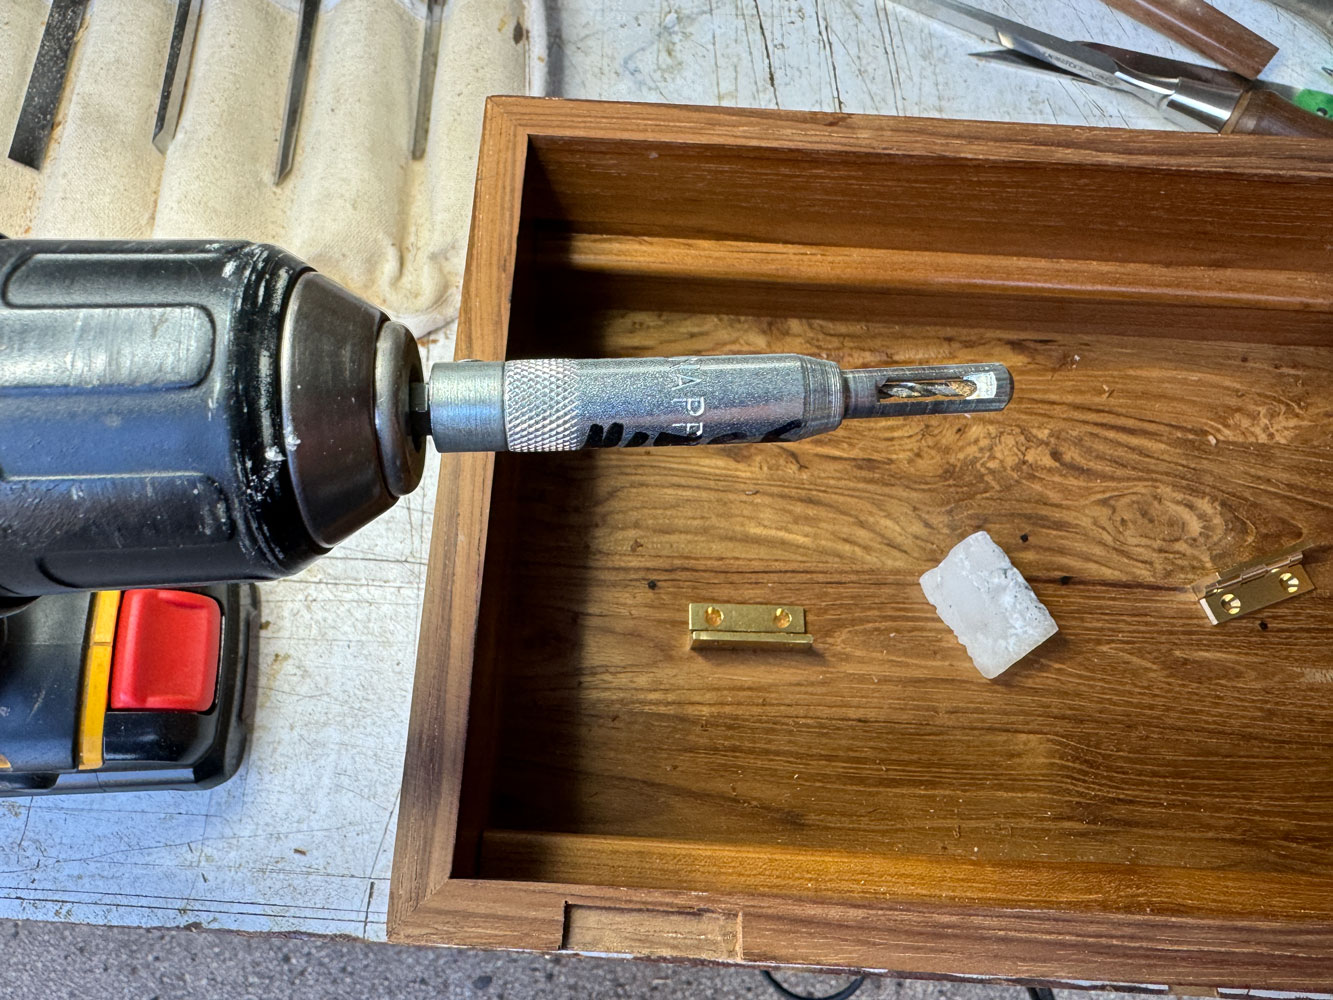
Here's the Vix bit being used to drill a centered hole for the hinge. When I really drill the hole, I'll have my hand on the hinge to hold it into place.

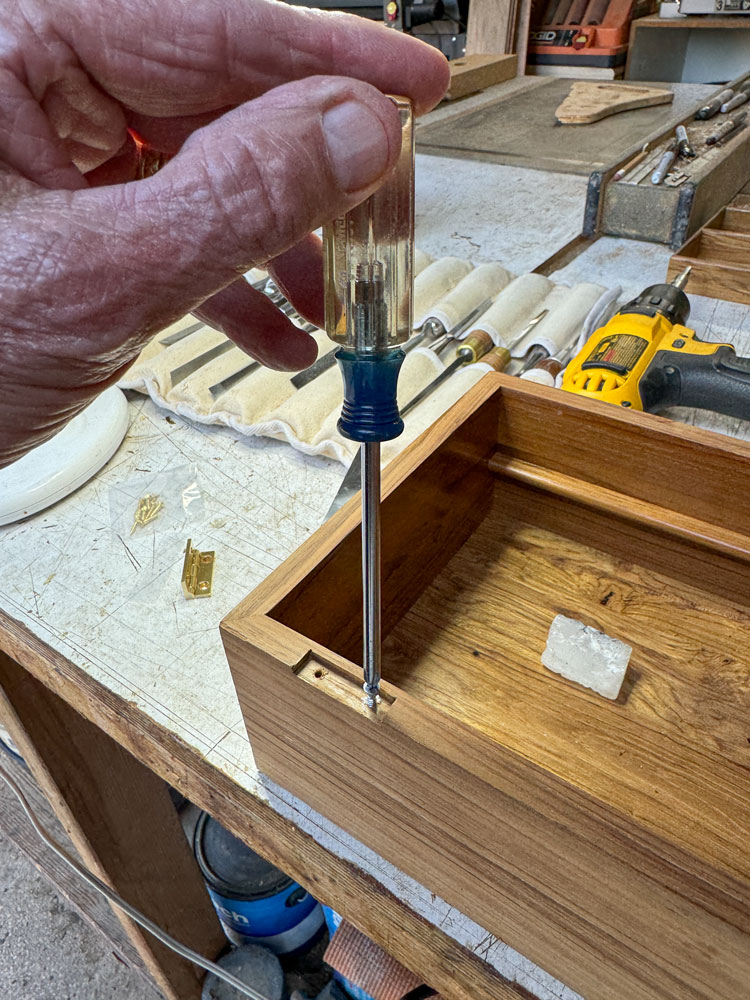
I use the steel screw that Brusso provides and drive it into the holes made by the Vix bit. This will create some threads in the holes for the brass screws. I put some paraffin on the steel screw. It reduces friction as the screw goes into the wood. If you use a brass screw for setting the holes, you risk breaking the brass screw in the hole. The steel screw is much stronger.
Drive all the screws by hand - do not use an impact driver. If you break a brass screw in one of the holes, the recovery process is a pain.
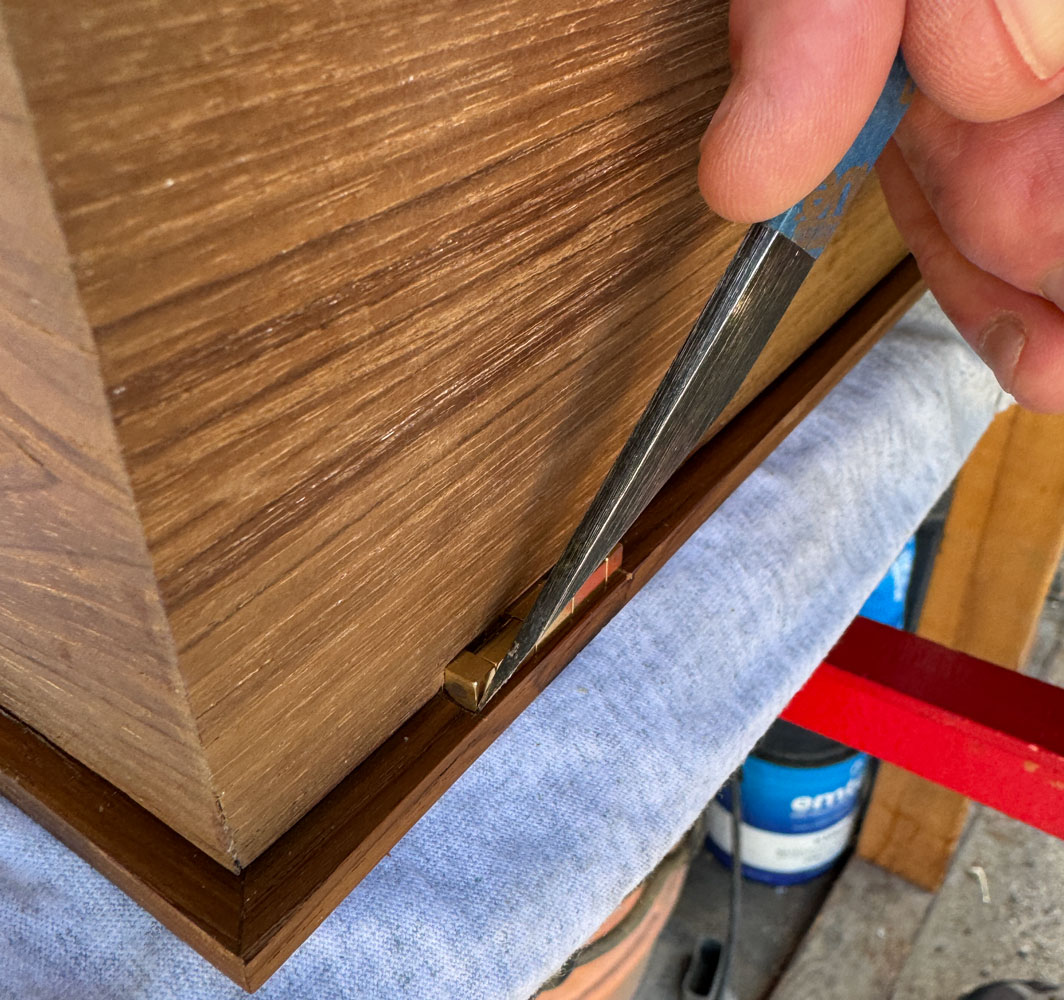
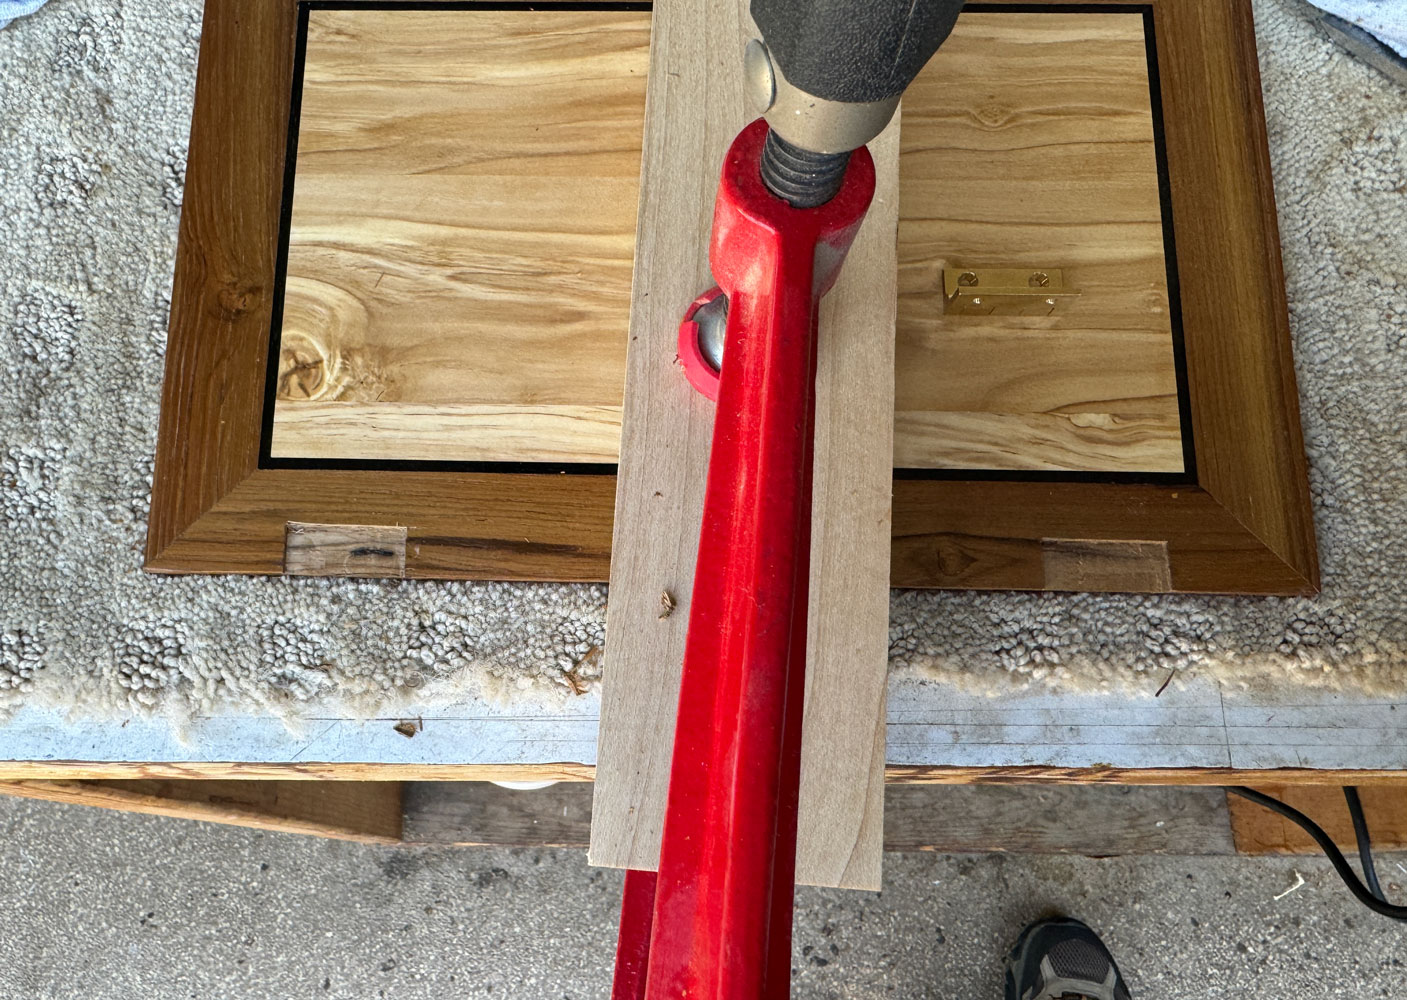
Here are the hinges set into the side of the box. You may find that you need to relieve the outside edge of the hinge mortise because of the way the hinge is made. If the hinge doesn't open and close easily, relive that edge just a little bit.
Of course, this is only half of the hinge setting. Now we have to set the hinges into the top. I want the top to overlap the box by about 1/4 inch all around so I put the top down and place the box on top of it.
I clamp the box to the top. I'm going to mark the hinge positions and I need to make sure nothing moves as I mark the placement of the hinges. It's no so tight that I can't tap the box to adjust the position.
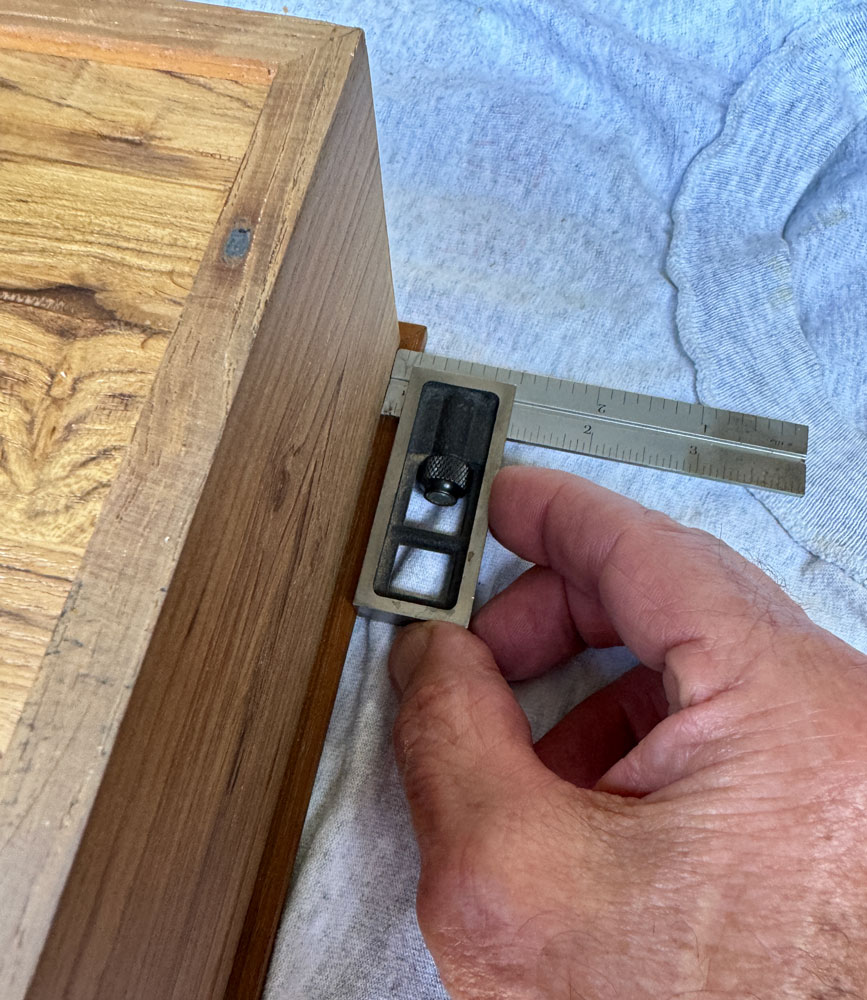
I'll use the double square to check the overlap of the top. I wanted 1/4 inch but it came out to a bit over 3/16 inch. I want both sides equal and the front the same as the sides. Don't worry about the back - no one is going to really see what the overlap is back there.
It can take some time to get everything adjusted just right.
I mark both sides of both hinges.
And the back of the hinge.
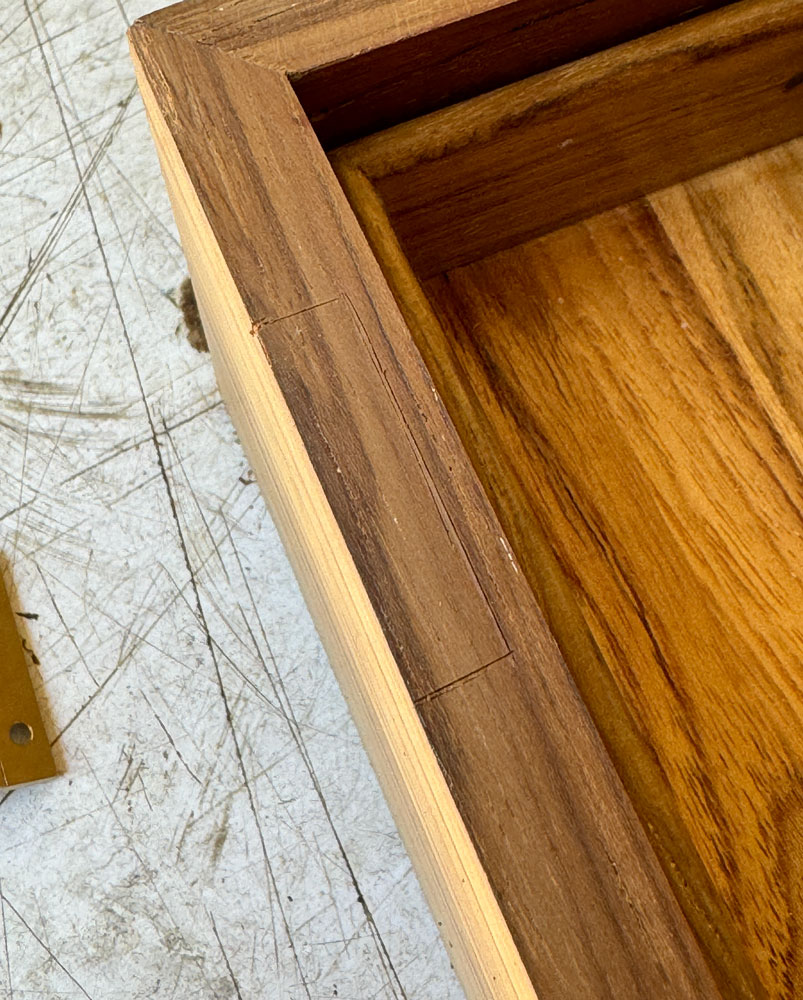
Then remove the box and this is what the marks look like.
I remove one of the hinges from the box and place it between the marks. Using a knife, I'll mark just the top end of the hinge. You just can't hold the hinge in place to trace the line with a knife.
Then I use a double square, adjusted to that mark and scribe a line.
Here are what the marks look like.
I'm now ready to route out the waste. When I made the hinge mortises on the box, I set the hinges down into the mortise. Here, I'll leave the hinges proud of the surface of the top. I do this because the top is thin and I want more wood under the hinge, primarily for the screws used to attach the hinges. It would be bad if the screws went through the top.
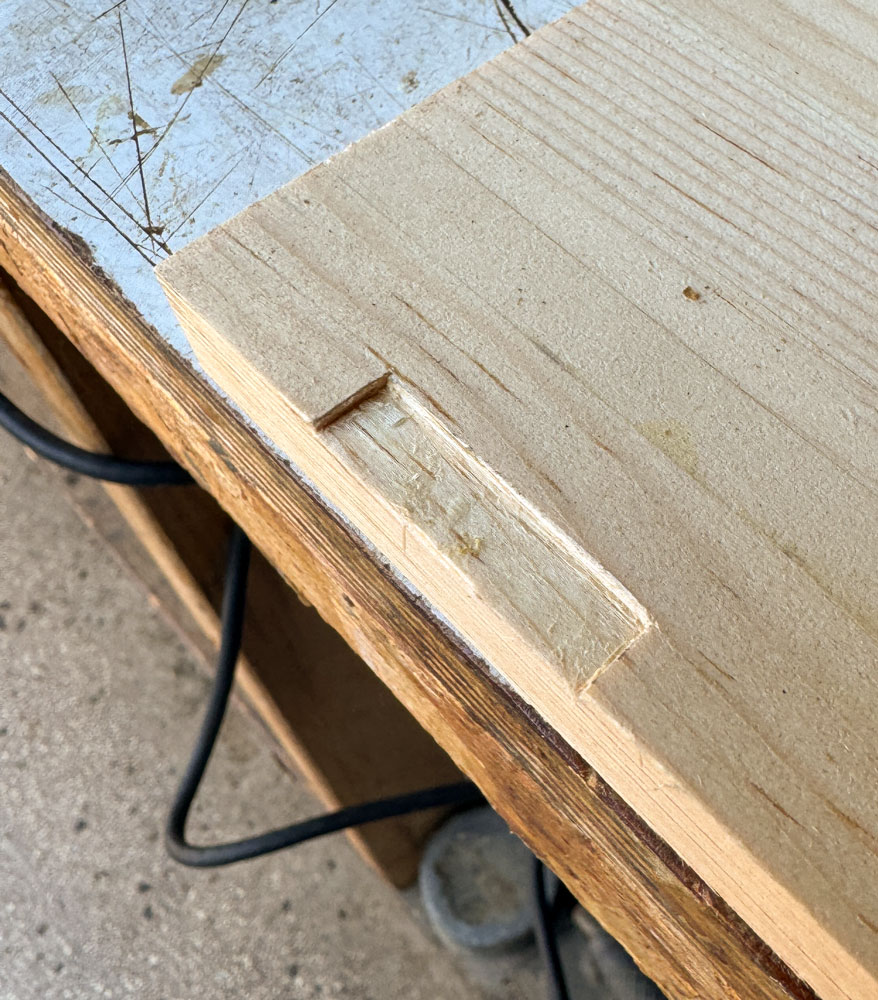
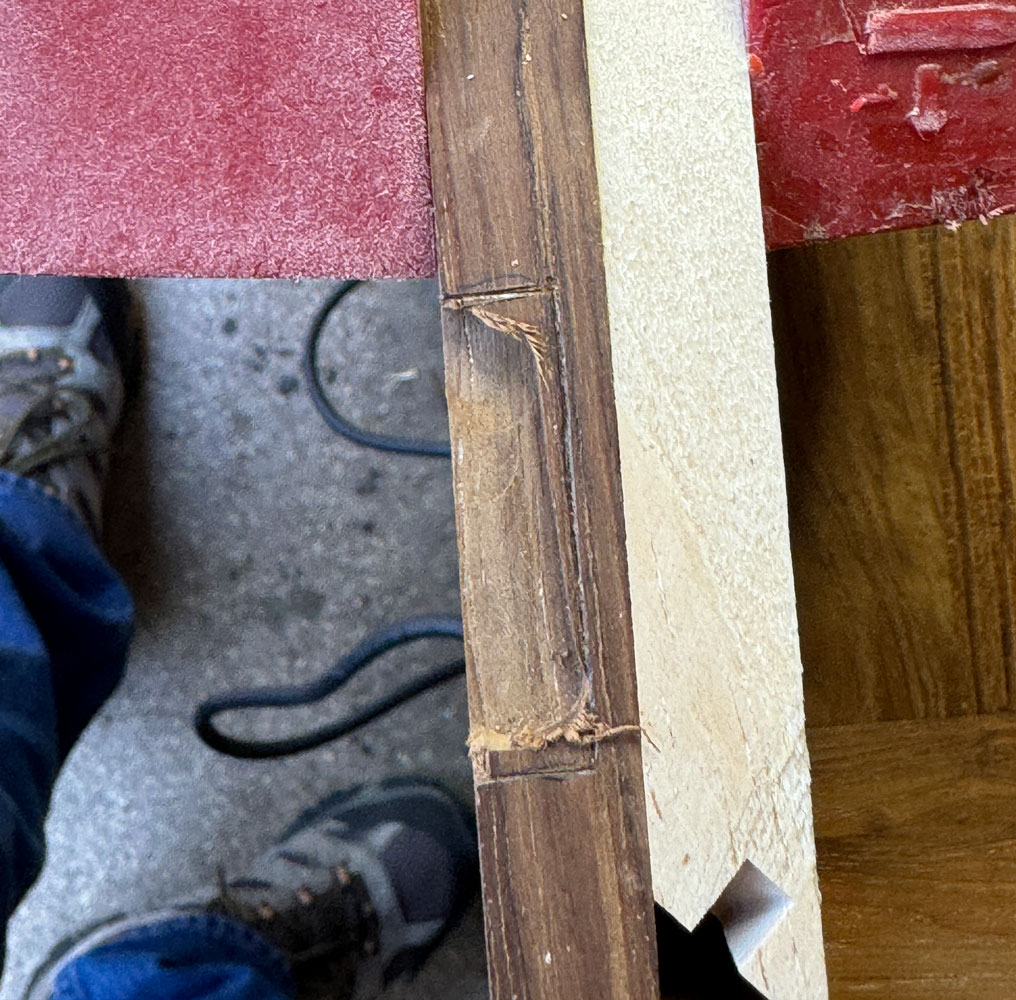
This is what it looks like after routing. I clean up to the lines VERY carefully. The wood here is not that thick so I have to be gentle when removing the waste. I used a knife to clean up the mortises, not a chisel.
Here are the hinge mortises cleaned up.
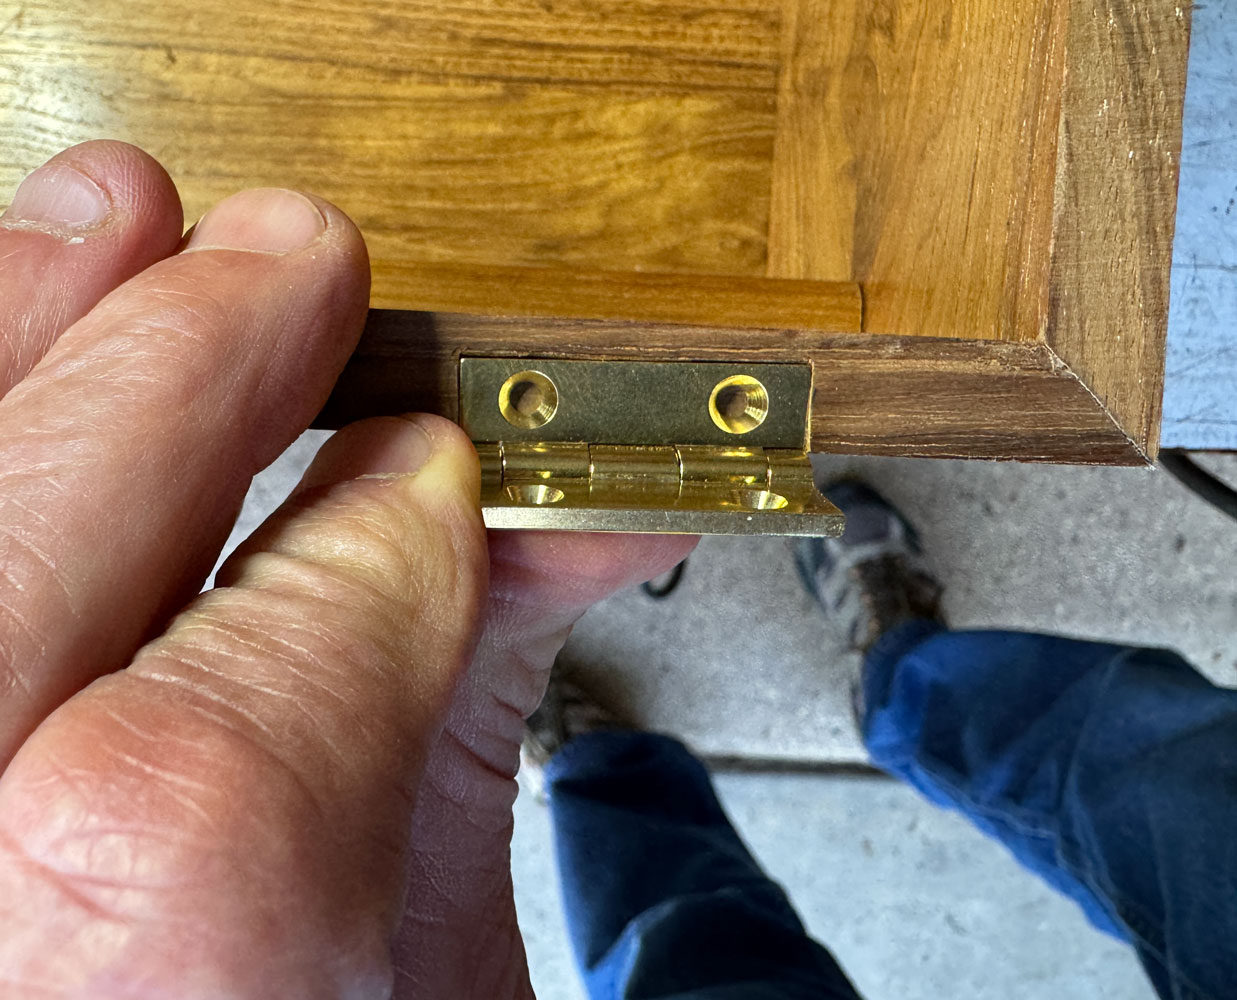
I want to check to see if the mortises in the top match to the mortises in the box. I attach both hinges to the box and place the top on. The hinges fit into the mortises on the top fine.
Next, I have to put some screws in to attach the hinges to the top. But the top is very thin so I certainly can't use the screws that came with the hinges. I'm going to use these #3 x 6mm screws (about 1/4 inch). Some of that 6mm will be in the hinge so only about 3mm (1/8 inch) will go into the wood. But that's enough to hold the hinge firmly. These are steel screws coated to look like brass.
I have to mark where the screws will go. I can't use a Vix bit because I might drill all the way through the top. So I 'm going to use this sharp awl and eyeball the center of the hole.
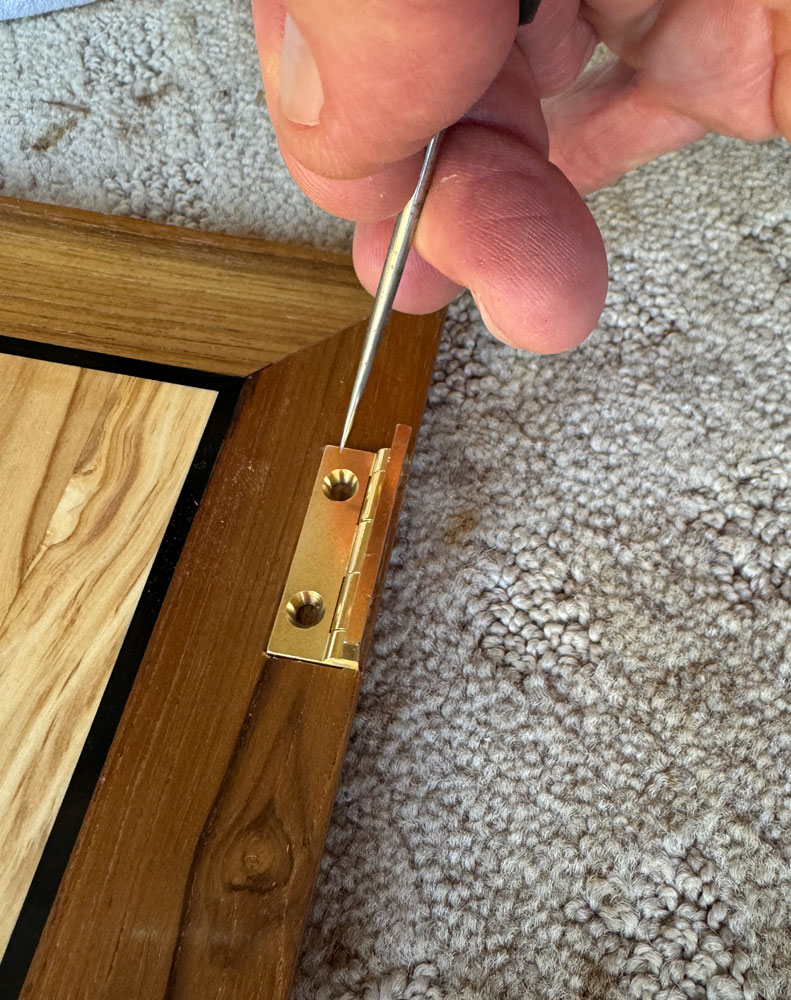
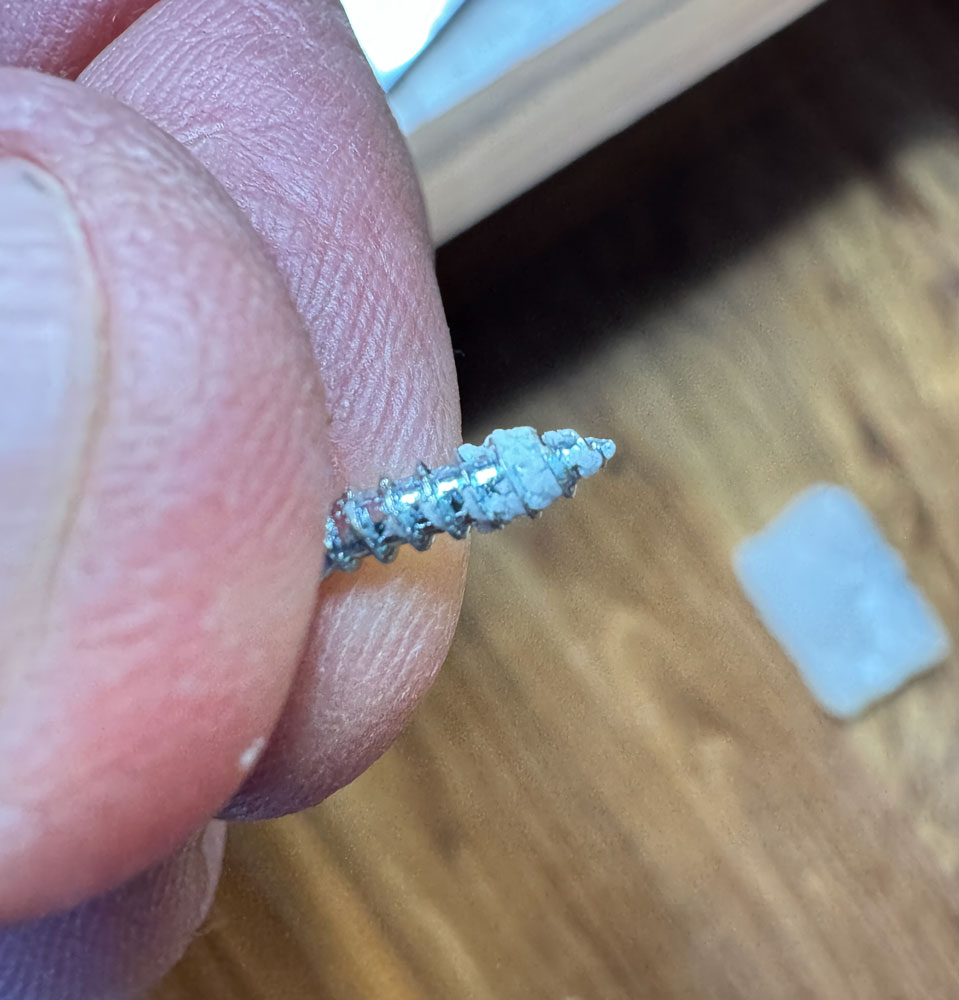
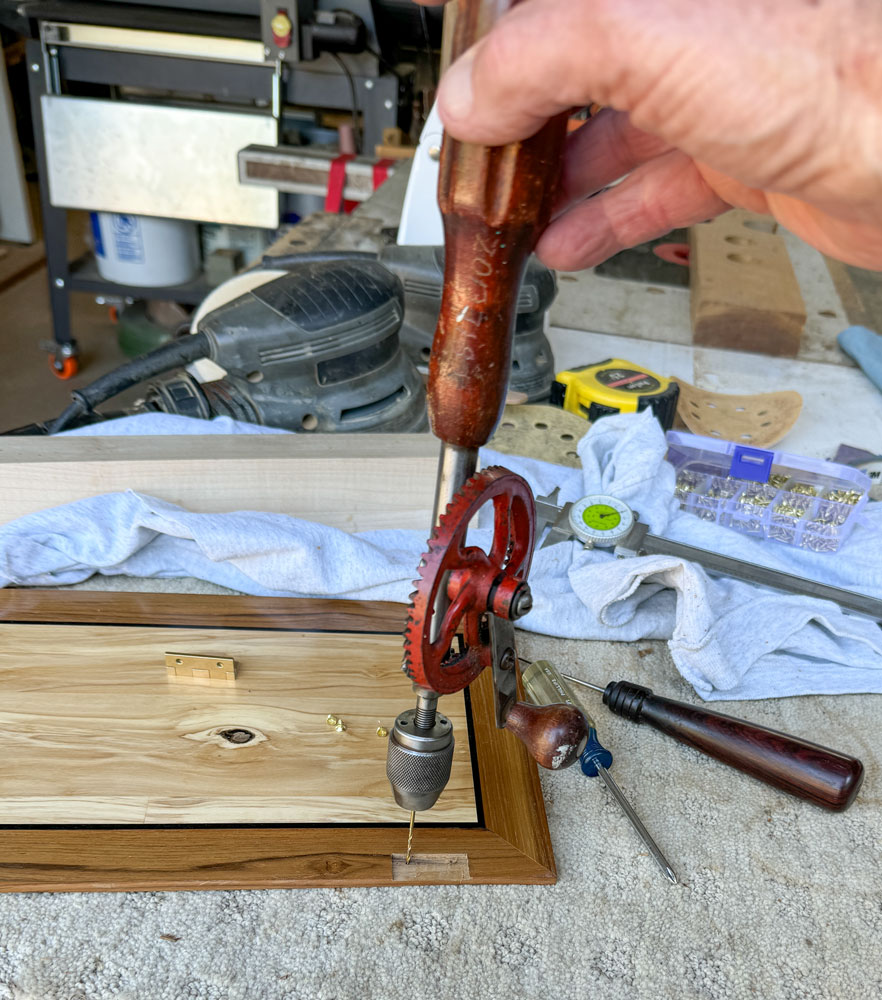
I need to drill a pilot hole because teak fractures fairly easily. If I were to try to put the screw in without a pilot hole, the wood would break in the area of the hole. I'm very afraid of drilling all the way through the top, so I'll use this hand drill. I have better control of the depth than if I used a cordless drill.
I drill a 1/16 inch hole, and not very deep.
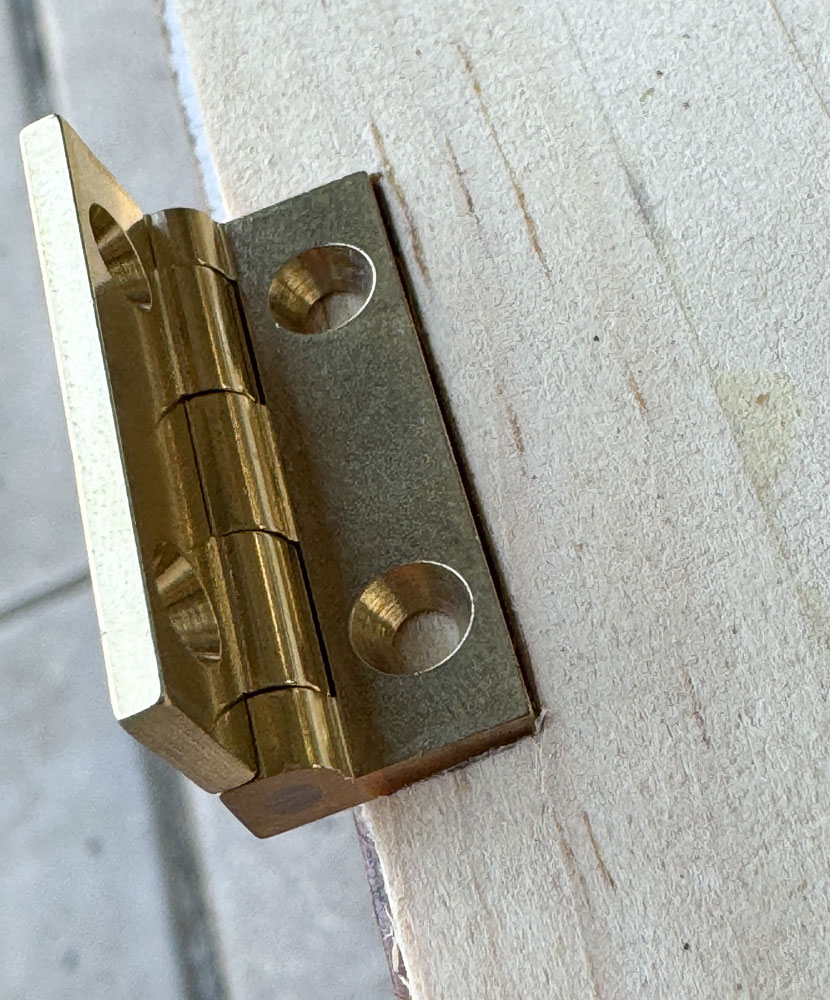
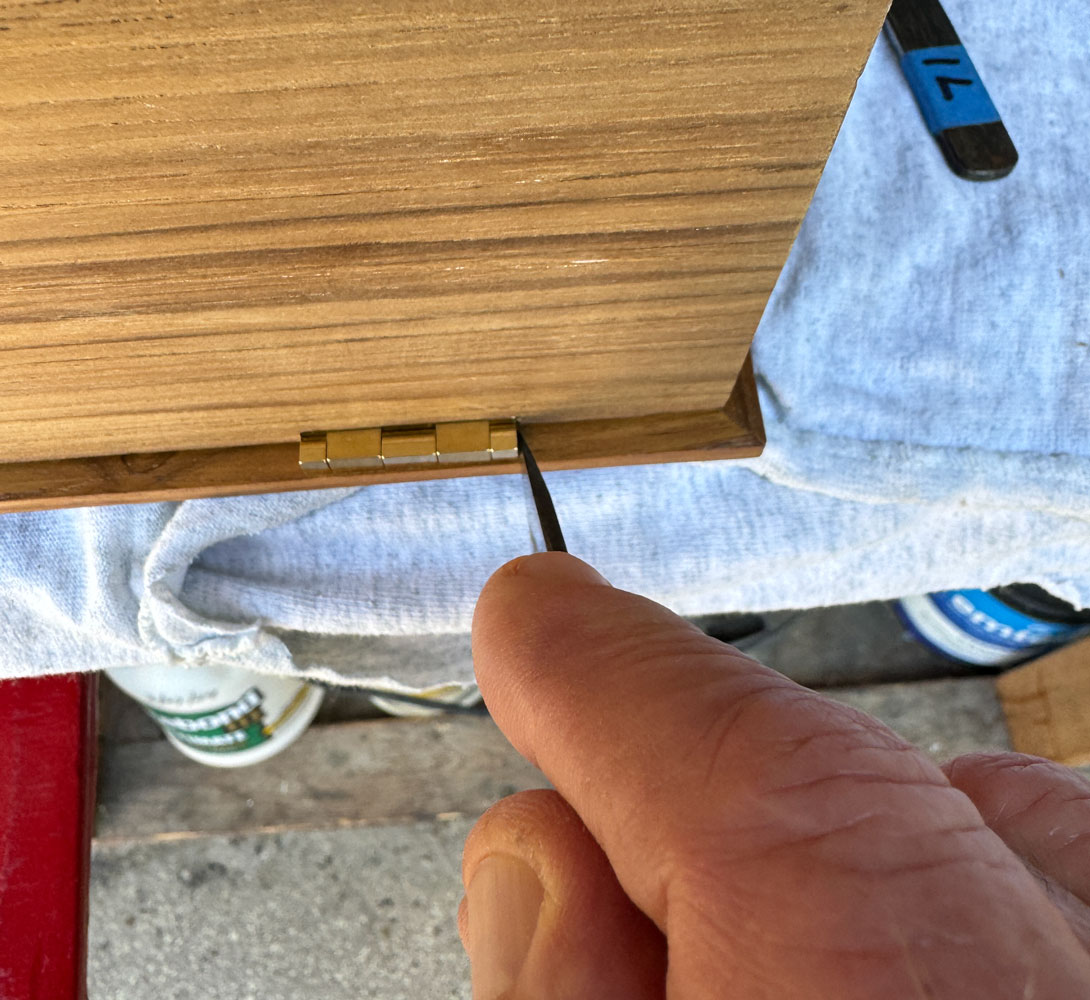
Then I screw in the small screws by hand. One unusual thing particular to these Brusso hinges - the knuckle on the hinge is square, so when the hinge opens, it requires some relief space under the knuckle. This is what I had to do to keep the hinge from binding.
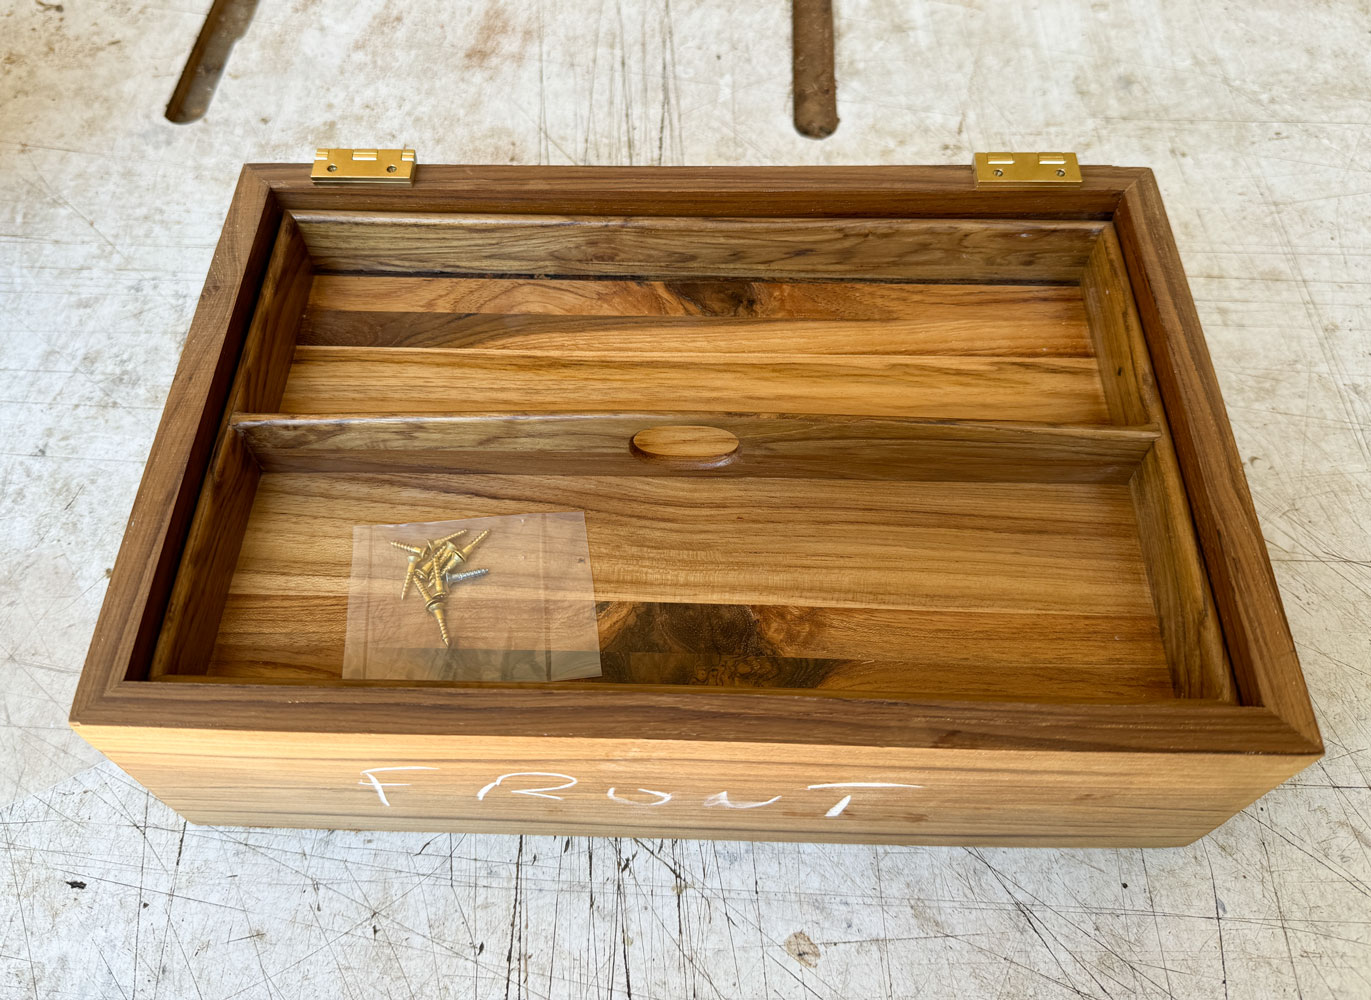
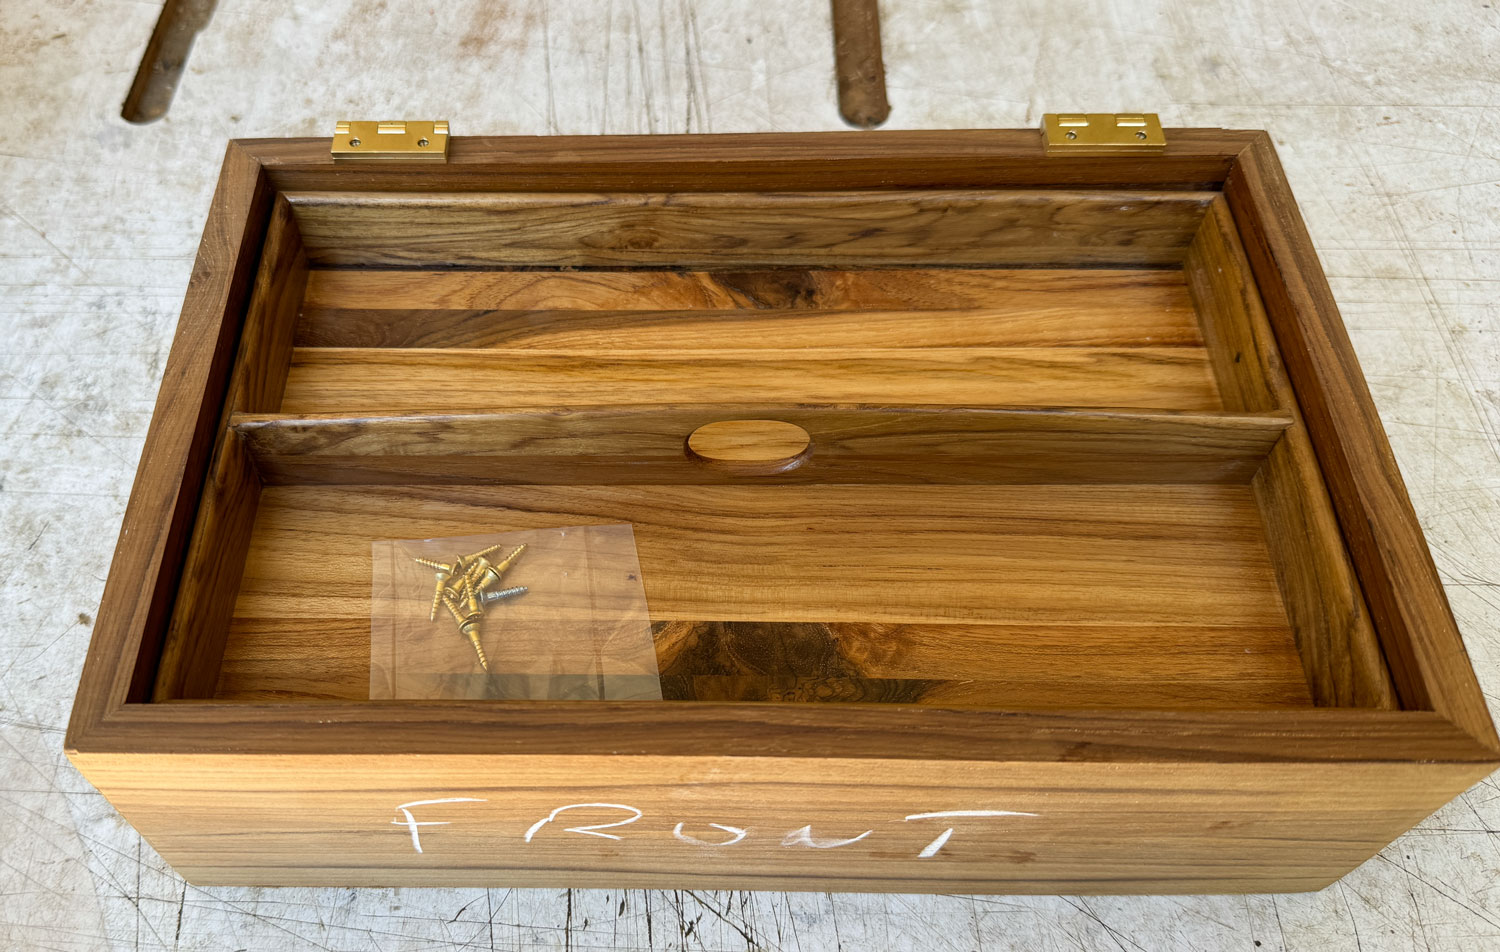
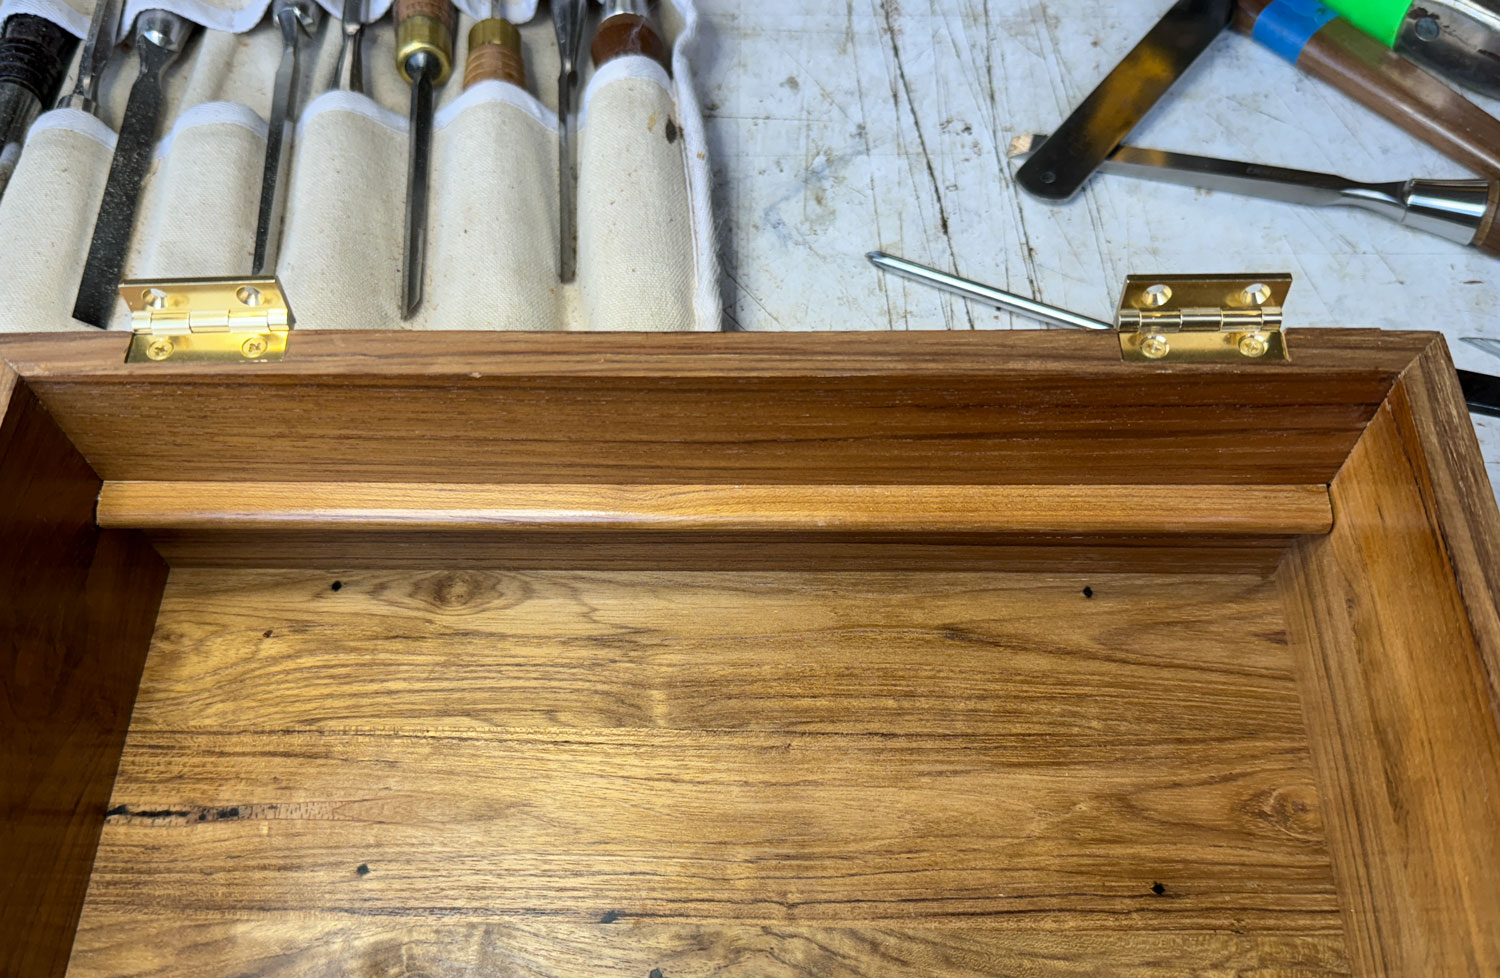
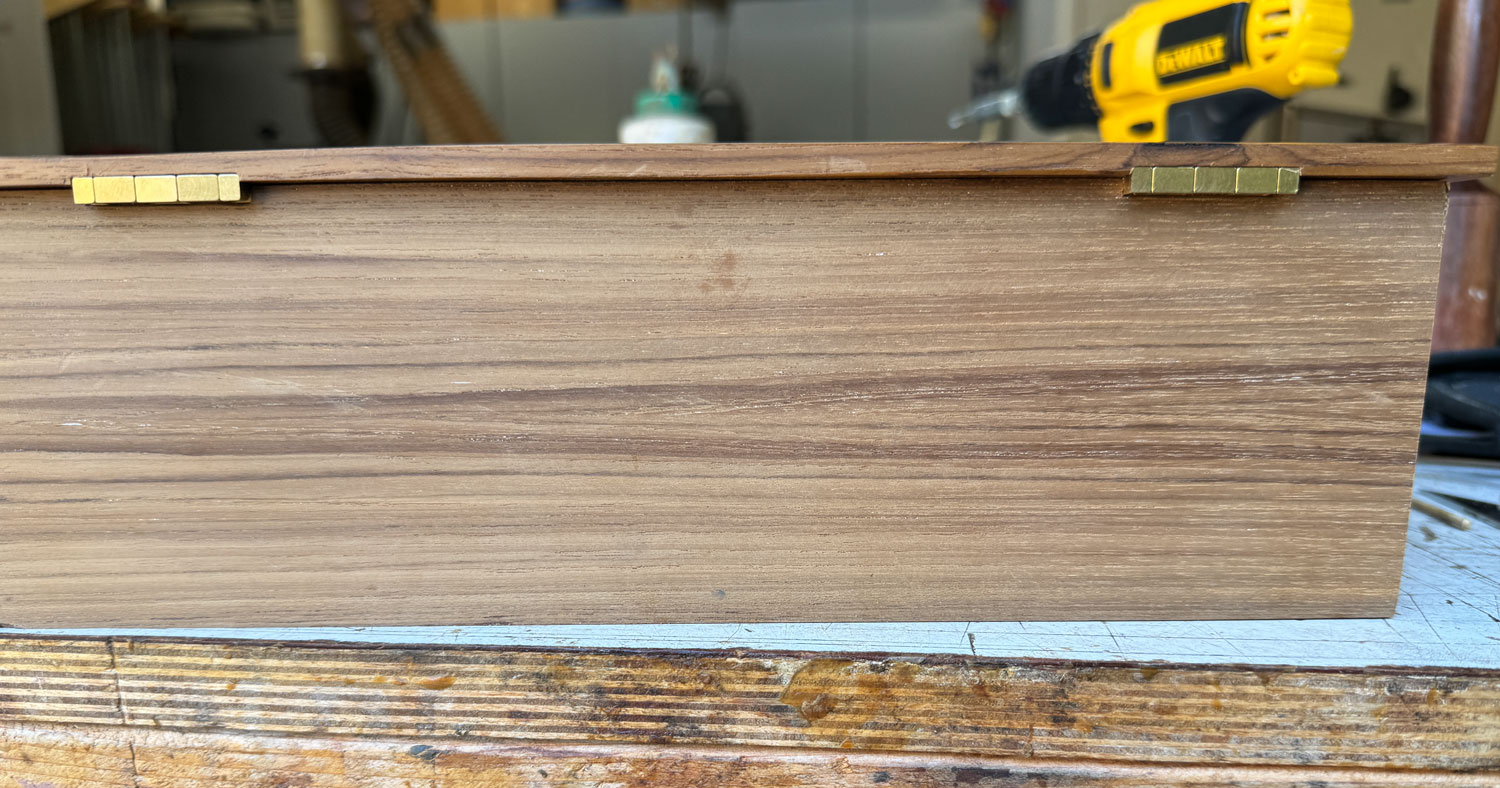
I attach the hinges to the top first, and then attach the top to the box. I find it easier to do it that way. Here's the unit with the hinges all done.
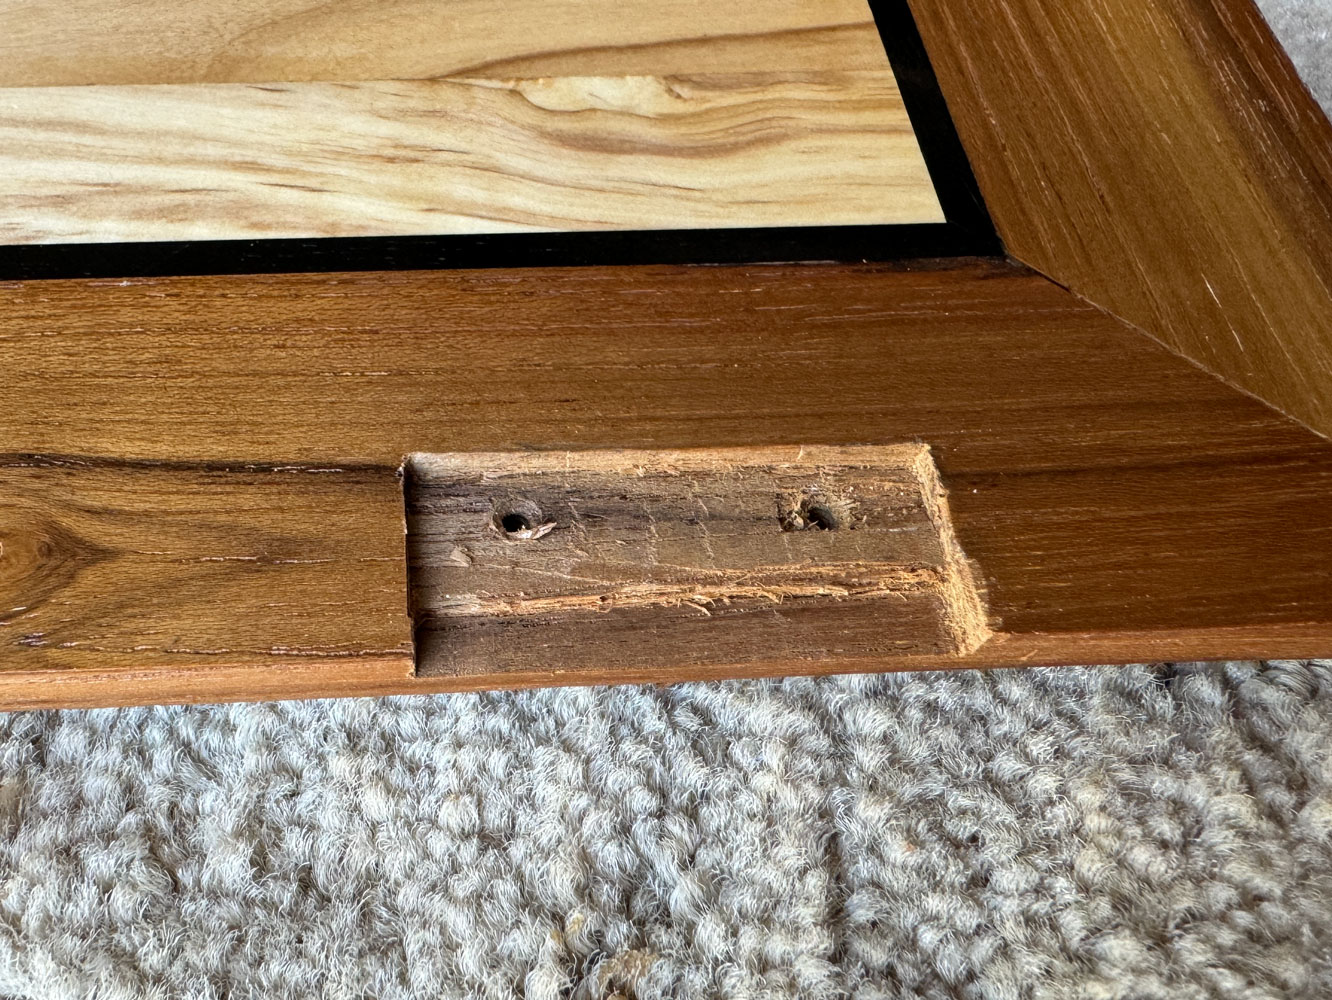
For the next step, I remove the top, just to protect it, and sand the outside of the box to 220 grit. Now, I'll make the molding that goes around the bottom. Since the top overhangs, the box needs something at the bottom to balance it visually.
I prepare some teak to 3/8 inch. I'll route the profile into those pieces.
And here's a closer look at the profile. You can use any profile you like. This is one I had.
I cut the profile into both sides of the teak pieces. Then I went to my table saw and cut the molding off of the teak piece. While I did this by cutting the profile on both sides of the board, a better, safer approach is to do the profile on two different pieces of wood. The way I did this the piece can tip down because the profile on the side against the fence doesn't provide good support.
This gave me four pieces of molding.
I cut the miters on the table saw, same way as I did before, and then glued them one piece at a time. I couldn't use clamps because of the shape of the molding so I held the molding in place with blue tape.
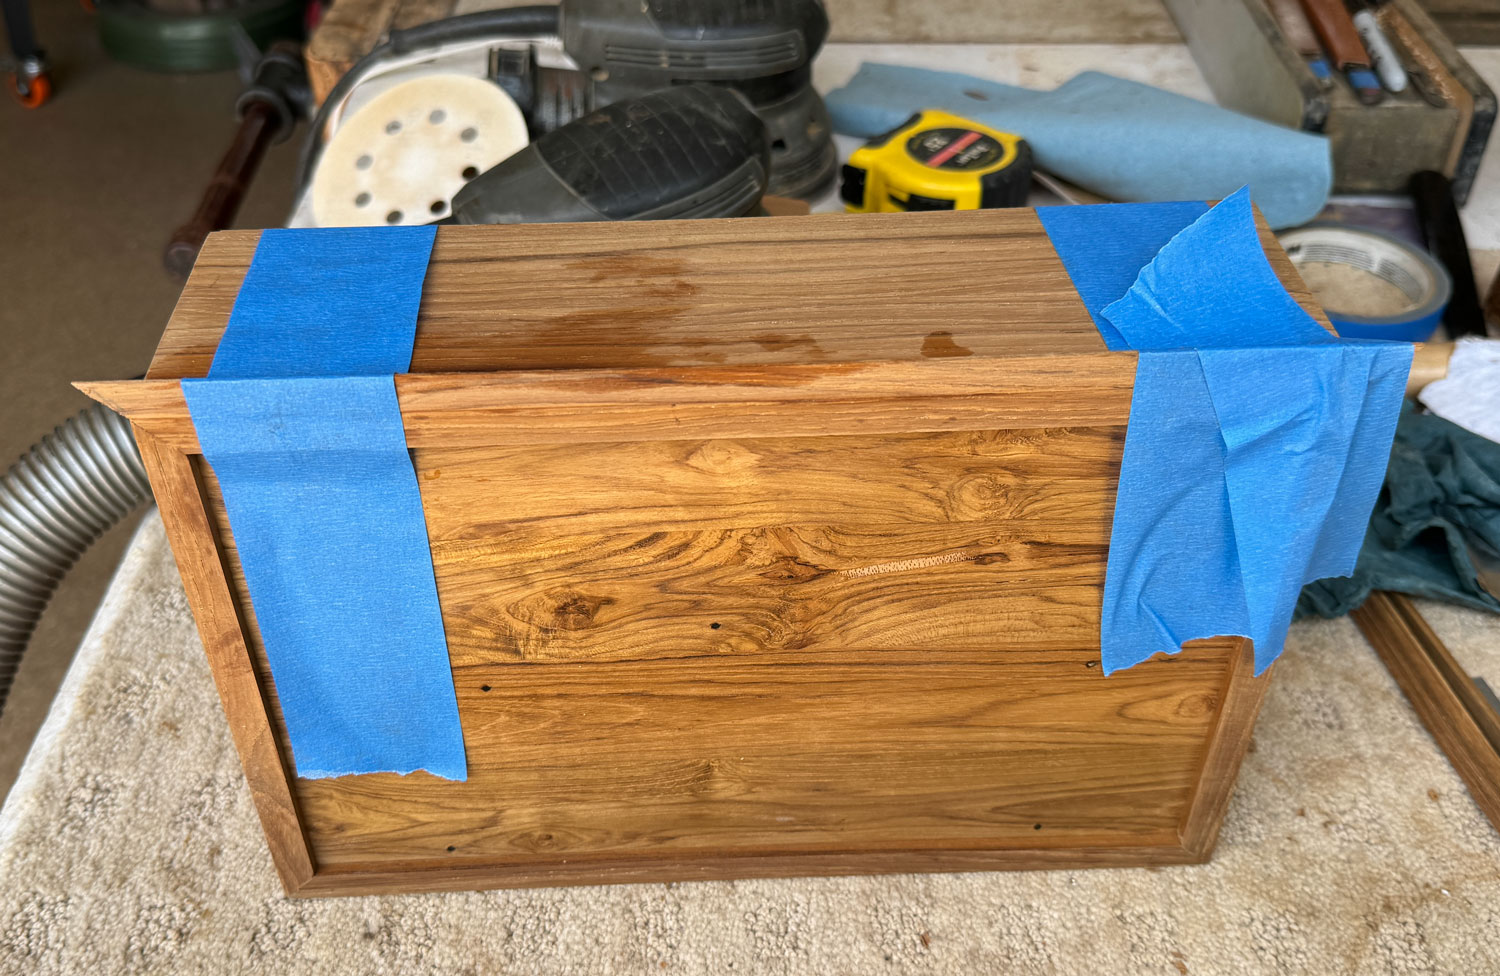
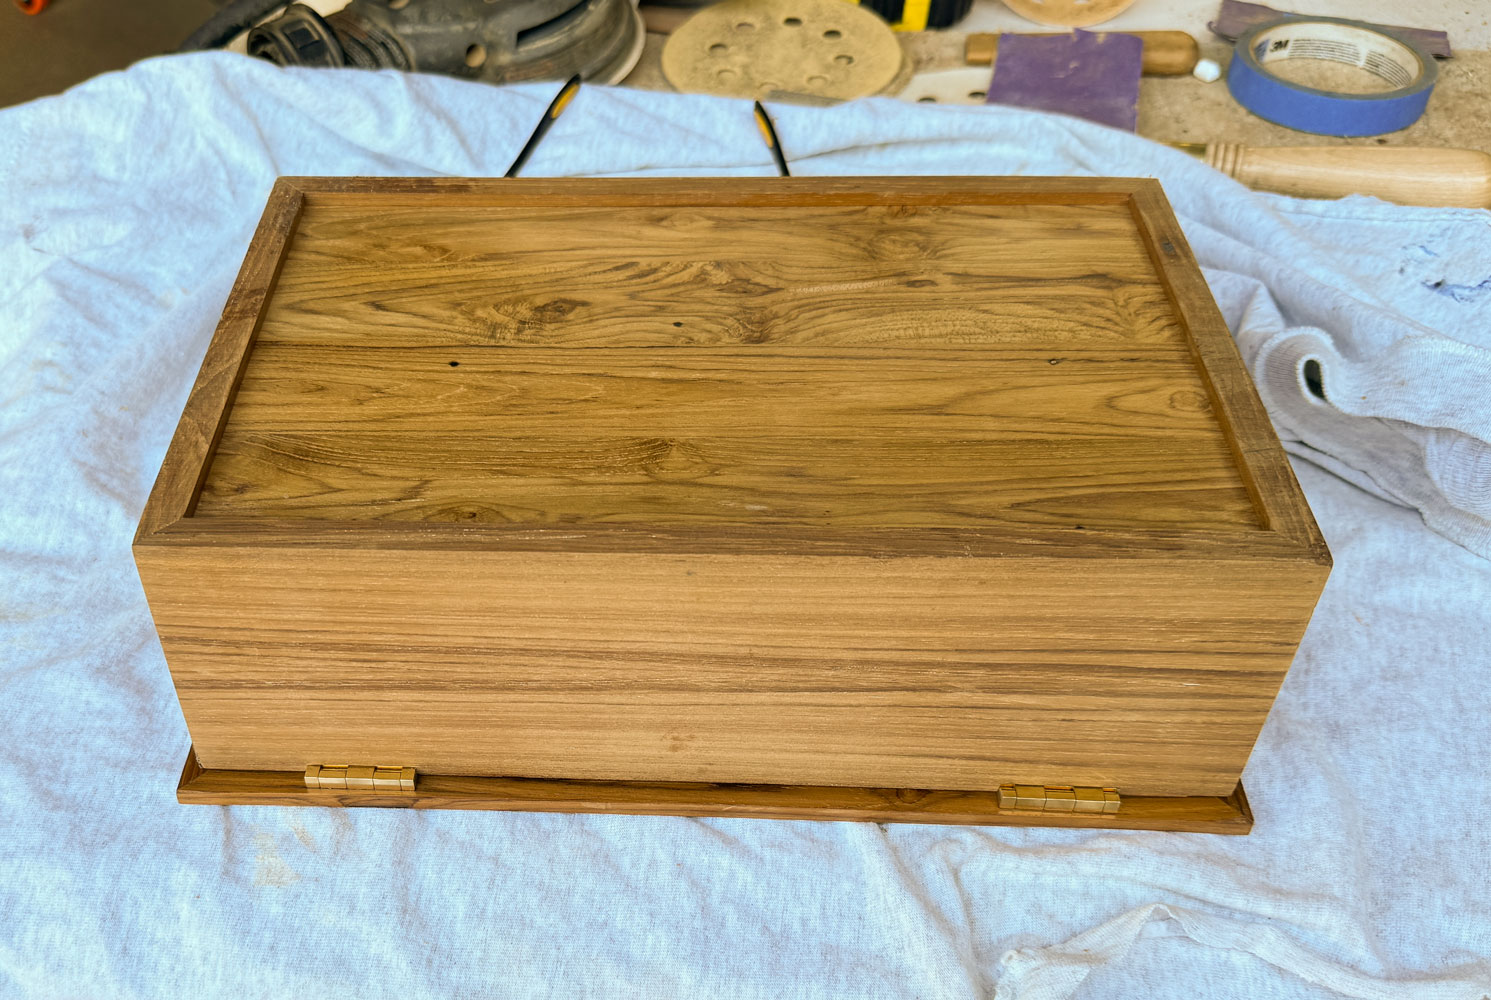
After I did all four sides, this is what it looked like.
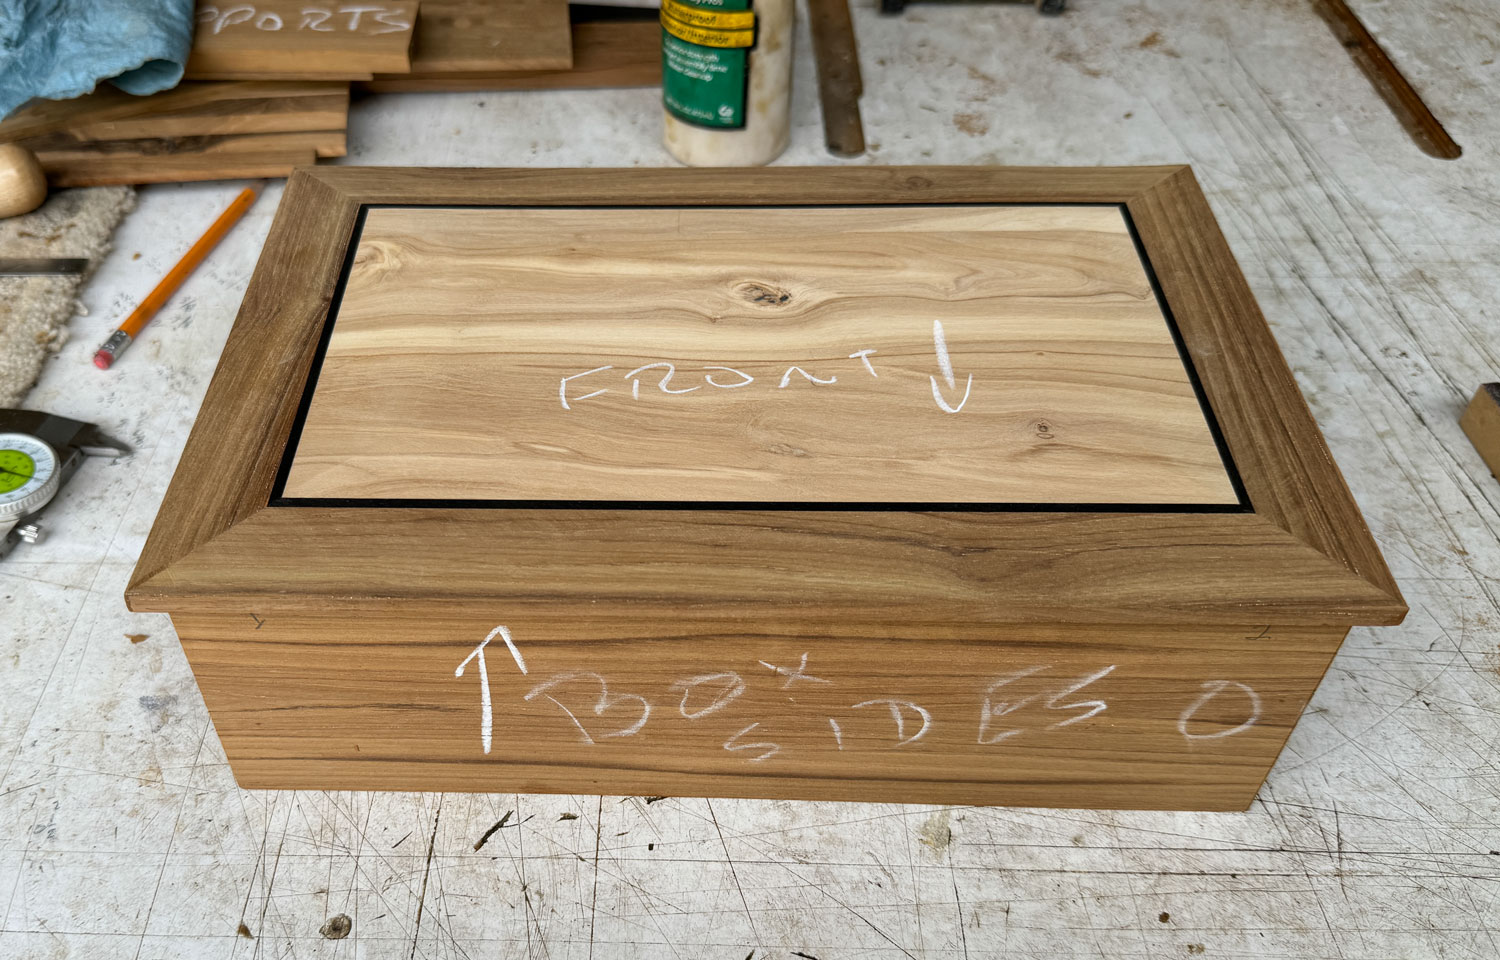
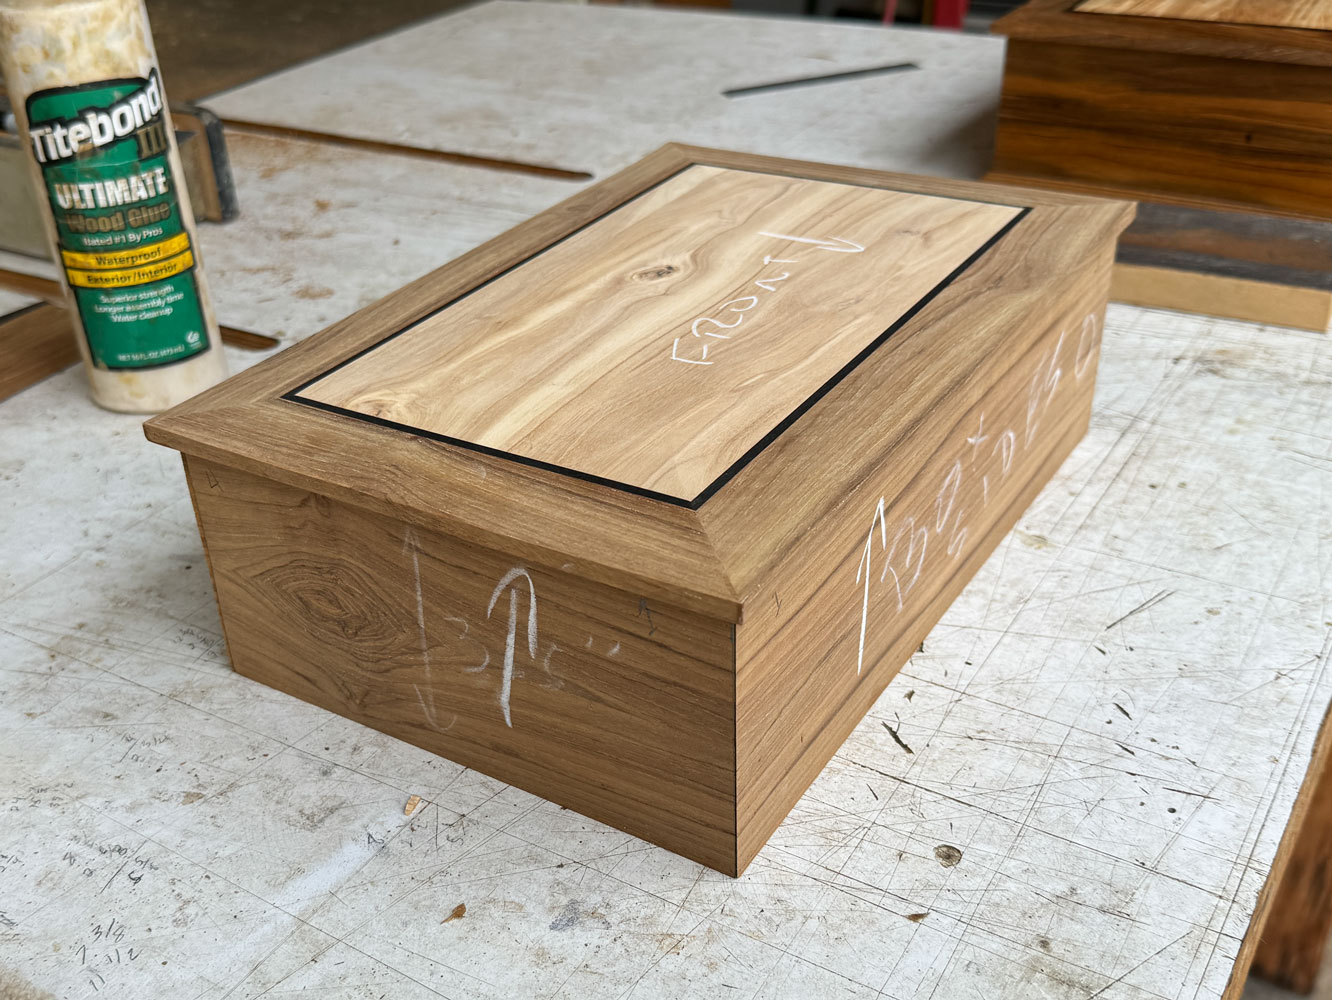
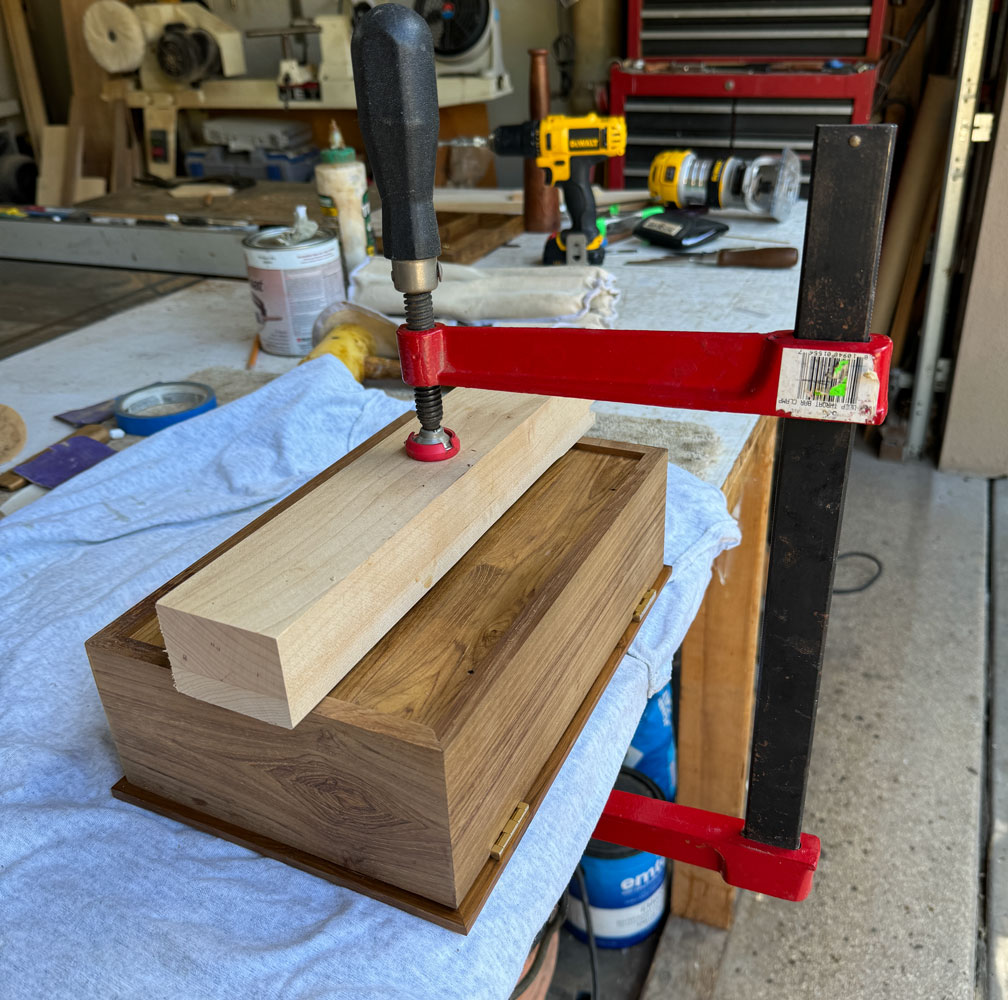
I sat the top on just to see what it looked like with the top.
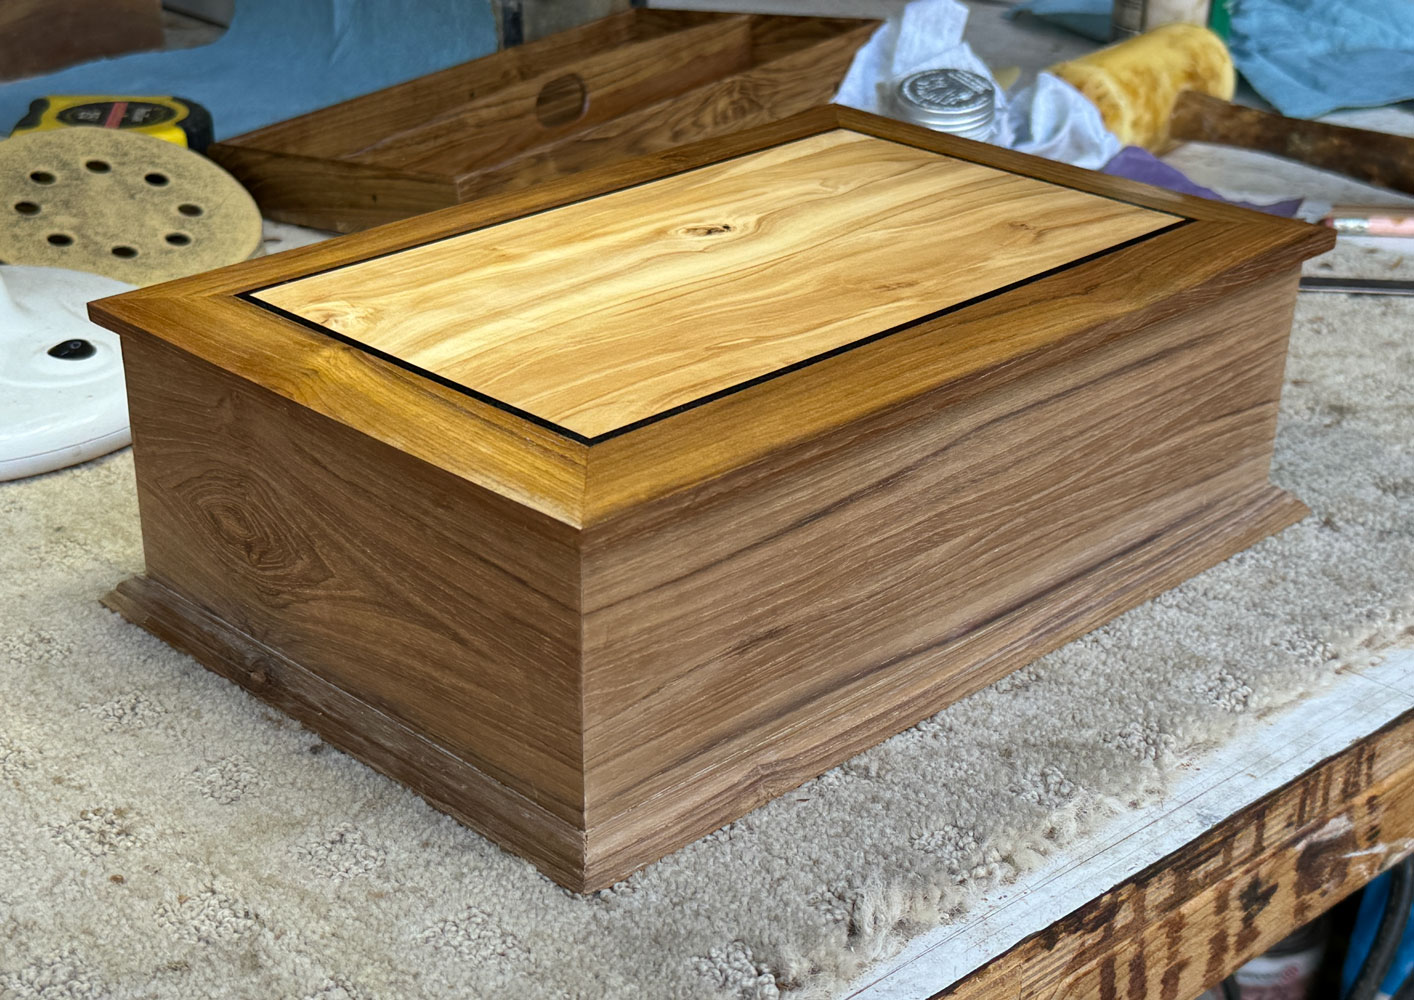
I sanded the box, applied finish, and then buffed it with carnauba wax. Here's how it came out.
I attached the top.
A picture with the top open.
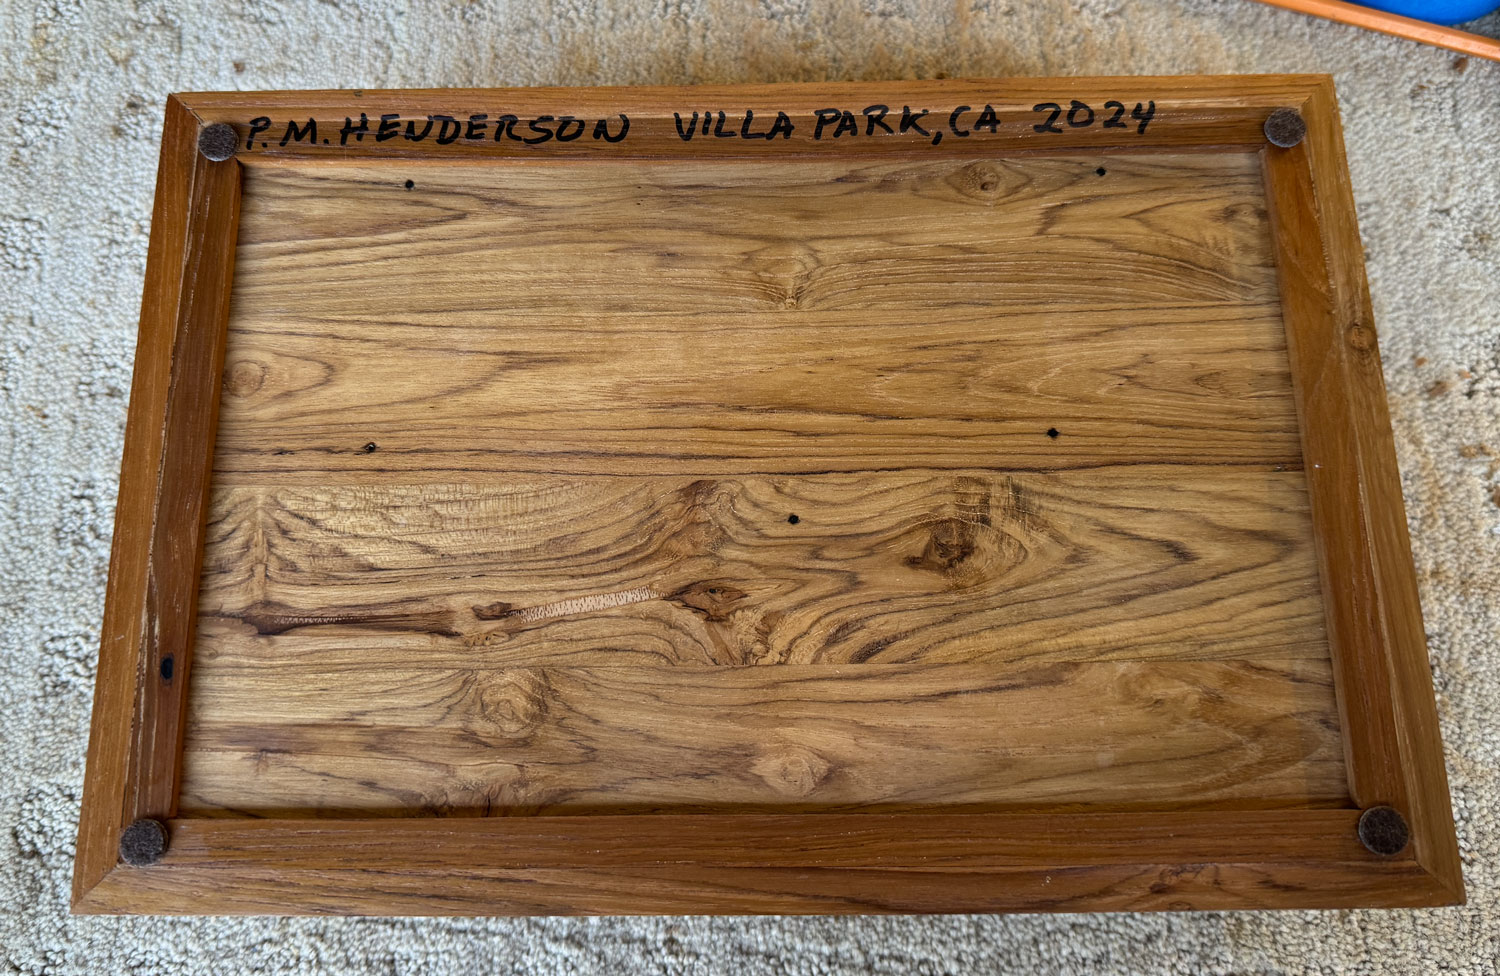
Then I turned it over, put some felt feet on it, and signed it.
That's the end of this project.
Click here to return to my main page.