Rocker in Walnut
P. Michael Henderson
I built this rocker for a friend of mine, Greg, and his wife, Karen, who are expecting a baby in January 2005 (UPDATE!! Karen delivered a healthy baby boy, Kevin, on January 14th)

I first offered to build a cradle for them but they already had a cradle passed down from Karen's side of the family. Greg suggested a rocker that they could use to rock the baby.
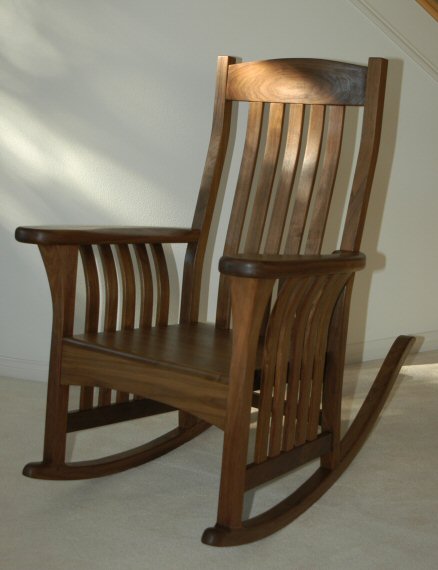
Much of their other furniture is in the craftsman style so they asked me to build the rocker in that style. I’m not a big fan of the craftsman style so I went searching for something that would fit with their other furniture but would not be strictly craftsman. It’s based on an original by Jay Speetjens that I saw in a 1995 issue of Woodwork. All I had was a picture to work from – there were no plans or details in the magazine. The thing I liked about the design is that it has a “craftsman” flavor without being completely rectilinear. I especially liked the curved side slats – the side slats say “craftsman” but the curves give it a more modern look.
Construction details
The rocker is built from walnut. Walnut is not a traditional craftsman wood, but the dark color fits well with the dark, ammonia fumed, quarter sawn oak commonly used for craftsman furniture.
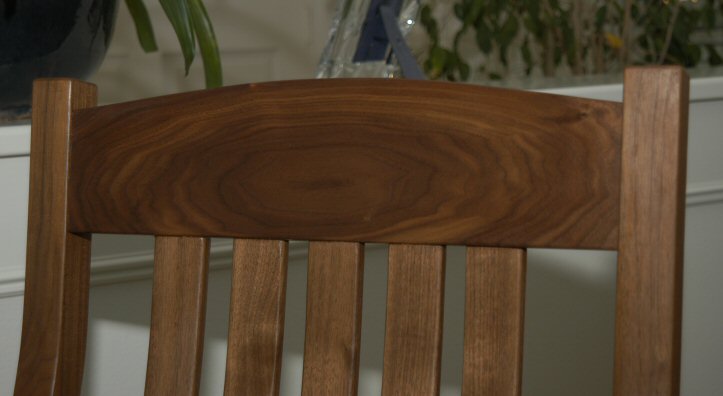
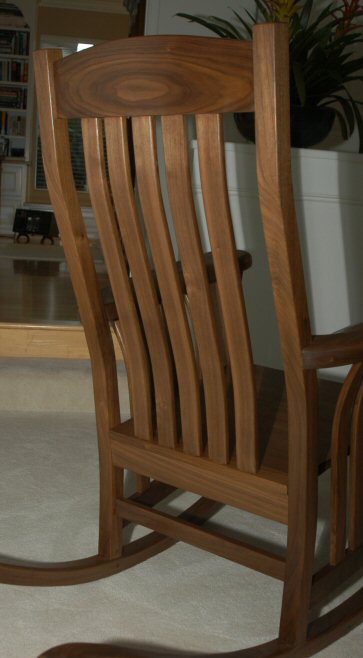
I was lucky with the crest rail – the grain figure came out really well and generally centered. The crest rail was cut from a piece of 8/4 plane sawn walnut. I cut the tenons before cutting the curves. To try to appreciate the work our ancestors had to go through, I cut the back curve of the crest rail by hand, using planes to cut away the excess material. The front curve would have been too hard to do by hand so I cut that on the band saw at school and smoothed it with a spokeshave.
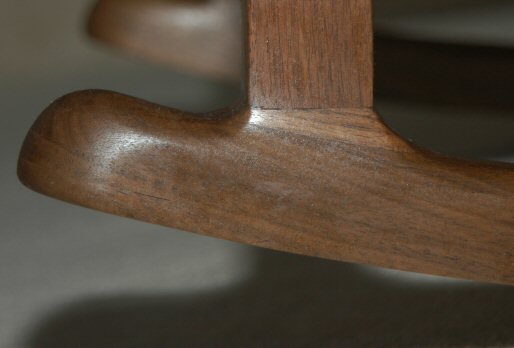
The rockers were lamination bent with a radius of about 39 inches. Note the reverse curve on the rear. Someone told me that the correct technical term is "skates" but I really don't like that name - so I call them rockers.

The rockers stick out the back more than necessary for rocking purposes – I chose the placement of the chair on the rockers for visual appeal, not just for function. At the front of the rockers, I did a “build up” lamination under the front legs. While I like the looks of this, it was a necessary addition after I cut the front legs too short!
In sitting the chair on the rockers, I placed it with a slight backward cant (this is done by adjusting the length of the rear legs). Again, this is just a matter of personal preference. I just think a rocker needs to “sit” with a slight backward cant to be inviting to the user. A rocker that sits idle in a flat position looks like an uncomfortable chair. At least, that’s my opinion and I was building the rocker!
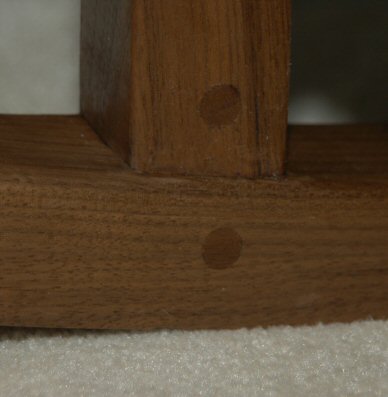
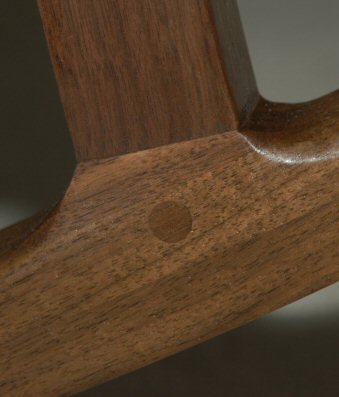
The rockers were attached to the legs with 3/4 inch dowels. The dowels were glued and also pinned with screws that went completely through the dowels. The screw holes were placed on the inside where they would be hard to see, and plugged with a walnut plug. A back leg is shown at left and a front leg at right. The hole in the front leg is made behind the leg and doesn’t show in the picture at right.
Here’s a close up of the side slats. I lamination bent these also, using 1/8 inch lamina. The bending took a major part of the time to build the rocker. My forms only allowed me to bend one at a time, but I only had enough clamps to clamp one even if I had more forms. Counting the rockers, I had 17 pieces to laminate and could only do about two a day.
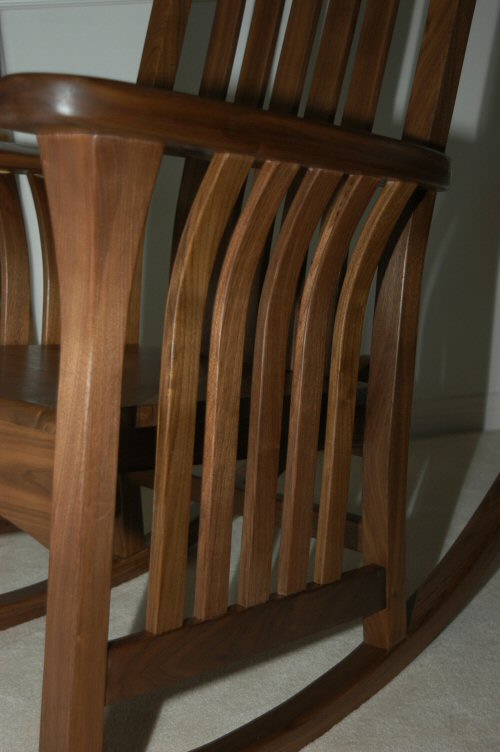
The most difficult part of installing the side slats was cutting the mortises in the arms. They have to be cut at an angle and I couldn’t figure out a safe way to mount the arms in the slot mortiser to cut them – so I wound up chopping them all by hand.
The back rails are cut so that the back has an angle to the seat of a few degrees. Additionally, there is a curve in the back that provides some support to the small of the back.

The arms are the thing I like least about the rocker – they’re too big. I cut them from 8/4 stock and planed them down to thin them somewhat but should have thinned them some more. I tapered them to the inside of the chair so that there would not be a sharp edge at arm level. The arms are glued and screwed to the rear leg rails and mortise and tenoned in the front.


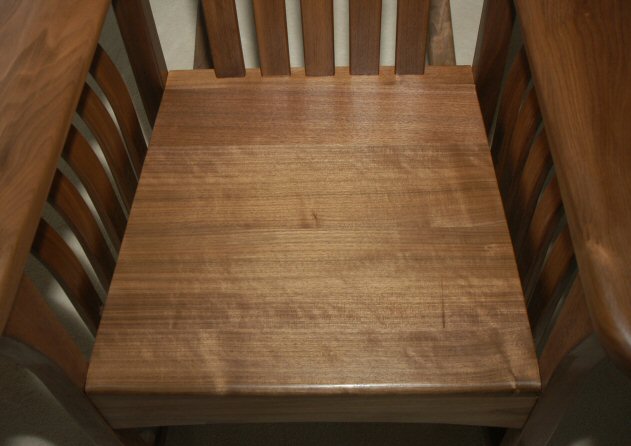
The seat is flat – designed for the addition of a tied on cushion. To minimize wood movement, I made the seat from quarter sawn walnut. The seat is only glued to the frame in the front. The rear of the seat is held down by the back slats. This allows the seat to move, i.e., expand and contract, in relation to the chair frame.
The rocker was sanded to 400 grit and finished with oil-varnish.
If you're interested in some of my other work, you can find it here.
(use your back button to return to the page you were previously viewing)