.jpg)

Kitchen Pullouts
P. Michael Henderson
Since I published my web site, several people have asked me how I added the pullouts to my existing cabinets. When I was building the pullouts, I was not thinking about publishing anything about them, so all of the following pictures were taken "after the fact" - I don't have any pictures of the pullouts in process.
The problem with adding pullouts to face frame cabinets is that the face frames overlap the sides of the cabinets. So you can't just add the pullouts - you have to build out the sides of the cabinets so that the build-out is flush with the edge of the face frame.
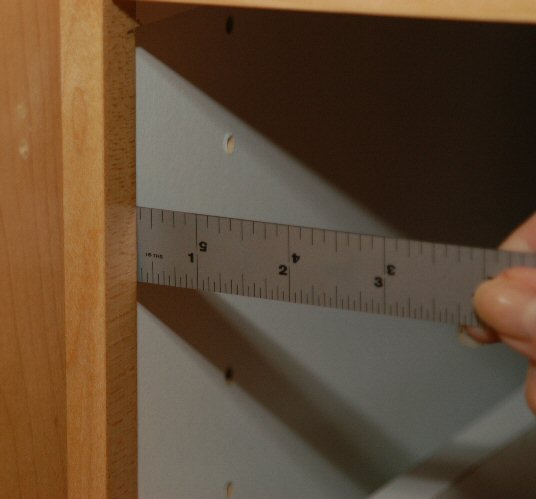
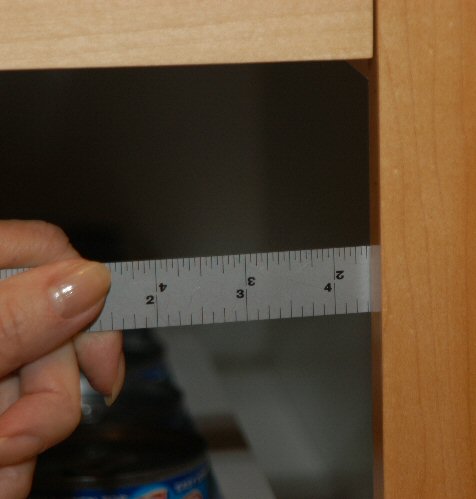
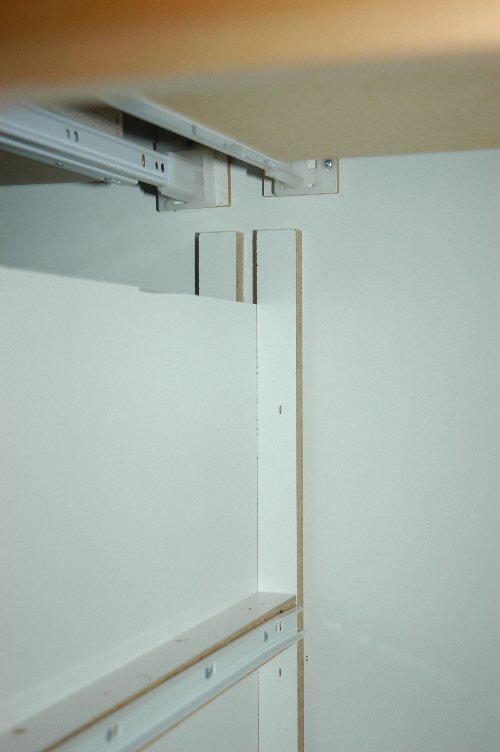
Note that the offset on the left is a bit less than 3/8 inch, while on the right the offset is about 1 5/8 inches. Different cabinets had different offsets - you have to measure each one and fit the build up material to each.
To prepare for the pullout installation, I had to build up each side so that I could mount the drawer slides.
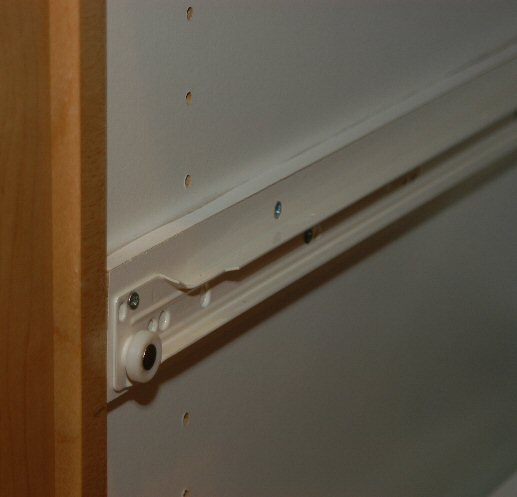
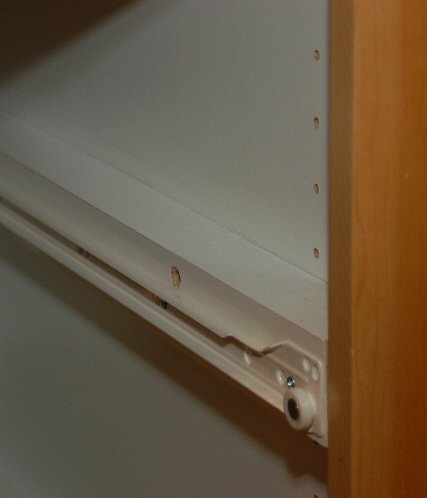
You can see on the left that I had to put in a smaller filler piece than on the right. When I started, I used screws to mount the filler pieces to the case but later, I used a narrow crown stapler and stapled the fillers to the case. On thick fillers, I stapled the filler material in stages - first the inside piece, then the next piece to the first piece, etc. When completed, I put melamine tape on the top edge, or used a thin piece ripped from the filler pieces with melamine still on it.
The under counter cabinets were a bit more difficult because most of the cabinets were "double cabinets", meaning that there was no upright piece in the middle of the double cabinet. On these, I had to first remove the shelves (I used the shelf material for making the pullouts), then fabricate a piece of melamine which would fit between the front and back to make an upright piece for attaching the drawer fillers.
This is a picture looking into one of the under counter cabinets showing the divider I had to install. I used two vertical pieces of melamine stapled to the back of the cabinets (and to the face frame in the front) to support the divider.
The other problem area was a narrow double cabinet, as shown below.
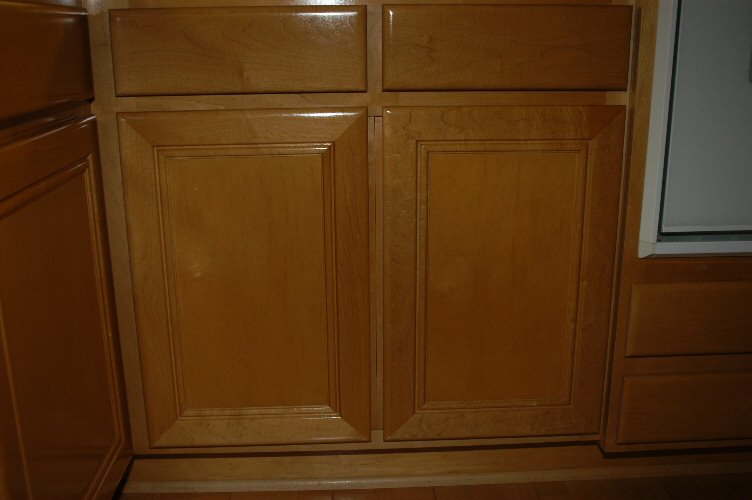
If I had put a divider in this double cabinet, the drawers would have been too small. To solve this problem, I cut out the stile between the two doors so that I could make the drawers the full width of the double cabinet - see next picture.
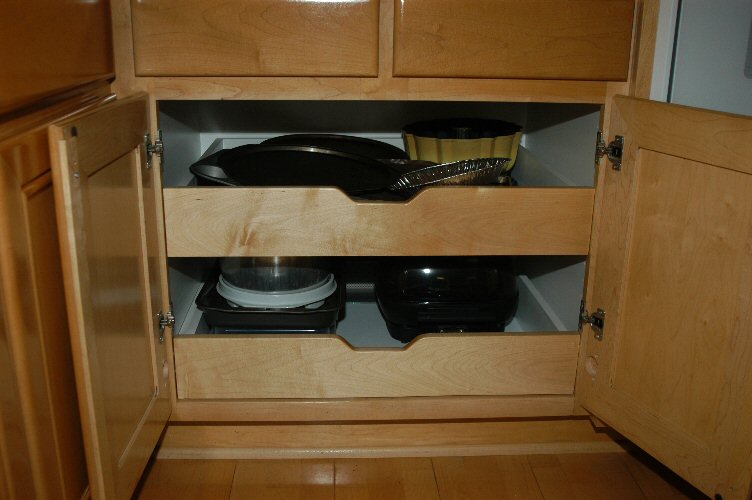
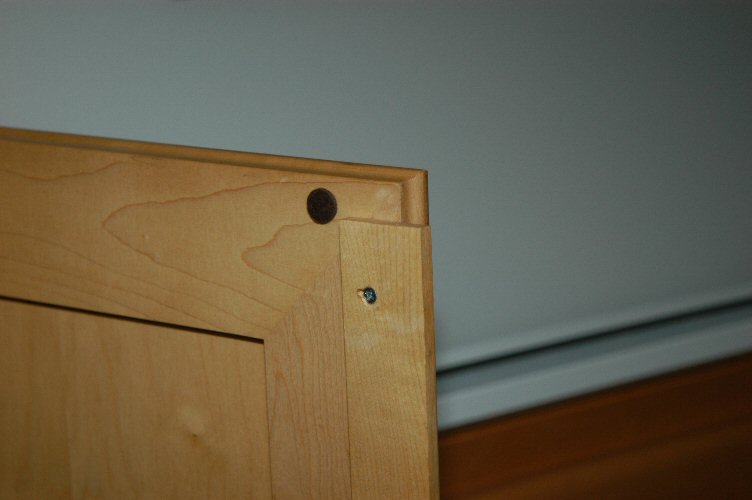
I resawed the stile to a piece about 1/8 inch thick, ripped it up the middle, and then applied half to each door (see below). Look carefully at the picture of this cabinet with the doors closed (above two) and you'll see the lines between the doors and at the top and bottom. Note that the pullouts have to be set in to the cabinet so that the doors will close with the stile material attached to the doors. The pullouts on all other cabinets are set flush with the face frame.
Making the pullouts was fairly simple - it's just like making any other drawer. I glued the maple drawer front to the melamine sides and have had no problems with them coming loose. The bottom is 1/4 inch melamine stapled to the front, sides, and back. A rabbit is cut in the front so that the bottom does not show from the front but is applied full size to the rest of the drawer bottom.
A note for you furniture people. The bottom is NOT set into a groove, it is butted against the bottom of the drawer. There are a couple of reasons for this. Using a groove would waste space and slow down production. Also, the drawer slides (Blum) support the bottom of the drawer. The attachment of the bottom is mostly concerned with keeping the bottom from sagging. I used a narrow crown stapler and was very satisfied with the performance of the drawers.
I used iron on melamine tape to finish the raw melamine along the top of the sides and back. You can find this tape at Austin or any hardware store catering to cabinet makers. Buy the big roll.
If you're interested in some of my other work, you can find it here.
(use your back button to return to the page you were previously viewing)