Making an Eight Sided Serving Tray
P. Michael Henderson
Earlier I did a tutorial on how to make a rectangular tray. I consider that a "beginning" project and wanted to offer a more complex tray project. This tray has eight sides and the veneer is laid in a sunburst pattern. I also used walnut burl for the sunburst, which is a "difficult" veneer to use for a sunburst and requires special handling when cutting and fitting.
If you find this tutorial to be valuable, I'd appreciate if you'd send me an e-mail at mike@mikes-woodwork.com with the subject line of "Eight Sided Tray".
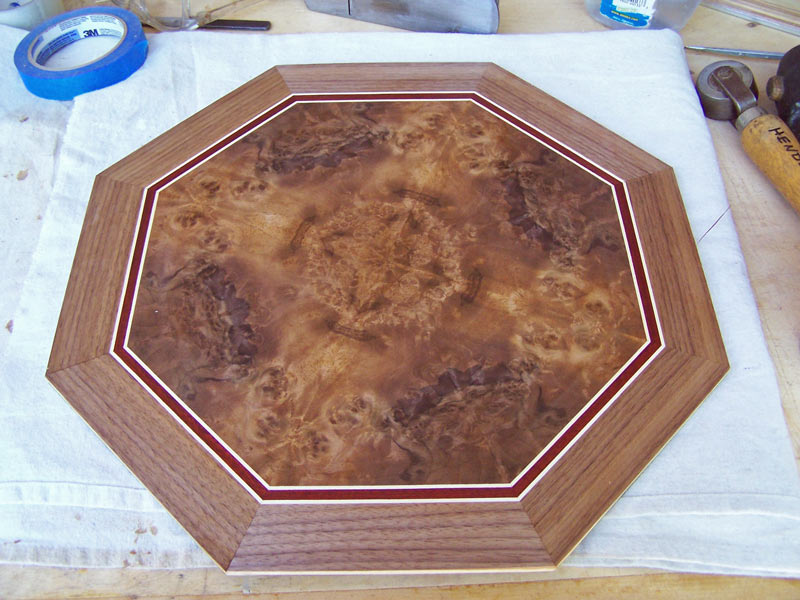
This is the bottom of the tray - where we're heading in the first part of this tutorial.
You'll need the following tools and supplies for this project:
1. 1/4" MDF for the substrate, approximately 18" around.
2. Eight consecutive pieces of field veneer. I'm using
walnut burl.
3. Veneer for the banding. I used bloodwood and holly.
4. Veneer for the border and back. I used walnut, and in the
back, I laid it in as an 8 piece sunburst.
5. 3/4" blue tape.
6. Veneer tape.
7. A sponge in a container of water to wet the veneer tape.
8. A 24" rule. If you use a "center finding" rule some of the
measurements will be easier.
9. A straight edge about 24 inches long. Used when cutting the
veneer.
10. A filleti guide for cutting the banding.
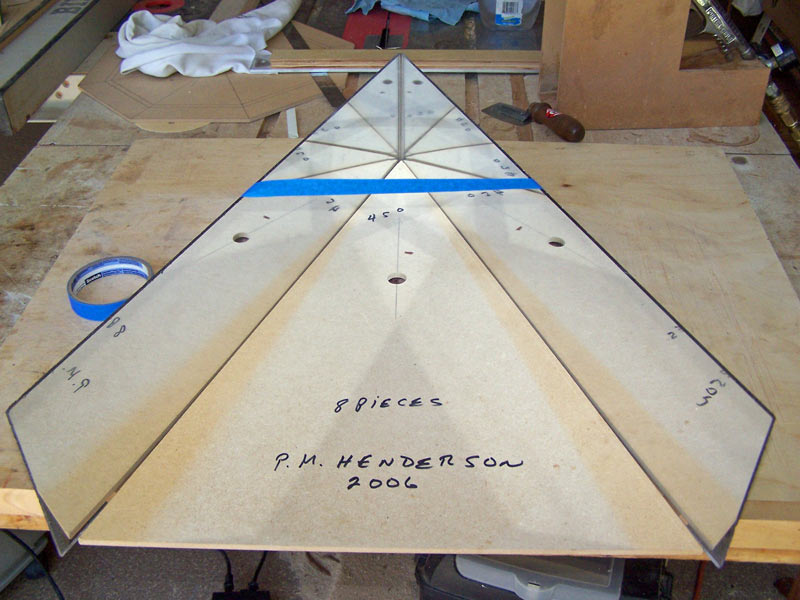
11. A template for cutting the sunburst segments. Since we're doing
an eight piece sunburst,
the template will be 45 degrees.
12. A veneer saw.
13. A knife or knives for cutting the veneer.
14. A sharp chisel about 1/2" wide.
15. A sanding block.
16. A small combination square is valuable for laying out the pattern.
17. A pencil.
18. A hinged mirror. You really can't do a good sunburst without a
hinged mirror.
19. Glue to attach the veneer to the substrate. I used regular white
glue.
20. A veneer pressing system. I used a veneer bag and a vacuum pump
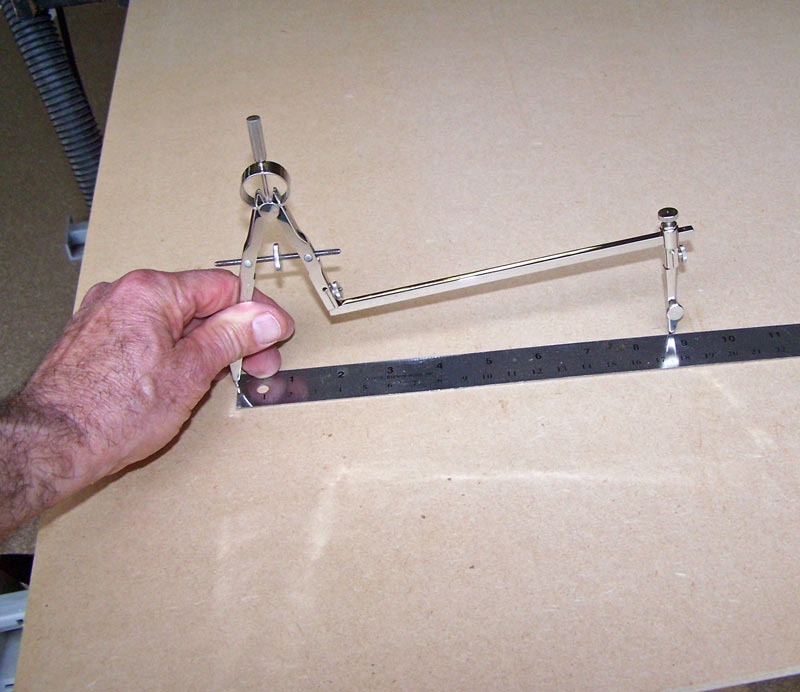
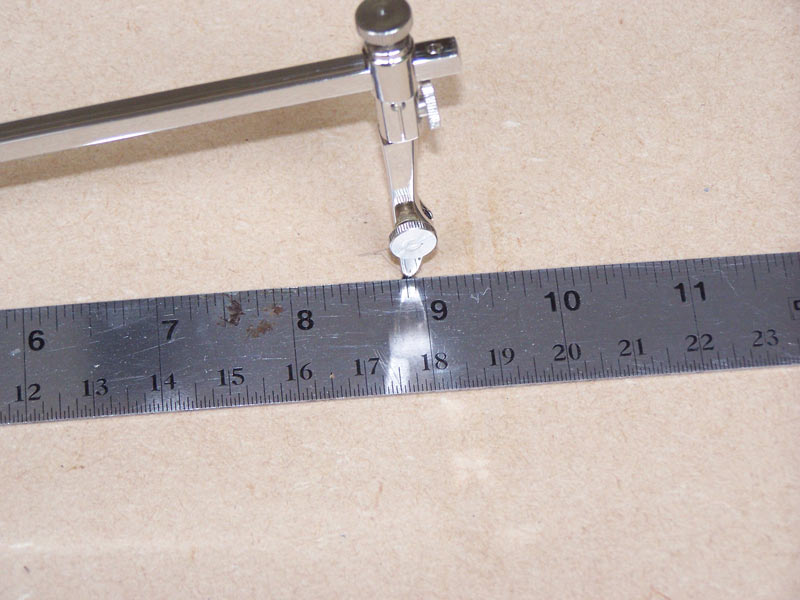
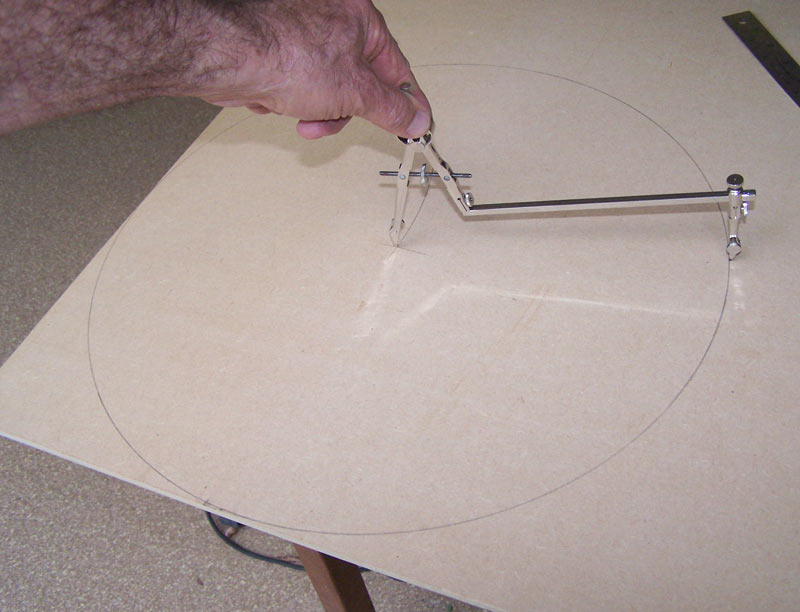
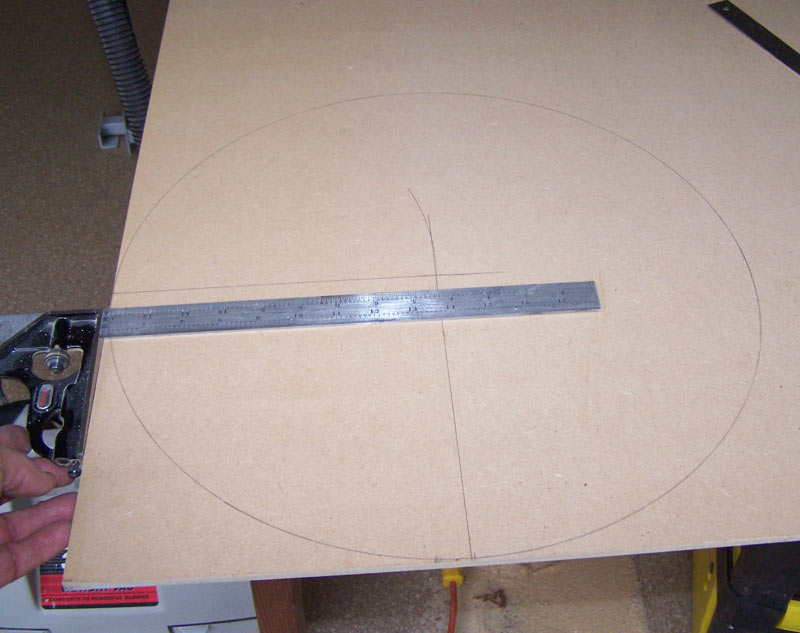
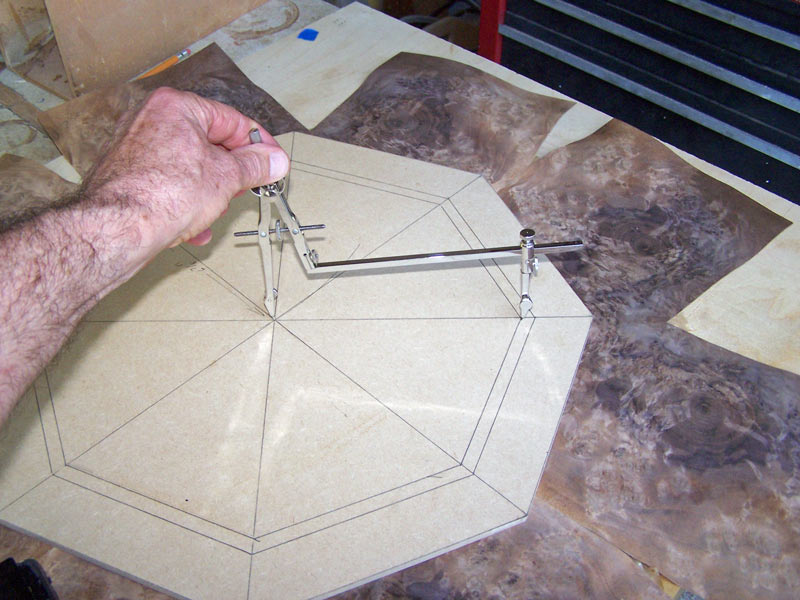
We begin by making the substrate. I cut what I need from a large piece of 1/4" MDF I have in the shop. I want the final tray to be about 18" across. I'll use a compass to draw a circle a bit smaller than the radius, or a bit less than 9". I'll set the compass from a rule.
I don't want to waste any of the MDF so I want my circle right against two of the sides. I can do that by drawing an arc from each side. The intersection of those two arcs will be the center of my circle.

Then, using a combination square, draw two lines through the center of the circle, perpendicular to each side.
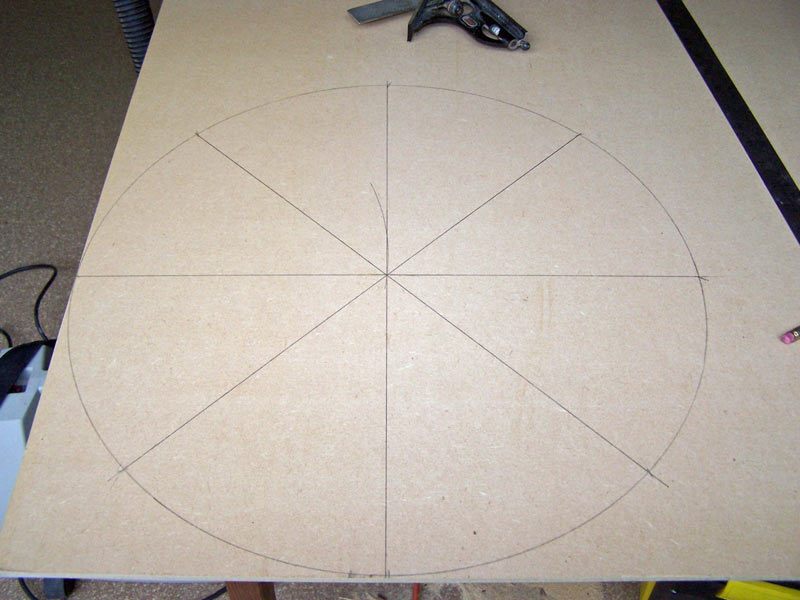
Next, I want to mark off eight equally spaced tic marks to delineate the eight sides. I could take a set of dividers and do it by trial and error (and that's a good way to do it) but there's an easier way. Use the technique you were taught in high school geometry to find the center of an arc. In case you don't remember, open your compass more than half way between the two perpendicular lines. Then, with the point of the compass on the intersection of the line and the circle, draw an arc between the two lines. Do the same from the other intersection. You'll have two arcs that intersect at two points. Draw a line between the two intersections and that will split the arc of the circle in half. And since you have four quadrants to the circle, you'll wind up with eight sides. The next picture doesn't show all of this, I just did trial and error to split the arc in two.

The distance you found should allow you to step around the circle with your compass and come back exactly to your starting point. If you're not exact, make a small adjustment and try again. Once you have the distance correct, go around the circle making a tic mark at each landing point. Your circle should like like this:

[Aside comment] I also occasionally do a six sided tray. If you make a six sided tray, you won't have to go through all this to divide the circle equally. Don't change your compass after you draw your circle and use that distance (the radius) to step around the circle. You'll find that the radius will step off the six sides exactly.
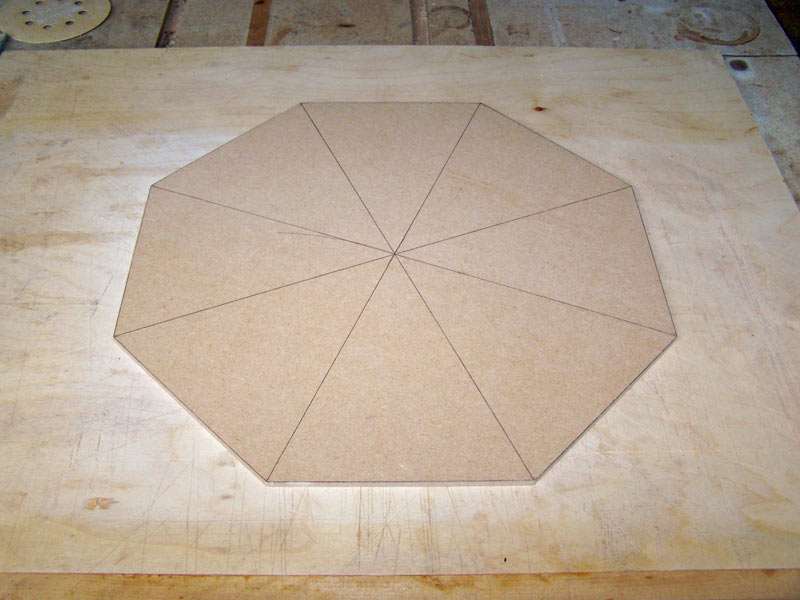
Then draw a straight line between the tic marks, making sure to go exactly through the center.
Now connect the ends of the lines.
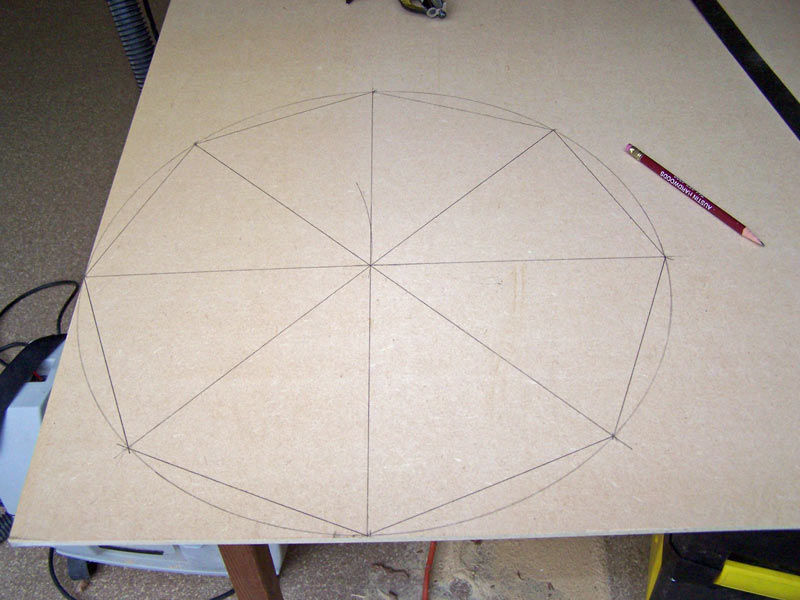
This will be your eight sided tray bottom. Cut the bottom out of the larger piece of MDF, making the cut roughly. I used a jig saw to cut it out.

I then went to my band saw and cut along the lines, being careful to stay outside the line.

To trim to the line, I used a block plane.
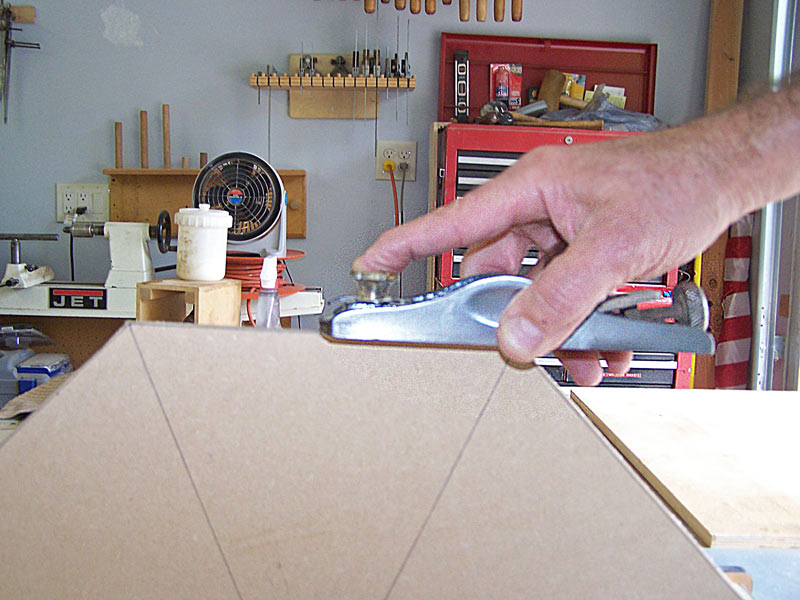
And here's the substrate for the bottom of the tray.
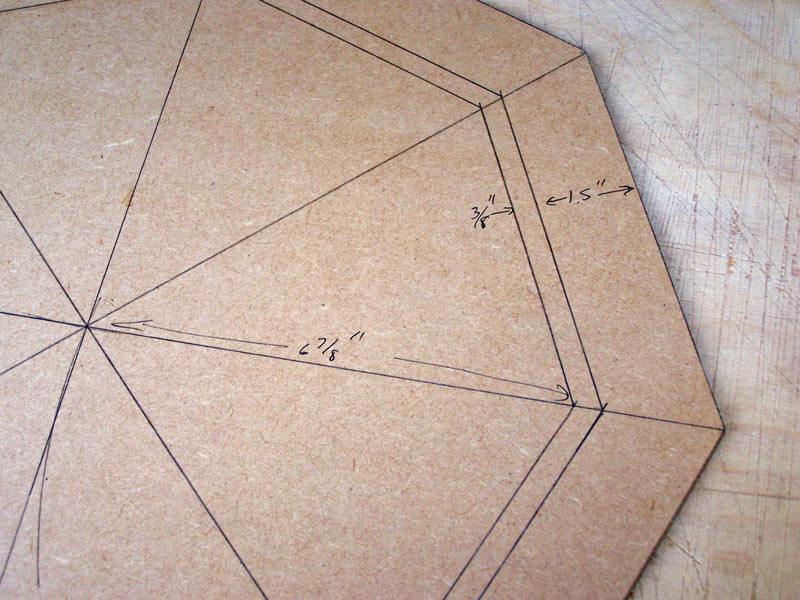
Now I'll lay out where the veneer will go. Using a small combination square, I draw the location of the various parts of the panel. I used a one and a half inch border on this tray so that the walnut burl would be the main focus. My banding is 3/8" because I'm going to put a holly outline on the primary banding of bloodwood.
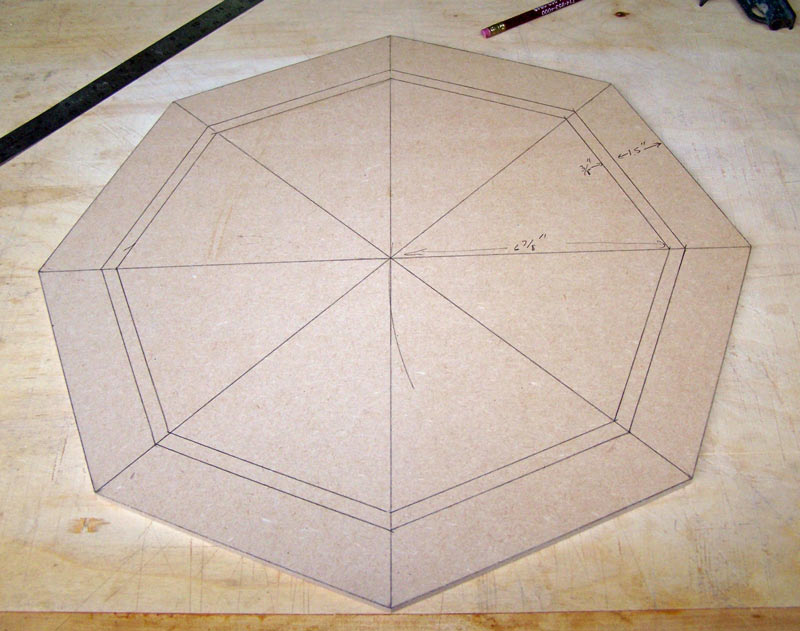
This leaves me about 7" that have to be covered by the walnut burl. Knowing that distance allows me to cut the burl to the right size (or at least not cut it too small).
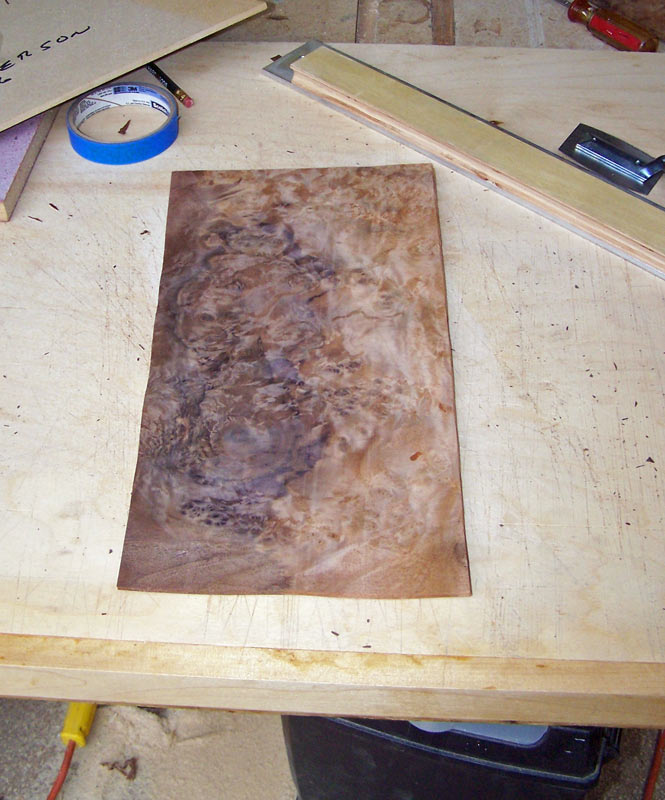
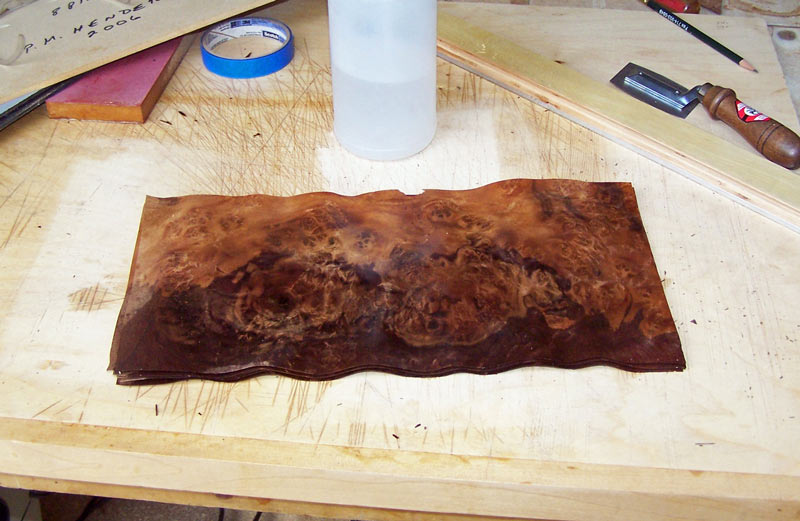
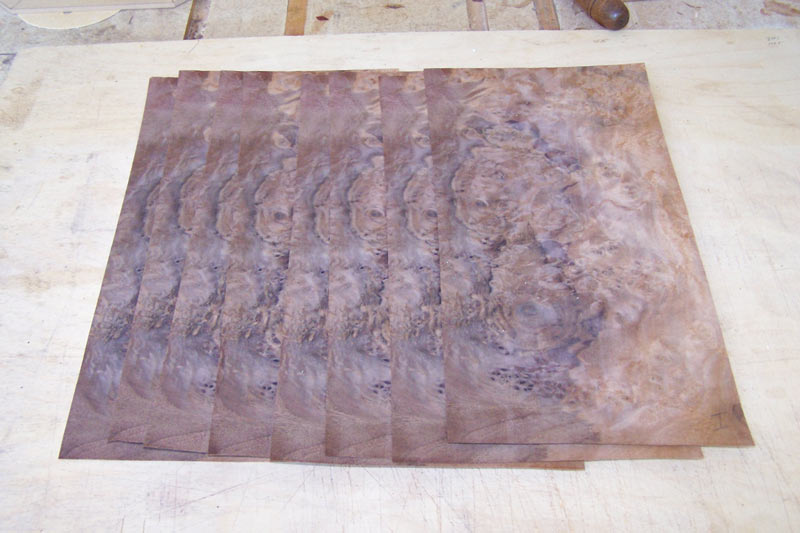
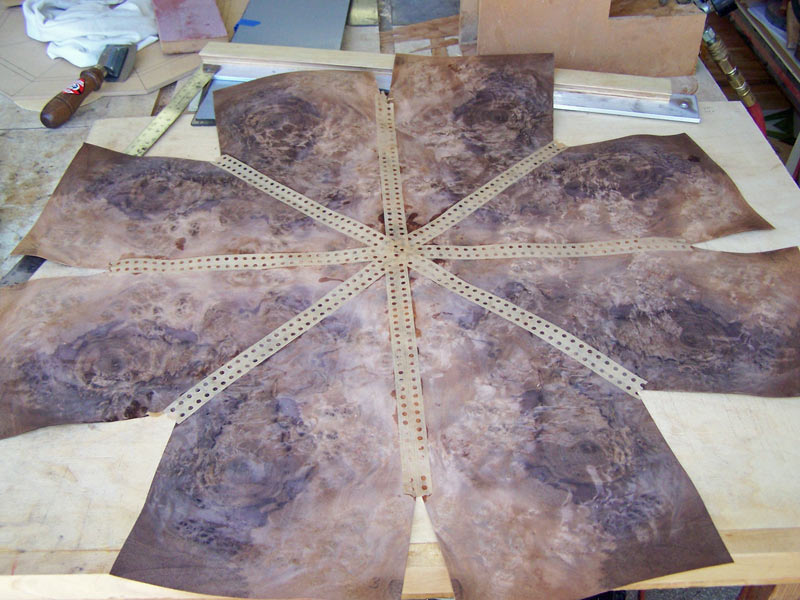
Now let's start on the walnut burl veneer. I have eight consecutive pieces of burl here. The problem with them right now is that they're too dry, and they're not as flat as I'd like. If I try to cut them, as is, the veneer is likely to break. This is especially a problem for the points in the sunburst.
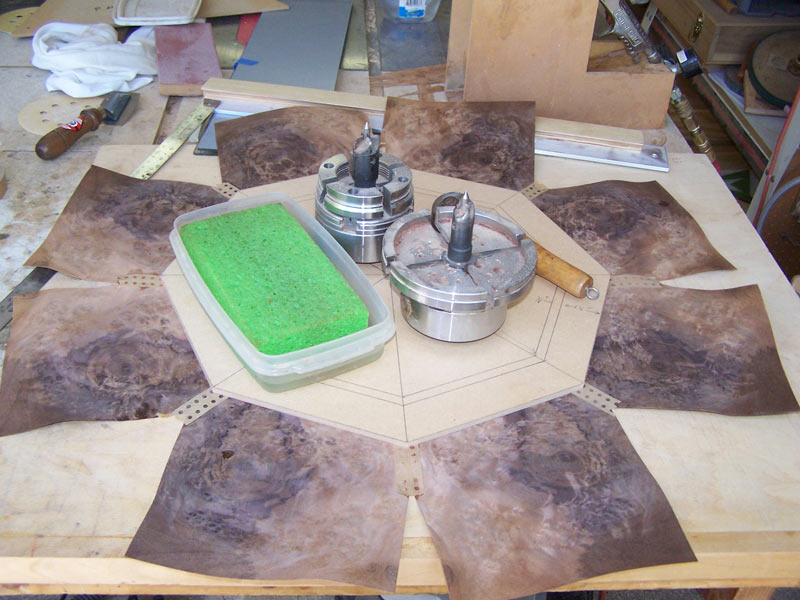
To address this problem, I've made up a "flattening solution" of water, glycerin, and alcohol. I spray the solution on both sides of each piece of veneer so that they're fairly well soaked. The glycerin is the active ingredient - it tends to hold moisture (it's hygroscopic) and keeps the veneer from getting so dry that it breaks when you try to cut it. This is especially true for the point of each segment (pie slice). If the burl is not well prepared, the point will break off if you look at it wrong. When laid in a sunburst, burls really need this kind of preparation.
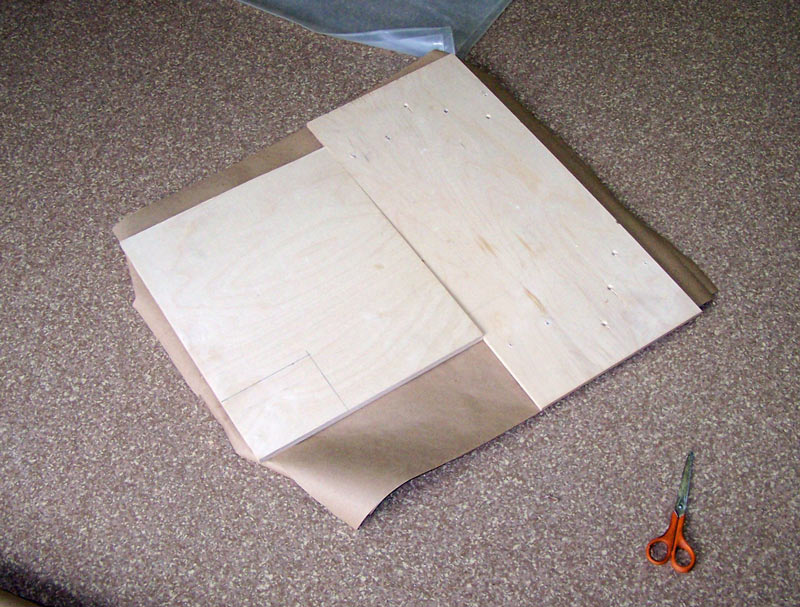
There are many ways to press the veneer while it dries but here's what I did. I divided the veneer into two packets of four pieces each. Then I put the packets between brown kraft paper, and that whole packet between pieces of plywood.

Then I put it in my vacuum bag.

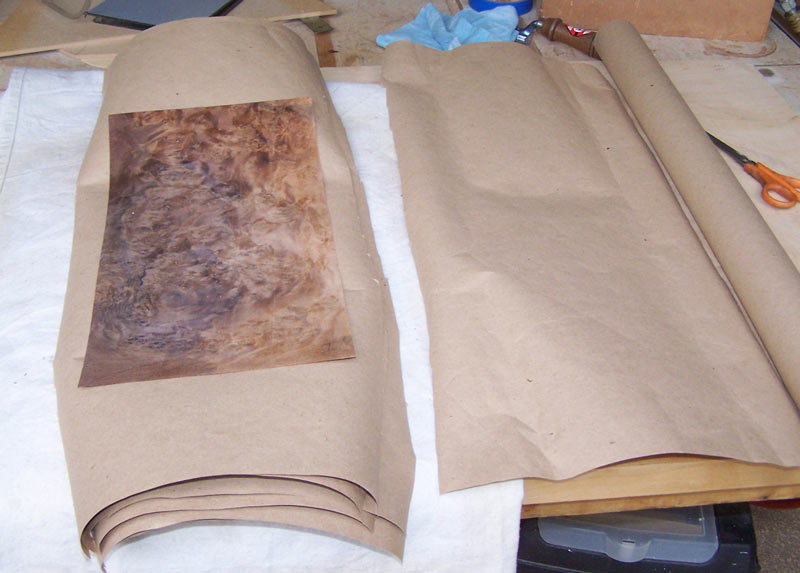
After about an hour, I changed the paper and put the packet back into press. Later in the day, I changed the paper again. Eventually, after being in press most of the day, I took the veneer out. This is what it looked like - flat but still too moist to work with.

I then put a piece of kraft paper between each piece of veneer and put the packet between two pieces of plywood, held together with clamps.
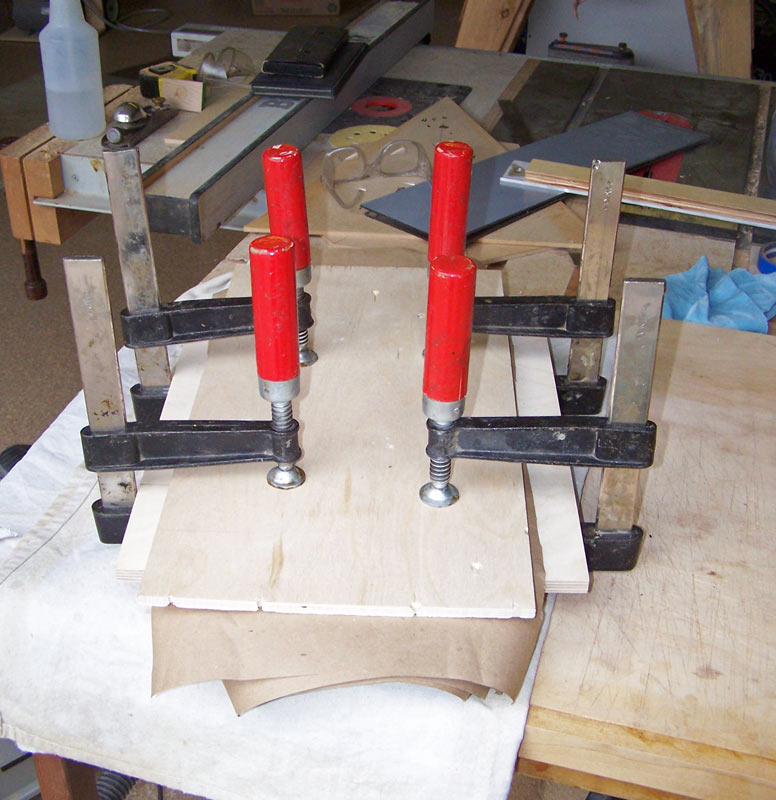
I let the veneer sit in the clamps overnight. The next morning, I changed the paper again and let the veneer sit in clamps a bit longer. When I finally took the veneer out of press, this is what it looked like - flat and just a bit moist.
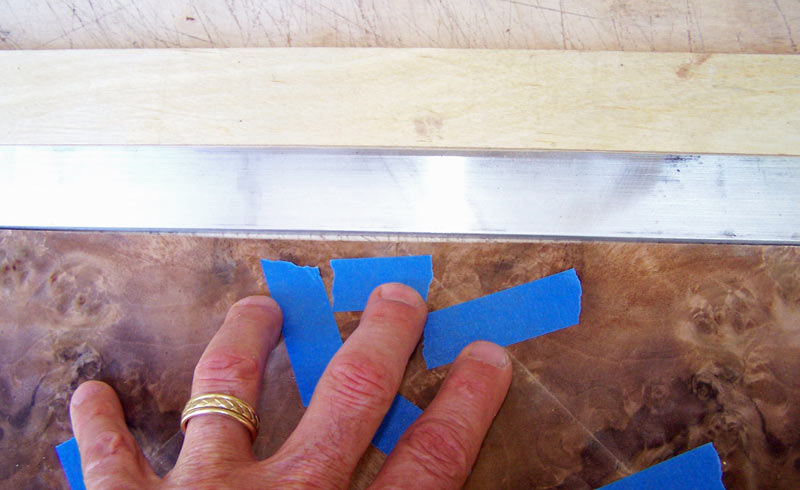
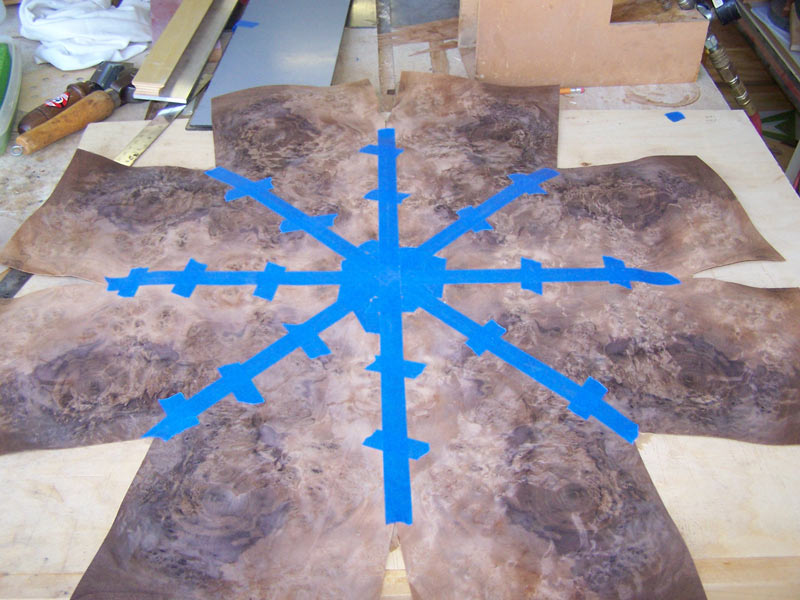
On difficult veneer, such as veneer that is brittle or otherwise tends to break easily, I'll put wide (2") veneer tape on the show face before cutting the veneer. The veneer tape holds the veneer together during the cutting process and while you're working the veneer to fit it together. Here, we're going to make an eight piece sunburst so I want to figure out how the pieces are going to wind up in the sunburst. The pieces are fit together in bookmarked fashion, but all the even numbered pieces will be on one side and the odd numbered pieces will be on the other side. I want to apply the veneer tape on what will become the show face of the veneer pieces. If I consider the side with the numbers on them as, for lack of a better word, the "face", and the other side as the "back", the veneer tape will be applied as follows to make it all wind up on the show face:
Piece number Apply tape to this face
1
Back
2
Front
3
Front
4
Back
5
Back
6
Front
7
Front
8
Back
If you're doing a sunburst in more than eight pieces, just continue the pattern: Two fronts, then two backs, etc.
I made up a packet of the eight pieces, carefully aligning the figure through the stack. On veneer like this, it's difficult to get the veneer all lined up perfectly. The packet is then taped around the edges to hold the veneer in place.
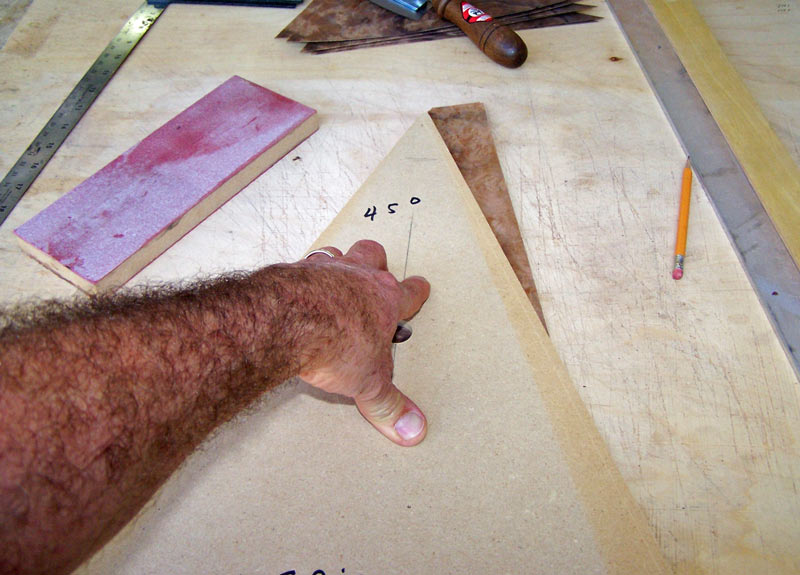
To help me choose where to cut the veneer, I use the folded mirrors. Since there will be eight pieces to the sunburst, I'll use a 45 degree template. I use the template to set the angle of the mirrors, putting a piece of tape across the top to keep the angle.
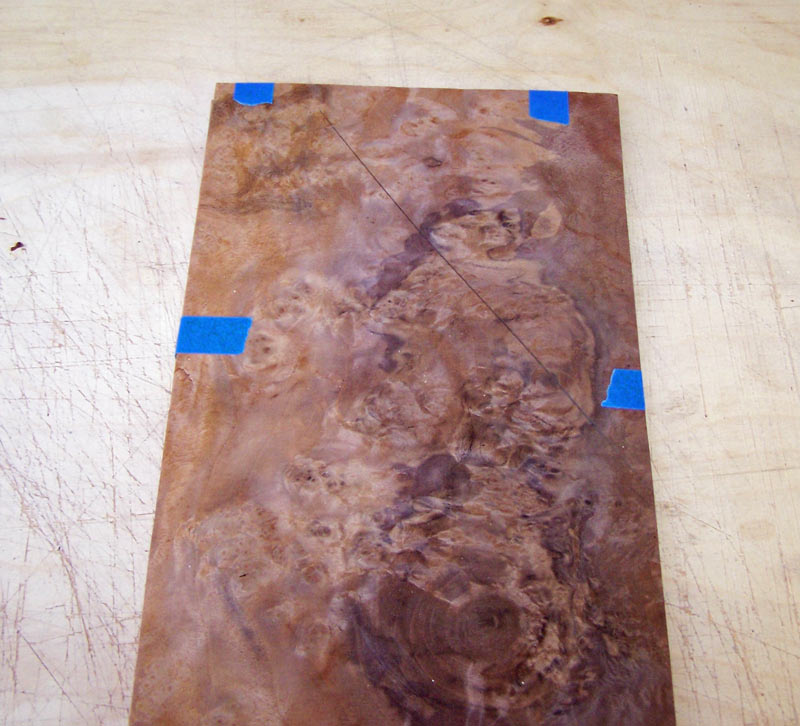
Then I move the mirrors around on the veneer looking for an interesting pattern in the veneer. It was difficult to find an interesting pattern in this veneer.

When I find a pattern I like, I mark it by drawing a line along one of the mirrors. This will be my first cut line.
Using my straight edge and veneer saw, I cut along that line. Then use my sanding block to sand the edges straight and flat.
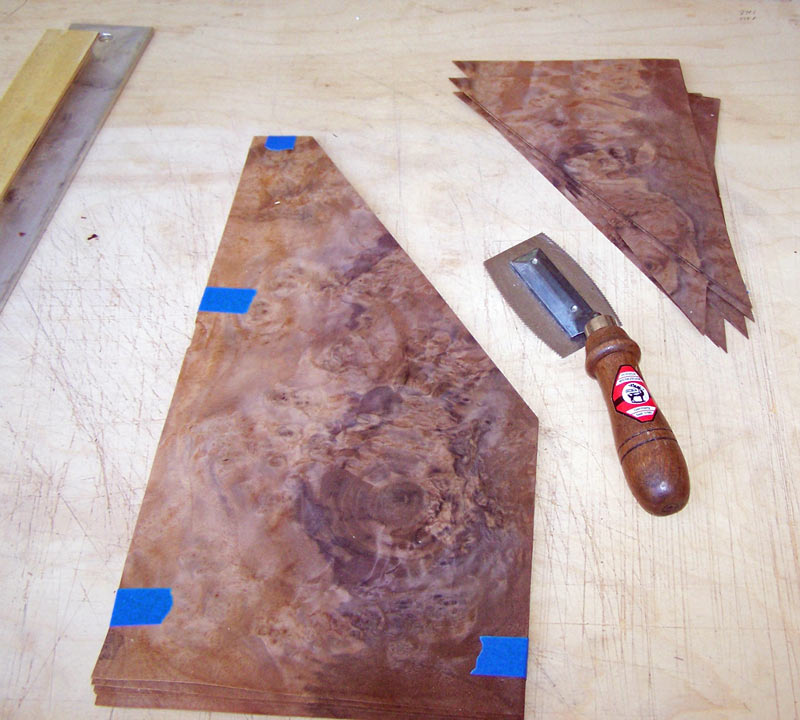
Now here's where things get dicey. I first use the mirrors to establish where I want the point (center) of the veneer and mark it with a pencil mark. Then I lay my template in position, carefully along the cut side with the point where I marked it, and cut the veneer along the template with my veneer saw. It's very easy to break one of the points when doing the cut so I make the cut slowly and carefully.
I was able to cut the veneer without breaking it. Hurray!

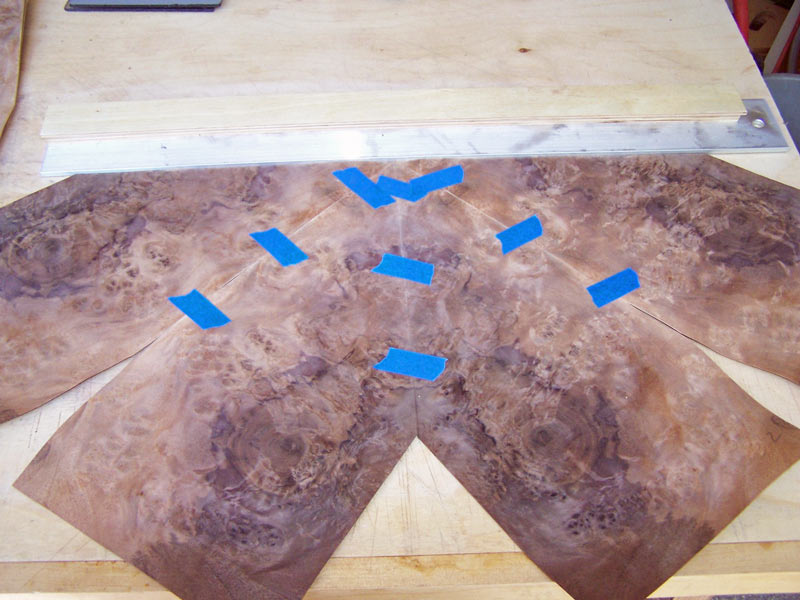
I carefully sand this edge and begin to put the veneer together. I open pieces 1 and 2 and bookmatch them. Then, all the even numbered pieces go on the side with piece number 2 and all the odd numbered pieces go on the side with piece number 1.
For my first trial fitting, I piece together the first four pieces, 1 and 3 on one side and 2 and 4 on the other. Ideally, I'll have a straight edge along the finished piecing.

I slide the veneer against my straight edge to see how straight the edge is. It's off just a bit.
I could actually work with the veneer like this but I prefer to go for an exact fit. So I take the veneer apart and sand the edges some more, concentrating on what will be the outside of the pattern. When you do this, it's easy to make the edge into a convex edge instead of straight. So be careful and sand the whole edge, but more at the outside. In the picture above, the error is four times the amount I have to take off (because there's four pieces ) so I don't have to sand too much. After sanding, I put the veneer back together and check it again.
This time I'm exactly on.

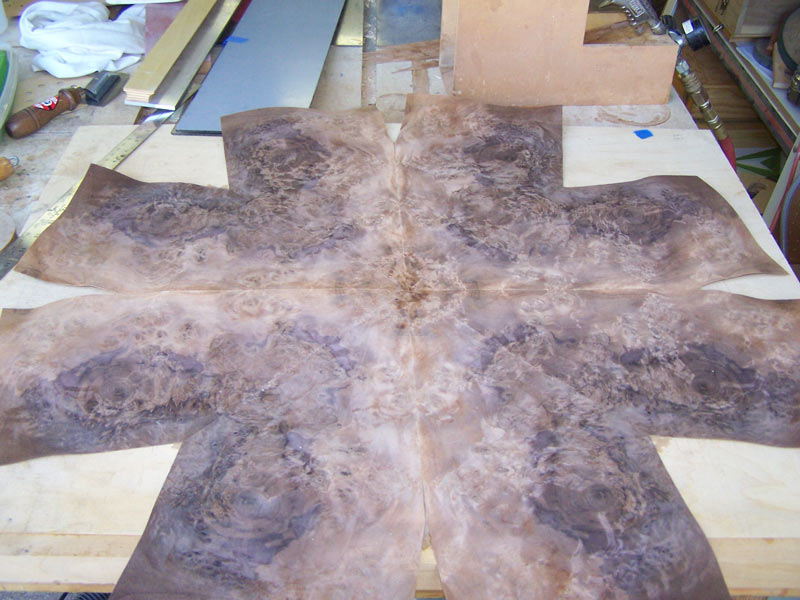
Now I can proceed to put all eight pieces together. I do it by making two sections of four pieces each and then joining the two sections.
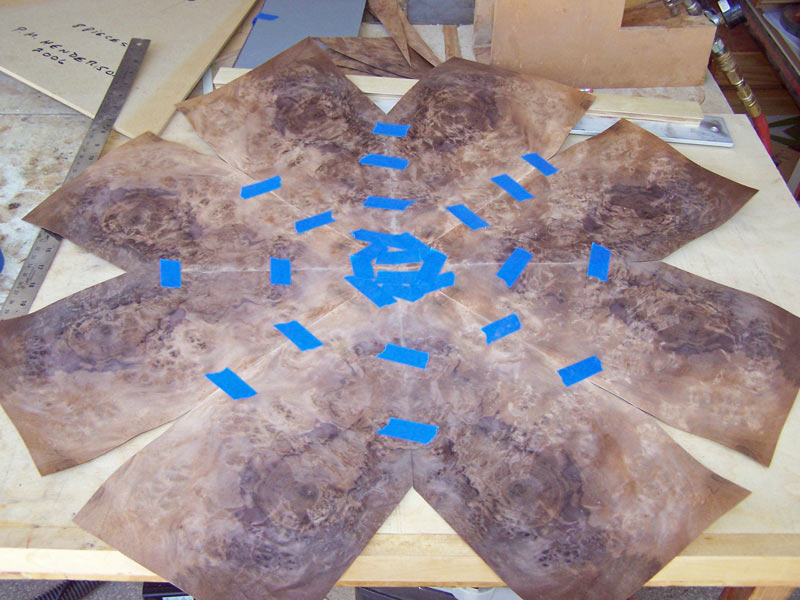
Turning it over, we can see the show face - what the veneer will look like on the tray. It's not as interesting as I'd like but the best I could do with the burl I had.

Apply veneer tape.
And then press the veneer while the veneer tape dries.
When the veneer tape is good and dry, take everything off the veneer and turn the veneer over.
Remove the blue tape.
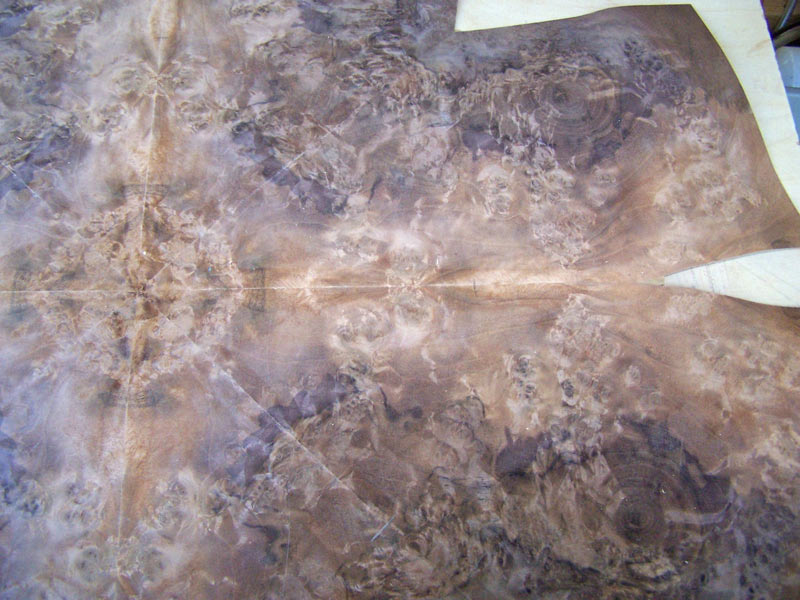
We now need to cut the burl to the correct size for the field of the tray. To get that size, I use a compass and set it from the drawing I did at the beginning of the project.
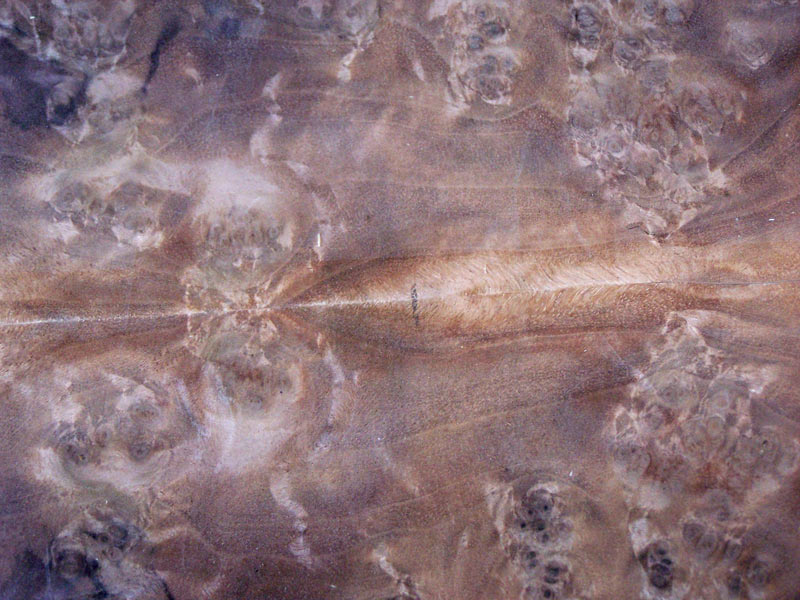
Place the point of the compass in the center of the sunburst and make a mark on each seam. You don't have to draw the complete circle because all you're interested in is the place where the circle would cross each seam. You have to look closely at the seam in the center of the picture to see the pencil mark.
Here's a close up of that mark.
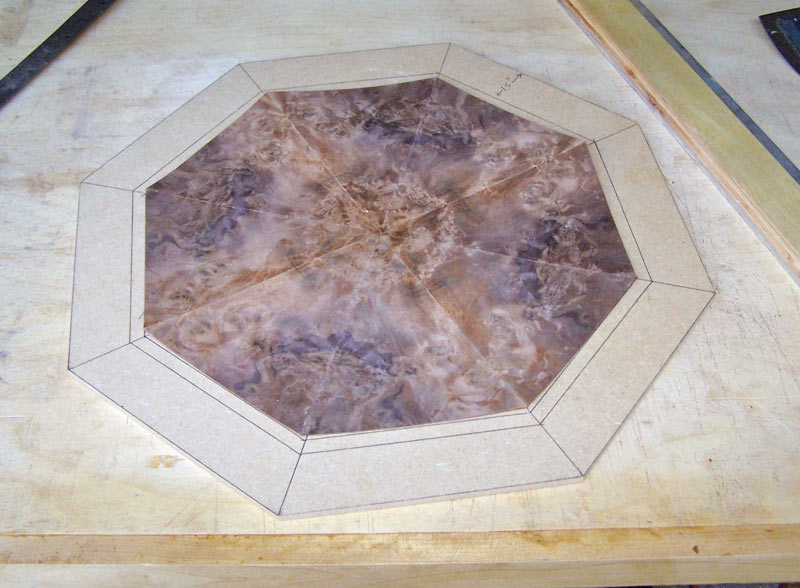
Using my straight edge and my veneer saw, I cut from each seam to the next seam, aligning my straight edge with the pencil mark on each seam. A pencil mark on walnut is hard to see so make sure you have good lighting when you do these cuts. These cuts will give us a sunburst that will exactly fit into the place for it on the drawing.

In this next picture, the veneer is not laying flat so it looks like it's not an exact fit. It really is an exact fit if the veneer is pressed down into place.
Next, we'll do the banding and the border.
The tutorial continues here.