Cabinet
For Marquetry Trays
Continued
This is a continuation of the build of the cabinet for the marquetry trays and covers the making of the marquetry for the front of the cabinet.
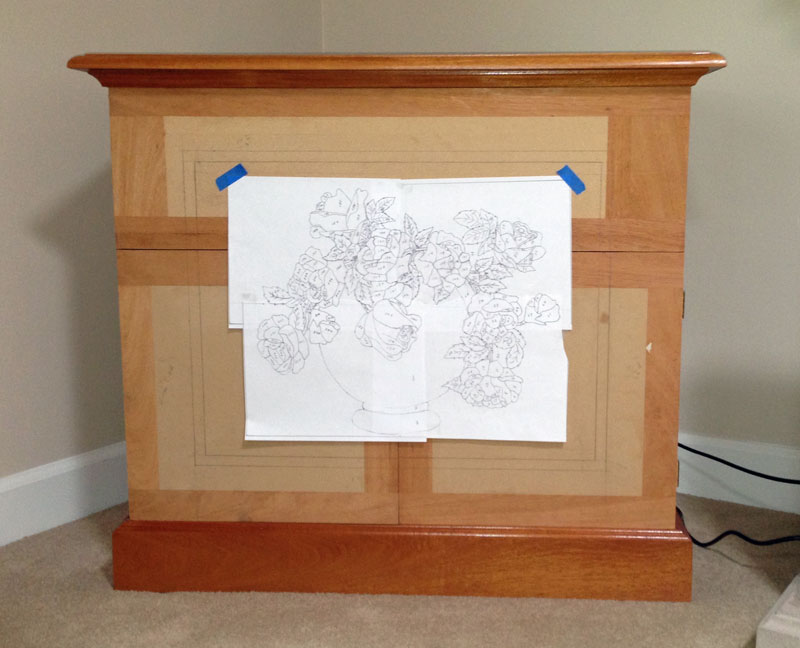
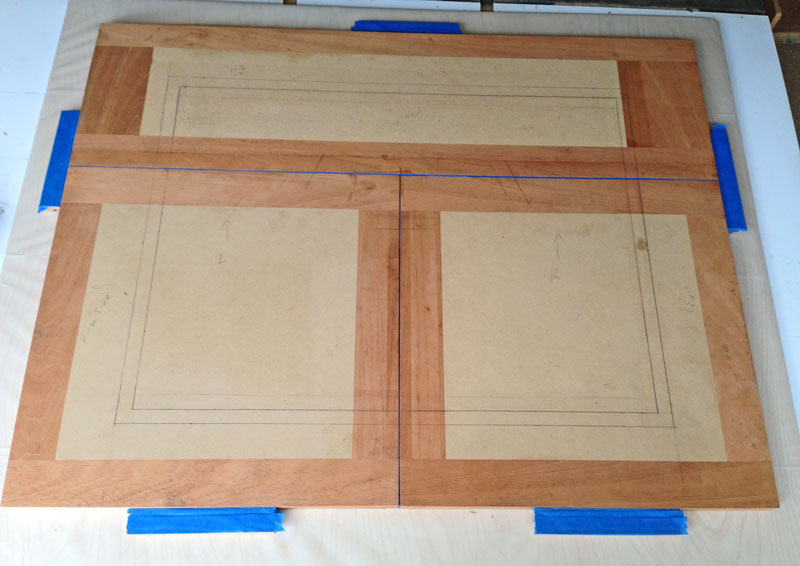
8/13/2013 I'm making progress on the marquetry design. I'm not finished yet, but I have enough to be able to lay out the front of the cabinet.
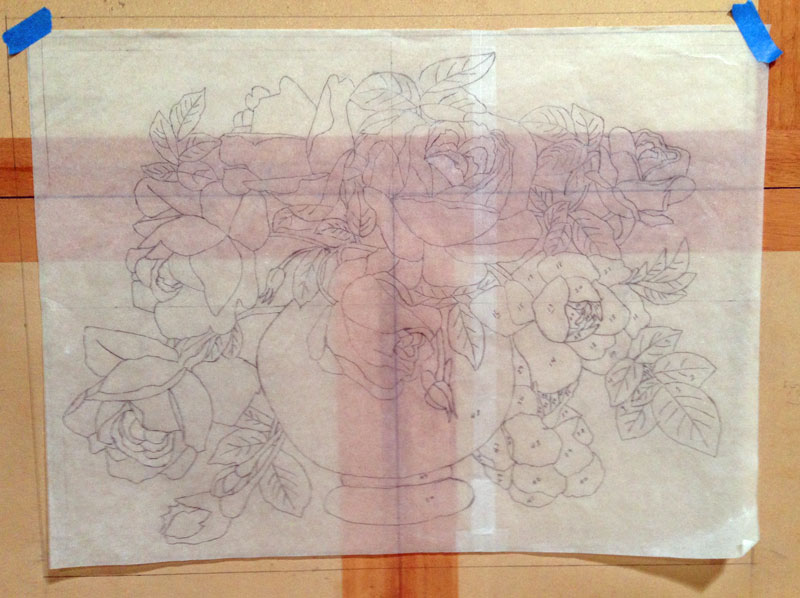
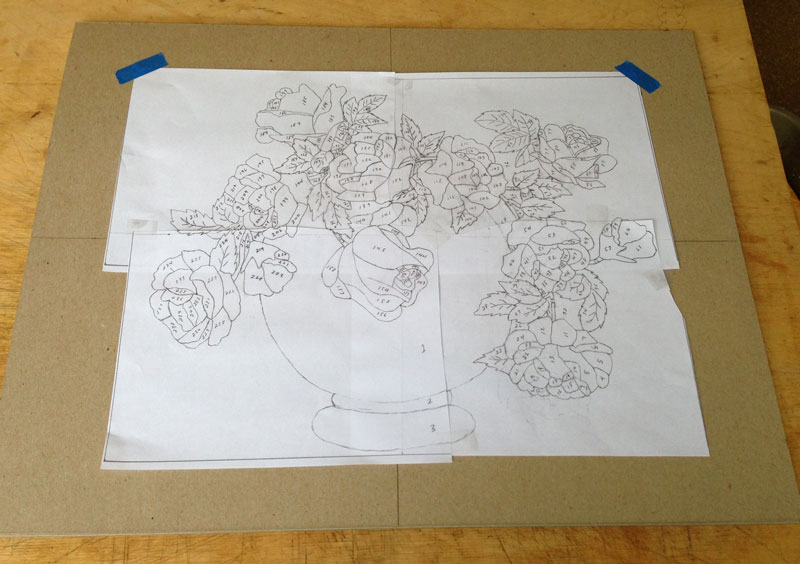
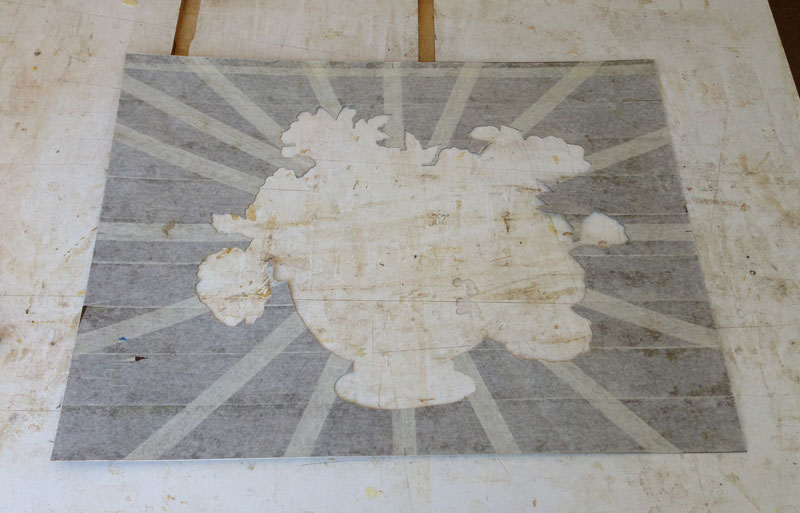
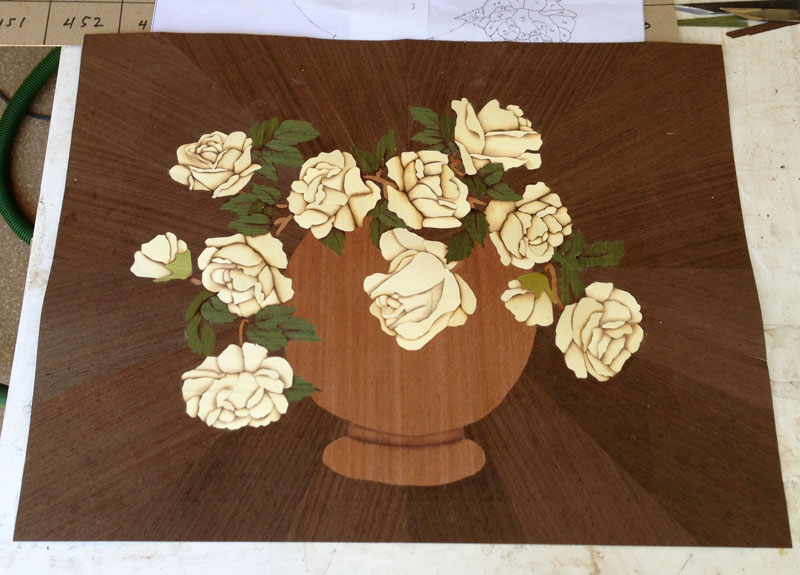
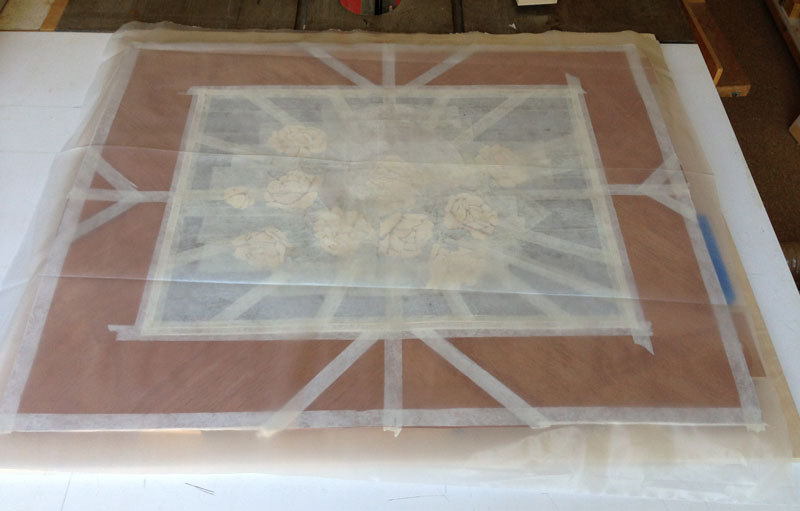
Here's a picture of the front with the design in its approximate place. The field will be a 16 piece radial match of wenge, with banding of tulip wood and holly. The border will be mahogany. The border will be about 4" on the sides and about 3 3/8" at the top and bottom.

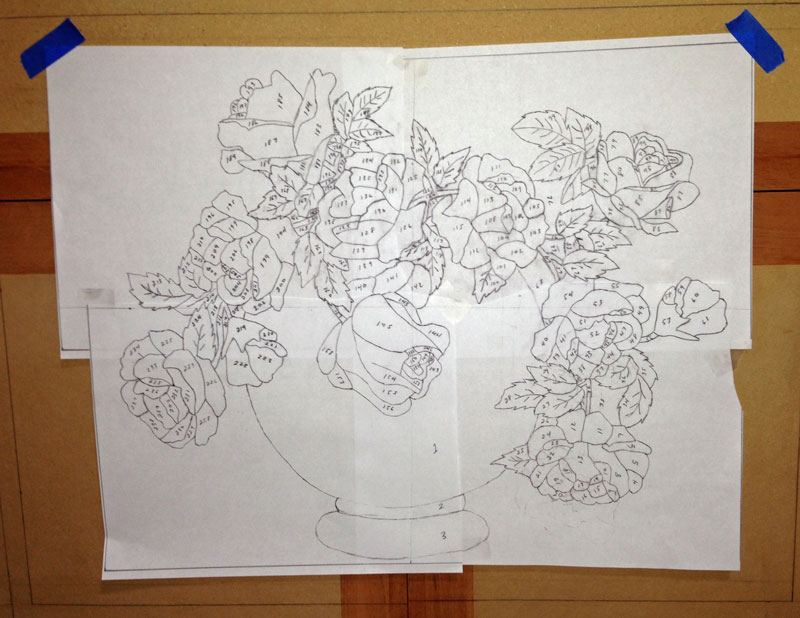
For anyone who's interested, here's the design. I'm finished drawing it (except for some minor revisions) and now I'm numbering it. I sometimes miss numbering a piece and have to add the number when I'm cutting the pieces out.
I had planned to make all the roses white, but my wife is now telling me to make the roses different colors. I'll have to see what she comes up with as far as colors are concerned.
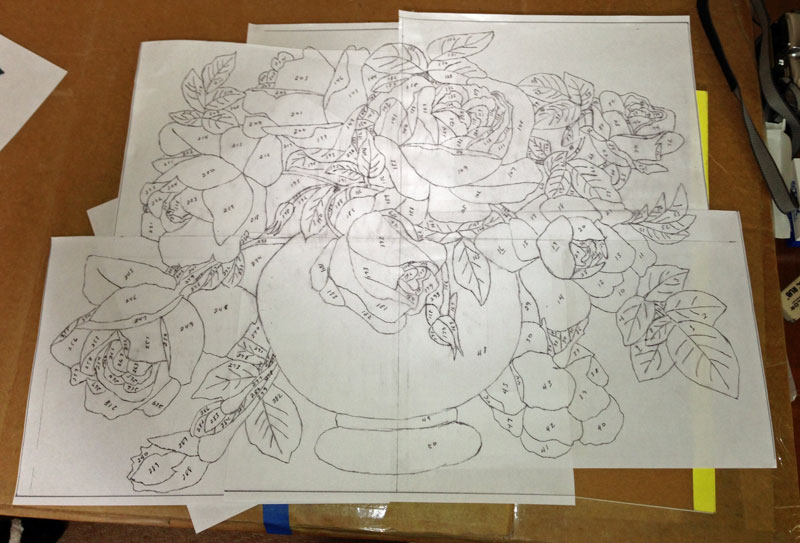
8/16/2013 I have the design pretty much finished and have copied the original drawing. I made two copies, one will be glued to the packet and the other will be used to orient the pieces when I'm putting the design together.
I copy the original drawing on my scanner so I only get a letter size "piece" of the drawing. I then have to put the pieces together to make the complete image. I probably should take the original drawing somewhere and pay for them to make some full size copies - it'd be a lot less work.
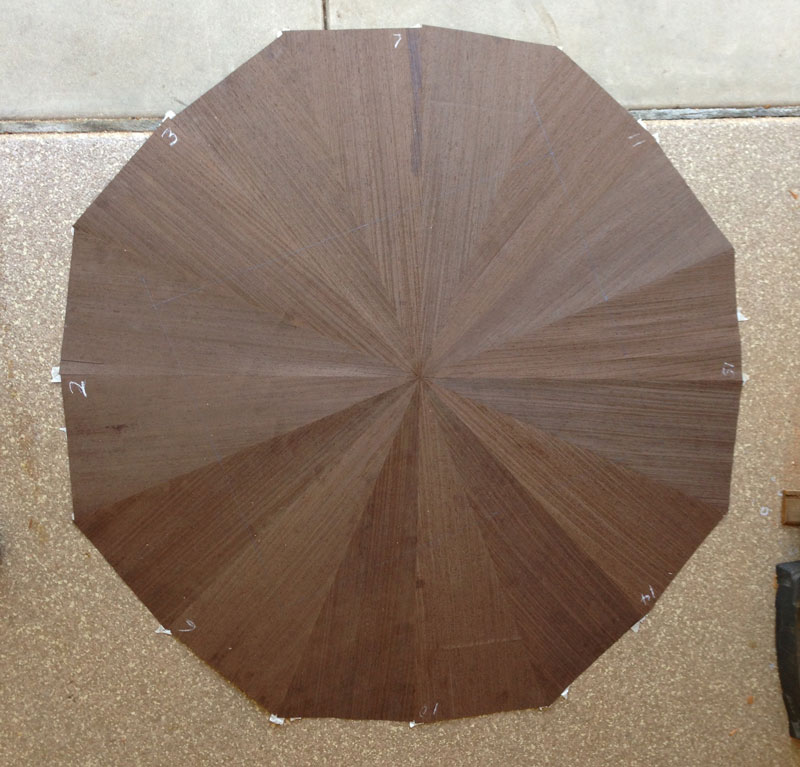
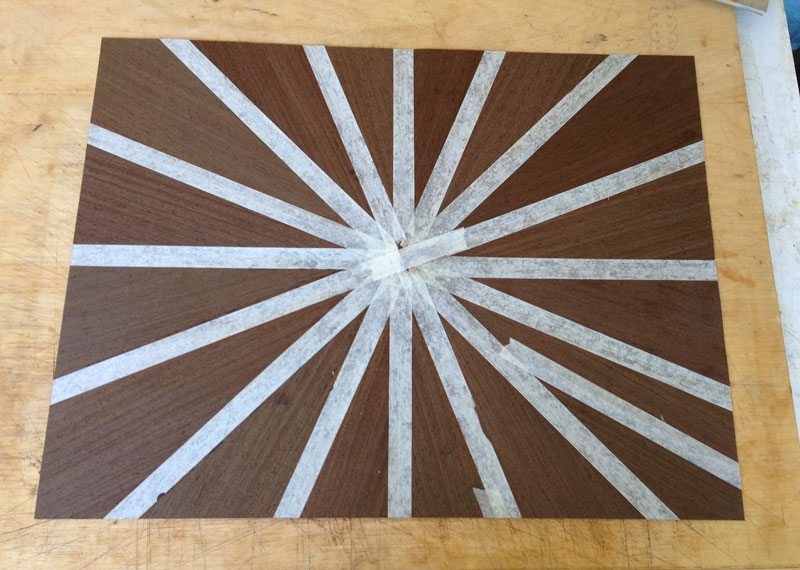
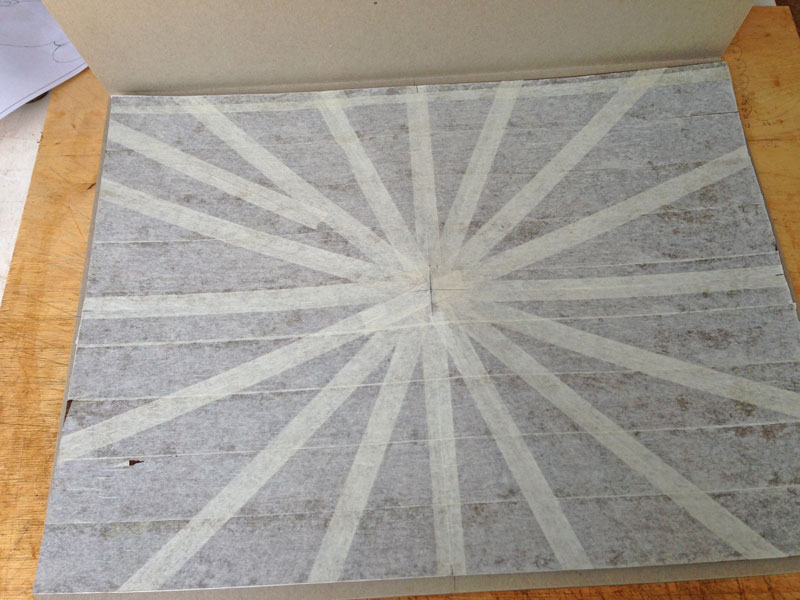
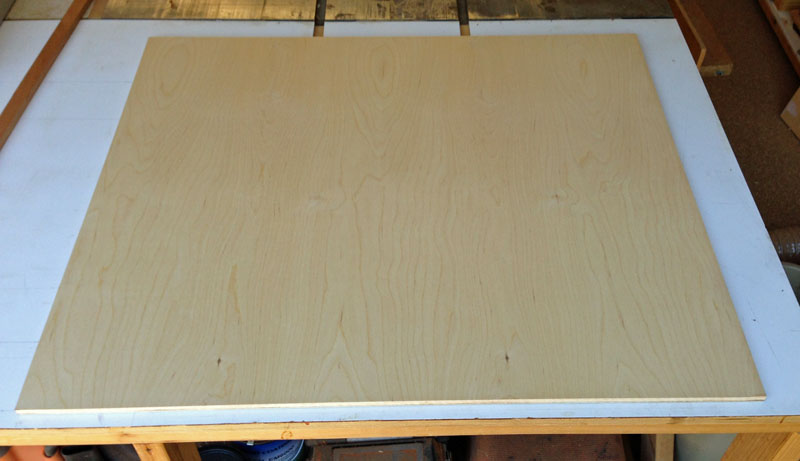
I also put the background together - 16 pieces of wenge laid in a radial match. A lot of the wenge will be cut away by the design but I wanted the pieces left to be pointing to the center. I thought that looked better than just laying it vertically or horizontally. Here's the radial match before trimming.
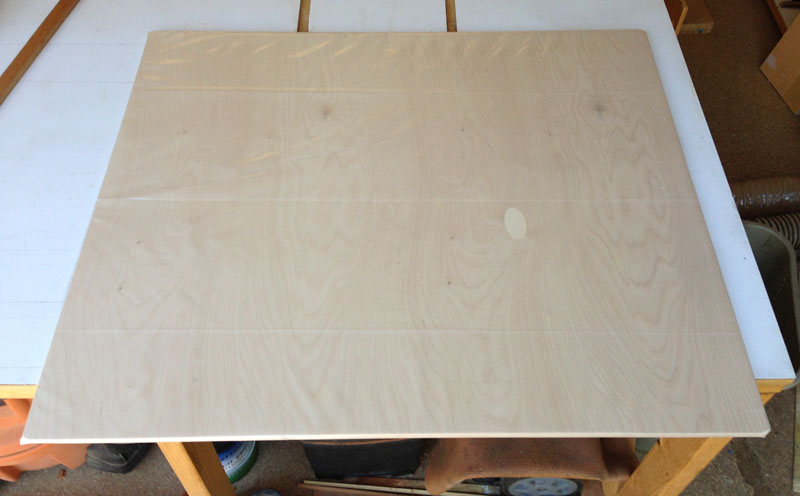
And here it is after trimming (you're looking at the glue face). The required size is 22 1/2" by 16 7/8" so I went about an inch larger in both dimensions. After everything is put together, I'll trim to size.
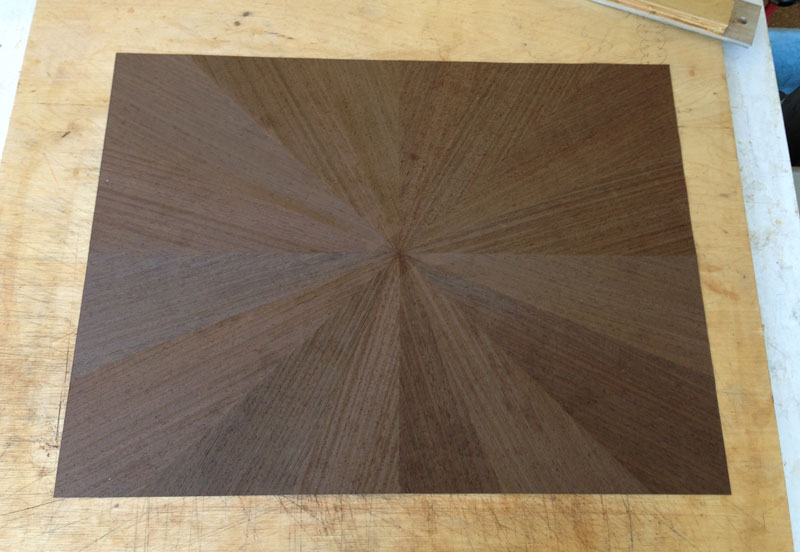
Here's the show face.
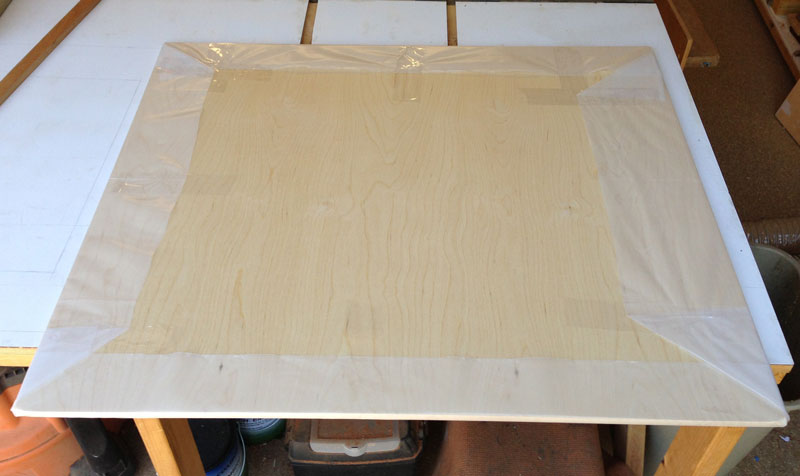
When doing marquetry, you generally need to put paper on the show face to hold the veneer together. Often the pieces are complex and it would be easy for a fragment to break off, and, of course, you'd never find that broken fragment. The paper helps hold the piece together.
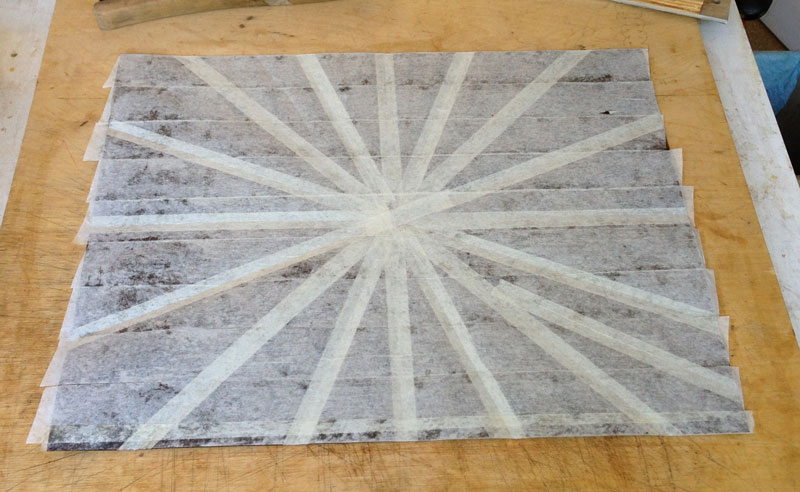
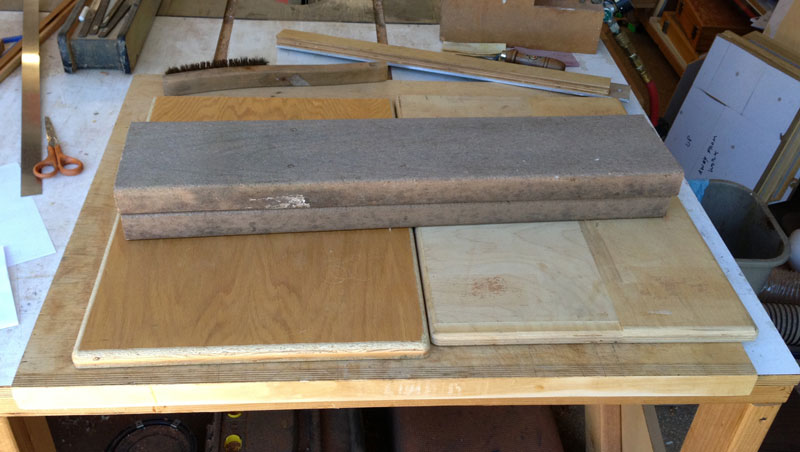
Putting all that wet veneer tape on the face can cause the veneer to buckle so I press it until it dries. The weight on top is a couple of pieces of Trex. If you ever worked with Trex, you know how heavy it is. I'll let it dry for a day.
Next, I need to get with my wife and select the colors for the roses and the vase. Then, I'll prepare those veneers in a similar way, and make up the packet.
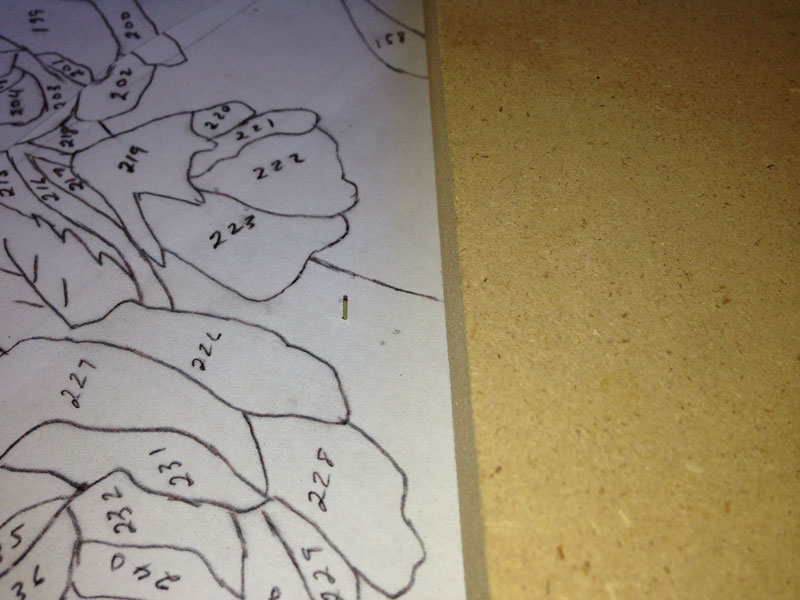
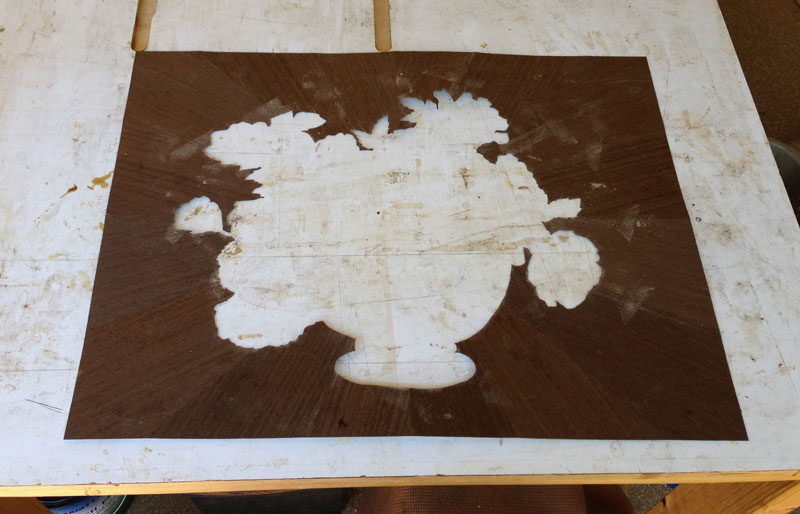
8/26/2013 The first design did not make it past the client (my wife). She had a number of suggestions which led me to do another drawing. It's similar to the first one, but different. We did decide that the roses will all be white, and she wants the vase to not be a strong color, so I'm going to make it in an earth tone. Here's what the design looks like now.
And a close-up.
Note that each element is numbered. This is so that I can track each piece and get it back into the proper place.
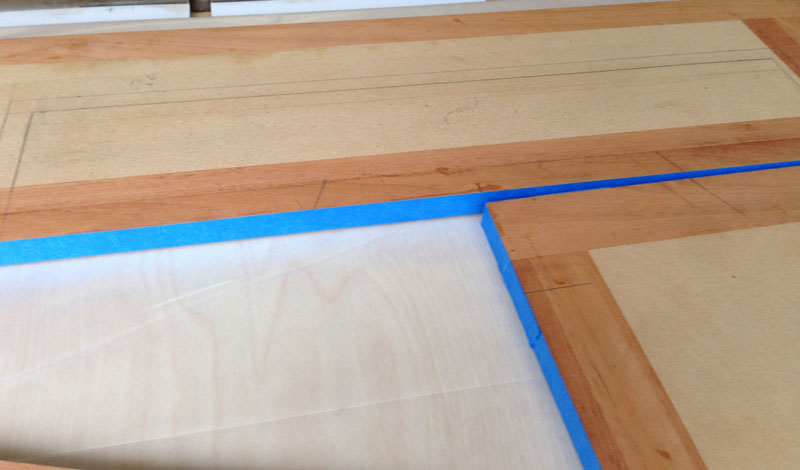
To begin creating the packet, I start with cardboard, approximately the size of the background.

There's a top and a bottom, which I hinge by cutting part way through the cardboard so it will fold easily and in the right place.
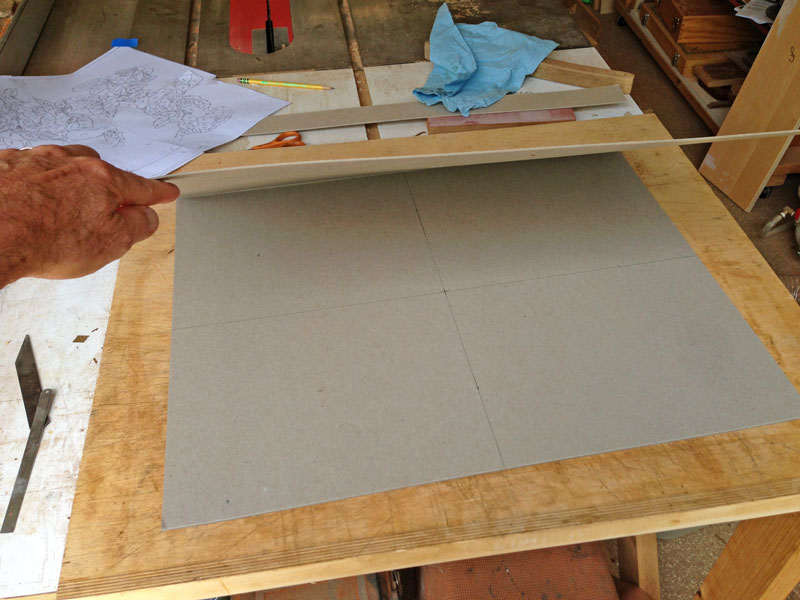
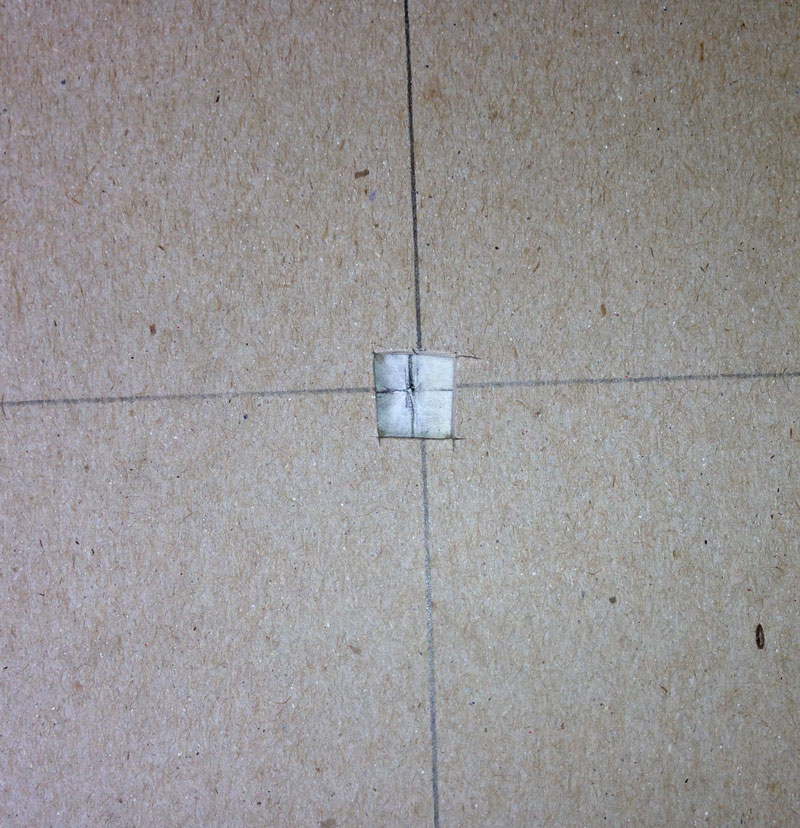
I've drawn a horizontal and vertical line on both the top and inside bottom. I've also cut a small window in the center of the top. This helps me align the background veneer. I replace the cut out cardboard after getting everything aligned.
Note that I have the veneer with the veneer tape up. You can work with the veneer tape down, which helps you see the location of things a bit better, but then your design comes out as a mirror image.
Notice that I've located the center of the background veneer. I do this by bending the veneer along the seams, which allows me to see exactly where the center is.
Now, I can place the background veneer exactly where I want it and then replace the cut out piece of cardboard, using a tiny amount of glue to hold it in place.
I position the cartoon where I want it to be and tape it in place. Then I draw a couple of marks on the cardboard at the top of the cartoon and on each side, at the top. These will be used to align the cartoon when I glue it down.
I use 3M 77 spray adhesive and spray it on the back of the cartoon.
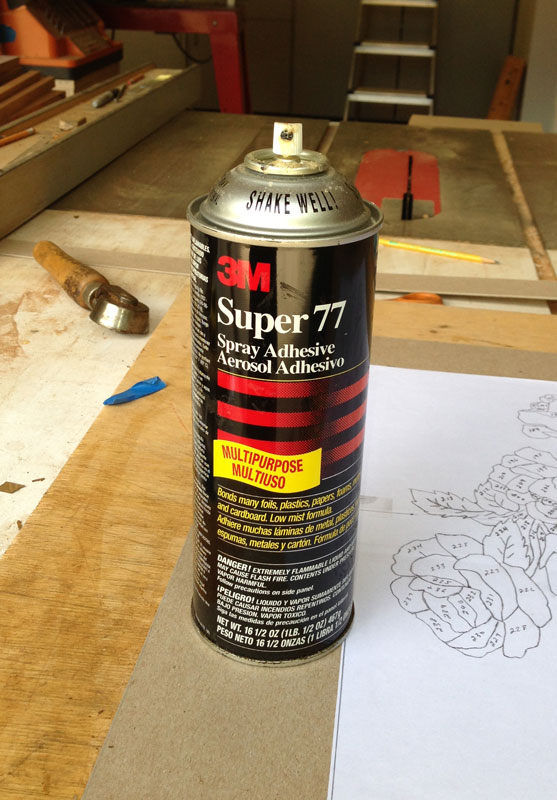
Once the back is sprayed, I have to place it carefully. I hold the bottom end in my mouth and use my hands on the top sides. I align the top of the cartoon to the marks I made earlier and place it down, starting at the top and moving downward. This will allow you to lay the cartoon without any bubbles or wrinkles.

Next, I start to build up the packet by adding the other colors of veneer. There are more to go but I'll finish it tomorrow.
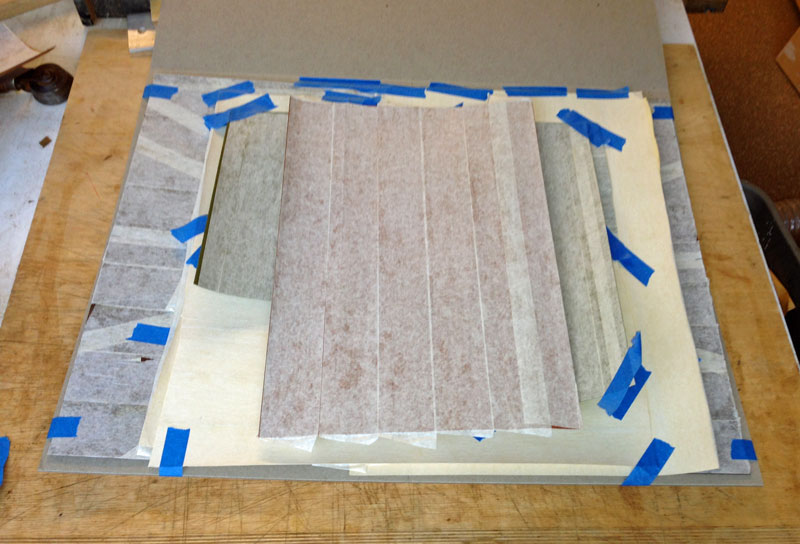
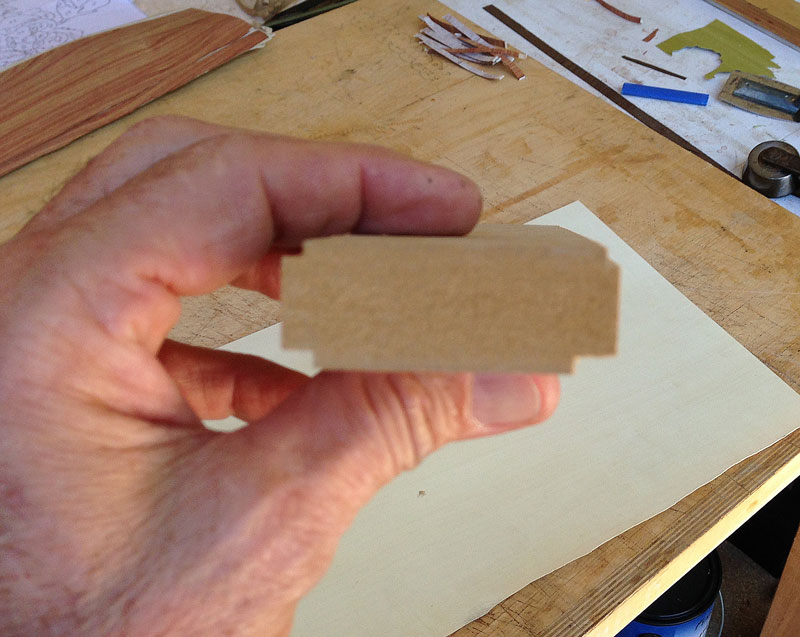
8/28/2013 A fair amount of preparation goes into making a packet. Each piece of veneer has to be covered with paper. I use 2" veneer tape. When one side is covered with tape, the veneer tends to curl which makes placing it a bit more difficult. Some veneer, such as the holly and the green, are laid both horizontally and vertically so that I can choose the piece that give the grain direction along the long axis of the element (a leaf, for example).
When I apply the veneer tape to the veneer, I have to let everything dry for about a day. I press the veneer between two pieces of plywood, but even with that, the veneer curls when I take it out.
Anyway, here's the inside of the packet with all the colors needed (hopefully, I didn't forget any!).

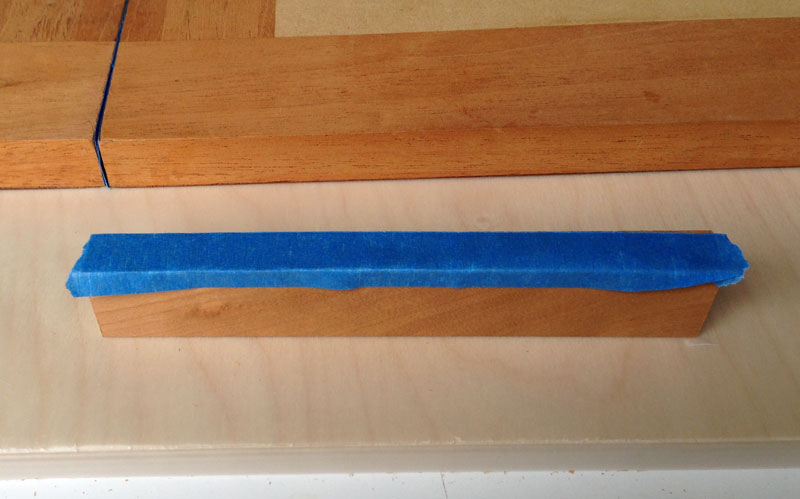
The next step is to put pins through the packet so that the veneer does not shift while I'm cutting it. Our ancestors used very small nails, but we can use 23 gauge pins. You want pins that are longer than the thickness of the packet so that you can clinch the pins over. Since I want the pins to extend out the back, I use some foam behind the packet when I shoot the pins.
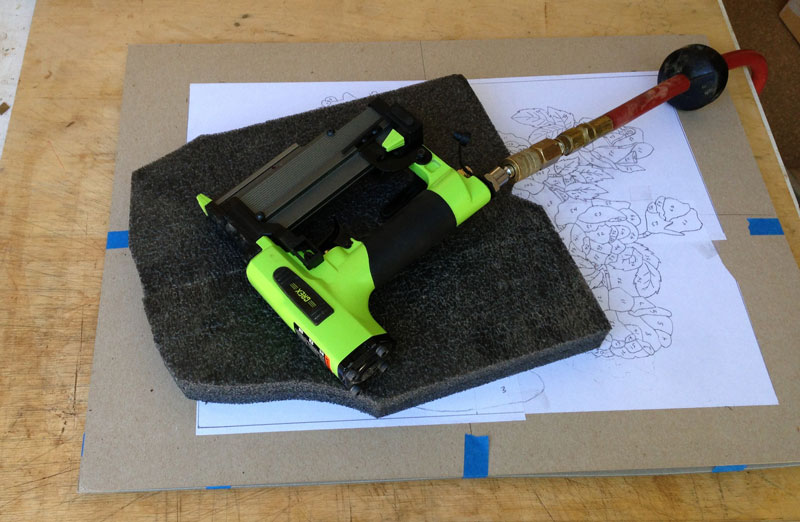
I have to stand the nose of the pinner away from the surface of the packet so I use a piece of wood (here, MDF).

As you can see, below, this leaves the pin protruding from the top surface. Although not shown, the pin also protrudes from the back.
I clinch the pins over. When I clinch the pin on the back, I try to do it so that the bend is the same direction as the top. If you could see the pin from the side, it would look like the letter U.

After I clinch the pins on the back, I put blue tape over the pins so that they won't get hung up while I'm moving the packet around on the scroll saw.

This brings up the question: "How many pins should you use, and where should you put them?"
The goal is to make sure the veneer is held in position so you need enough to do that even after you've cut out most of the elements. The pin holes don't show very much, but they can be seen so I try to put them where the remaining veneer is dark, or is burl. The holes don't show up as much that way.
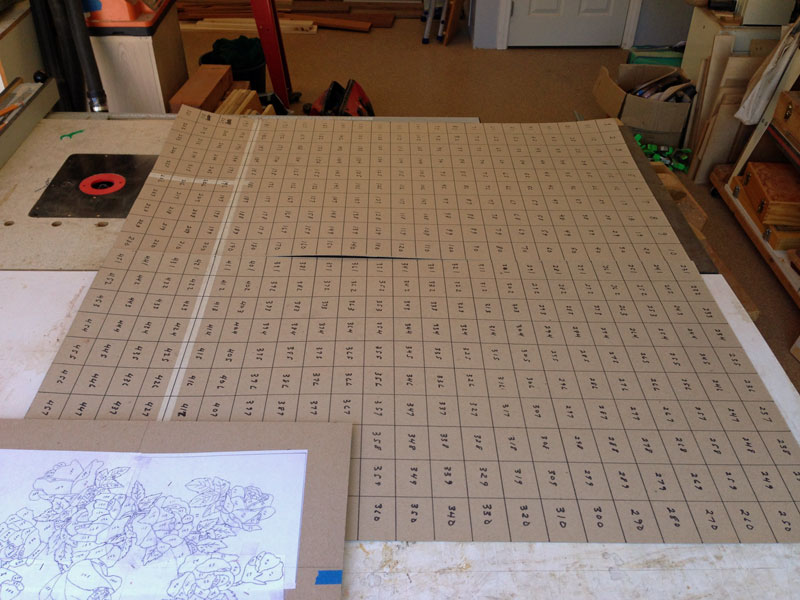
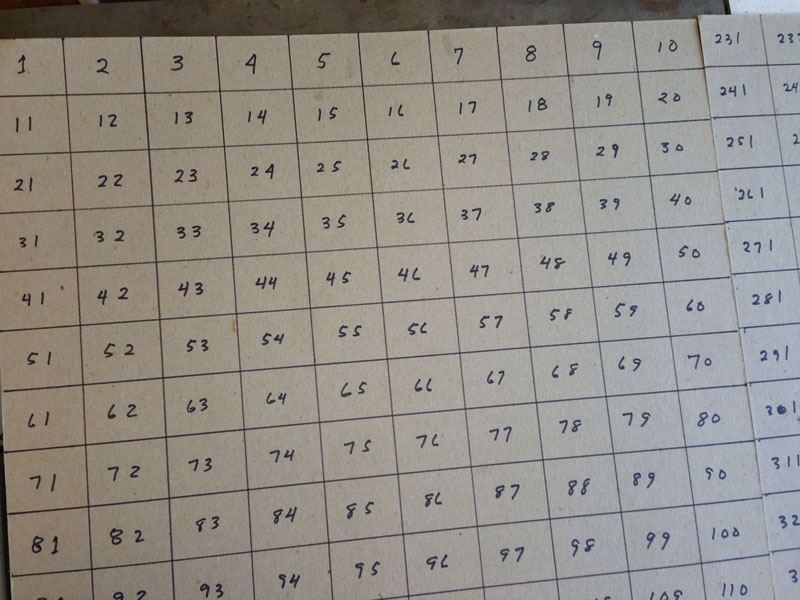
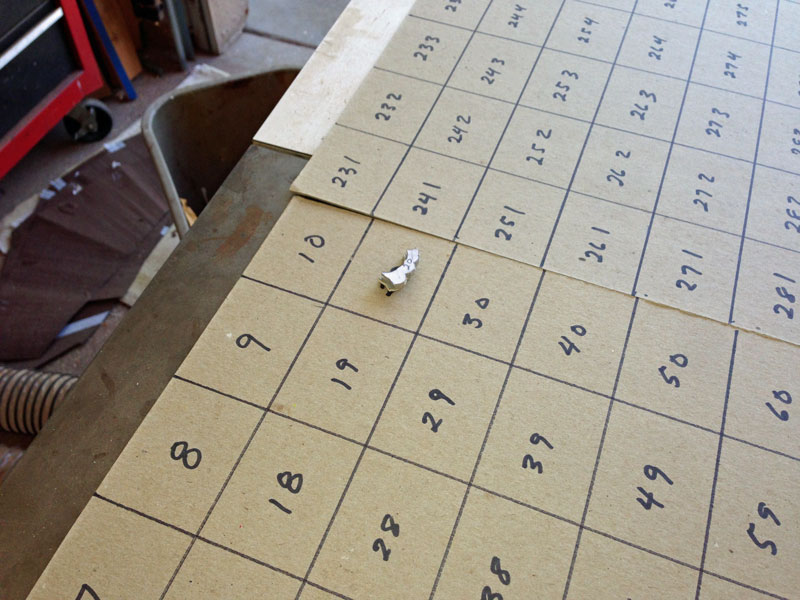
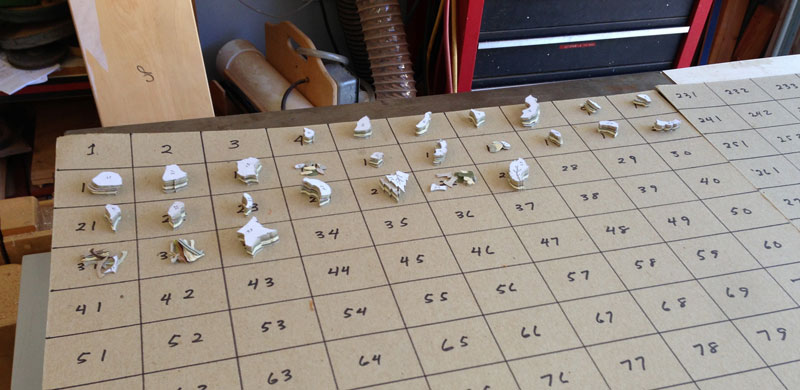
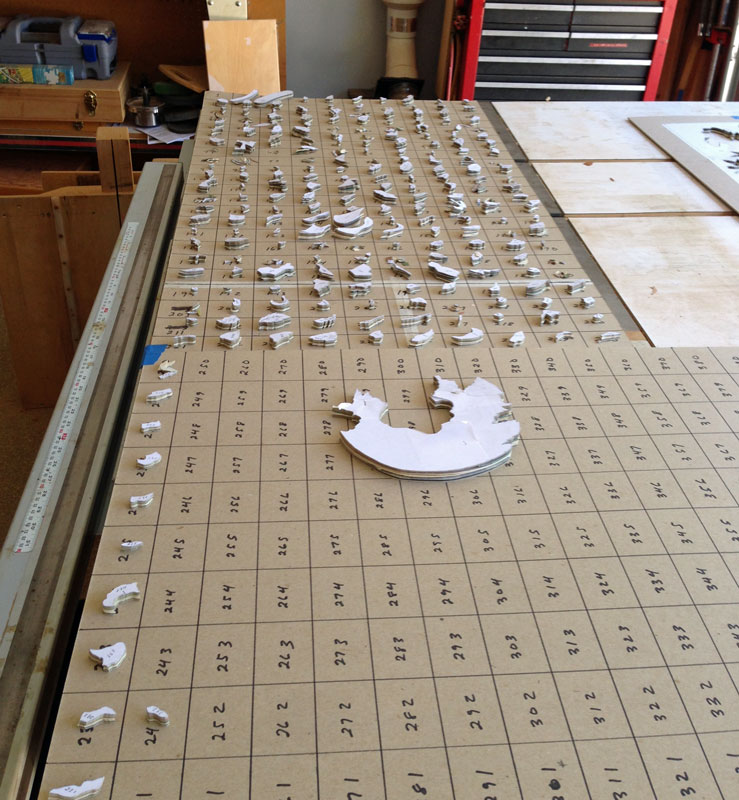
As I cut out the elements, I need to place them so that I can easily find each one. I do this by using a numbered grid, as seen in the following two pictures.
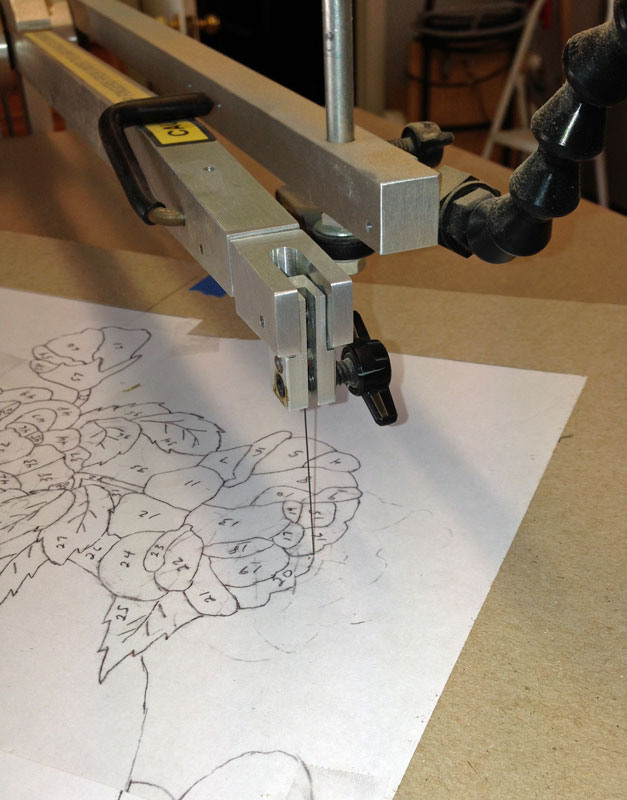
To begin the cutting process, I have to thread a scroll saw blade through the packet. I could drill a hole, but perhaps a better approach is to push an awl like device through the packet. The advantage of the awl like device is that it pushes the wood fibers apart and they tend to close up again from the water in the glue.
Even with that, I want to choose an inconspicuous place to make the hole. I usually choose a place where several lines come together.
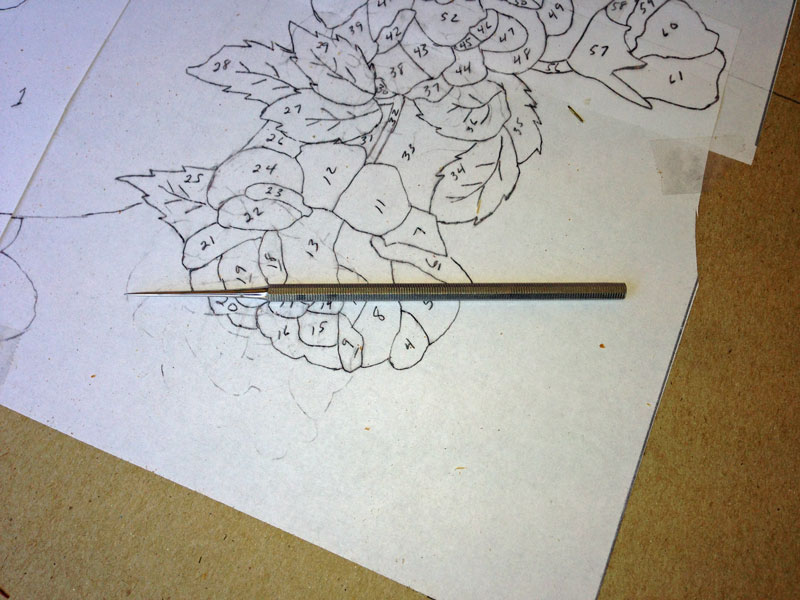
And here's the awl like device being pushed into the packet.

I can thread the blade through this hole.
Here's the first piece cut out.
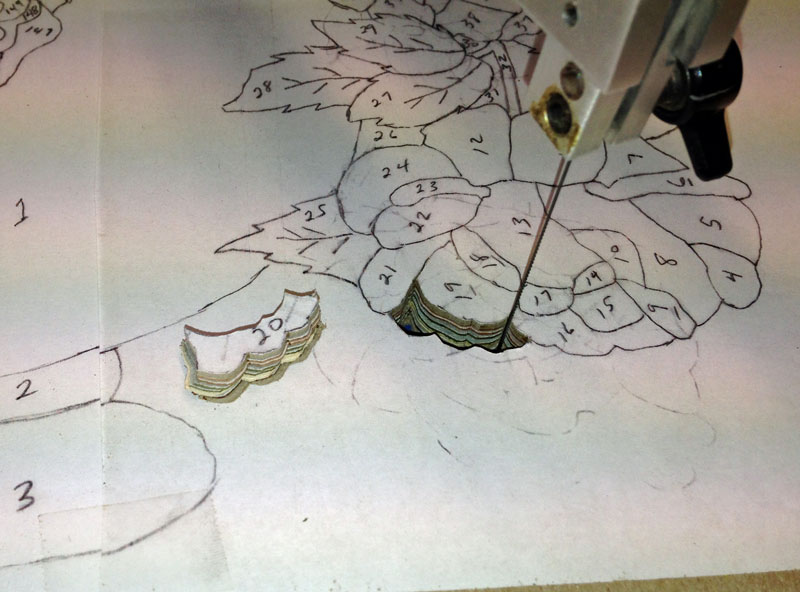
And placed in the proper position on the grid.
A picture after several more elements have been cut out.
And placed on the grid.
In cutting the elements out, I tend to proceed from one end to the other. In this design, I'll go around the vase - the vase will be the last thing I cut out.
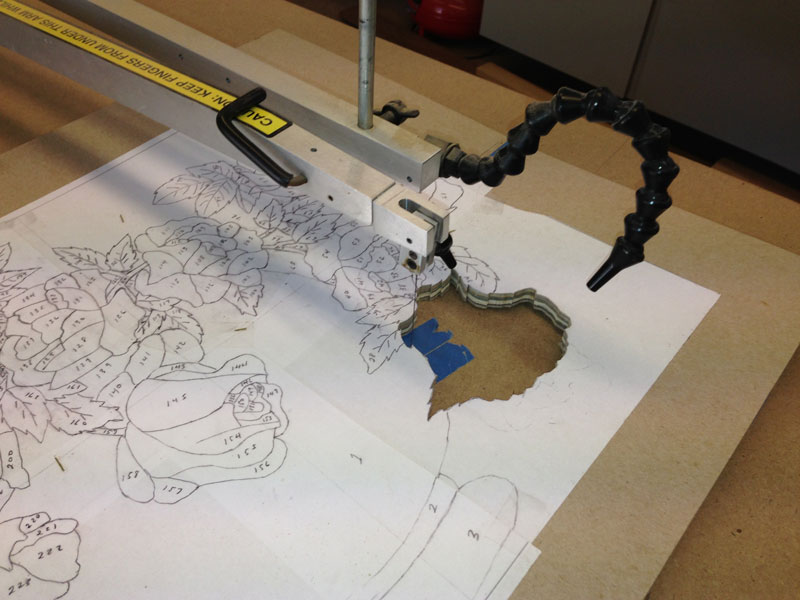
9/3/2013 I finished cutting out all the elements. It normally would not take me this long to cut out this many pieces (about 240) but I had other things going that limited how much time I could spend on this project.
Anyway, here are the pieces.
And here's the the packet after everything has been cut out.

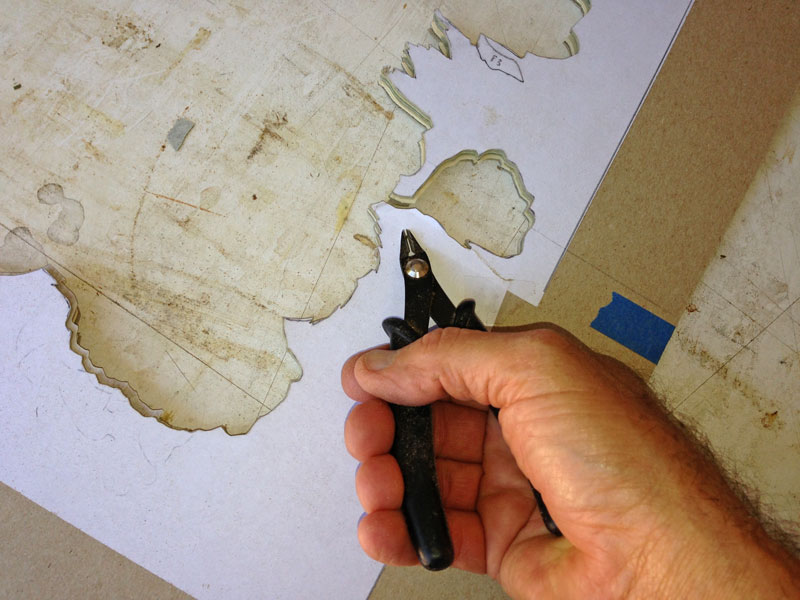
The first step is to open up the packet and retrieve the background veneer. Remember that I had put pins through the packet so I have to remove them. Using a set of nippers, I cut the pins off at the top. Use safety glasses because the cut off pin goes flying when you cut.
Then I go to the back side and pull the pins out (sorry, no picture). This is what the packet looks like on opening it up.
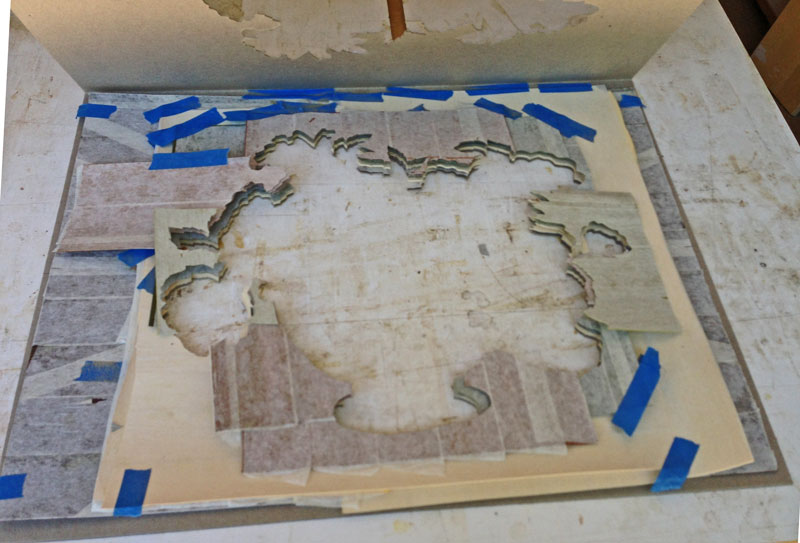
I remove all the veneer to get to the background, and remove the background from the cardboard.
Then I flip it over and put wide blue tape on the back. I use 3" blue tape.

The blue tape will hold the elements as I start to assemble the marquetry. This next picture shows the background with the vase parts put in. I'll do some sand shading on these pieces but just wanted to show how things fit together.

9/4/2013 Next is the sand shading. Here's my setup for sand shading - a Coleman gas stove and an old frying pan with about an inch of sand in it.
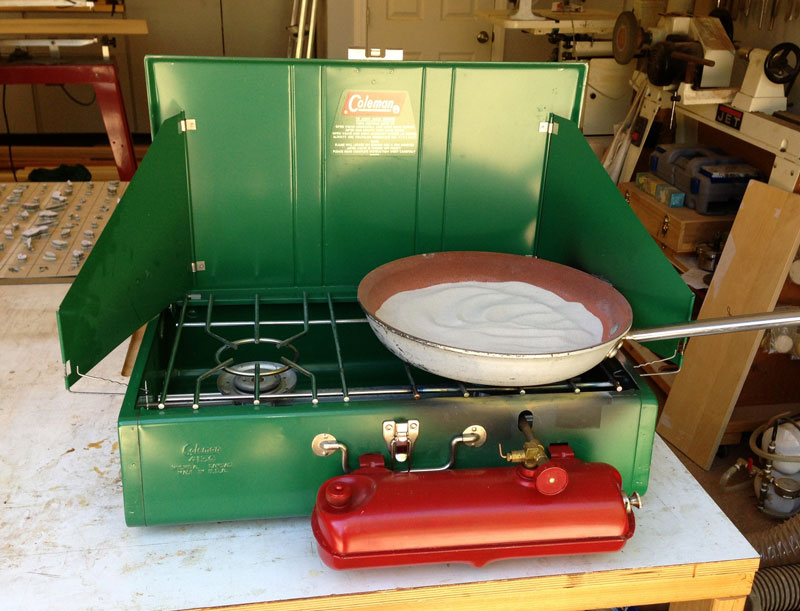
It takes a while to get the sand hot, maybe 15 minutes. I test the temperature by putting a scrap piece of veneer into the sand to see if it will shade, and how fast.
When I first started doing sand shading I used an electric hot plate but it really wouldn't get hot enough so I went to this Coleman stove.
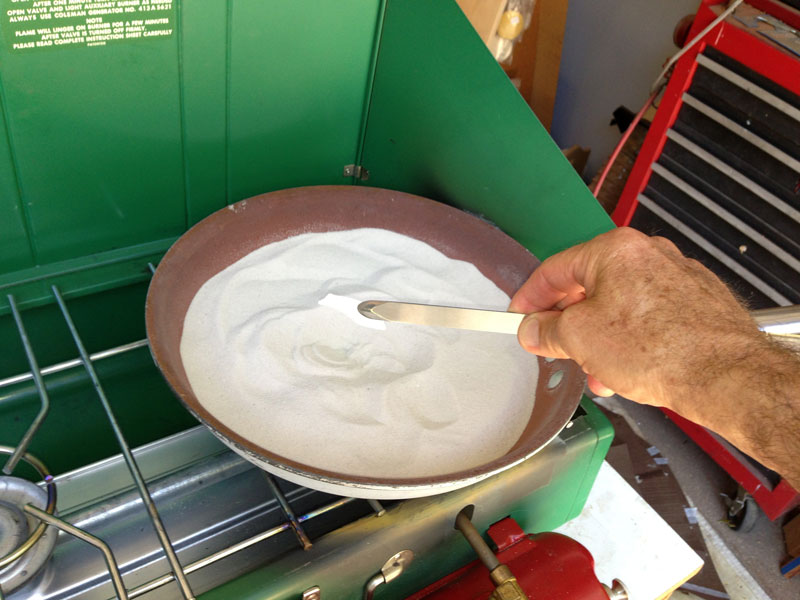
To do the sand shading, I use a set of tongs to hold the veneer while I insert it into the hot sand. For complex parts, I use a spoon to scoop up some of the hot sand and apply it to the veneer where I want to create a shaded effect.
The light colored veneer (such as holly) shades faster than darker veneer.
One question you may ask is "How do you know where to put the sand shading?" There's a couple of ways to deal with that question. One way is to mark each element when you draw the design. Paul Schurch recommends putting a series of pencil dots where the shading should be. That way, you can look at the design and know where to shade.
When I'm sand shading, I have a copy of the design (with the numbers on it) on the bench. That way, I can see the number of the next piece I need to work on. I just look at the "picture" and how the piece fits in and I make a decision on where to sand shade at that time.
Here's the work in progress. You're looking at the veneer from the show face and it's all covered with paper tape - so the final colors don't really show up. If you work with the paper tape down, you can see the colors as you work, but then the picture will come out as a mirror image.

When you sand shade veneer, the heat drives off the moisture in the veneer and the veneer shrinks. So when you put the pieces together, there will be small gaps between the pieces. You can mitigate that problem by misting the pieces of veneer after sand shading to increase the moisture content. But this can cause it's own problems. If the pieces expand too much, you won't be able to fit them together.
Mostly, I don't re-hydrate the pieces and deal with the gaps. I move the pieces around to keep the gaps about equal. When I glue up the veneer, I use a dark urea formaldehyde glue, which is water based. The water in the glue causes the veneer to expand, and the glue comes up between the pieces, filling any gaps. The effect is that the piece may be outlined by a dark brown line, which I do not find objectionable.
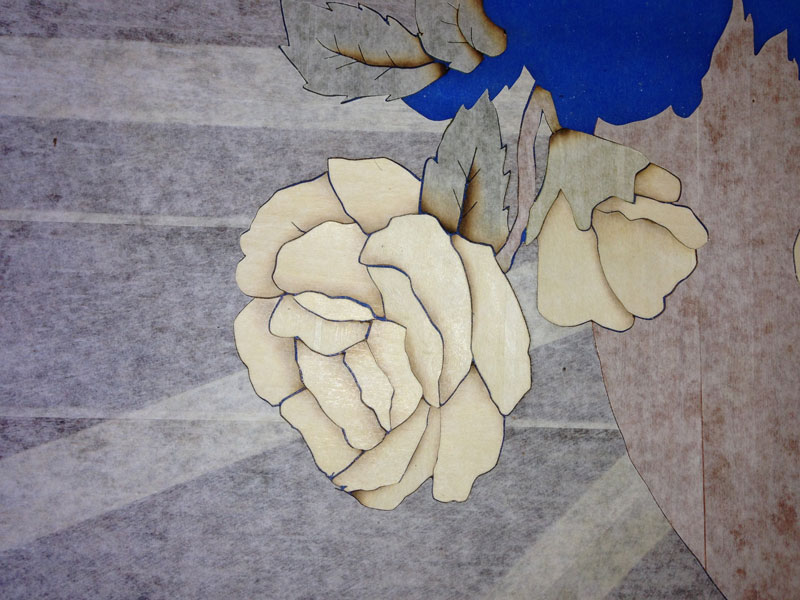
Here's a close up of a rose from my floral coffee table. You can see the elements are outlined by the brown glue. to my mind, that just helps delineate the pieces and makes the design stand out better.

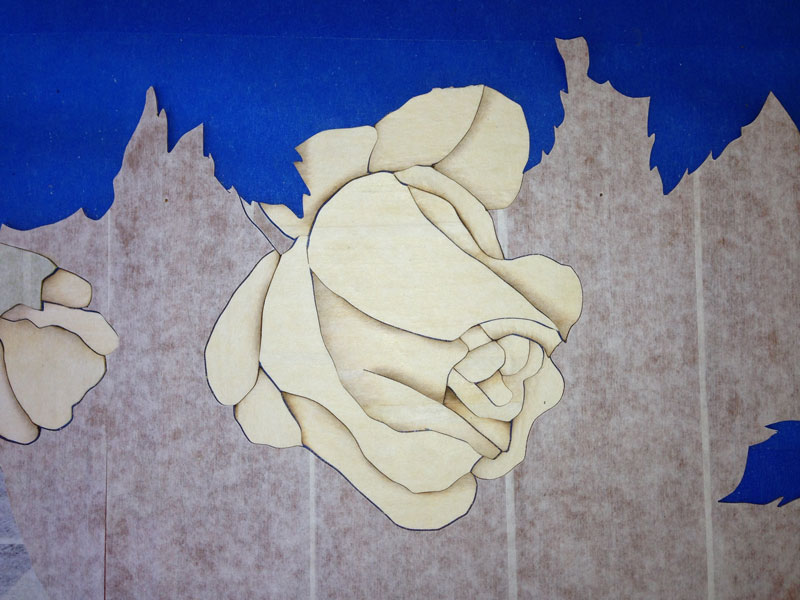
Here's a close up of the two flowers done so far. Remember that everything is covered with paper so the actual colors cannot really be seen.
9/7/2013 I finished sand shading and putting the design together. I then put paper tape over the show face of the design to hold the pieces together, and remove the blue tape from the back.
Here's what the show face looks like now, with the paper tape over the face.

Taking the blue tape off the back gives me my first look at what the design will look like. Since we're looking at the glue face (the back of the design) we see a mirror image of the design.
I'm pretty satisfied with the way it came out, although there are a few places where I might have shaded a bit more, or a bit less.
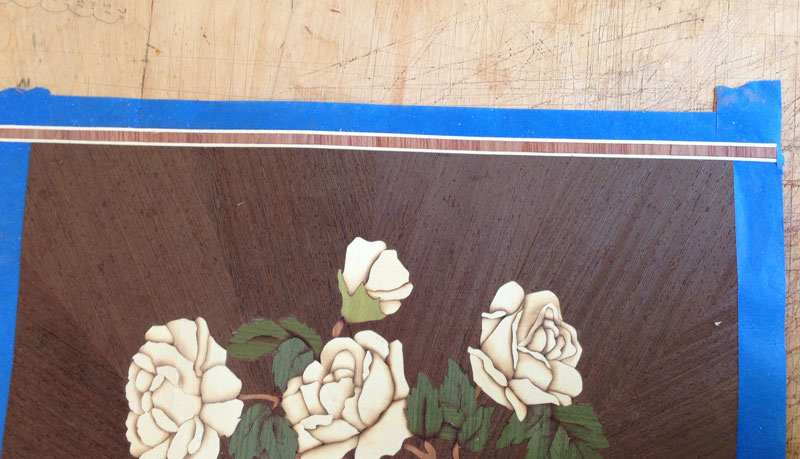
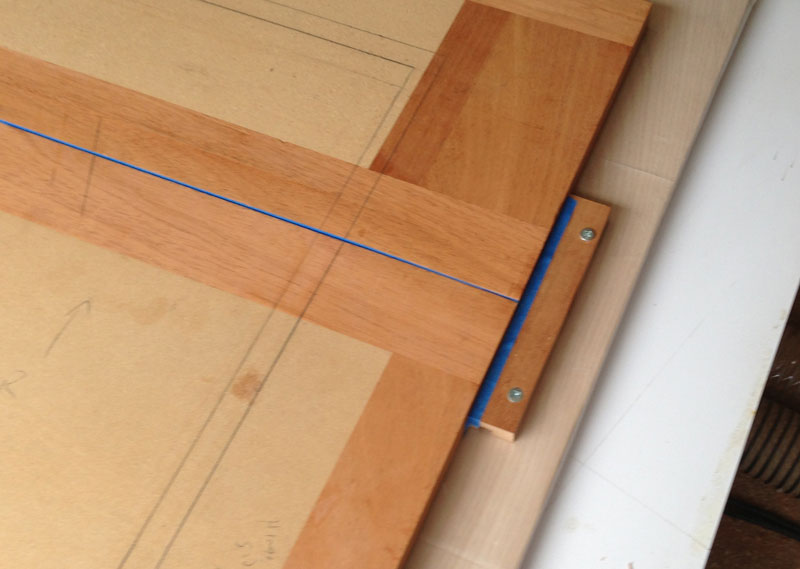
9/8/2013 I trimmed the veneer to size - it required taking about 1/2" off on all sides. Next, I'm going to lay the banding. I'm going to use quarter cut tulipwood, cut across the grain, outlined by two strips of holly.
In preparing to lay the banding, I put blue tape on the show face all around the border.

I'm going to work from the glue face, so this gives me the sticky side on the glue face.

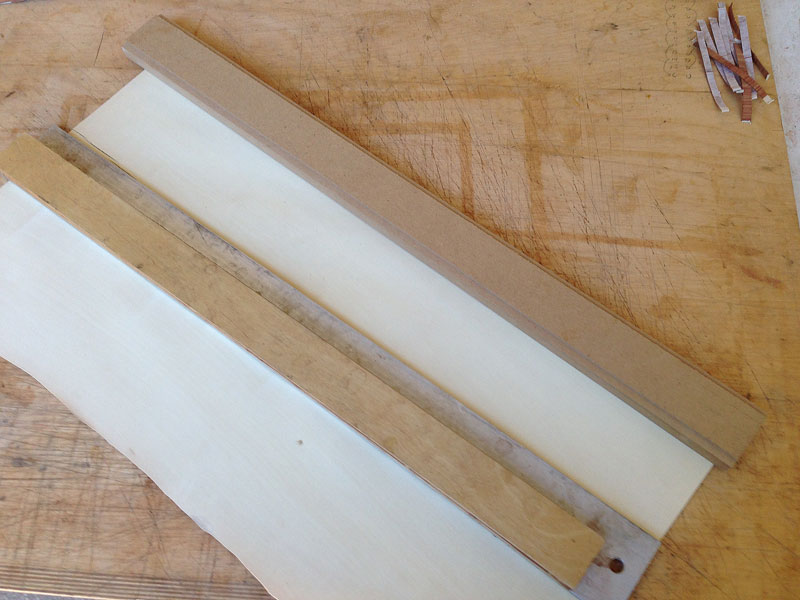
In cutting the banding, I use a banding guide, which is a piece of MDF about 24" long with rabbets cut in each corner. The one shown here has rabbets of 1/16", 2/16" (1/8"), 3/16" and 4/16" (1/4"). I'm going to use the 1/16" for the holly.
I first create a straight edge on the holly veneer, then slide the banding guide against the holly so that the veneer is in the 1/16" rabbet.
Then I slide my straightedge against the banding guide, being careful not to displace the guide.
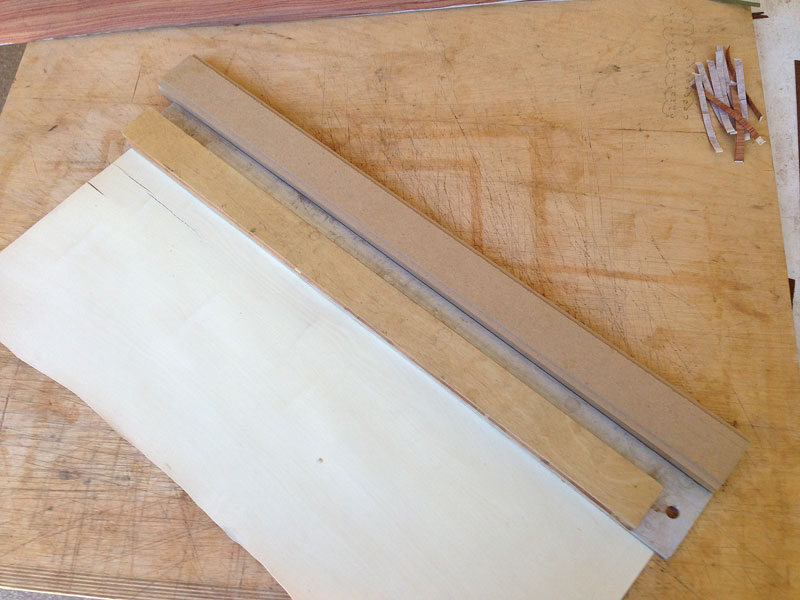
Then I remove the guide. This leaves a 1/16" strip of veneer exposed beyond the straightedge.
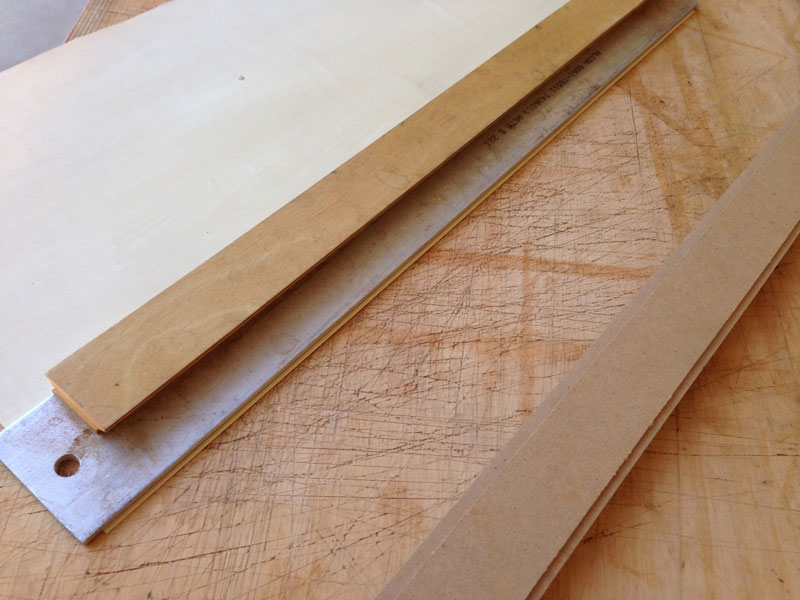
I use my veneer saw to cut the veneer, giving me a 1/16" strip of veneer.
It's almost impossible to cut these strips without a guide. The strips have to be exactly the same width from piece-to-piece, and exactly the same width from end-to-end. Trying to accomplish this by measuring is extremely difficult. With the jig, you can cut a bunch of strips quickly.
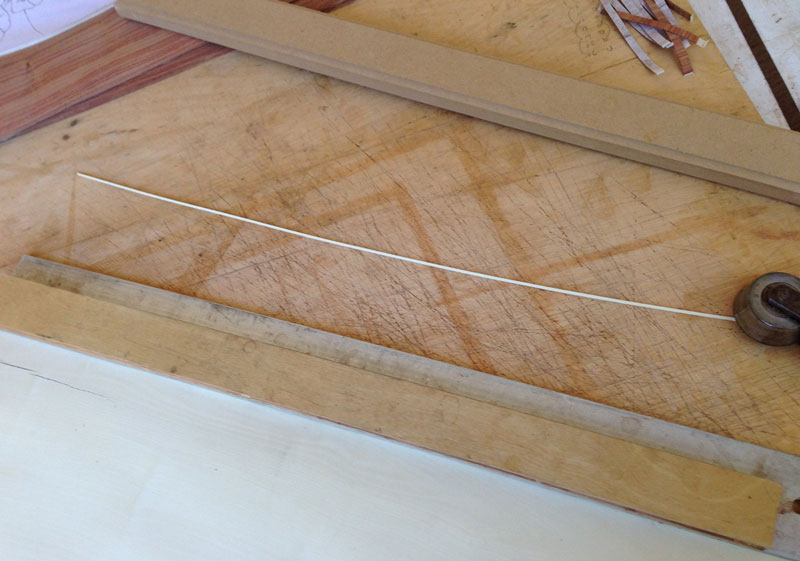
That doesn't mean they're all going to be okay. I examine the strips before use and discard any that are tapered or have any other defects. So cut more strips than you'll need.
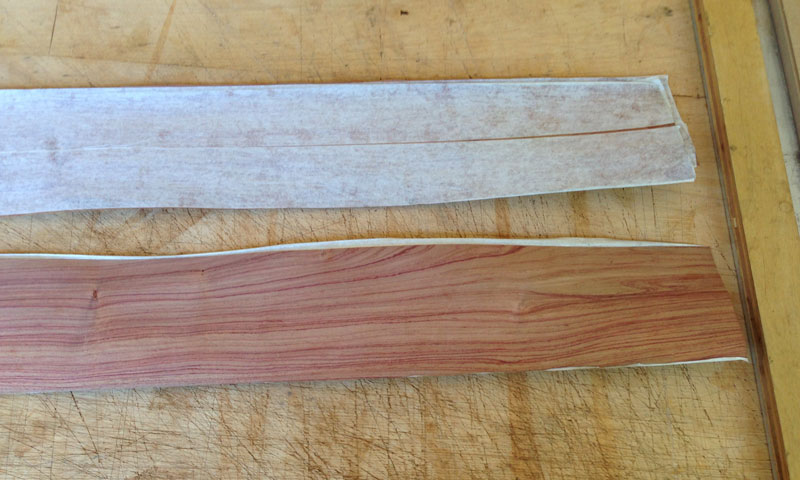
The tulip wood is cut across grain. When you do this, you must provide something to hold the veneer together. Otherwise, it'll fall apart in the cutting or when you attempt to handle it after cutting. Here, I've used paper tape on one side of the veneer. For small amounts of banding, you can use blue tape instead of the paper tape.
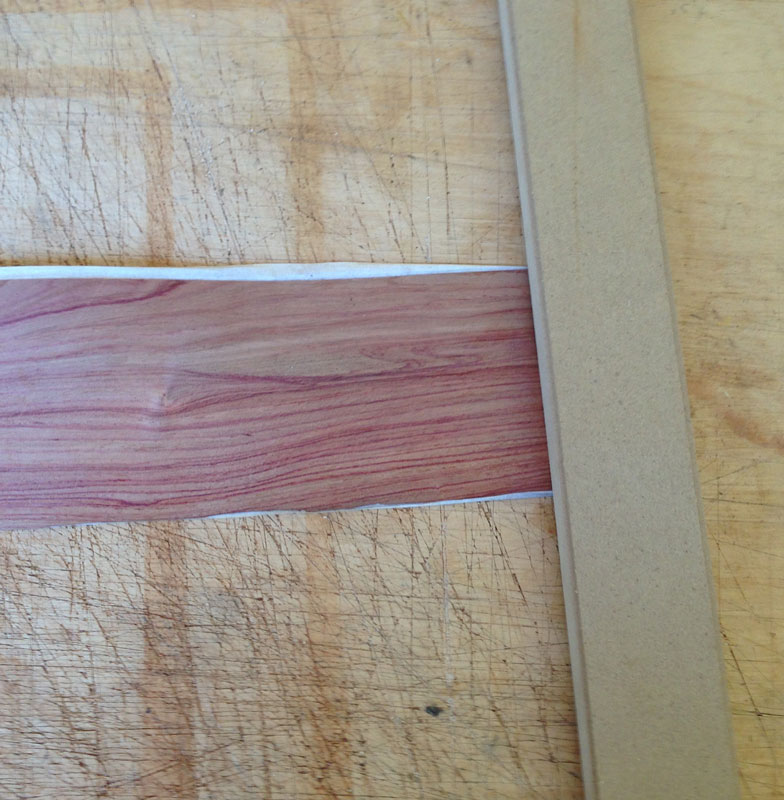
To cut it, I do exactly the same as for the holly, except I use the 4/16" (1/4") rabbet. Cut the end square and slide the guide against the veneer.
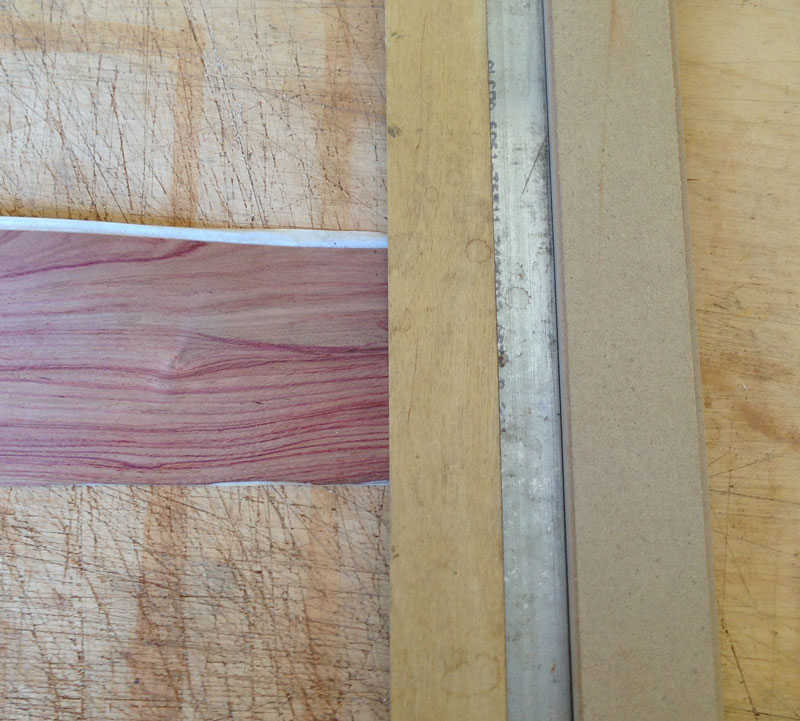
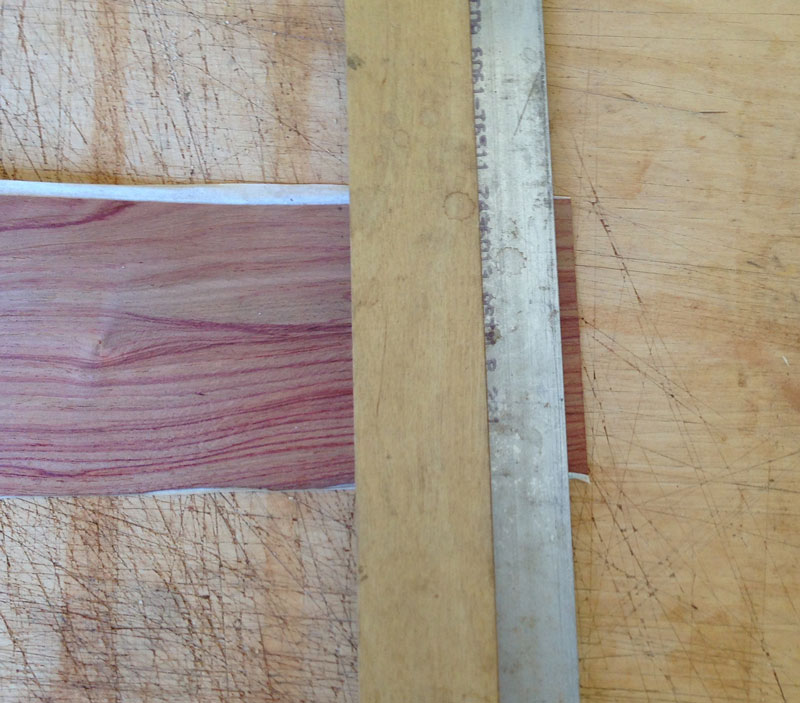
Then move the straightedge into position, remove the guide, and then cut.
Each piece is fairly short so the pieces will have to be pieced together to make the banding. I do this by cutting each end square before placing it and slide the next piece tight against the previous piece. It may take some trimming to get the two piece to fit together invisibly.
On the corners, I want to miter the two pieces of banding together. I do that by overlapping the banding and cutting it with a chisel. The chisel must be aligned very accurately so that the miter will be correct. I tap the chisel with a mallet to make the cut.

And this is what a corner looks like.
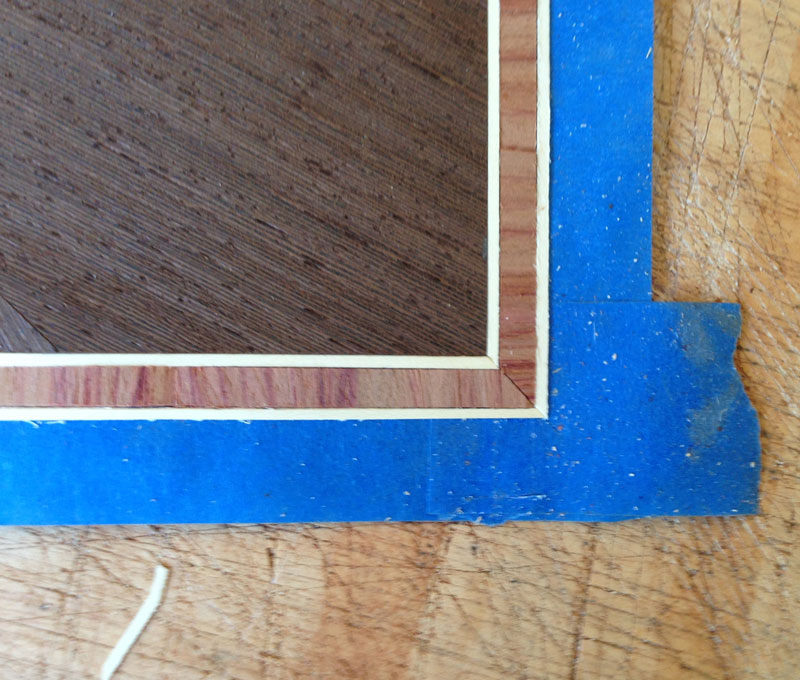
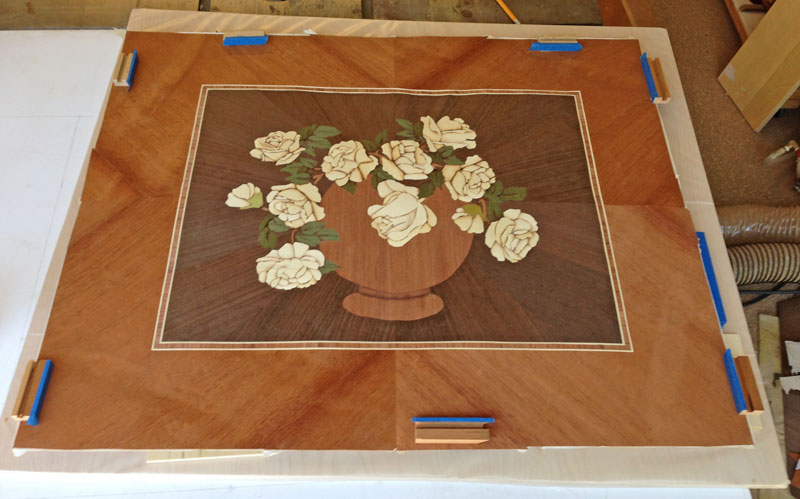
Here's the panel with the banding complete.
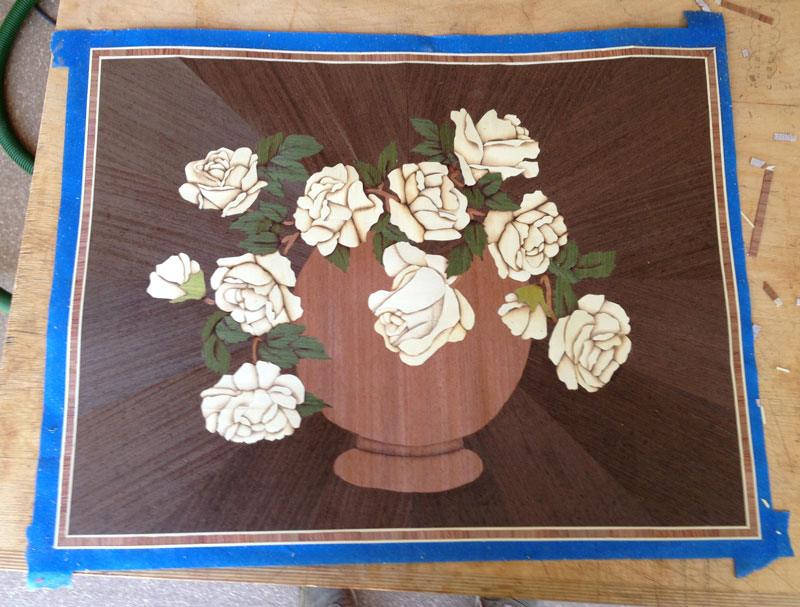
9/9/2013 I made the border for the panel today. Doing the border is fairly straight forward although doing it at a 45 degree angle, as this one is, is a bit more of a challenge. The border is oversize by about 1/2" to 3/4" all around.
Remember that you're looking at the glue face so the design is a mirror image.
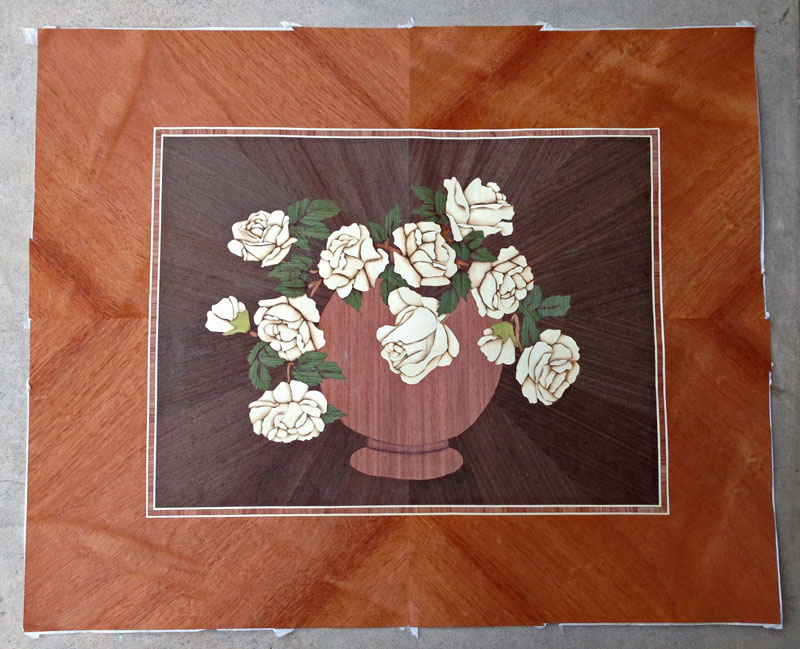
And here's a picture of the show face. I put veneer tape around the perimeter to help protect the veneer from splitting along the grain. This mahogany veneer is fairly fragile and splits easily.

This completes the marquetry and veneer work. Next, I'll start preparing for gluing the panel to the doors. It's going to take some special "jigs" to hold the doors in place during the press.
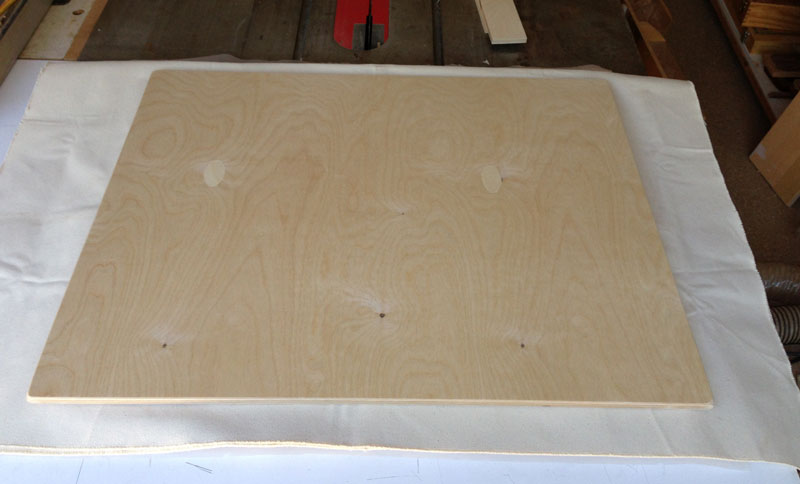
9/11/2013 I worked on preparing for the glue up. Since there are three doors that make up this glue-up, I need to construct something that will hold the doors in place during the press. I start by cutting a piece of plywood larger than the three doors.
Since this will go into a vacuum bag, I like to smooth any sharp edges.

Then, I covered the plywood with plastic. The reason for doing that is to make sure any glue that squeezes out does not glue a door to the plywood.
Viewing the plywood from the back.
Here are the doors laid on the plywood.

I need to space the doors the same as they were on the cabinet, and make sure they don't get glued together by any squeeze out. To do this, I put blue tape on the faces, and build it up to get the same spacing.
I made some blocks, 1/2" thick, to use to hold the doors in place. It's important that the blocks be thinner than the doors so that there's no risk of them holding the caul off the doors.
This is how the blocks will be placed.

I put two screws in each block.
And then covered the blocks with blue tape, just to be sure.
One problem with this glue up is that the seam in the veneer MUST align with the space between the doors. To make sure I achieve this alignment, Paul Schurch suggested that I glue blocks onto the veneer to exactly position the veneer on the doors. Here's a few of the blocks. Note the blue tape on them to keep them from getting glued to the doors.

Here's the veneer with the blocks glued on.
Here's what I do after I apply the glue to the substrate. First, I place the veneer, using the blocks to achieve the alignment I want. Then I put a sheet of plastic over the veneer. The purpose of this plastic is to prevent the cloth (or caul) from getting glued to the veneer if any glue bleeds through the veneer. And since there are some gaps in the marquetry I can be assured that some glue will bleed through.
Then I place a layer of heavy cloth, such as sail cloth. The reason for this is to spread the pressure across the veneer. If there are pieces of veneer that are thicker than others, the cloth will press the lower pieces as well as the higher pieces.

Then I place a caul on top. The caul should be approximately the size of the panel (just a bit larger). If you make it too large, the outside of the caul can be pulled down, resulting in lower pressure just inside the border of the doors. That is, the caul could bow upward.
9/14/2013 Yesterday, I did the glue up. I don't have any pictures of the process because the glue up is a stressful procedure and I didn't take any time out to take pictures. I mix up the urea formaldehyde glue (it comes as a powder) and spread it on the substrate. I also put a bit on the back of the marquetry to make sure that the glue came up between the elements - so that there wouldn't be any voids between the pieces.
Then my wife and I placed the veneer on the substrate and put the plastic, cloth, and caul on. I use packing tape to hold everything in place so that nothing shifts as we're putting it in the bag.
Here's a picture of the bundle in the vacuum bag with an electric blanket on top. The UF glue is very sensitive to temperature and won't cure at temperatures much below 70 degrees. While it's hotter than that now, extra heat causes the glue to set faster.

I commented that the glue up process is a high stress time for me. There's just so many things that can go wrong. If I put too little glue, I'll have bubbles - but these can usually be repaired. The veneer can shift during the process of putting the packet together and getting it into the bag. If placement is critical, this can be a fatal flaw. A piece of marquetry can get stuck in the glue and if you then shift the veneer, you can have that piece under another part of the veneer. The UF glue is slow - I usually leave it in press for 6 to 8 hours - so I have to wait a long time to find out if everything went well.
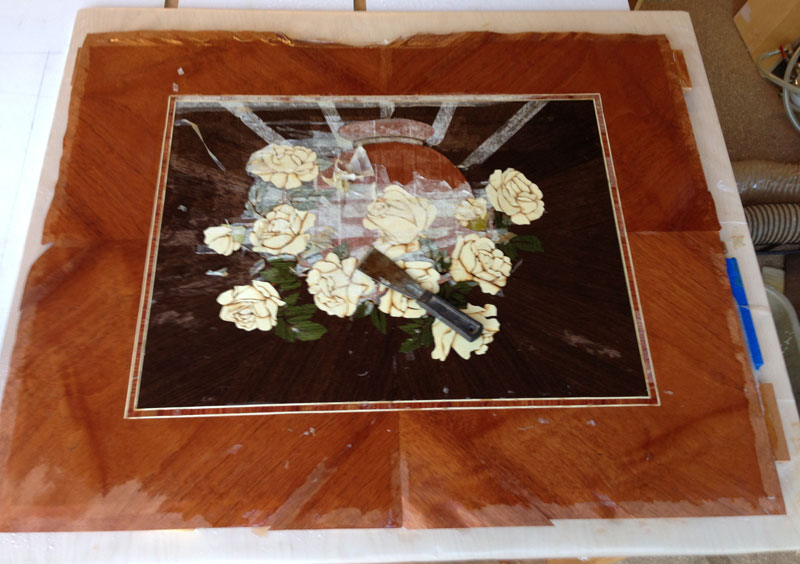
Anyway, after biting my fingernails, the time finally came to take it out of press. This is what it looked like (I've already sprayed some water on it in preparation for removing the veneer tape).

Here it is with about half the veneer tape removed. When moistened, the veneer tape comes off pretty easily. But there's many layers of tape and the water doesn't penetrate that fast so I have to spray again after I remove each layer. Paul Schurch uses a belt sander to remove the paper tape but I'm too chicken to do that. I'm afraid I'll sand through and ruin the work.
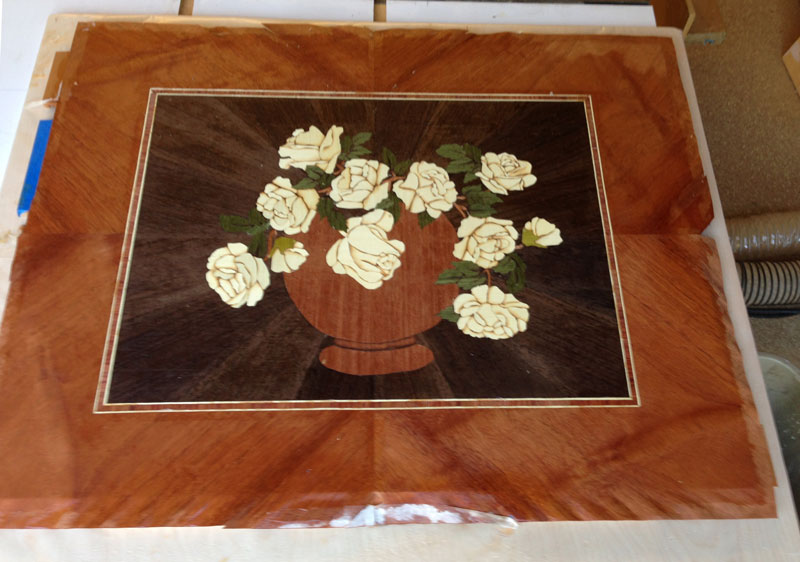
And here it is with essentially all the veneer tape removed.
My next step is to separate the doors. First, I trim back the excess veneer at the seam between the top door and the bottom doors - I need to see exactly where it is.

Then I clamp a straightedge across the work, aligning it with the seam, and use my veneer saw to cut through the veneer.

Here's the top door cut loose.

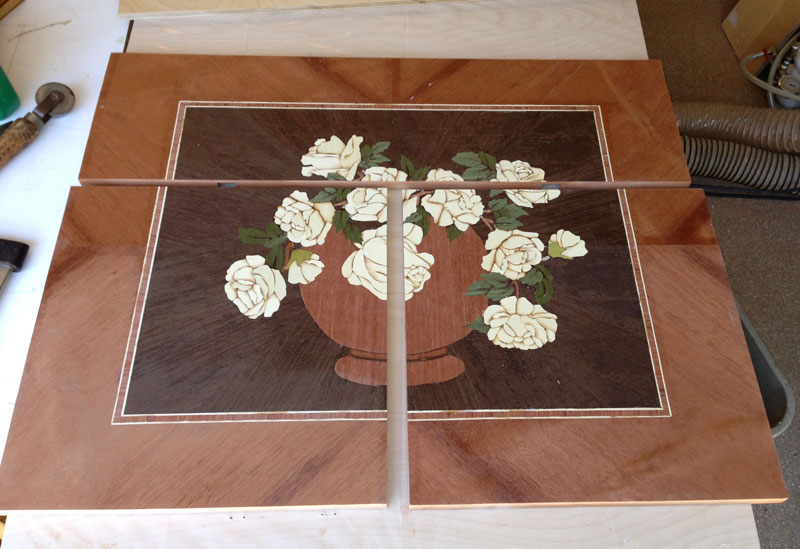
I cut between the two bottom doors in the same way. After trimming the excess veneer around the doors, this is what the doors look like.
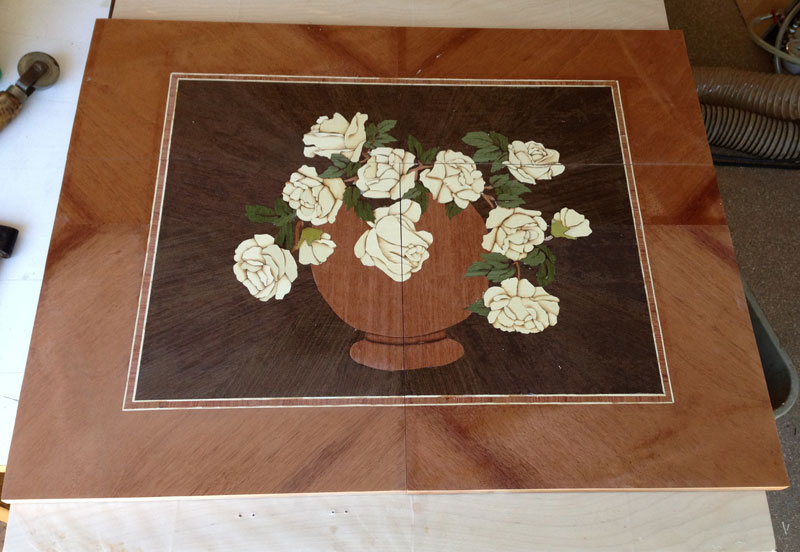
Here's a picture with the two bottom doors pulled out just a bit so you can see them better.
Here are the doors installed on the cabinet. The fit is not perfect but it's close.
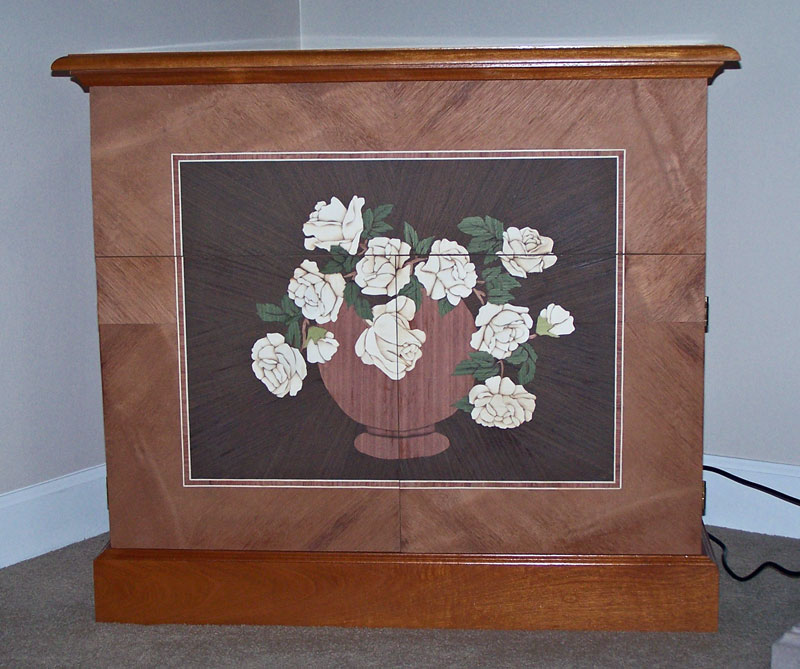
My next step is to fit the doors a bit better. Once I'm satisfied with the fit, I'll begin the finishing process.
9/20/2013 Here's a picture of the doors finished and fitted. My issue now is knobs. I'm thinking of putting an ebony handle on the top door but I'm stuck on what to do for the bottom doors. I don't want to put knobs on the marquetry but putting them at the bottom would be awkward to reach.
9/22/2013 I put in the magnets to hold the lower doors closed. I wanted to do it invisibly so my only choice was to cut a mortise for each magnet from below. The problem is that the magnet must be very close to the surface or there won't be enough pull to hold the doors closed. So the mortise must be cut with one very thin side.
To support the side, I put a caul against the "thin side" to keep from breaking the wood there.
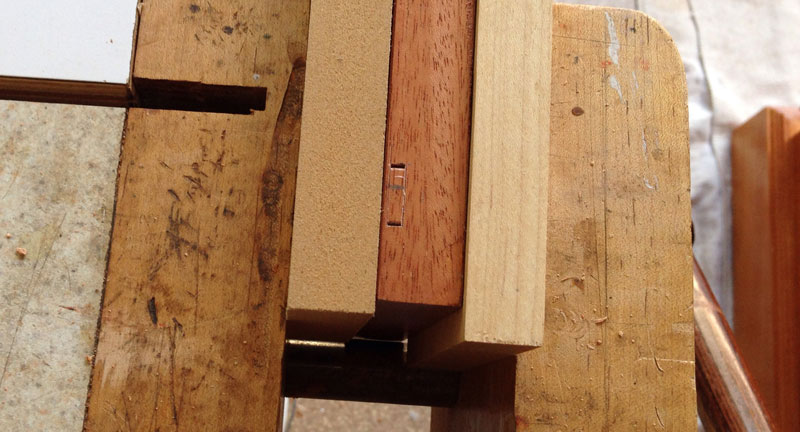
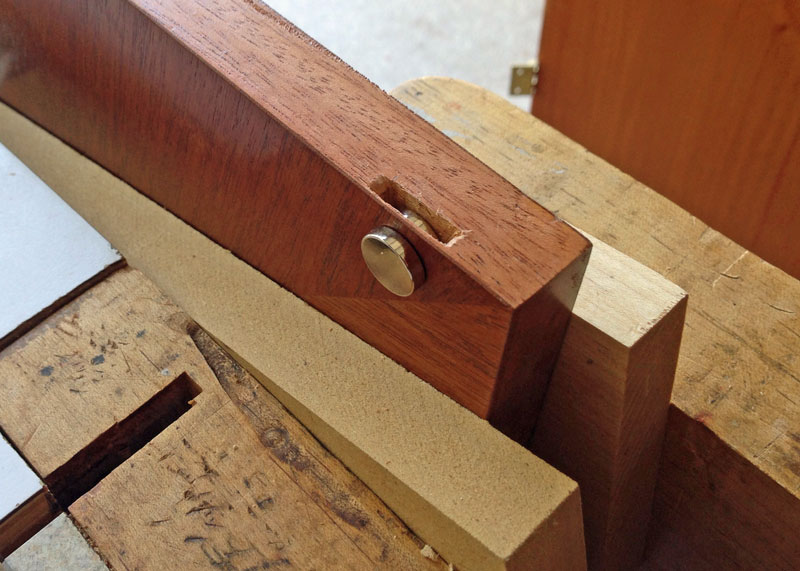
Then, I chopped the mortise using a 1/8" chisel. The mortises had to be 5/8" deep. The magnets are 1/2" so that's the length of the mortises. This picture shows the mortise finished with a magnet in it. The magnet on the outside is just there to hold the magnet in the mortise forward.
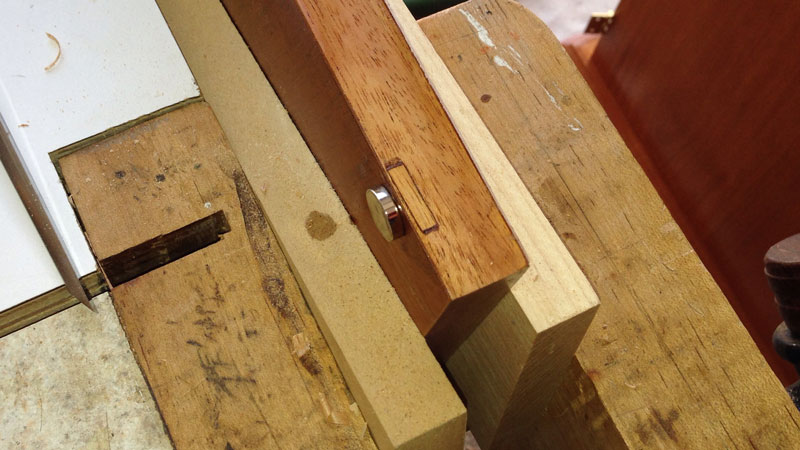
I used epoxy to glue the magnet in place, and put a plug in the end of the mortise to support the lower part of the mortise (so it didn't break later, in use).
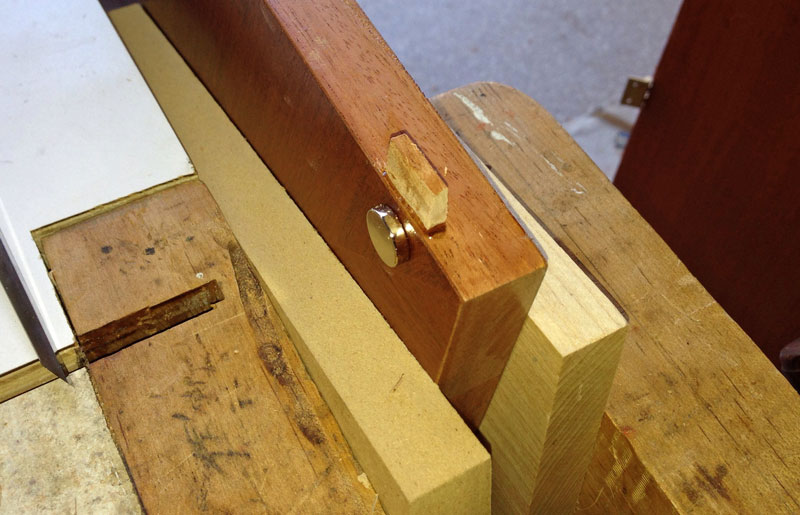
After the epoxy was cured, I planed the plug down. Since this is the bottom of the door, you won't be able to see the plug.
I did the same thing on the bottom of the cabinet. This picture just shows the mortises. I plugged them when I did the glue up.

With that much wood between the magnets, the pull is a lot less than if two magnets were placed face-to-face but it's more than enough to keep the doors closed.
The only thing left is some knobs for the lower doors. I ordered some finger pulls and will install them when I receive them.
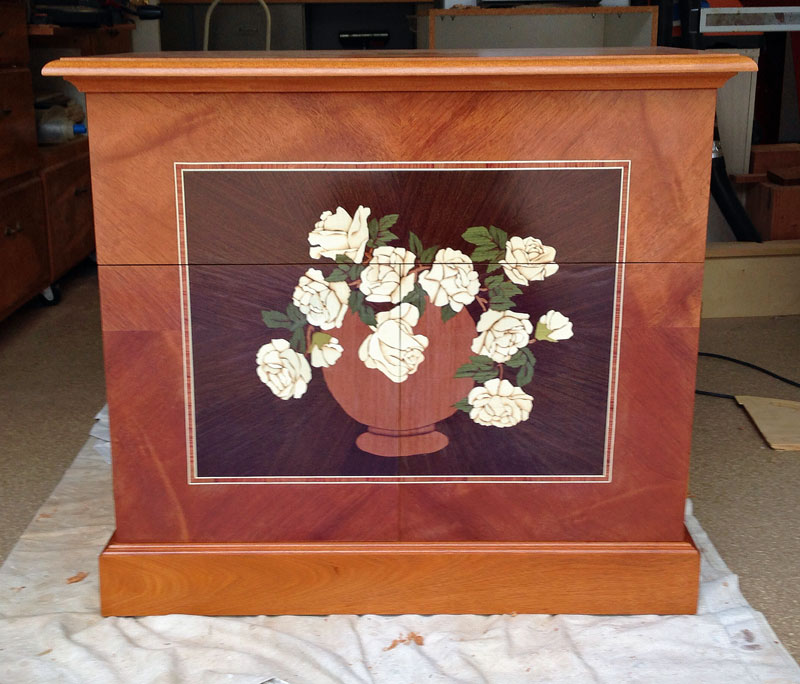
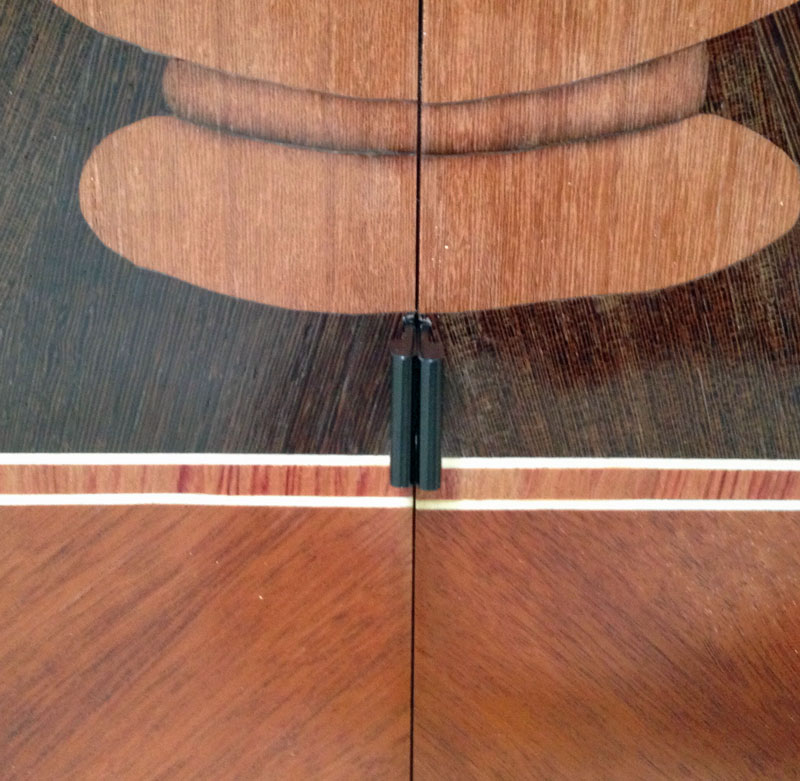
9/25/2013 I received the pulls and installed them today. Here's a picture front on to the cabinet. Hard to see the pulls, isn't it?
I decided not to put a pull on the upper door. It can be easily opened by placing the hands on the outside edges and pulling forward. That will minimize the amount of hardware on the front of the cabinet.

Here's a close up of the pulls.
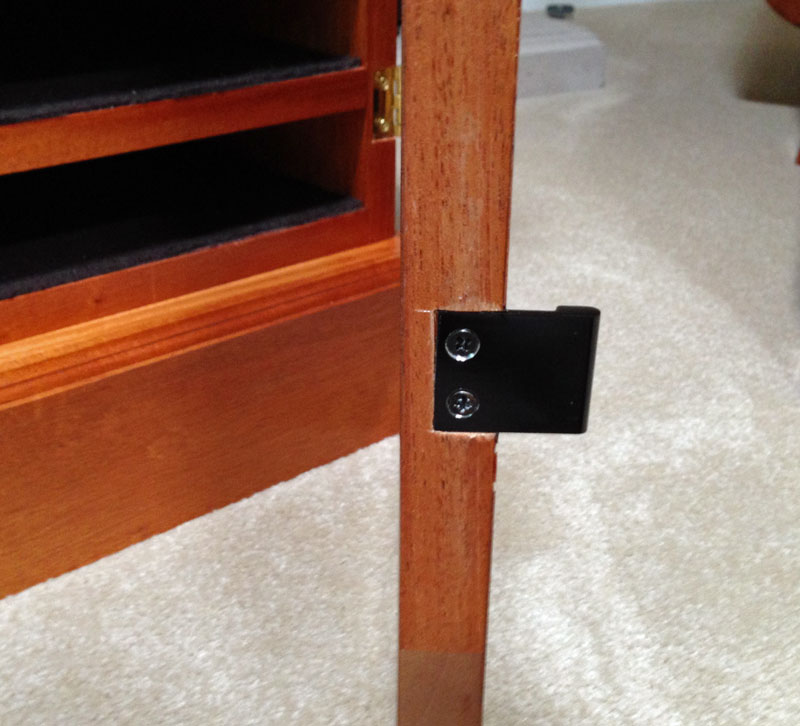
And here's a view from the side of the door, showing how the pulls are attached.
Except for a bit of cleanup, this completes the project. Thank you for looking.
Return to the main page