Bee Vacuum
P. Michael Henderson
The bee vacuum described below is "out of date". I've made significant improvements to the bee vacuum described in the video on this page.
Occasionally a beekeeper will need to remove a hive from a location where the bees shouldn't be - such as in the wall of a house. In that situation, you need something which you can use to capture the bees without killing them. That's where a bee vacuum comes in.
There are many designs for bee vacuums on the Internet - this is my contribution.
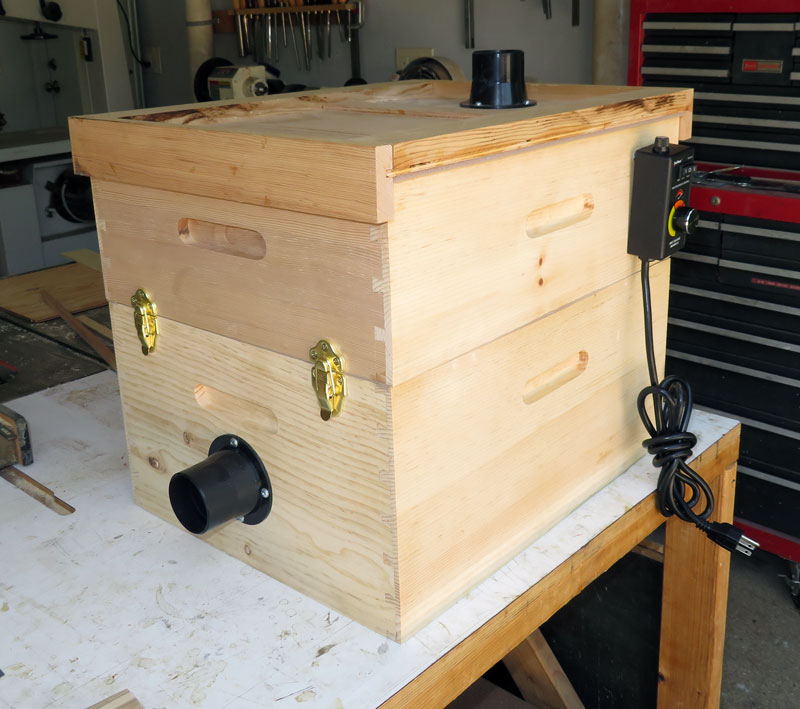
My bee vacuum consists of three parts, a top with a connector for a shop vacuum hose connector, a "diffuser" section, and the bee container with a connector for a hose that you'll use to suck up the bees. Note I use some draw latches to hold the two boxes together. Once you have bees in the bottom box, you don't want the two boxes to come apart, especially if that happened while you were transporting the bees in your car:-)
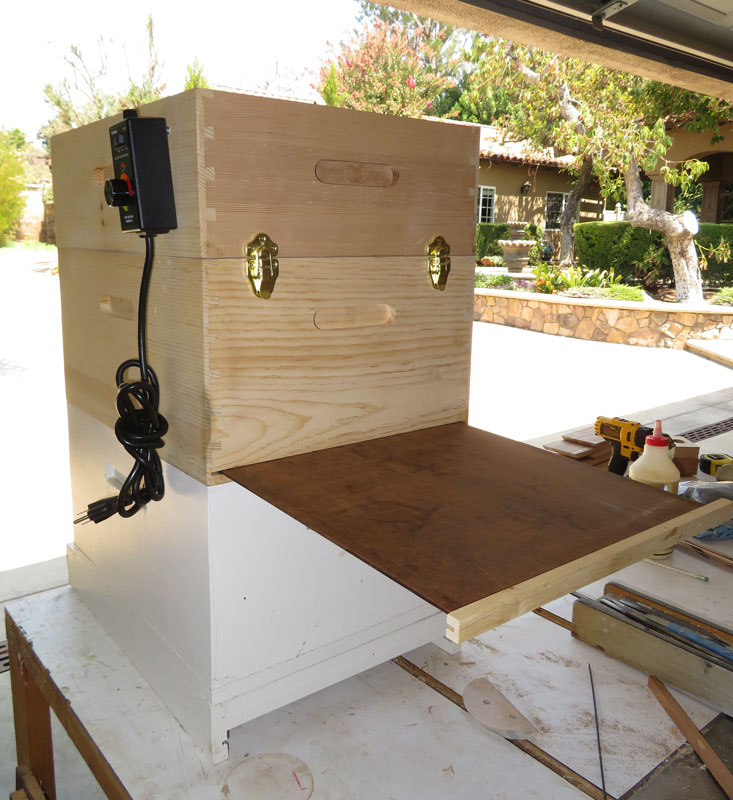
Note, also, the router speed control device on the side of the box. The shop vac is plugged into this and this allows you to control the speed of the vacuum motor, and thus the speed of the air being pulled into the chamber. You need to adjust it so that it's at the lowest speed that will still suck up the bees. Too high a speed and the bees will be killed.

The top is a standard migratory top with a connector to fit a standard shop vacuum hose. You will connect your shop vacuum to this connector. Note that I put weather stripping around the top to help get a better air seal. I'll discuss why later.
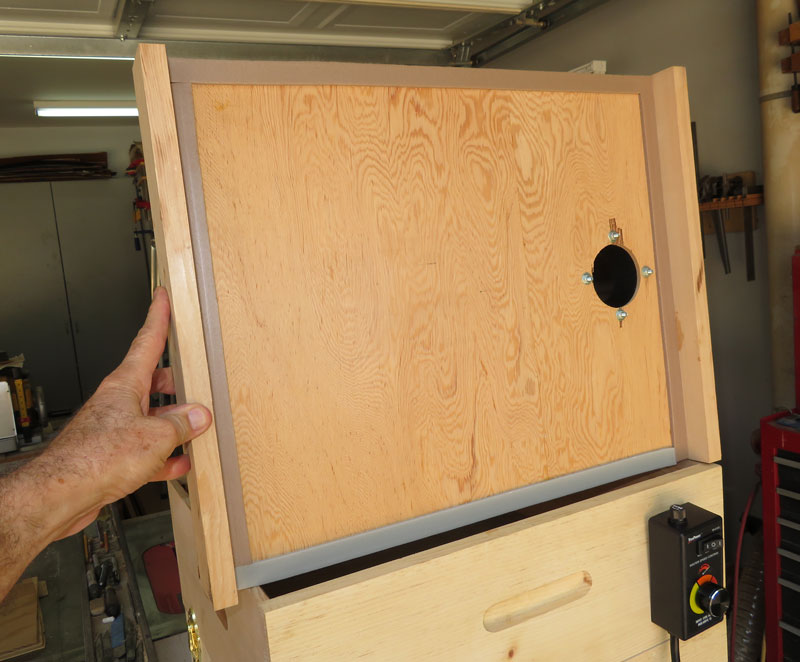
The "diffuser" box is a standard medium super box which has 1/8" hardware cloth on the bottom. During a job, you could take the top off and see how the bees are doing.
Since I wanted to get an air tight seal between the two boxes, I cut a rabbet into the inside of the box and stapled the hardware cloth to the bottom of the rabbet. Then I put wooden strips on top of the hardware cloth to fill in the rabbets. This gave the diffuser box a smooth bottom for a good air seal.
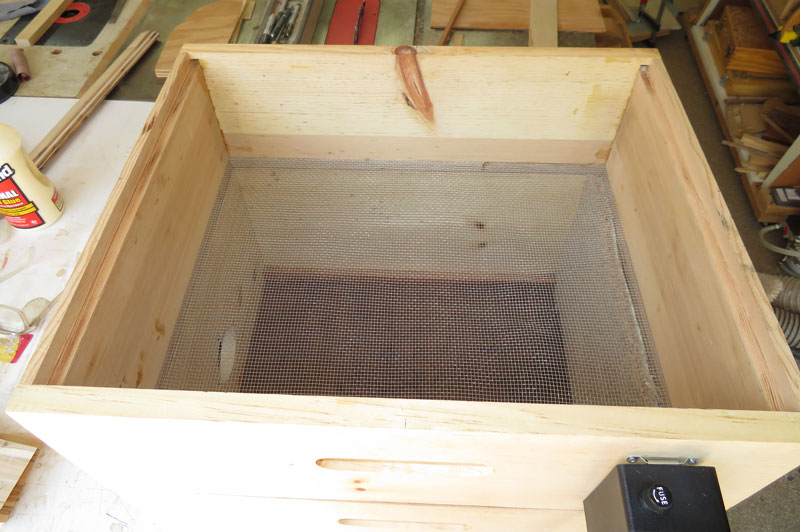
The reason for the diffuser box is to slow down the air speed so that the bees are not sucked against the hardware cloth. They should be able to move around in the lower box - the bee container - while the vacuum is operational.
Here's a view into the bee container box. It's on its side to give you a better view.
This box is the size of a standard brood box. I've added a slide bottom to the box. The slide is captured between two pieces of wood glued to the side of the box. You need to do it this way so that the bottom is not pulled upward by the low pressure in the box when you're vacuuming the bees. I also put weather stripping along the top of this box to form an air tight seal between the two boxes.
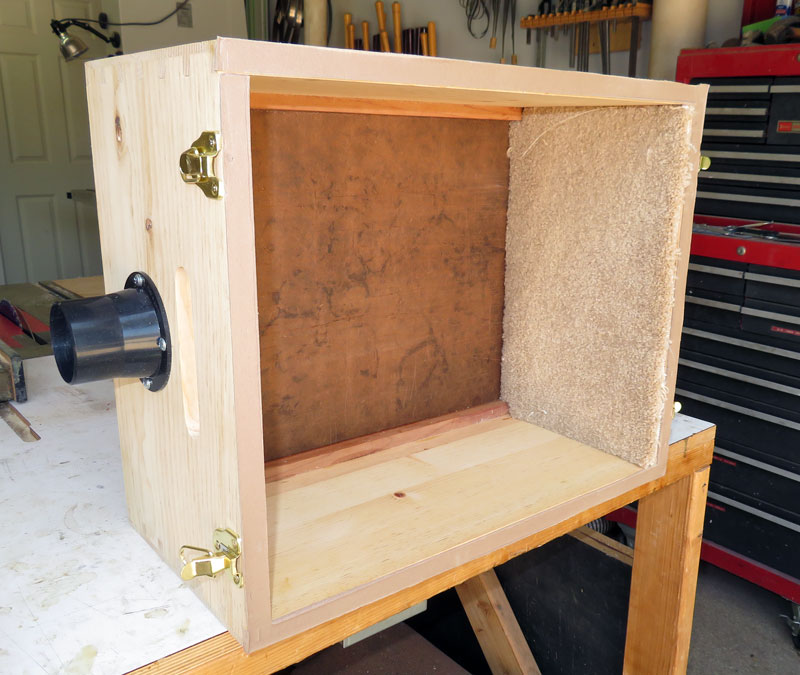
I also put some carpet on the side opposite the vacuum connector in an attempt to cushion the landing of the bees. I don't know if this will help, but it can't hurt.
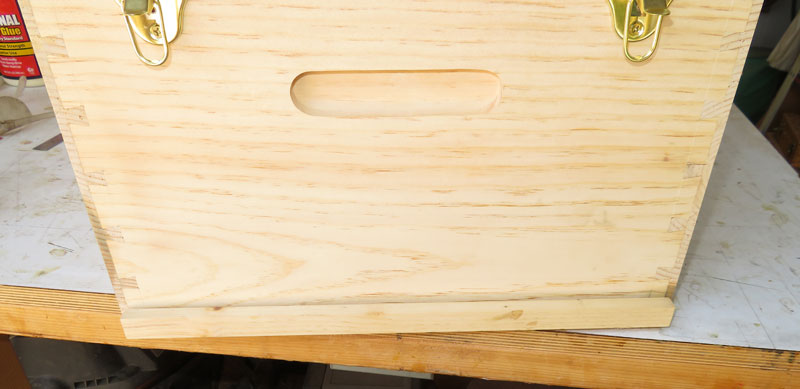
Here's a view of the slide handle from the outside of the box.
And here's a view with the slide pulled out about 3/4 way.
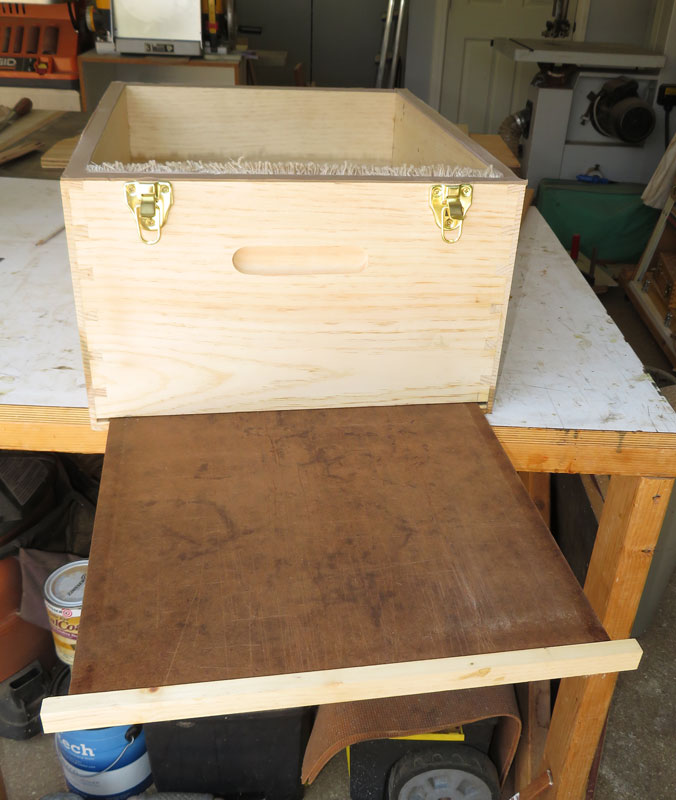
A view into the interior of the box, showing what it looks like with the slide pulled out.

In an established hive the bees will have drawn comb and started raising new bees. You want to recover as much of that comb as you can and put it into the new hive. Carefully cut the comb from whatever it's attached to and use string (or wire) to put it in a standard frame. Then put those frames into a standard brood box.
Now, you need to transfer the bees to the box where you put the comb. Since the bee vacuum is the size of a standard hive box, just place the vacuum on top of the brood box with their comb and pull back the slide.
Hopefully, you got the queen when you were sucking up the bees and you want to make sure she's going to stay. To keep her from leaving, put an excluder at the bottom of the hive box which holds their comb. The worker bees will be able to come and go, but the queen will be prevented from leaving.
I show a rag stuffed into the intake port. I may try to develop some other method of blocking that port to keep the bees in the box. Maybe a small slider between the port and the box or a plug that fits into the port.
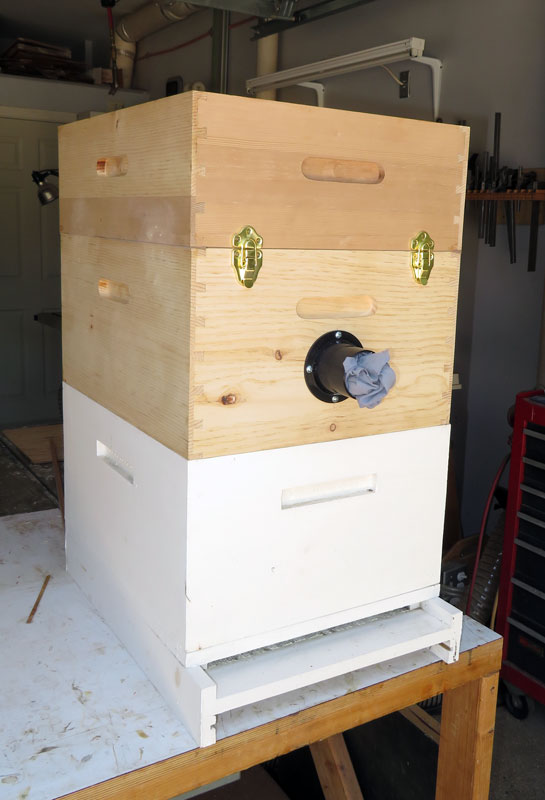
Here's a view from the rear showing the sliding panel pulled out. The bees should migrate into the regular hive box and you can remove the bee vacuum boxes in a couple of days.
I talked earlier about putting weather stripping on the boxes to make a good air seal. The reason is that I'm going to experiment with using a portable vacuum for those situations where electrical power is not readily available.
The hose on the portable vacuum is smaller than a regular shop vacuum so I made an adapter for it.
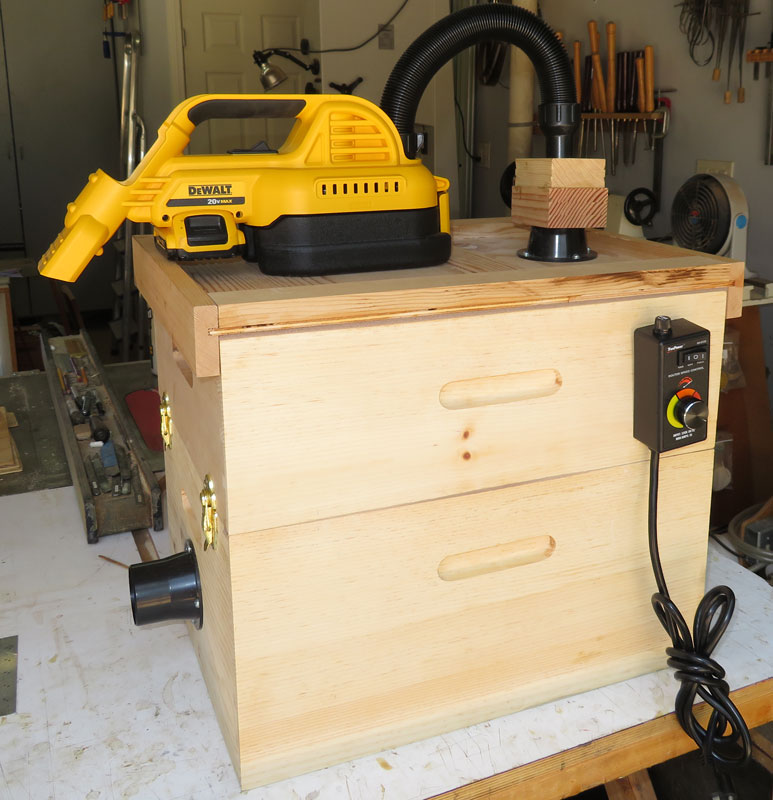
Here's a closer view. With the weather stripping, I get a pretty good air flow on the intake port. But I'd use a smaller hose to suck up the bees. That little vacuum couldn't support the standard 2-1/2" shop vacuum hose.
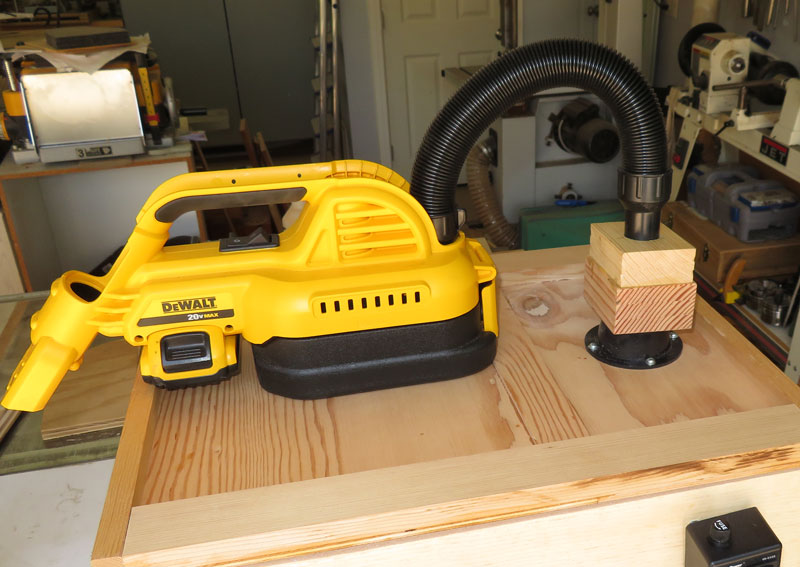
If one portable vacuum is not sufficient, I'll make an adapter so that I can use two portable vacuums simultaneously. I could have the two holes for the portable vacuum hoses coming out the side of the wooden adapter, perhaps.
Click here to return to my web site